The Affiliate User is the system user from the side of the Affiliate company and represents the company employee. The Affiliate entity represents the company for which the related affiliate users will be created. This user has no access to the creation of a new user.
The “Manage Affiliate Users” section allows you to search, manage existing, and create new affiliate users.
To view the list, go to the Affiliates > Manage Affiliate Users section.
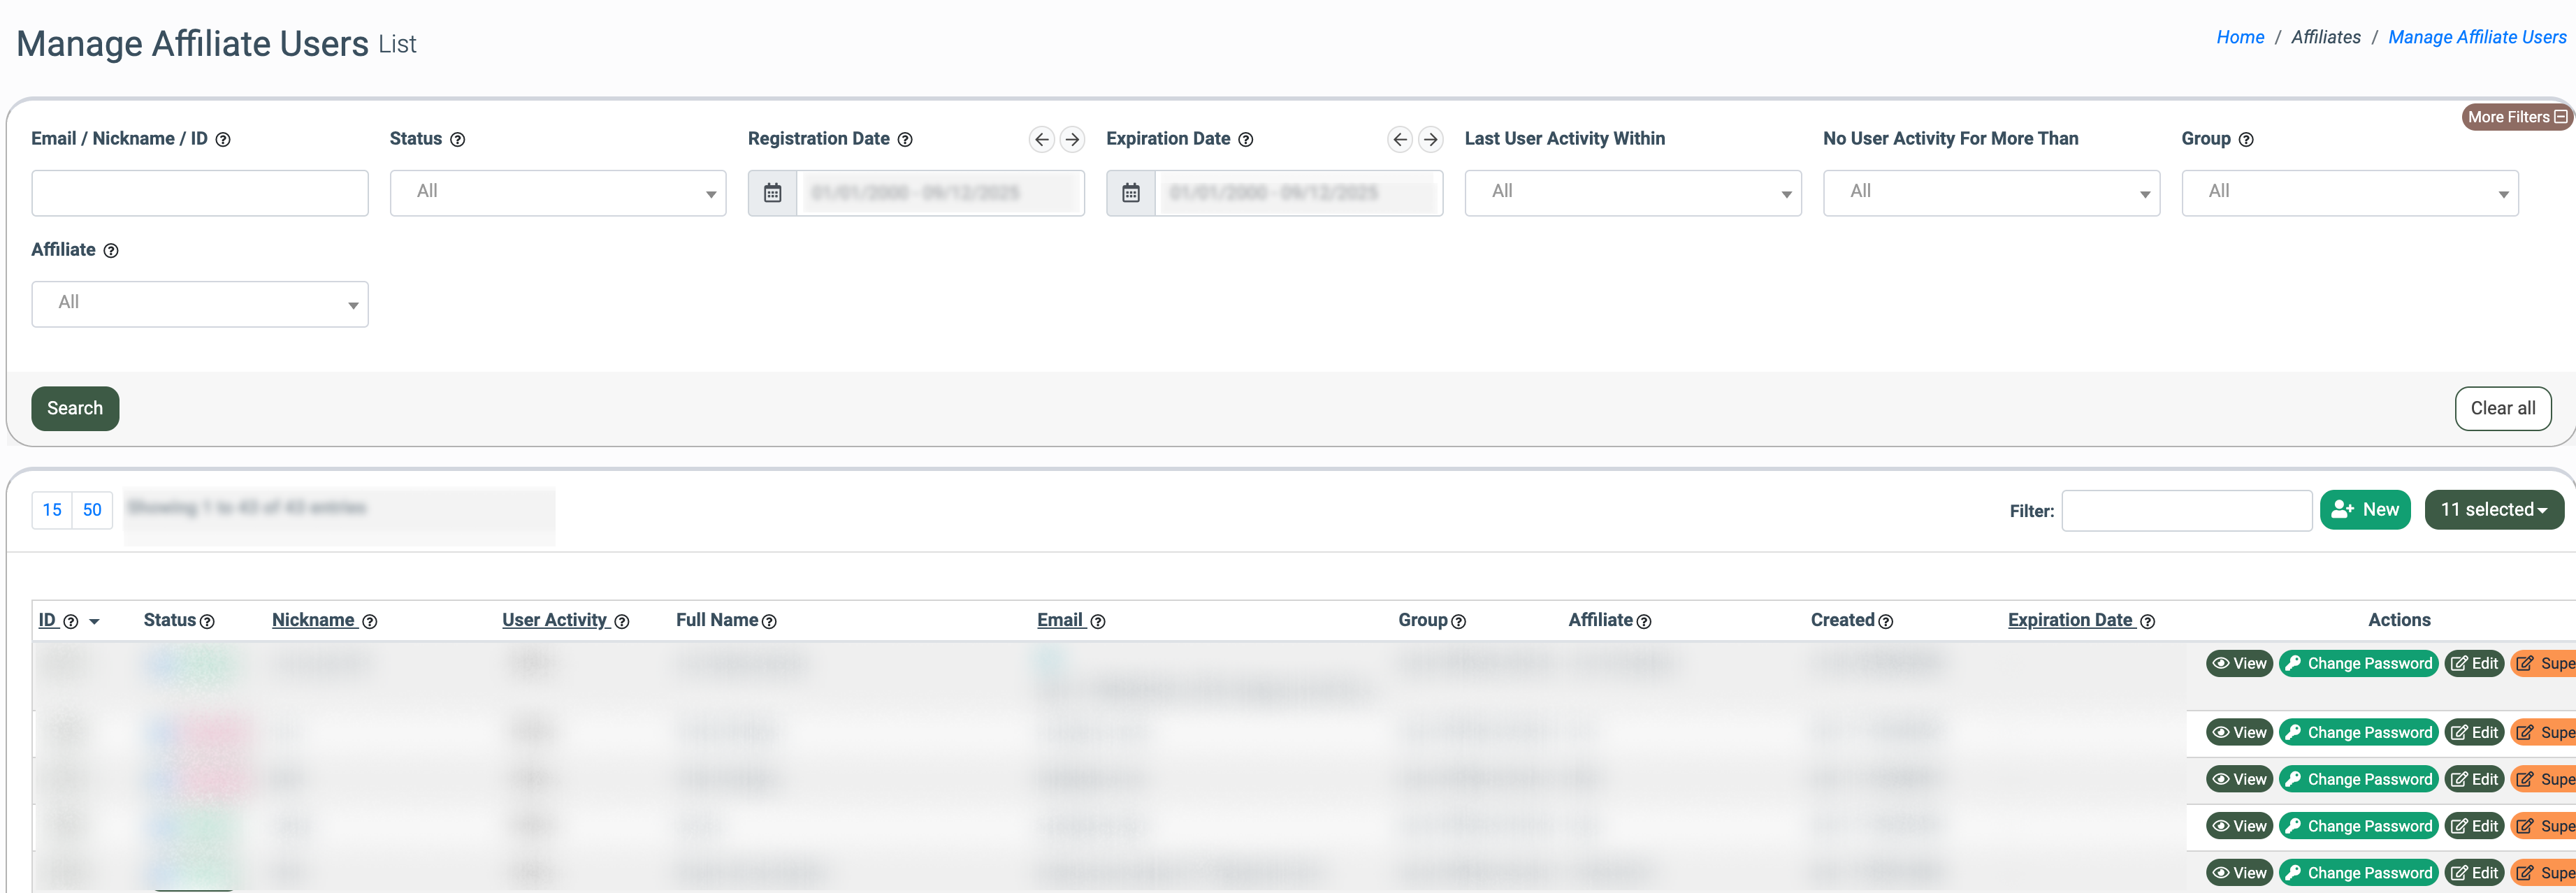
You can narrow down the search results by using the following filters:
- Email / Nickname / ID: Enter the corresponding email address, nickname, or ID of the particular affiliate user.
- Status: Select the ongoing status of the affiliate user (Active, Disabled, or Deleted).
- Registration Date: Select the date range for the affiliate user registration date.
- Expiration Date: Select the date range for the affiliate user activity expiration date.
- Last User Activity Within: Select the range for the user’s last activity (Week / Two Weeks / Month / Three Months / Six Months / Year).
- No User Activity For More Than: Select the range for the user’s inactivity (Week / Two Weeks / Month / Three Months / Six Months / Year).
- Group: Select the user group with which the affiliate user is associated (Lynx Affiliate, Lynx Affiliate Senior).
- Affiliate: Select the corresponding affiliate to which the particular affiliate user is related.
Note: The Affiliate Agent will be able to display information only about the affiliate users that are associated with them, along with the reporting data.
The list of affiliate users contains the following information:
- ID: The unique identification number of the affiliate user.
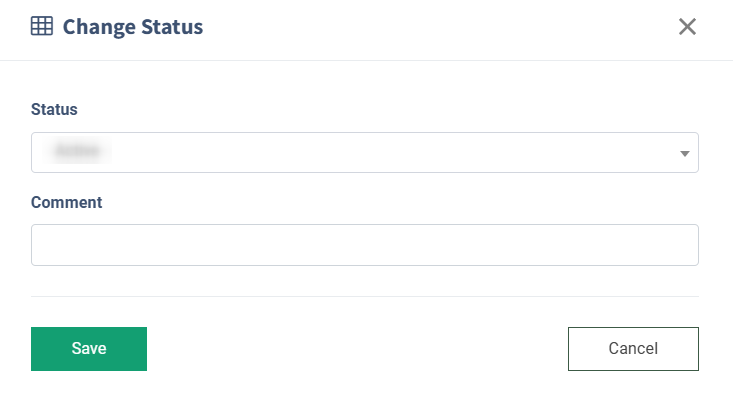
- Status: The ongoing status of the affiliate user (Active, Disabled, or Deleted). To change the current status of the affiliate user, click the “Status” button, select the corresponding status, attach a comment if needed in the pop-up window, and click the “Save” button to complete the action.
- Nickname: The nickname of the affiliate user.
- User Activity: The ongoing status of the affiliate user activity.
- Online: The last activity was less than 10 minutes ago.
- Recently Online: The last activity was less than 30 minutes ago.
- Away: The last activity was less than 1 hour ago.
- Offline: The last activity was more than 1 hour ago.
- Full Name: The full name of the affiliate user.
- Email: The email address associated with the affiliate user.
- Group: The user group with which the affiliate user is associated.
- Affiliate: The name of the affiliate with whom the particular affiliate user is associated.
- Created: The date and time of the affiliate user creation.
- Expiration Date: The date and time of the affiliate user activity expiration.
To create a new affiliate user, click the “New” button and follow the instructions from this Knowledge Base article.
Note: If you need to keep the affiliate user account active endlessly, select the “Never” option in the “Expiration Date” field during its creation.
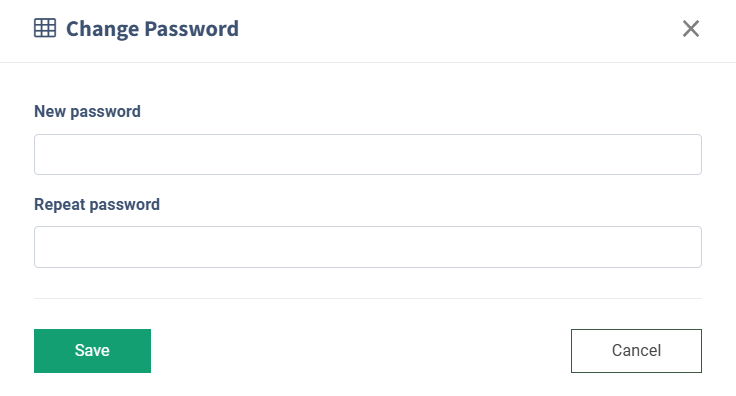
To change the current password of the affiliate user, select the one from the list, and click the “Change password” button in the “Actions” column.
Enter a new password with its repetition in the corresponding fields of the “Change Password” pop-up window and click the “Save” button to complete the action.
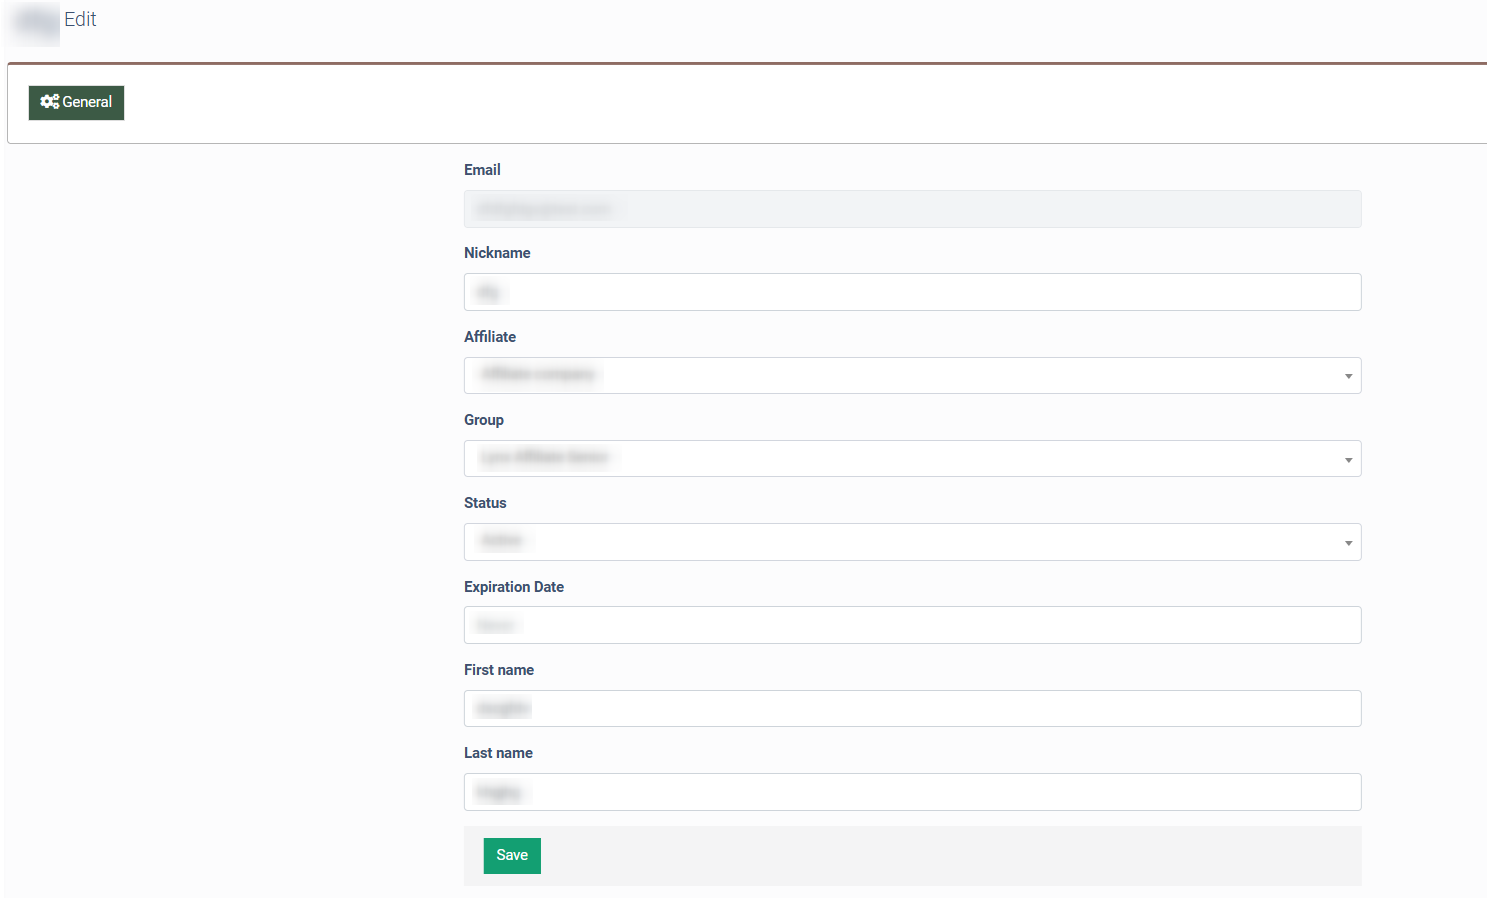
To edit general information about the affiliate user, click the “Edit” button in the “Actions” column.
You will be redirected to the General Edit settings of the affiliate user.
The following settings are available:
- Email: The email address of the affiliate user (can not be changed).
- Nickname: The nickname of the affiliate user.
- Affiliate: The affiliate that is related to the particular affiliate user.
- Group: The user group with which the affiliate user is associated.
- Status: The ongoing status of the affiliate user.
- Expiration Date: The date and time of the affiliate user activity expiration.
- First name: The first name of the affiliate user.
- Last name: The last name of the affiliate user.
You will be redirected to the Affiliate User View section. The following tabs are available:
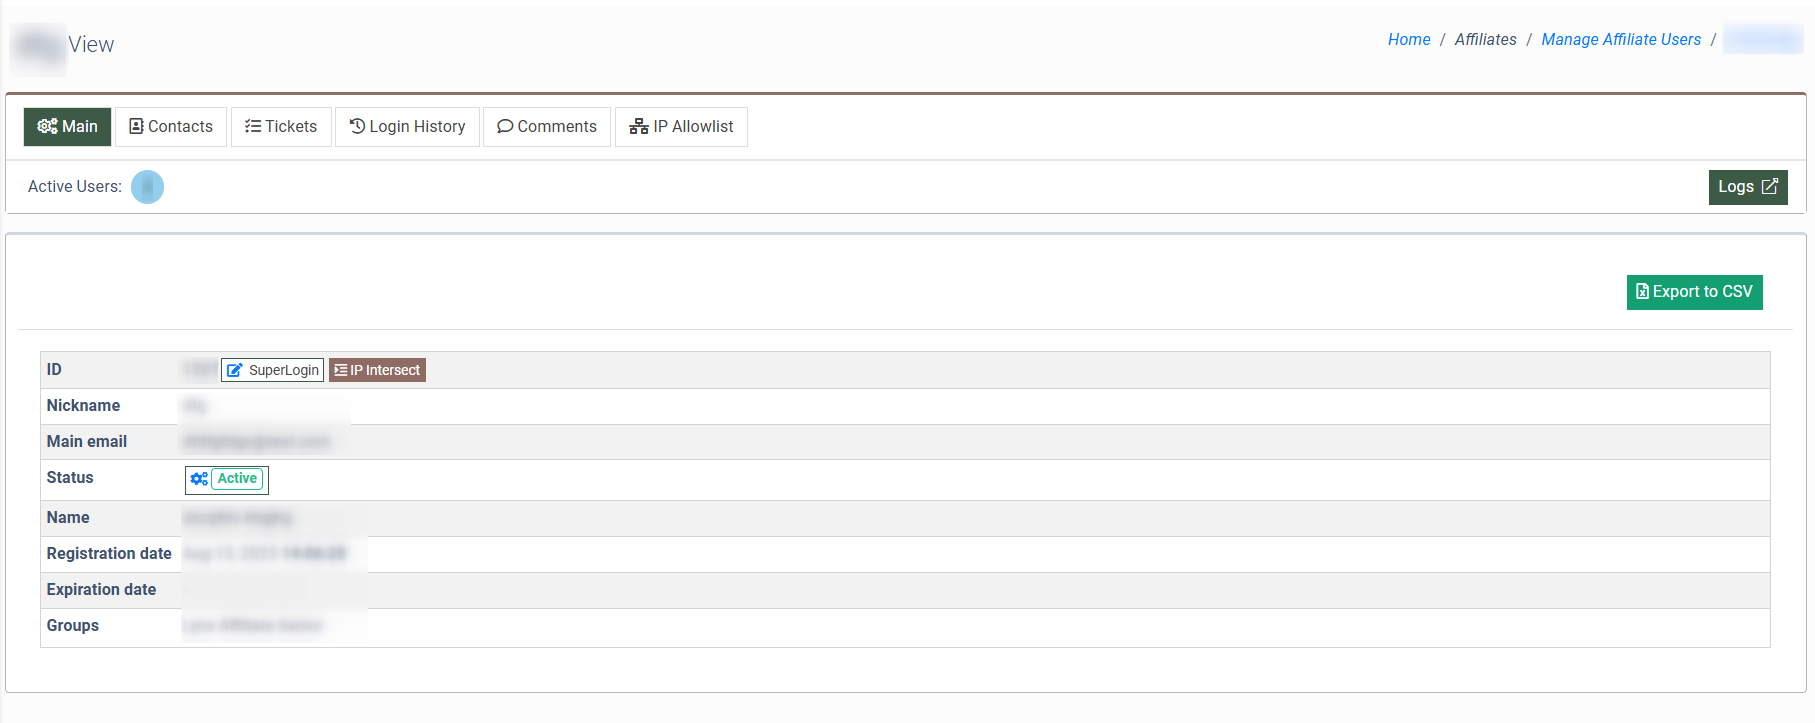
Main
The “Main” tab displays general information about the affiliate user:
- ID: The unique identification number of the affiliate user.
- Nickname: The nickname of the affiliate user.
- Main email: The primary email address that is associated with the affiliate user.
- Status: The ongoing status of the affiliate user. To change the current status of the affiliate user, click the “Status” button, select the corresponding status, attach a comment if needed in the pop-up window, and click the “Save” button to complete the action.

- Name: The name of the affiliate user.
- Registration date: The date and time of the affiliate user registration in the system.
- Expiration Date: The date of the affiliate user account expiration.
- Groups: The user group that is associated with the affiliate user.
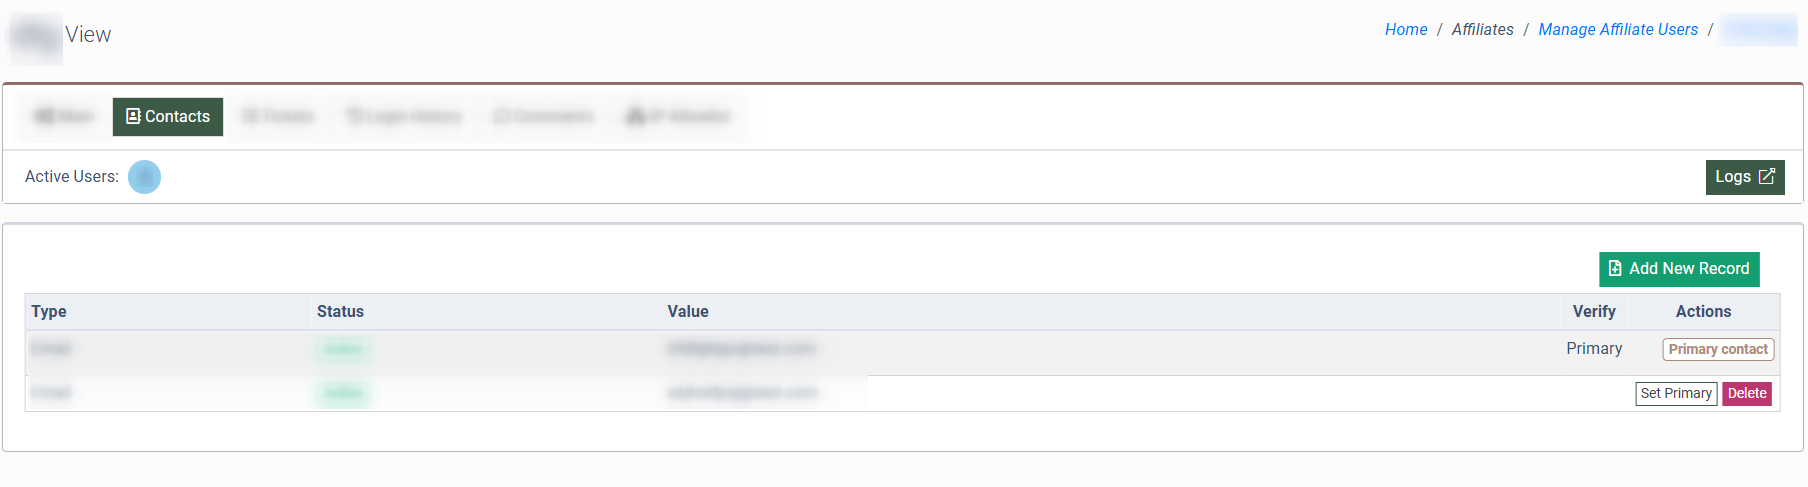
Contacts
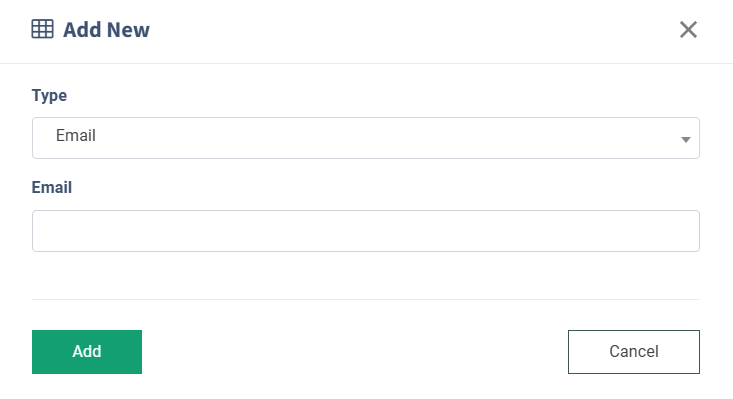
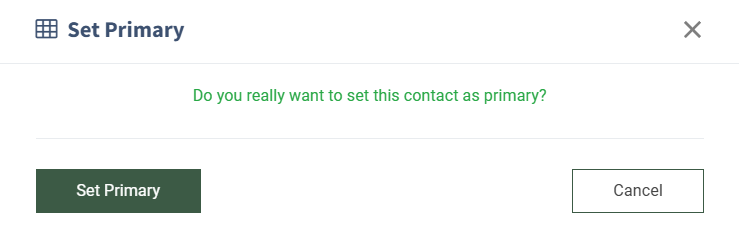
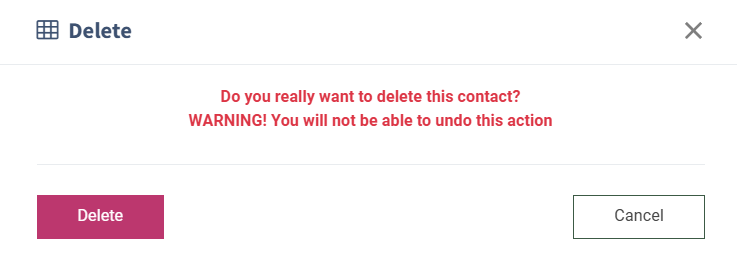
The “Contacts” tab allows you to add, delete, and set primary contact details for the affiliate user.
Tickets
The “Tickets” tab allows you to view and manage tickets connected with the affiliate user.
You can narrow down the search results by using the following:
- Ticket ID: Enter the unique identification number of the ticket.
- Ticket Status: The ongoing status of the ticket.
- Group: Select the topic group to which the ticket is related.
- Manager: Select the manager that is assigned to the ticket.
The list of available tickets contains the following information:
- ID: The unique identification number of the ticket.
- Status: The ongoing status of the ticket.
- Updated: The date and time of the last update received on the ticket.
- Subject: The subject of the issue described in the ticket.
- User: The name of the user who created the ticket.
- Group: The name of the topic group that is attached to the ticket.
- Messages: The number of messages left in the ticket thread.
- Manager: The name of the manager to whom the ticket is assigned.
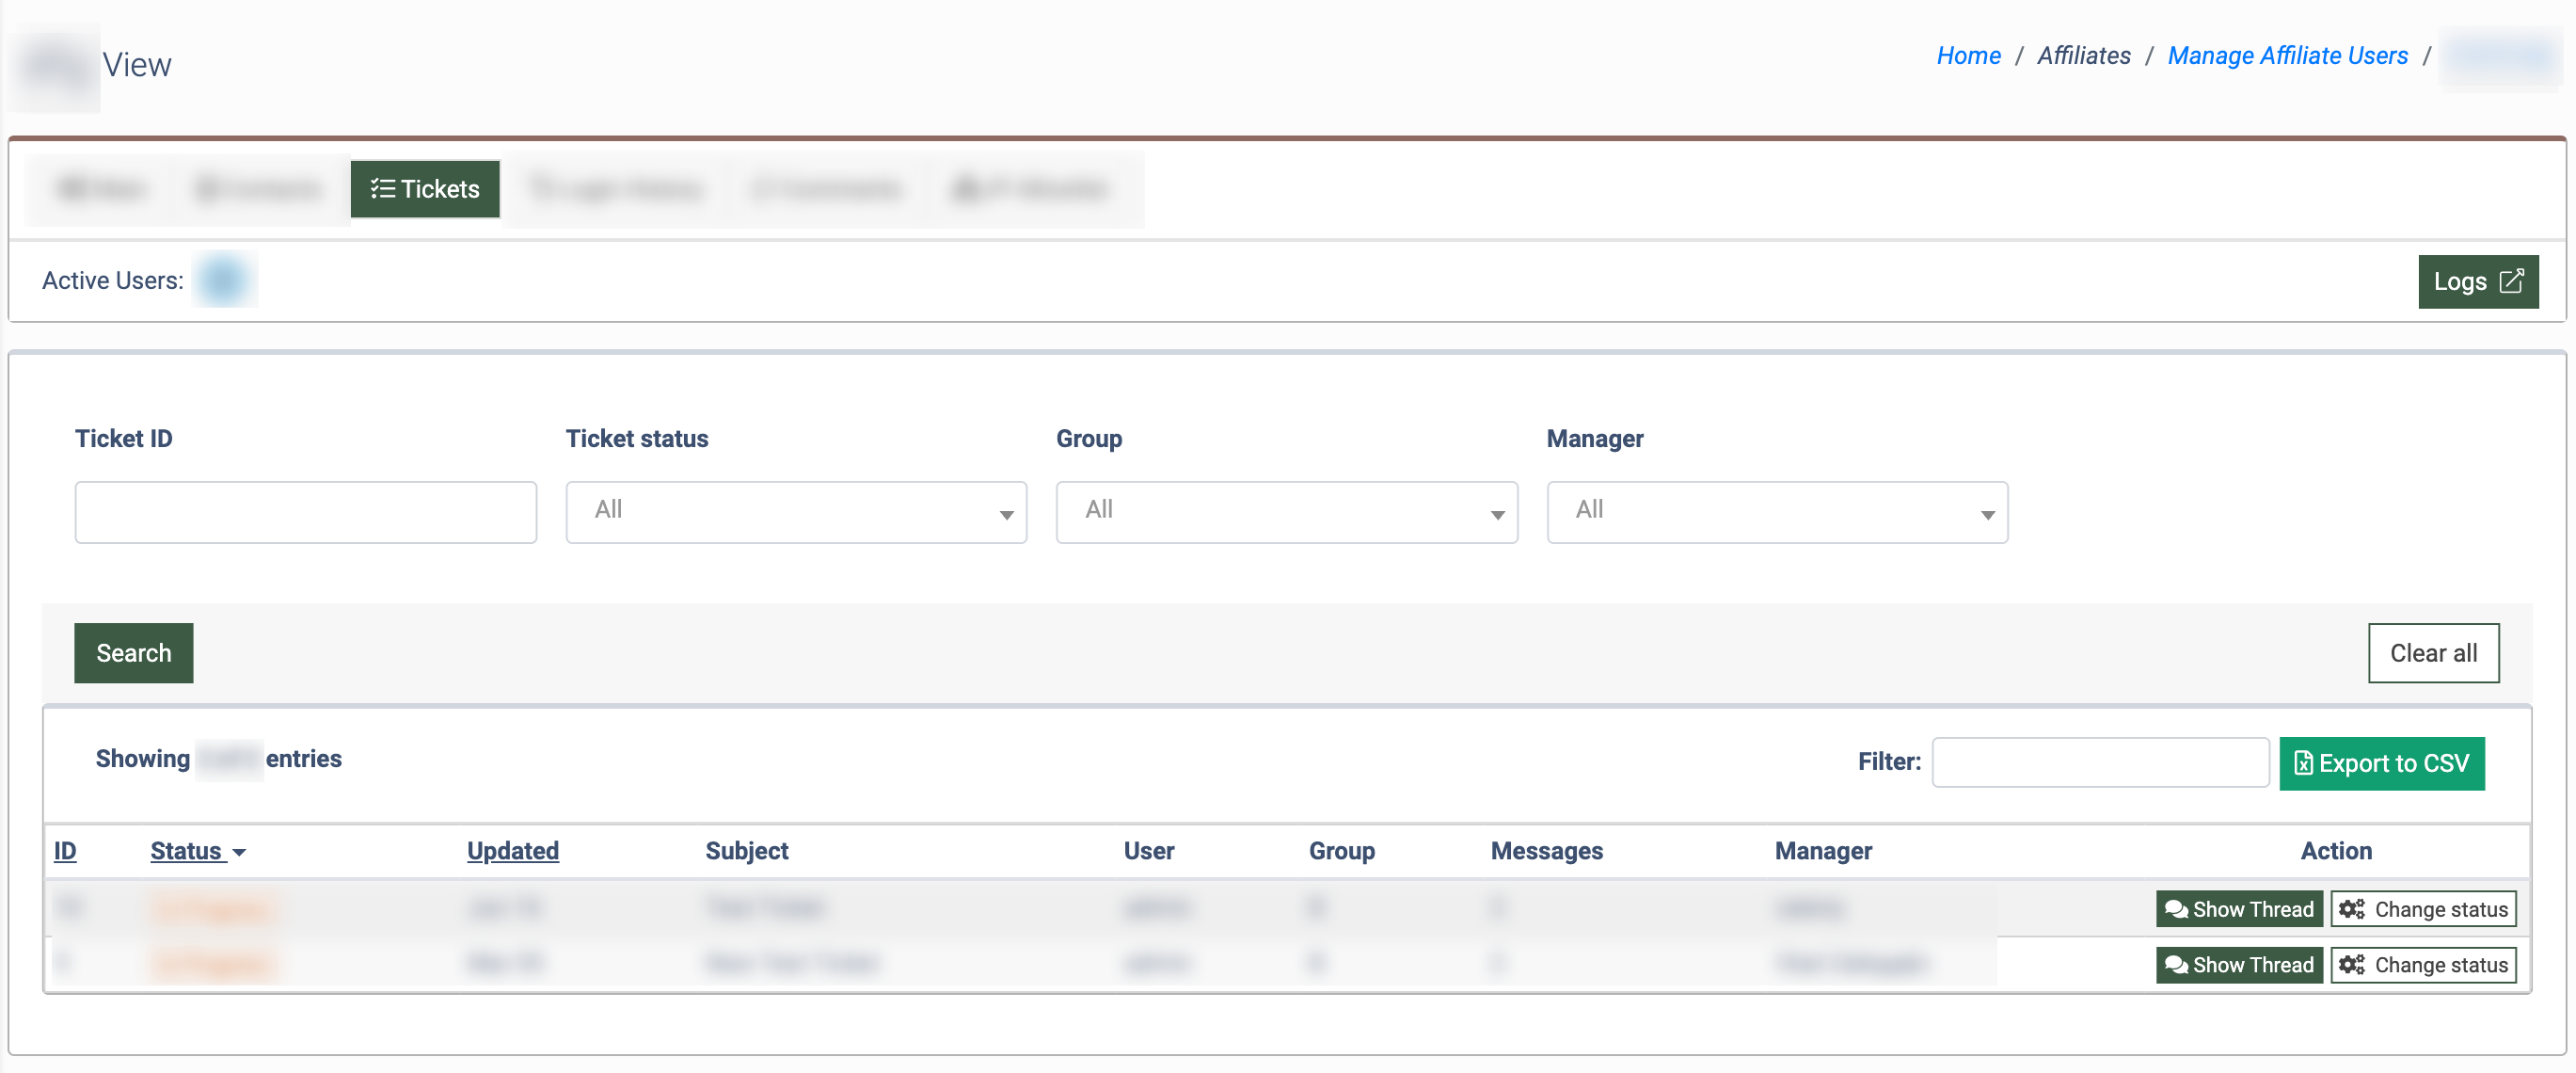
To view and manage the detailed information about the ticket, click the “Show Thread” button in the “Actions” column.
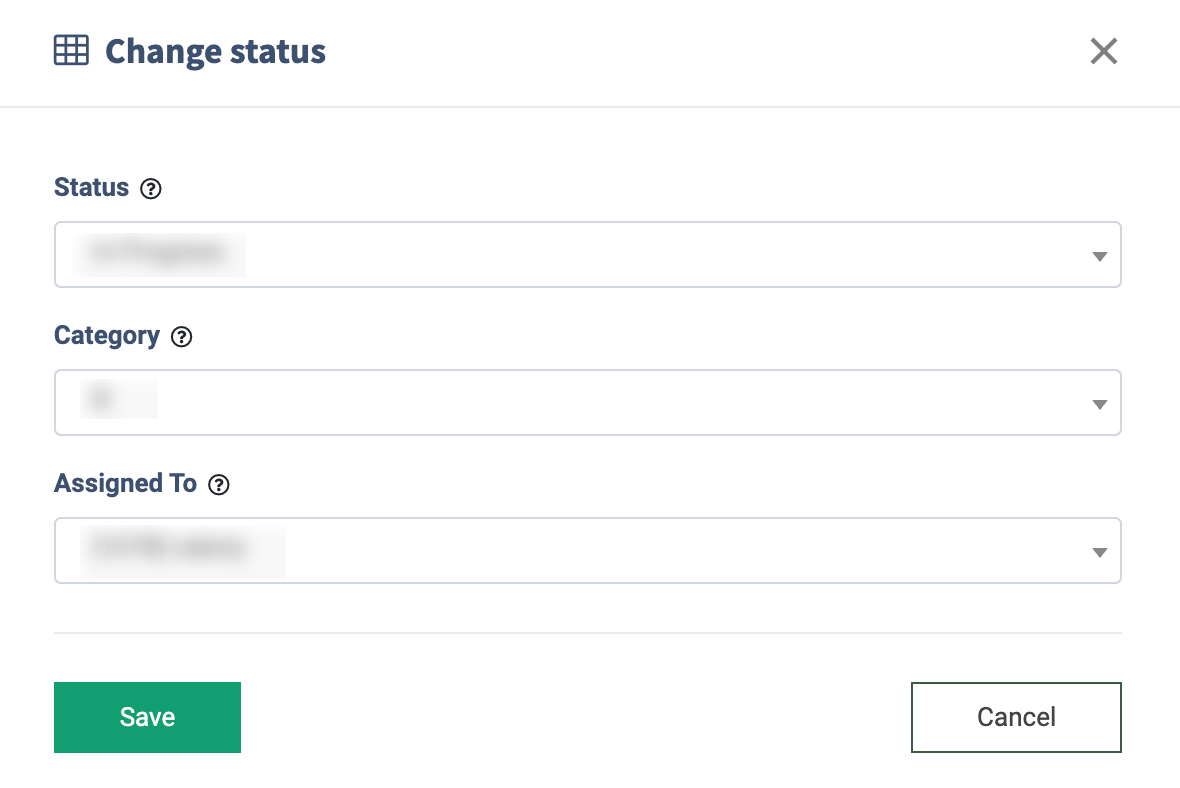
To edit the ticket status, click the “Change status” button in the “Actions” column and fill in the data fields in the “Change status” pop-up window.
- Status: Change the ongoing status of the ticket.
- Category: Change the category to which the ticket is related.
- Assigned To: Change the manager that is assigned to the particular ticket.
Click the “Save” button to complete the changes.
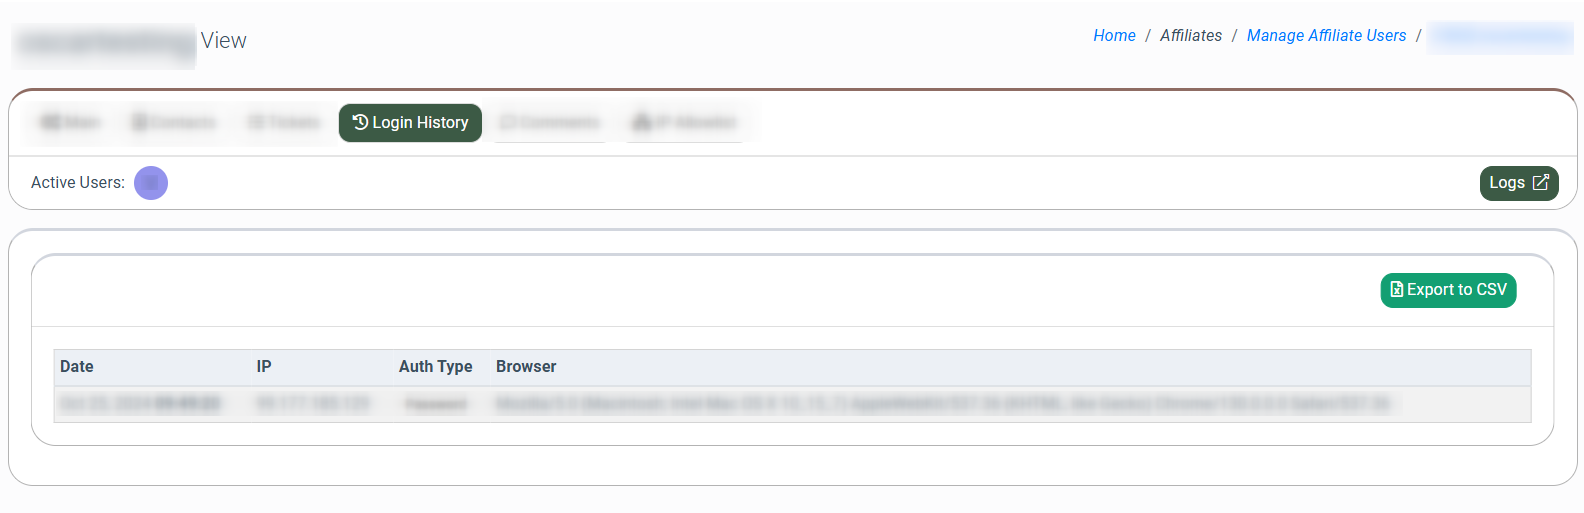
Login History
The “Login History” tab displays information about the affiliate user’s login activity.
The following information is available:
- Date: The date and time of the affiliate user login.
- IP: The affiliate user's IP address.
- Auth Type: The type of authentication that was used during the affiliate user authorization.
- Browser: The full information about the user agent that was used by the affiliate user during the login.
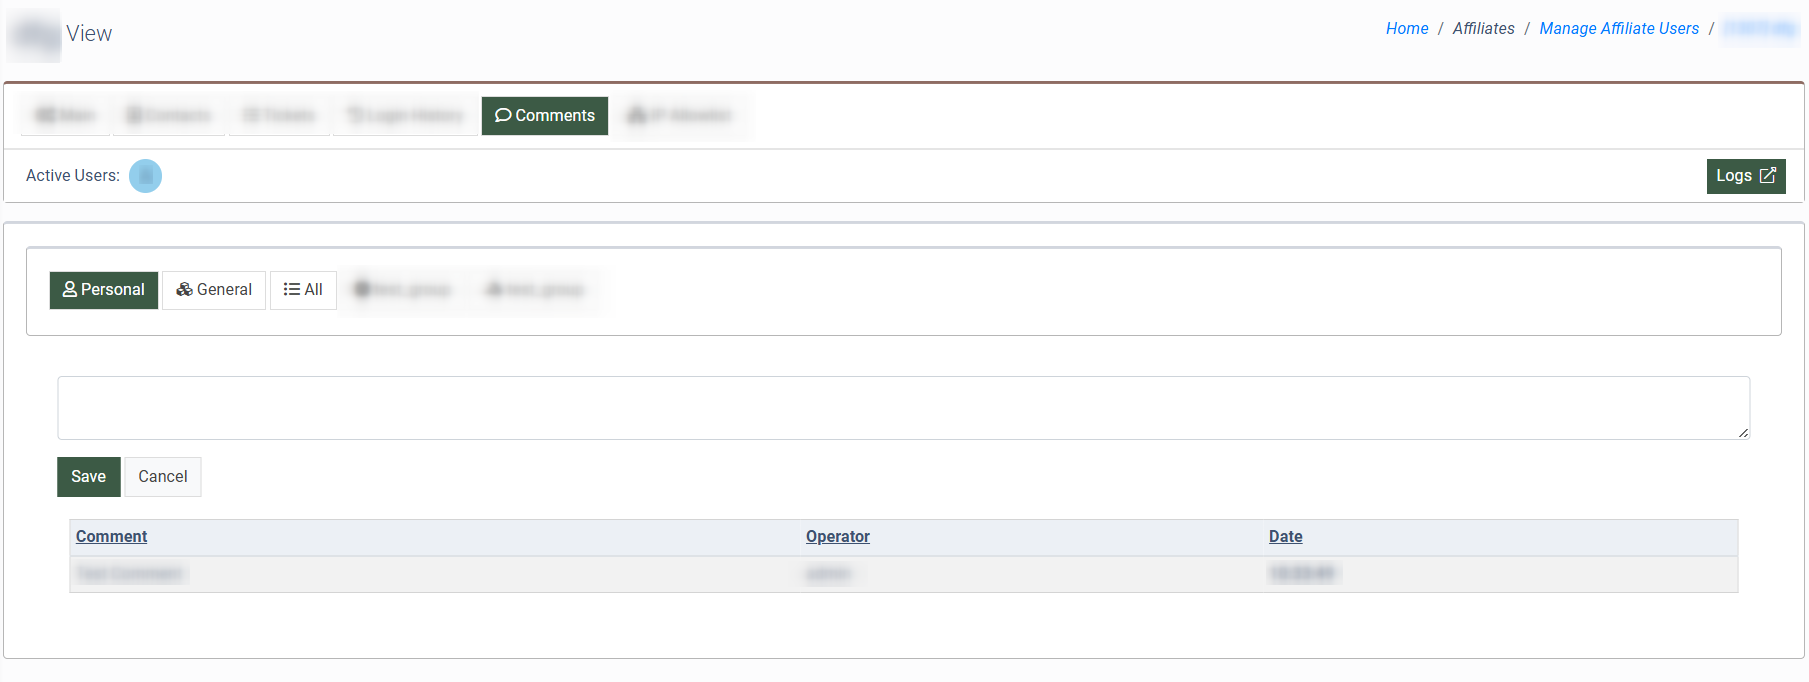
Comments
The “Comments” tab allows you to display and create Personal and General comments in the appropriate subtabs. The list displays the comment, the user who created this comment, and the date of the comment creation.
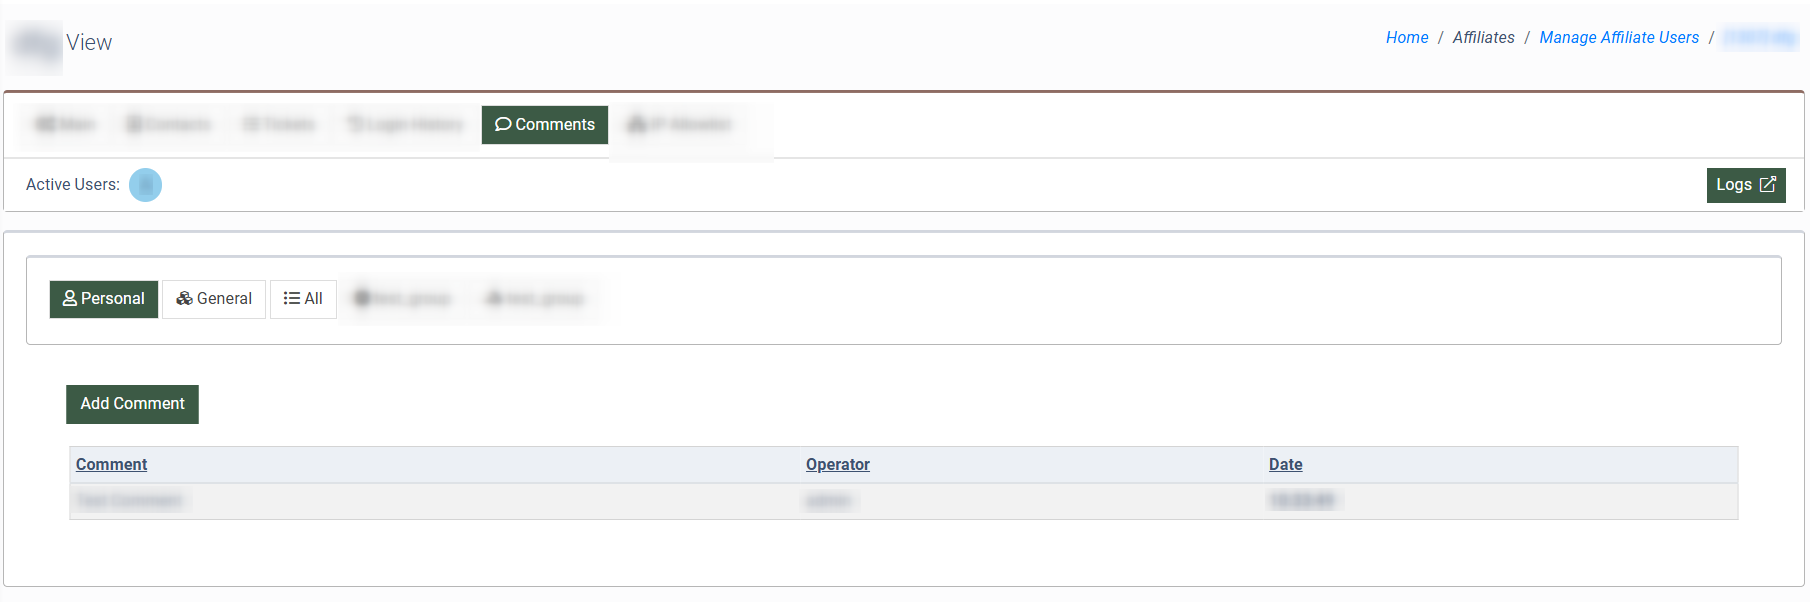
To add a new comment, click the “Add Comment” button, fill in the text of the comment in the corresponding field, and click the “Save” button to complete the comment creation.
IP Allowlist
The “IP Allowlist” tab allows you to add and manage particular IP addresses of the affiliate user for which login is allowed. This feature helps to prevent the login from another IP address, and it can be used for security purposes.
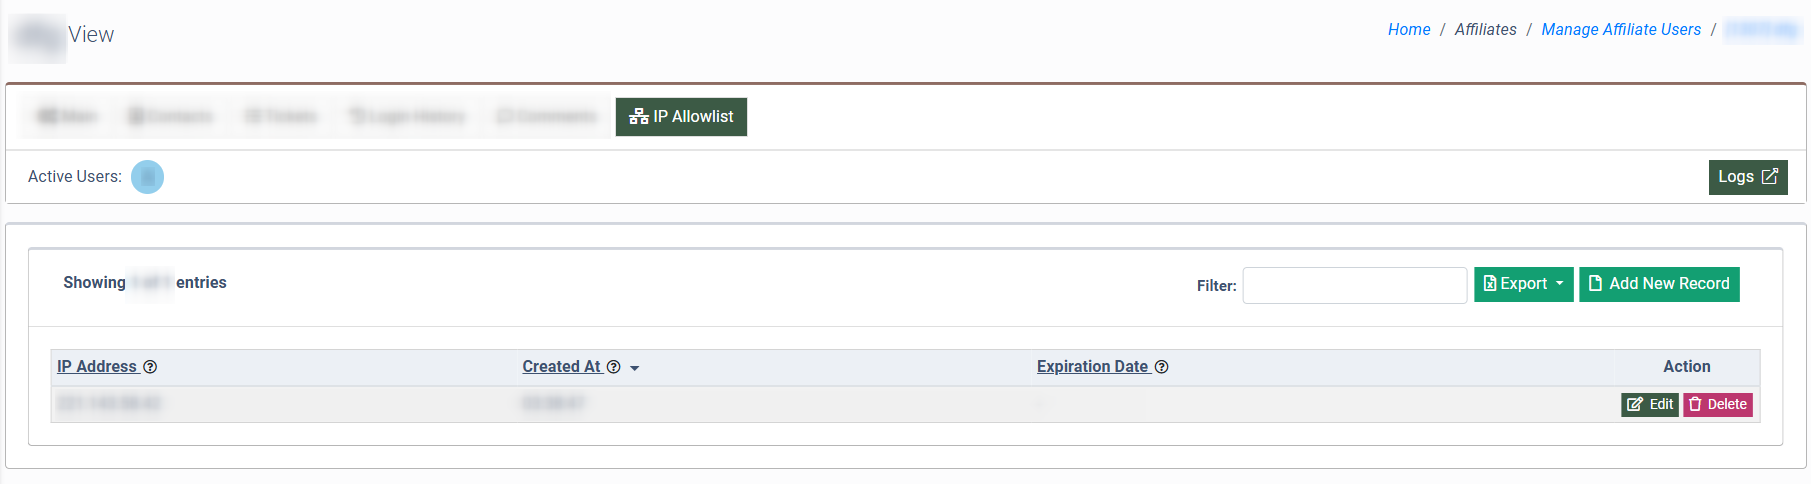
The list of added IP addresses contains the following information:
- IP Address: The particular IP Address of the affiliate user.
- Created At: The date and time of the allowlist IP record creation.
- Expiration Date: The date and time when the allowlist record IP will expire.
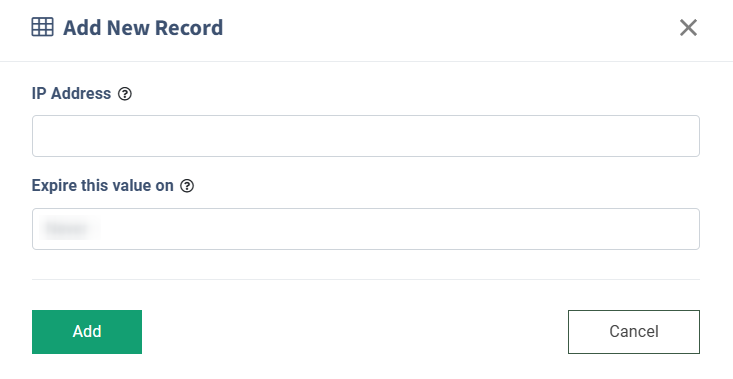
To add a new allowlist IP record, click the “Add New Record” button, fill in the particular IP address, set the expiration date and time for the record activity, and click the “Add” button to complete the action.
 To edit the existing allowlist IP record, select the one from the list, click the “Edit” button in the “Action” column, change the required information in the corresponding field of the pop-up, and click the “Update” button to complete the action.
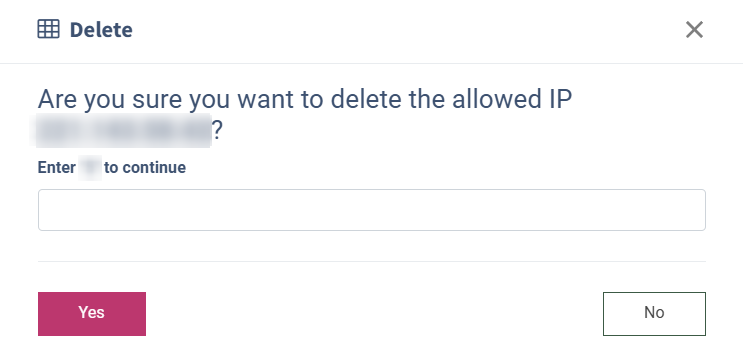
 To delete the existing allowlist IP record, click the “Delete” button in the “Action” column. Confirm the deletion operation by entering the corresponding value in the field and clicking the “Yes” button in the “Delete” pop-up window.
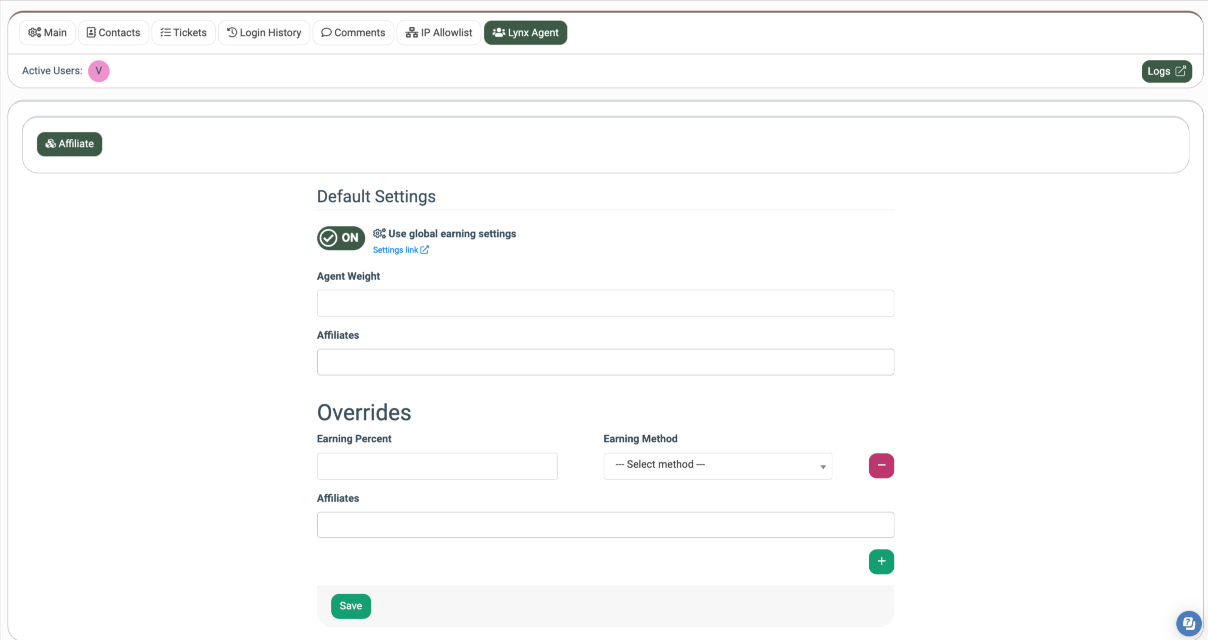
Lynx Agent
The “Lynx Agent” tab allows you to configure Lynx Agent settings, including the earning percentage, agent weight, and bulk selection of affiliates associated with the agent.
The “Lynx Agent” tab contains two blocks of settings – “Default Settings” and “Overrides”. The “Overrides” block overrides the settings for the specified affiliates; this block of settings has the highest priority, both the global settings and the “Default Settings” of the current Agent. This allows you to flexibly manage commissions at the level of each affiliate or their groups.
Fill in the following information:
- Default Settings:
- Use global earning settings: Switch the toggle to the “ON” position to enable the global earning settings for the Lynx Agent. Note: Click the “Settings Link” button to open the Affiliate Agent Settings page.
- Agent Weight: Enter a number between 0 and 10 to specify the agent's weight.
- Affiliates: Select one or multiple Affiliates associated with the agent.
- Overrides:
-
- Earning Percent: Enter the earning percentage.
- Earning Method: Select the earning method (Payout * Earning Percent / Revenue * Earning Percent / (Revenue - Payout) * Earning Percent).
- Affiliates: Select the affiliate(s) that will be affected by the “Override” settings.
To set another earning percent or another earning method for the corresponding affiliate(s), click the “+” button to add another “Overrides” block.
Click the “Save” button to confirm.