The “Security Settings” tab allows you to safeguard your account by enabling features such as two-factor authentication (2FA), updating passwords, setting up PIN settings, adding trusted IP addresses, and reviewing recent login activity for enhanced protection.
To access this tab, go to the Account Settings > My Profile section, then select the “Security Settings” tab. Alternatively, you can access it through the My Profile Modal Window in the upper-right corner of the page. The Security Settings tab contains five blocks:
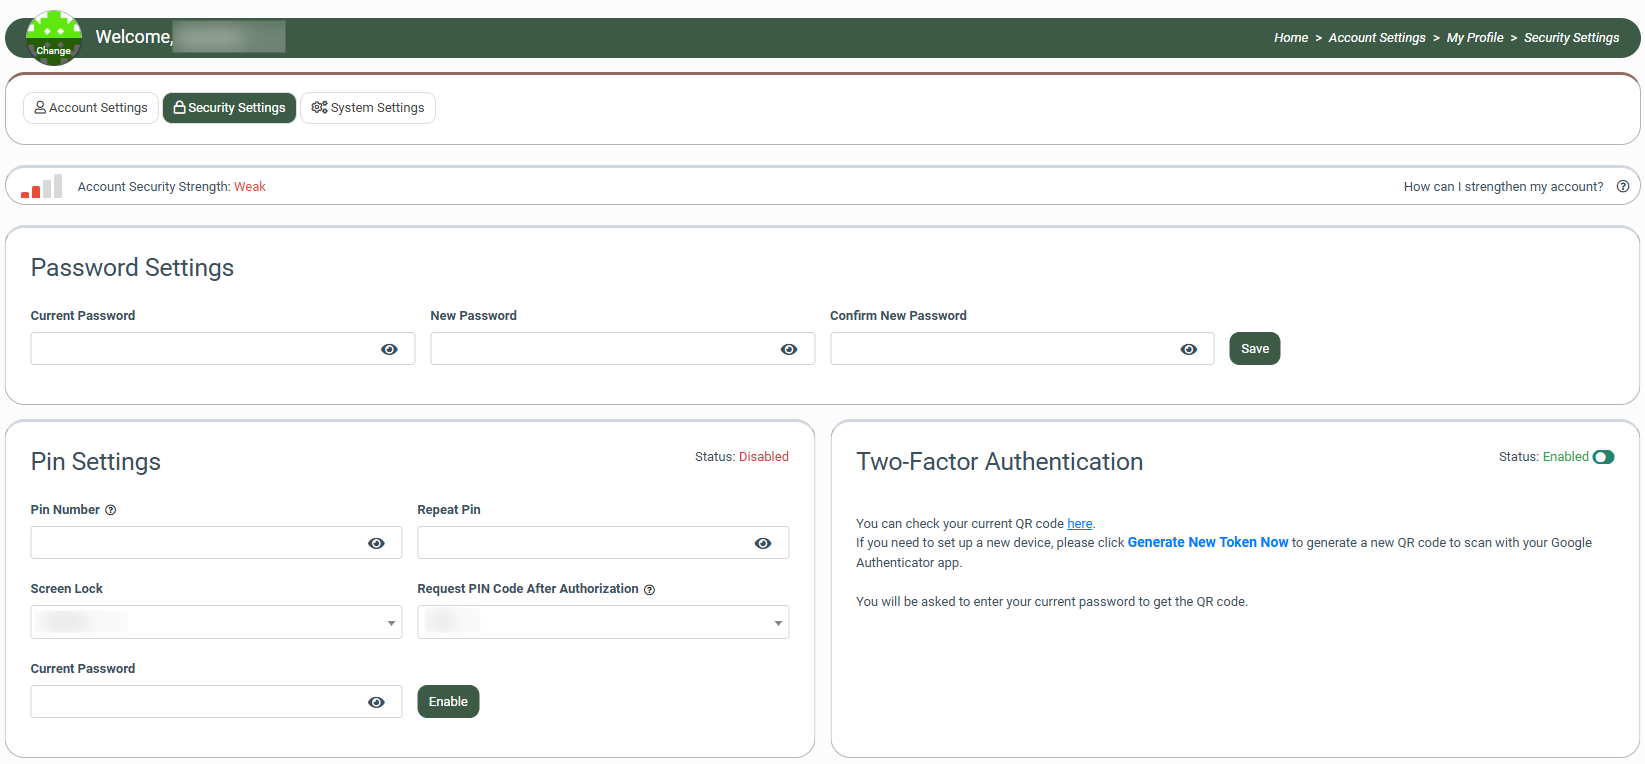
The “Password Settings” block allows you to change your current password and configure complexity requirements to enhance security. To change the password, fill in the following fields:
- Current Password: Enter your account’s current password.
- New Password: Enter a new password for your account (must be at least 8 characters long, have a mixture of uppercase and lowercase letters (a-z), contain at least one number (0-9), and include at least one special character (!@#$%^&*)).
- Confirm New Password: Re-enter a new password to confirm and ensure it matches.
Click the “Save” button to confirm.

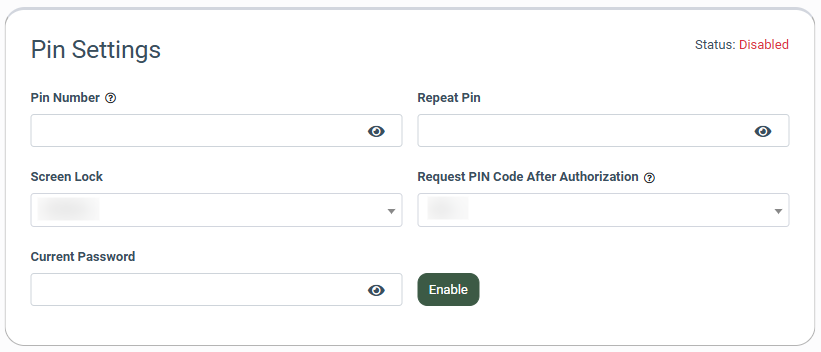
The “Pin Settings” block allows you to activate the auto-locking feature for your account and set up a personal identification number (PIN) for secure access. To enable it, fill in the following fields:
- Pin Number: Enter a secure PIN that will be required to unlock the system.
- Repeat Pin: Re-enter the PIN to confirm and ensure it matches.
- Screen Lock: Select the preferred time frame for the system to lock the screen after a period of inactivity automatically. (5 min, 10 min, 20 min, 30 min, 60 min).
- Request PIN Code After Authorization: Select the “Yes” option to require PIN after signing in.
- Current Password: Enter your current password to verify your identity before making changes.
Click the “Enable” button to confirm.
The “Two-Factor Authentication” block allows you to enhance the security of your account by adding an additional layer of protection, such as a code generated by the Google Authenticator app when signing in.
The Two-Factor Authentication is disabled by default. To enable this option, set up the primary cell phone number via the “Account Settings” tab.
To set up the primary cell phone number, add the phone number to your account by clicking the “Add New Contact” button in the “Contacts Settings” tab and filling in the following fields in the “Add New” pop-up window:
- Type: Select the “Cell Phone” value.
- Cell Phone: Enter the phone number in the required format.
Click the “Add” button to complete the action. 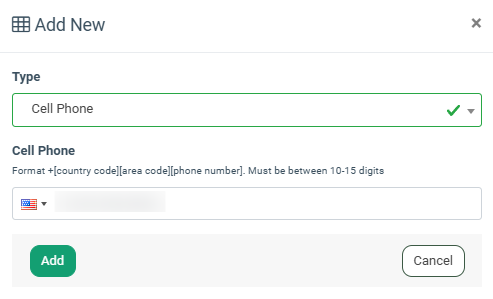
To verify the phone number, click the “Verify” button in the “Action” column.

Choose whether you prefer to get the verification code via text or the call and click the respective button.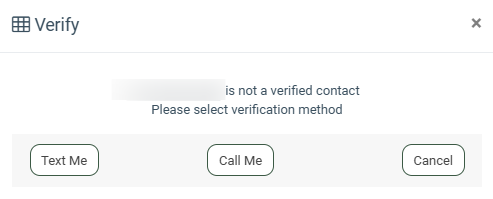
Enter the received code and click the “Verify” button to complete. The phone number status in the “Status” column will change to “Active.” 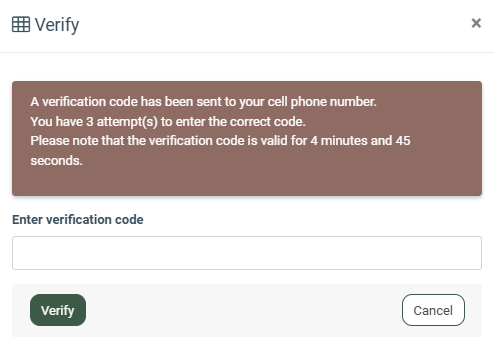
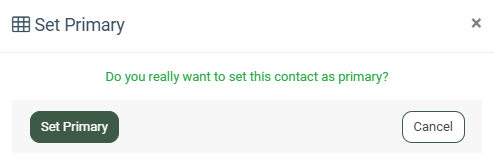
To set up the phone number as a primary, click the “Set Primary” button in the “Actions” column.

Then click the “Set Primary” button in the pop-up window to confirm.
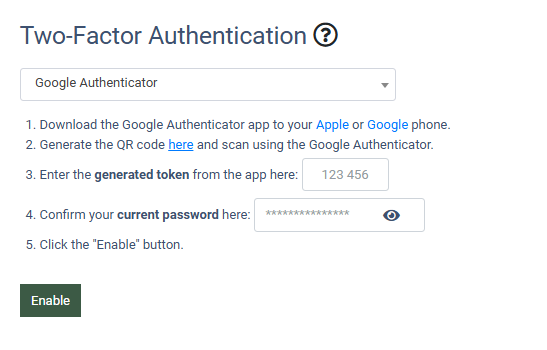
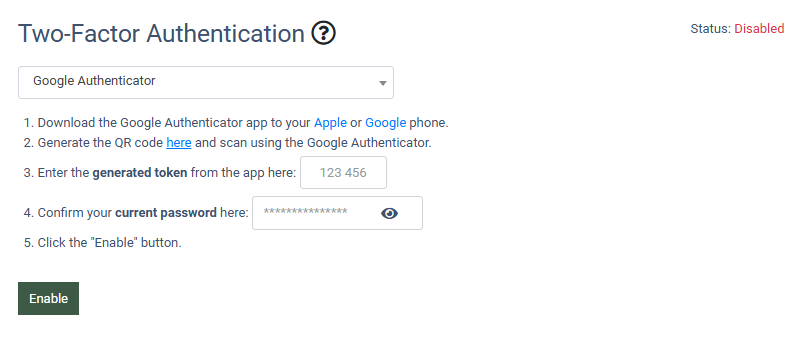
When your primary cell phone number is set up, you can proceed to set up Two-Factor Authentication. Go to the “Two-Factor Authentication” block, select the “Google Authenticator” option in the “Authentication Type” field, and enter your current password. Follow the instructions on the page:
- Download the “Google Authenticator” app.
- Using the “Google Authenticator” app, scan a QR code.
- Enter the generated token from the app.
- Enter the current password.
- Click the “Enable” button to complete.
 An authentication code will be displayed each time you open the “Google Authenticator” app on your device. Note: An authentication code is updated every 30 seconds and is valid only for 30 seconds before it is refreshed.
Once you have performed all of the steps, the Two-Factor authentication is successfully set up.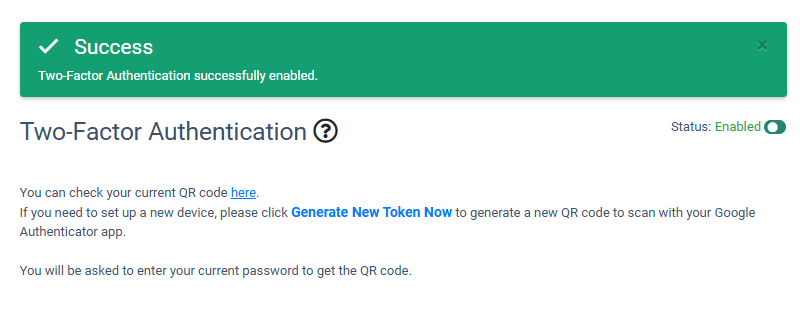
The “Trusted IP List” block allows you to create and manage a list of your trusted IP addresses, enabling you to skip two-factor authentication or PIN code verification when logging into the system from a trusted IP address.
Note: It is not recommended to use this option if you have a dynamic IP address or VPN connection.

The Trusted IP list contains the following information:
- IP Address: The trusted IP address.
- Type Authentication: The type of two-factor authentication set for this IP address.
- Created Date: The date of the trusted IP creation.
To add a new IP address to the Trusted IP list, click the “Add New IP Address” button and fill in the following fields in the pop-up window:
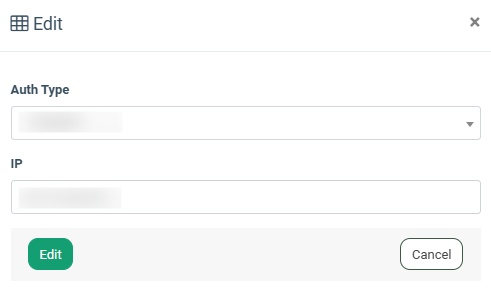
- Auth Type: Select the type of two-factor authentication that you would like to skip. (e.g., if you want to disable Google Authenticator for the Trusted IP, select the “Google Authenticator” option).
- IP: Enter the IP address (by default, the field displays your current IP address).
Click the “Add” button to complete

To edit the record, click the “Edit” button in the “Action” column. Fill in the information you want to modify and click the “Edit” button to confirm.
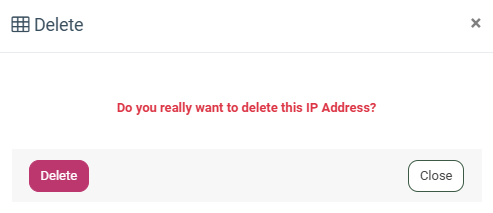
To delete the Trusted IP, click the “Delete” button in the “Action” column. Then confirm the action in the pop-up window.
The “Session History” block allows you to view the information about all log-ins to your account, including timestamps, user agent information, and IP addresses. Using this information, you can monitor and detect any suspicious activity on your account. The list contains the following information:
- IP Address: The IP Address under which the system login was performed.
- User Agent: The browser and operating system through which the login to the system was performed.
- Created Date: The date and time of login.

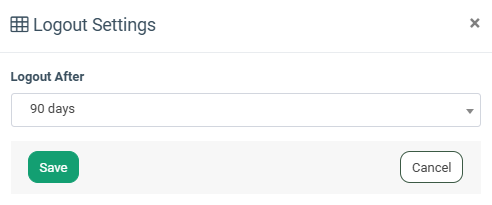
To set an automatic logout timeframe for existing sessions, click the “Logout Settings” button. In the pop-up window, choose the number of days after which the session will automatically end, and the user will be logged out. Then click the “Save” button to confirm your selection.