Phone Numbers List
Find out how to find and reserve a phone number in our quick guide to Phone Numbers List.
The Phone Numbers section allows you to review the list of reserved phone numbers in the system, reserve phone numbers, assign and reassign them, and search for specific numbers based on input keywords.
To view and manage phone numbers, go to the PBX Management > Phone Numbers section.
This section includes three tabs:
Reserve Phone Numbers(s)
The “Reserve Phone Number(s)” tab displays a list of all phone numbers that have been reserved in the system. From this tab, you can configure, unassign, or delete these phone numbers.
You can narrow down the search results by using the following filters:
- Phone Number: Enter the reserved phone number.
- Label: Enter the label assigned to the phone number.
- Group: Select the phone number group (Local, Toll-Free).
- Call Group: Select the call group.
- Assigned To: Select the Queue, Operator, IVR, SIP Trunk, Campaign, or Voicemail Box assigned to the phone number.
The list contains the following information:
-
Phone number: The reserved phone number.
-
Trusted Caller ID: The status of the Trusted Caller ID feature (Active / Disabled). Read more about the "Trusted Caller ID” feature in this Knowledge Base article.
-
Label: The label assigned to the phone number.
- Group: The name of the phone number group (Local, Toll-Free).
-
Assigned to: The Queue, Operator, IVR, SIP Trunk, Campaign, or Voicemail Box assigned to the phone number. When the number is dialed, the call is redirected to the assigned Queue, Operator, IVR, SIP Trunk, Campaign, or Voicemail Box.
-
Call Group: The group assigned to the phone number.
-
Bypass Routing: The status that indicates if the Bypass Routing feature is available for this phone number (Yes / No). The Bypass Routing feature allows you to set up the custom route (Operator, IVR, or Queue) for the incoming call from the predefined external phone number to the specific internal phone number (the phone number reserved in the PBX platform).
- Changed by: The user’s name which implemented changes.
- Last Changed: The date and time when changes were made.
To copy the phone number, click the “Copy number” button next to the number in the list.
To edit the reserved phone number’s settings, select the number from the list and click the “Edit” button in the “Actions” column.
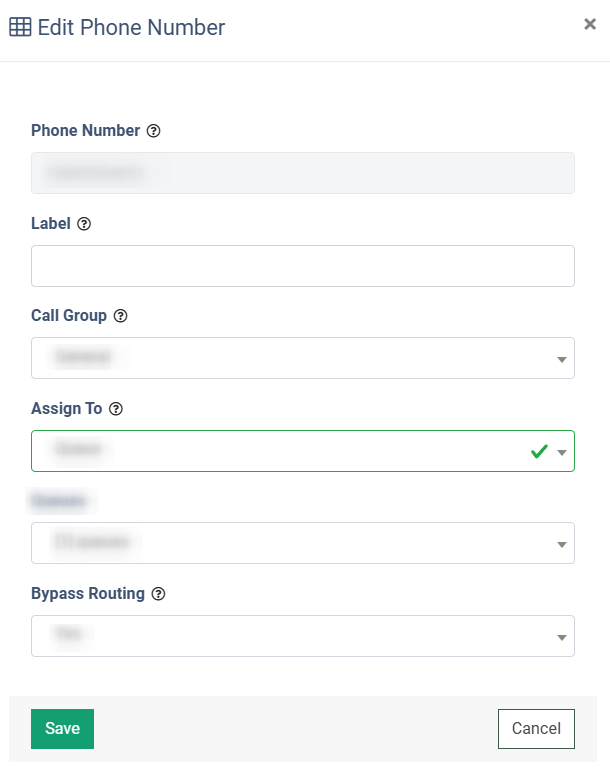
In the “Edit Phone Number” pop-up window, fill in the following fields:
- Phone Number: The reserved phone number.
- Label: Enter the phone number label.
- Call Group: Select the call group.
- Assign To: Select the Queue, Operator, IVR, SIP Trunk, Campaign, or Voicemail Box assigned to the phone number.
- Bypass Routing: Select the status of the custom call forwarding method (Yes / No).

To view the list of phone number groups available for reservation, click the "Reserve Phone Number(s)" button. The system will redirect you to the "Phone Numbers Reservation” tab. Please view the description below.
To view the settings of the assigned Queue, Operator, IVR, SIP Trunk, Campaign, or Voicemail Box, click the button located next to the entity name in the “Assigned to” column.
To view the Routing Bypass list, click the “Routes” button in the “Actions” column. The system will redirect you to the Routing Bypass section.
To delete the phone number from the list, click the “Delete” button in the “Actions” column. Confirm the action in the “Delete” pop-up window and click the “Save” button, or click the “Cancel” button to close the window.
To unassign the phone number from the Queue, Operator, IVR, SIP Trunk, Campaign, or Voicemail Box, click the “Unassign” button in the “Actions” column. Confirm the action in the “Unassign Phone Number” pop-up window and click the “Save” button, or click the “Cancel” button to close the window.
Click the "Export" button and select "Current Page to CSV" to export the current page to CSV or "All Pages to CSV" to export all pages to CSV.
Click the “Bulk Change” button and select the required phone numbers to apply changes to multiple numbers at once.
Click the “Edit” button (1) to edit the selected numbers. Click the “Save” button to confirm the action, or click the “Cancel” button to close the window.
Click the “Change Trusted Caller ID” button (2) to change the status of the Trusted Caller ID for selected numbers. Select the Trusted Caller ID status, type “YES” in the field, and click the “Save” button to confirm the action, or click the “Cancel” button to close the window.
Click the “Unassign Phone Numbers'' button (3) to unassign the selected numbers. Click the “Save” button to confirm the action, or click the “Cancel” button to close the window.
Click the “Delete Phone Numbers” button (4) to delete the selected numbers. Click the “Save” button to confirm the action, or click the “Cancel” button to close the window.
Phone Numbers Reservation
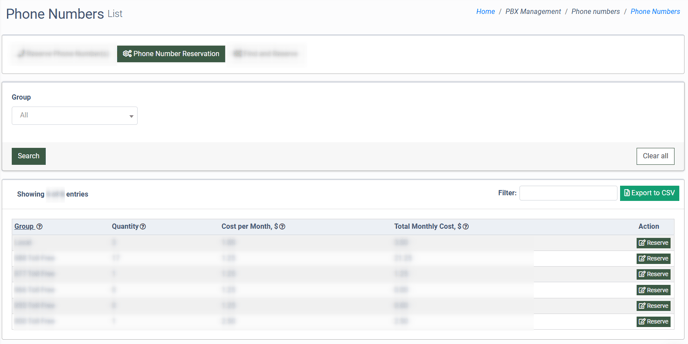
The “Phone Numbers Reservation” tab displays the list of phone number groups available for reservation and their cost.

You can narrow down the search results by using the following filters:
- Group: Select the Group from the drop-down list.
- Filter: Enter any string or number value related to any column from the list.
The Phone Numbers Reservation list contains the following information:
- Group: The name of the phone number group (Local / Toll-Free).
- Quantity: The number of phone numbers already reserved for the group.
- Cost per Month, $: The price of one phone number reservation per month for the group.
- Total Monthly Cost, $: The total cost of the phone numbers reserved for this group per month.
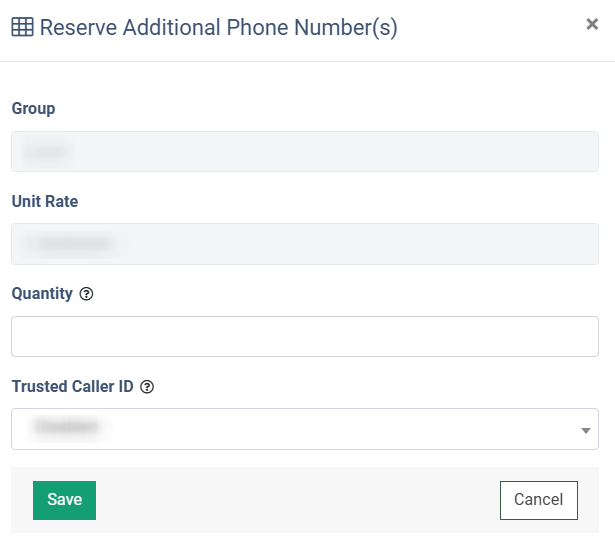
To reserve a phone number, select the group from the list and click the “Reserve” button in the “Actions” column. In the “Reserve Additional Phone Number(s)” pop-up window, enter how many phone numbers you would like to reserve, select whether you want to enable the “Trusted Caller ID” feature for these numbers, and click the “Save” button. The reserved phone numbers will be available via the “Reserved Phone Number(s)” tab.

Click the "Export to CSV" button to export the current page to CSV.
Find and Reserve
The “Find and Reserve” tab allows you to search for a specific phone number and reserve it.
-1.png?width=688&height=312&name=unnamed%20(84)-1.png)
The list of available phone numbers contains the following data:
- Group: The phone number group (Local / Toll-Free).
- Cost per Month, $: The price of one phone number reservation per month.
- Phone Number: The phone number that is available for reservation. If the “ABC” filter is applied, the phone number will contain a matching keyword.
You can narrow down the search results by using the following filters:
- Group: Select the phone number group to which the numbers are assigned. (Local, Toll-Free).
- Phone Number: Enter the phone number.
- State: Select the state the phone numbers are assigned to.
- City: Select the city to which the phone numbers are assigned.
To find the phone number matching the input letters/keywords, click the “ABC” button.
Note: After clicking the “ABC” button, the “Please enter a word to decode it” pop-up window will appear. You can enter the Latin letters which will be transformed into numbers as soon as you click the “OK” button. The letters correspond to the keys on old push-button phones, e.g. MNO - 6, TUV - 8, etc.
The list of available phone numbers contains the following information:
- Group: The phone number group (Local / Toll-Free).
- Cost per Month, $: The price of one phone number reservation per month.
- Phone Number: The phone number that is available for reservation. If the “ABC” filter is applied, the phone number will contain a matching keyword.
-1.png?width=688&height=311&name=unnamed%20(85)-1.png)
In the “Reserve Phone Number(s)” pop-up window, select the status of the “Trusted Caller ID” feature. Click the “Save” button to confirm the action, or click the “Cancel” button to close the window.


