The “Main” tab allows you to view and configure the general information about the Publisher.
To view the “Main” tab, go to the Publisher Management > Publishers section and click the “ID” button of the selected Publisher.
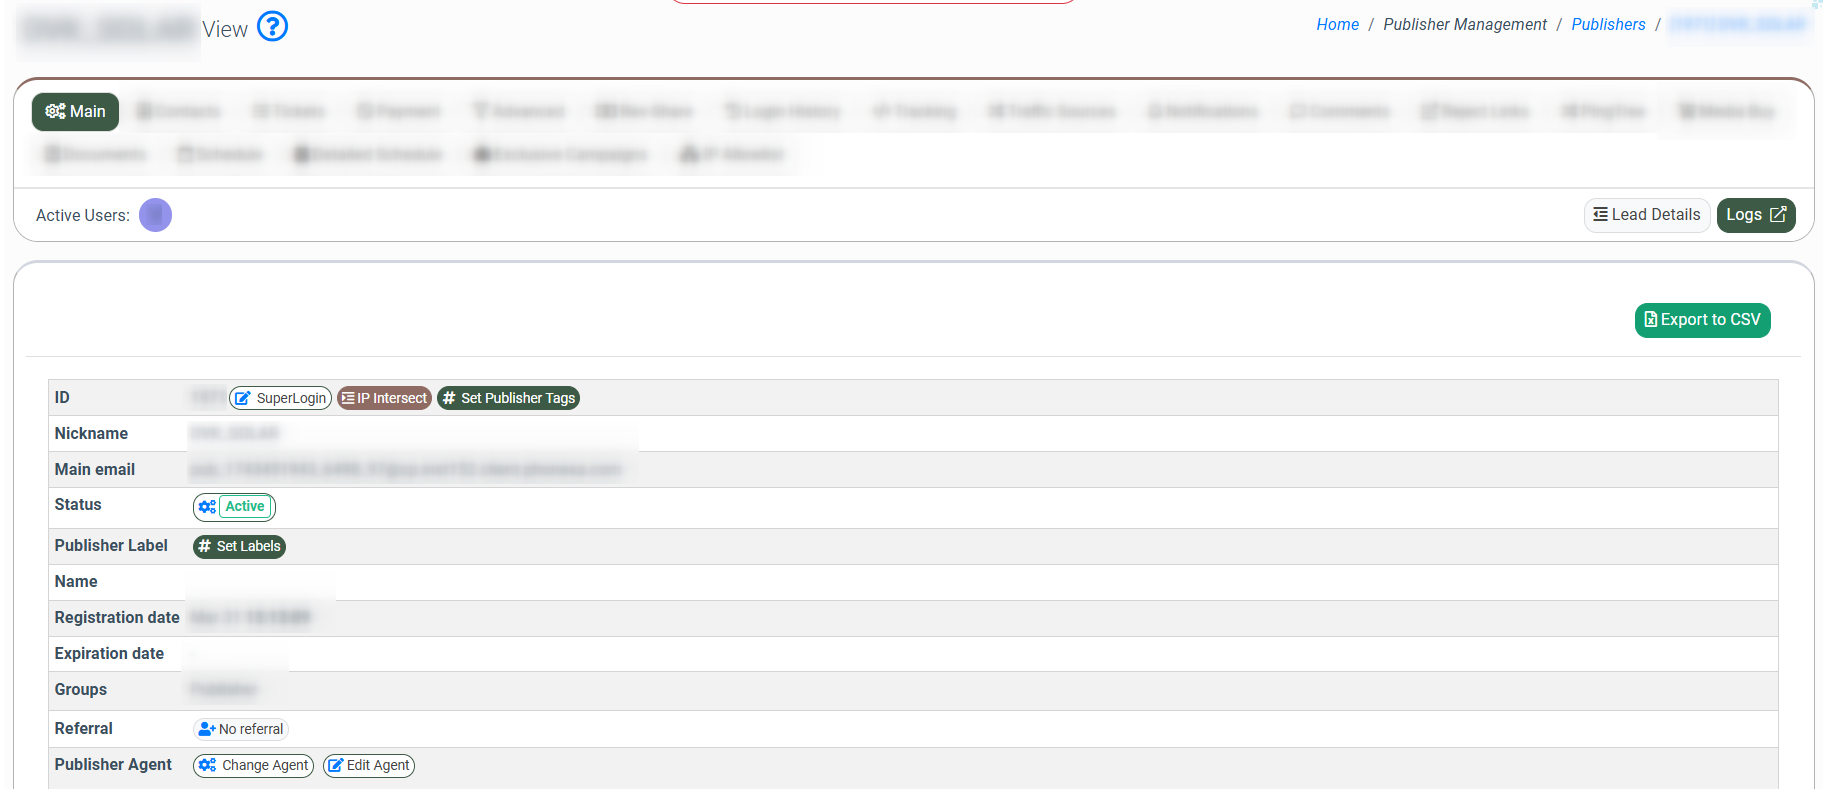
The “Main” tab contains the following information:
-
ID: The unique identification number of the Publisher. To log in under the particular Publisher, click the “SuperLogin” button. To view the information about the IP Addresses from which the Publisher was logged in, click the “IP Intersect” button. You will be redirected to the “IP Intersect” report. To assign the publisher tag, click the “Set Publisher Tags” button. Read more information about the Publisher Labels and Tags section in the following Knowledge Base article.
-
Nickname: The nickname of the Publisher.
-
Main email: The primary email of the Publisher.
-
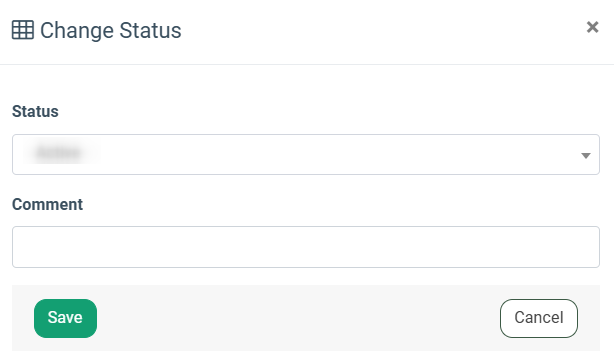
Status: The status of the Publisher (Active, Deleted, Disabled).
To change the Publisher Status, click the button with the current value icon. In the “Change Status” pop-up window, select the status and leave a comment (if needed). To complete, click the “Save” button.
-
Publisher Label: The label or list of labels assigned to the Publisher.
To set a label for the Publisher, click the “Set Labels” button. Select the publisher label(s) that you need to assign to the Publisher in the “Publisher Label(s)” field of the “Set Publisher Labels” pop-up window, and click the “OK” button to complete the action. Read more about the Publisher Labels and Tags section in this Knowledge Base article. -
Name: The name of the Publisher.
-
Registration Date: The date of the Publisher’s profile registration.
-
Groups: The system group (role).
-
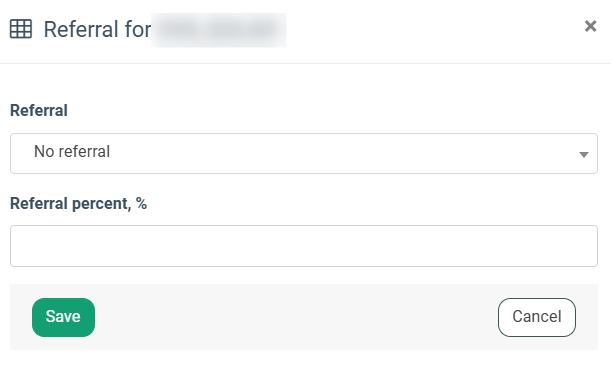
Referral: The nickname of the Affiliate that provided the referral link, along with the set referral commission percentage. To set a Referral, click the button with a current value icon. In the pop-up window, select the Referral from the drop-down list. You can also input the Referral Percent (if needed). To complete, click the “Save” button.

- Publisher Agent: The name of the Publisher Agent and the contact details:
- Email: The agent’s email address.
- Microsoft Teams: The agent’s Microsoft Teams username.
- Cell Phone: The agent’s cell phone number.
- Languages: The language(s) the agent speaks.
-1.png?width=631&height=227&name=unnamed%20(35)-1.png) To change the Publisher Agent, click the “Change Agent” button. Select a Publisher Agent from the list, leave a comment (if needed), and click the “Save” button to complete the action.
To change the Publisher Agent, click the “Change Agent” button. Select a Publisher Agent from the list, leave a comment (if needed), and click the “Save” button to complete the action.
-1.png?width=612&height=344&name=unnamed%20(36)-1.png) To view the detailed information or configure the selected Publisher Agent, click the “Edit Agent” button, and the system will redirect you to the setup page.
To view the detailed information or configure the selected Publisher Agent, click the “Edit Agent” button, and the system will redirect you to the setup page.