Note: This option is available for LMS campaigns only.
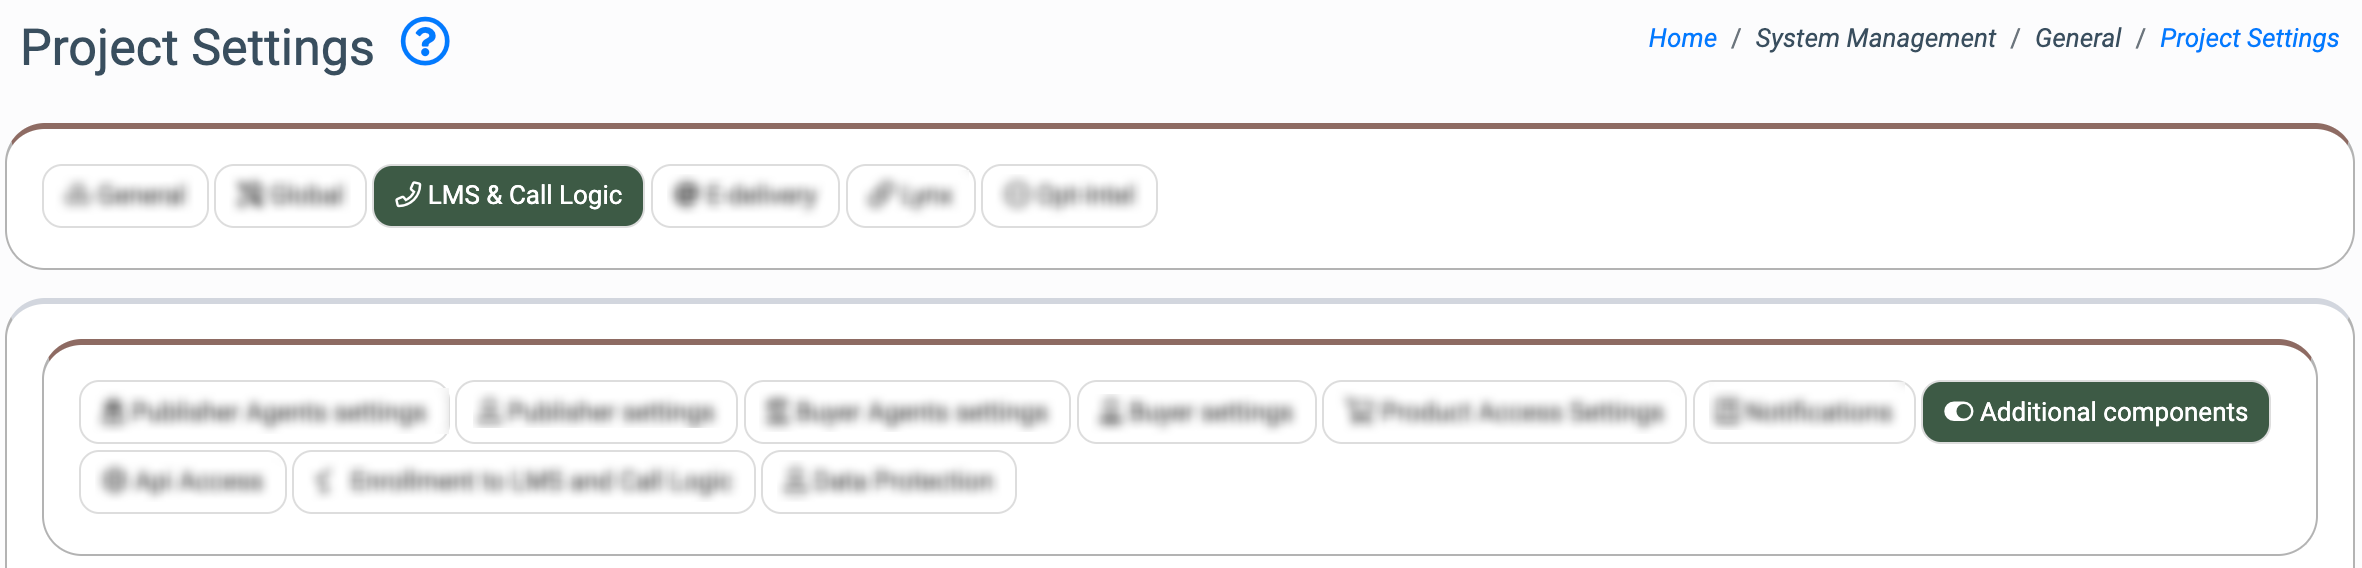
To enable the feature, go to the System Management > General > Project Settings section and set the “ON” value in the “Enable linked campaign settings” field.

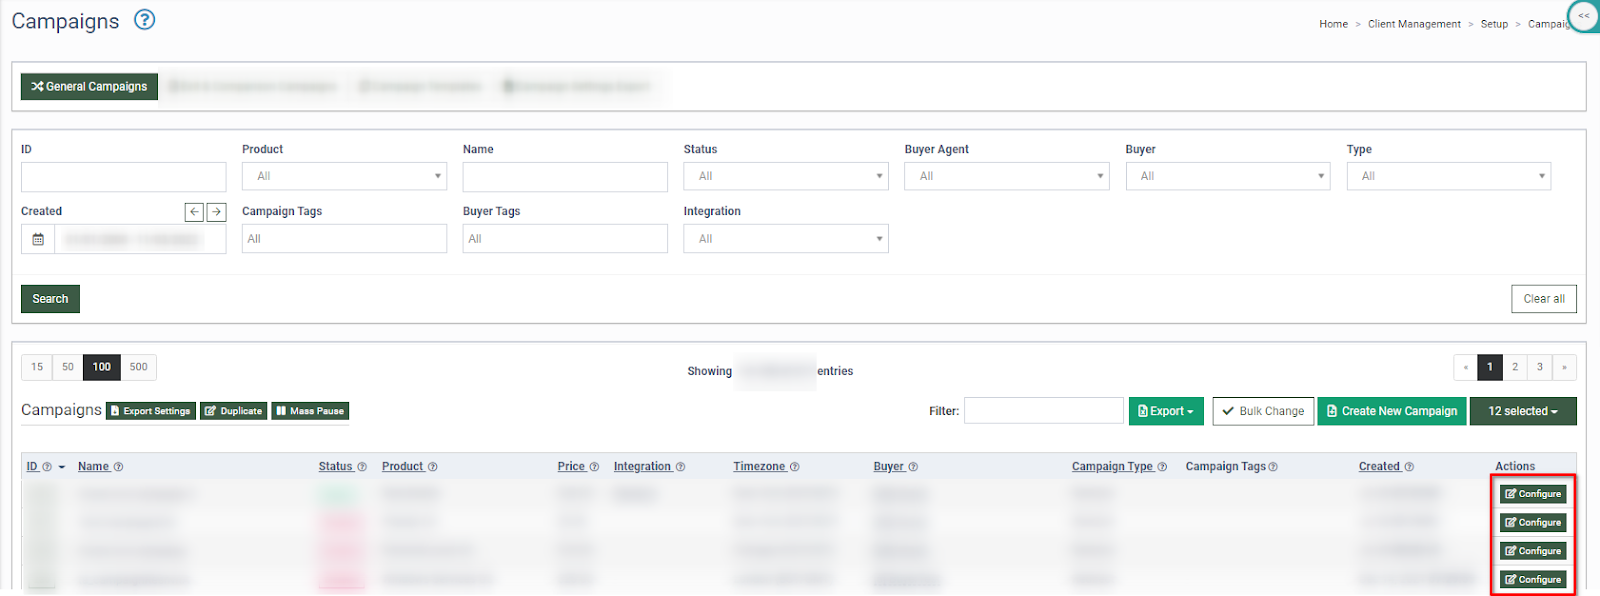
To enable the linked campaign settings for a campaign, go to the Client Management > Setup > Campaigns section, select the campaign and click the “Configure” button in the “Actions” column.
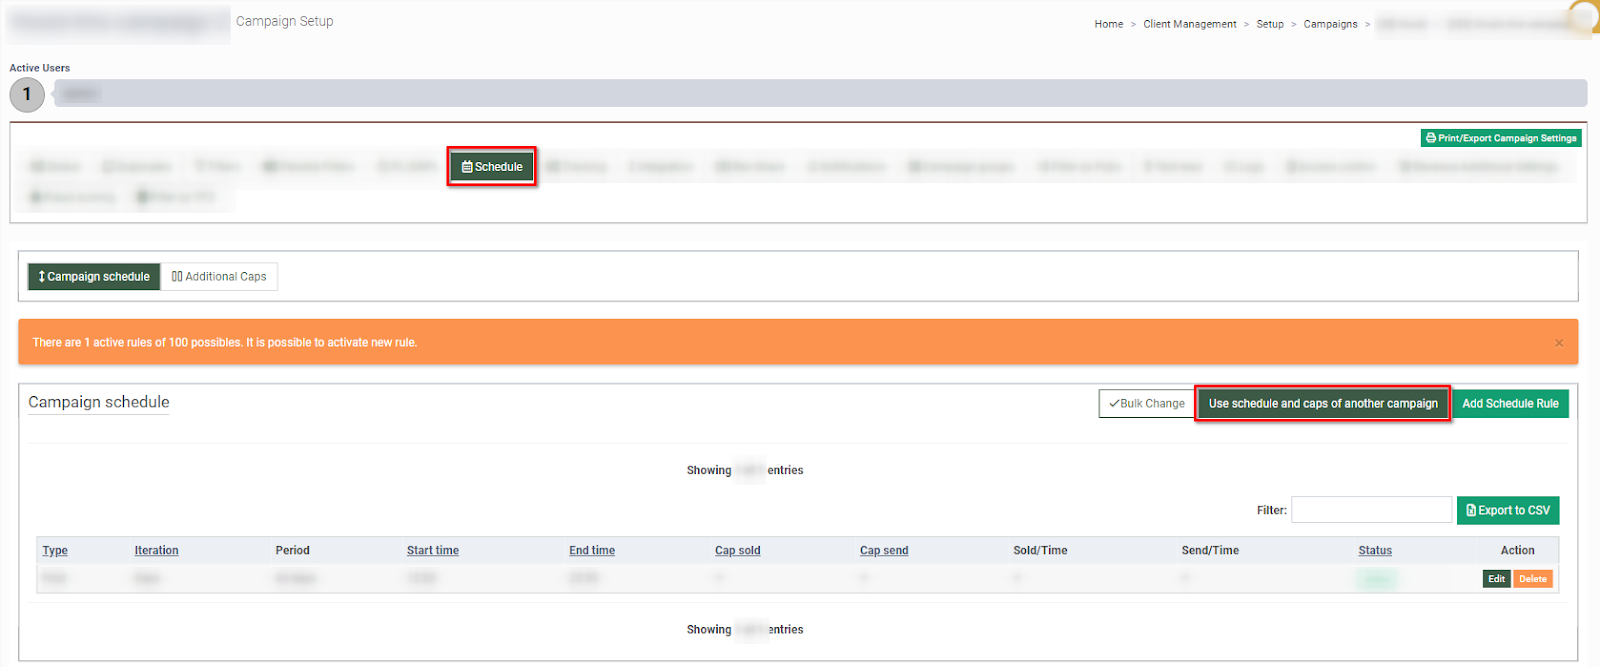
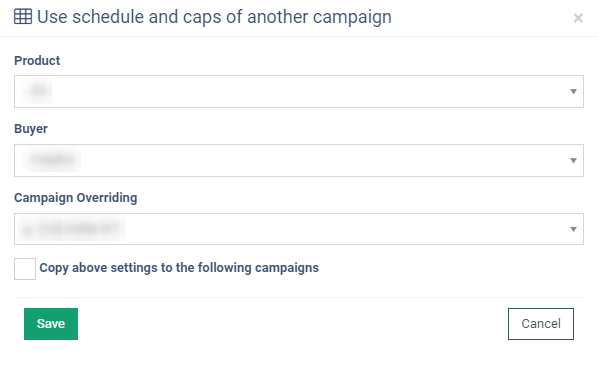
Go to the “Schedule” tab in the “Campaign Setup” section, and click the “Use schedule and caps of another campaign” button. Read more about the settings in the “Schedule” tab in the Knowledge Base article.
Fill in the following fields in the “Use schedule and caps of another campaign” pop-up window:
-
Product: Select the product.
-
Buyer: Select the buyer.
-
Campaign Overriding: Select the campaign with the schedule settings you would like to apply to the selected one.
-
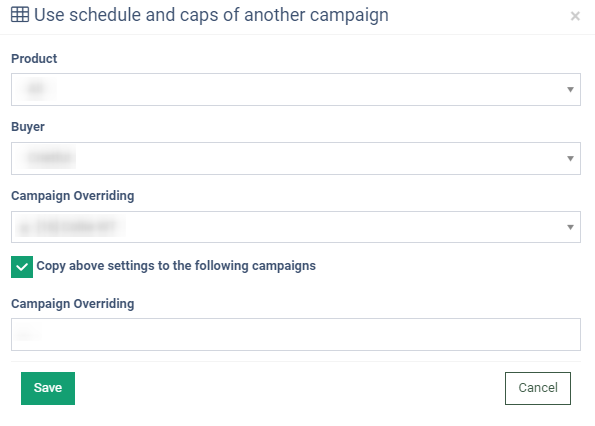
Mark the “Copy above settings to the following campaigns” checkbox if you want to apply these settings to any other campaigns.
Click the “Save” button to continue the process.
Please, read the message from the pop-up confirmation window, and click the “OK” button to complete the settings.
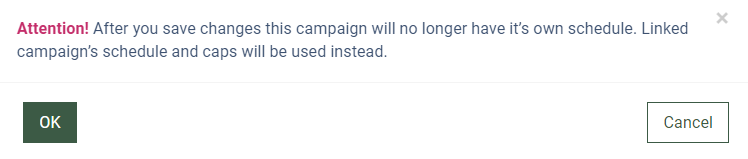
Note: The schedule and cap rules for the selected campaign will be non-editable after enabling this setting.
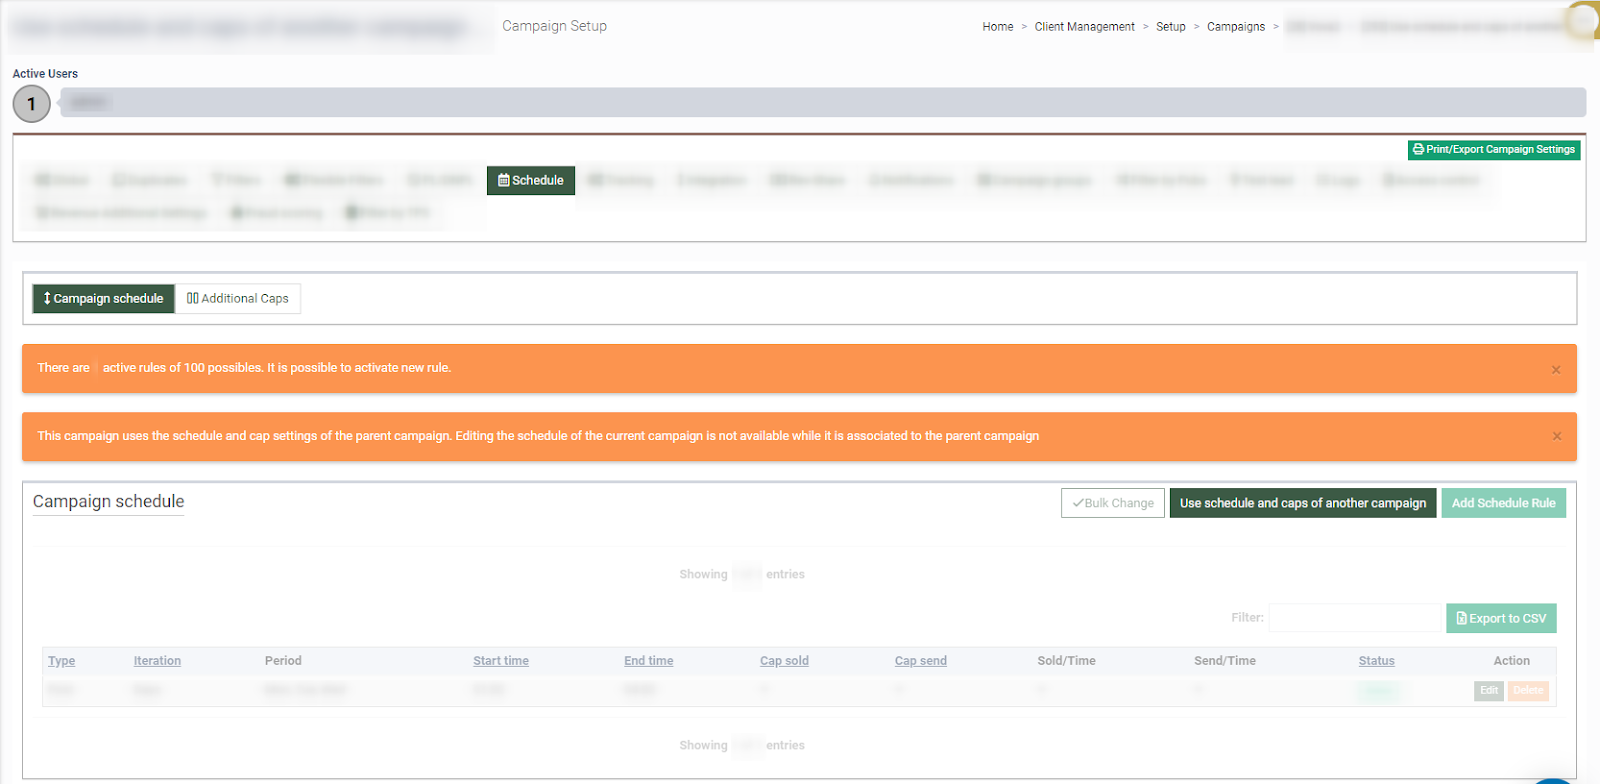
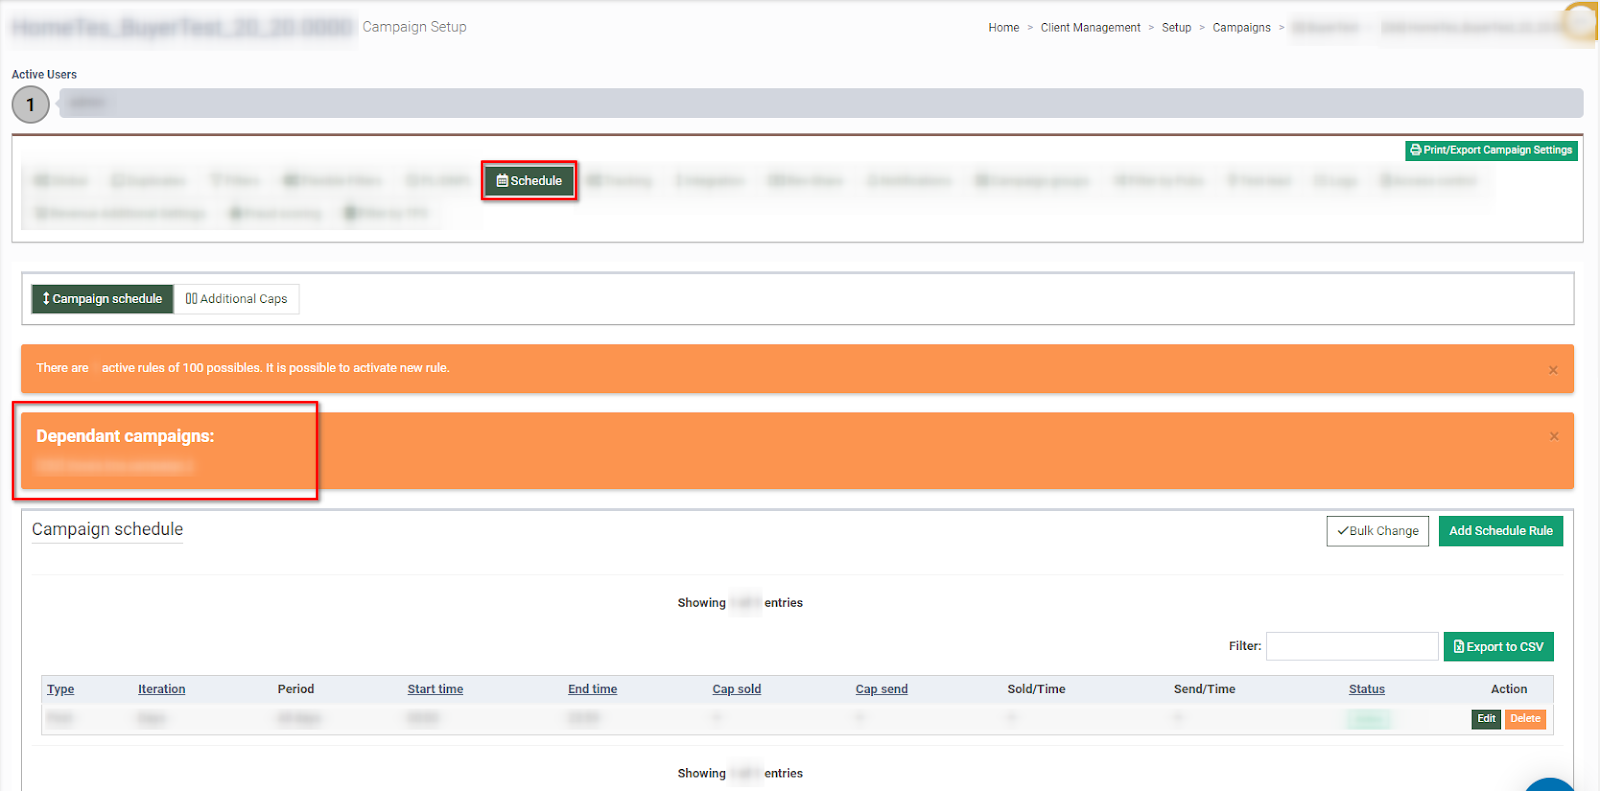
The linked campaign will be displayed in the “Dependant campaigns” field on the “Schedule” tab.