
The “Ping To URL” block allows you to set up different integrations in the block.
To add the “Ping To URL” block to your IVR select the “Ping To URL” icon from the list of blocks and click it.
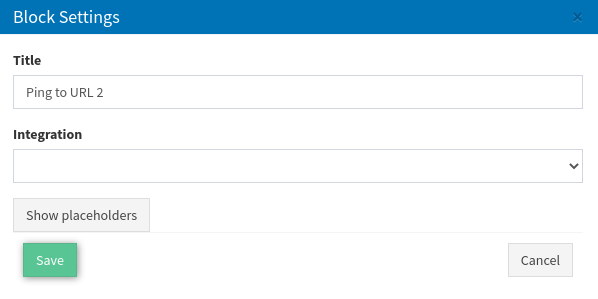
To set up the “Ping To URL” block click the “Configure” button (the button with the “Gear” icon), fill in the “Title” field, and choose the integration from the “Integration” dropdown list. The following integrations are available:
- Add to DNPL
- Lead Stash
- Opting in
- People Data Labs
- Publisher Payout
- Simple ping
- State from ZIP
- Experianaperture
Add to DNPL
The “Add to DNPL” integration adds the caller’s data from the “User’s Input” block to the DNPL list.
To set up the “Add to DNPL” integration, fill in the following fields in the pop-up window:
- Name: Enter the name of the block.
- Integration: Select the “Add to DNPL” integration.
- Extra Field: Select an extra field.
- DNPL list: Select a DNPL list.
Click the “Save” button to confirm.
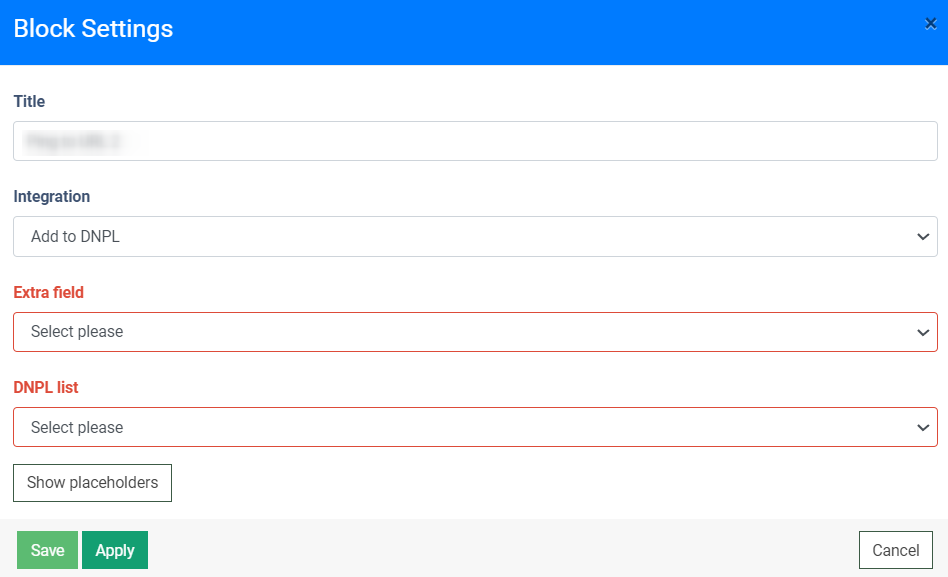
Note: You should create the Extra Field and DNPL list in advance.
Read more about the Product Extra Fields in this Knowledge Base article.
Read more about the DNPL Lists in this Knowledge Base article.
Lead Stash
The “Lead Stash” integration searches the data in the Tracking Pool or in the Lead Stash (or in both at the same time) within the time selected in the settings. When the values are found, the system automatically fills in the blocks that require this data and records the values to the lead body.
To set up the “Lead Stash” integration, fill in the following fields in the pop-up window:
- Name: Enter the name of the block.
- Integration: Select the “Lead Stash” integration.
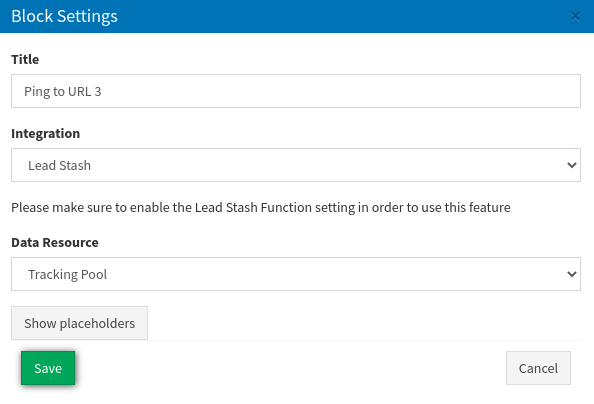
- Data Resource: Select the search method (Lead Stash, Tracking Pool, or Lead Stash+Tracking Pool).
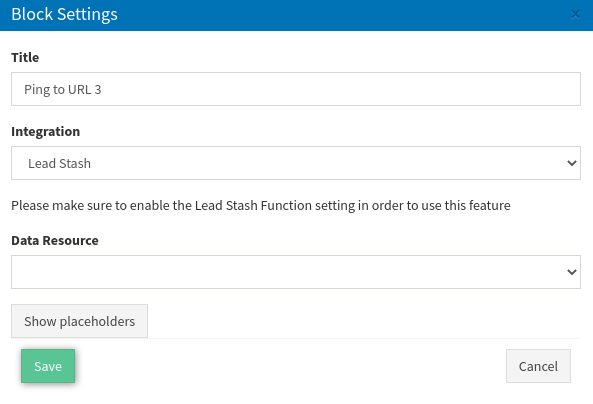
Depending on the selected method in the “Data Resource” field, the following additional settings are available:
- The “Lead Stash” option searches for the data within the selected time range.
- Lead Stash Data Lifetime: Select the term for the lead data search from the dropdown list (1 day, 1 week, 2 weeks, 1 month, 2 months, 3 months, 4 months, 5 months, 6 months).

- The “Tracking pool” option searches the lead data in the tracking pool.
- The “Lead Stash+Tracking Pool” option searches for the data in the Lead Stash and Tracking Pool within the selected time range and according to the specified priority.
- Lead Stash Data Lifetime: Select the term for the lead data search from the dropdown list (1 day, 1 week, 2 weeks, 1 month, 2 months, 3 months, 4 months, 5 months, 6 months).
- Data Priority: Select the priority option (Lead Stash, Tracking Pool).
Click the “Save” button to confirm.
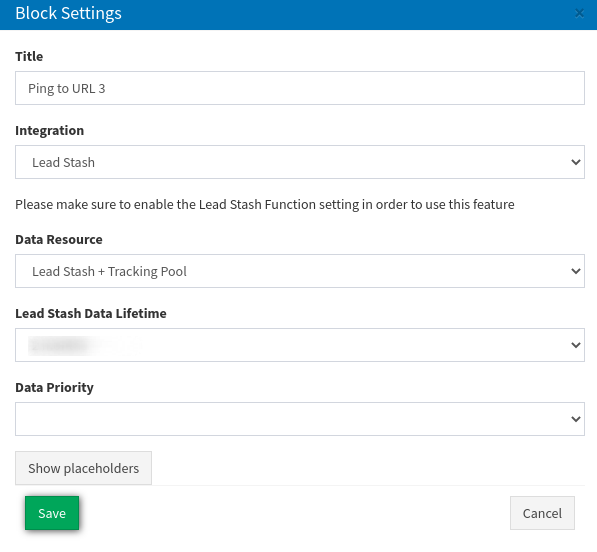
Note: The Lead Stash Function should be enabled for using this feature.
Read on how to set up the Lead Stash Function in this Knowledge Base article.
Opting In
The “Opting In” integration adds the current phone number to the specific E-Delivery list.
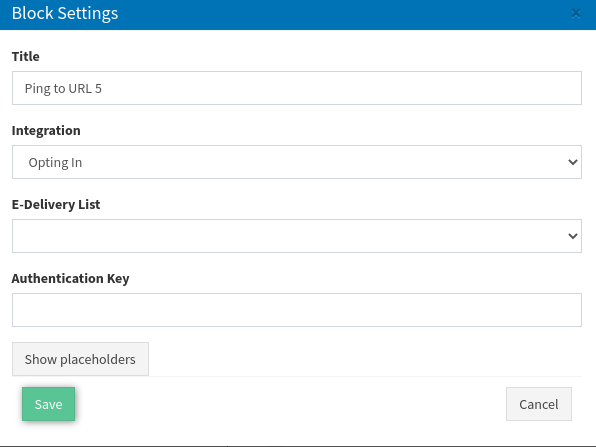
To set up the “Opting In” integration, fill in the following fields in the pop-up window:
- Name: Enter the name of the block.
- Integration: Select the “Opting In” integration.
- E-Delivery List: Select the contact list.
- Authentication Key: Enter the API key to log in and add numbers to the E-Delivery list
Click the “Save” button to confirm.
Read about the API Keys in this Knowledge Base article.
People Data Labs
The “People Data Labs” integration identifies the State by phone number based on the ANI of the caller. If the Zip code cannot be identified, then the caller will be sent to a block that requests it.
Note: Automatic number identification (ANI) is a feature of a telecommunications network for automatically determining the origination telephone number on toll calls for billing purposes.
To set up the “People Data Labs” integration, fill in the following fields in the pop-up window:
- Name: Enter the name of the block.
- Integration: Select the “People Data Labs” integration.
- API Key: Enter the API key for authorization on a service.
Click the “Save” button to confirm.

Note: The caller’s approval for the Service is required.
Read about the API Keys in this Knowledge Base article.
Publisher Payout
The “Publisher Payout” integration charges the admin for the particular amount of money mentioned in the block settings. The debited amount is transferred to the publisher from whom the call came.
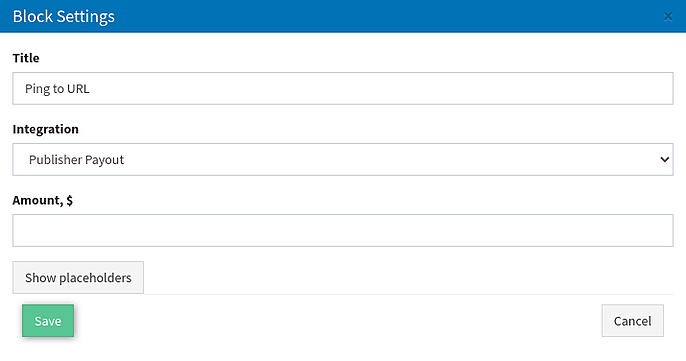
To set up the “Publisher Payout” integration, fill in the following fields in the pop-up window:
- Name: Enter the name of the block.
- Integration: Select the “Publisher Payout” integration.
- Amount, $: Enter the required amount.
Click the “Save” button to confirm.
Simple Ping
The “Simple Ping” integration allows inserting any placeholders into the URL. When the call gets to the block, the system automatically places the value into the URL and sends the data by the URL.
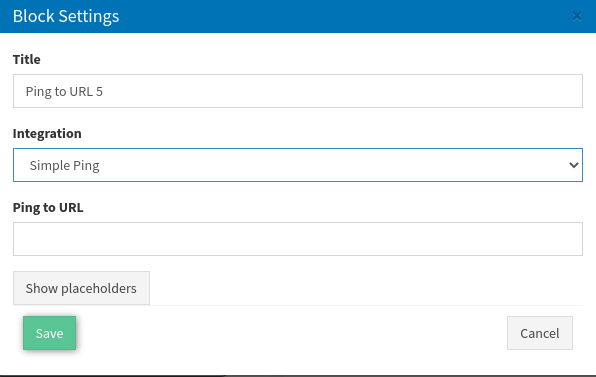
To set up the “Simple Ping” integration, fill in the following fields in the pop-up window:
- Name: Enter the name of the block.
- Integration: Select the “Simple Ping” integration.
- Ping to URL: Enter the placeholder to be inserted into the URL
Click the “Save” button to confirm.
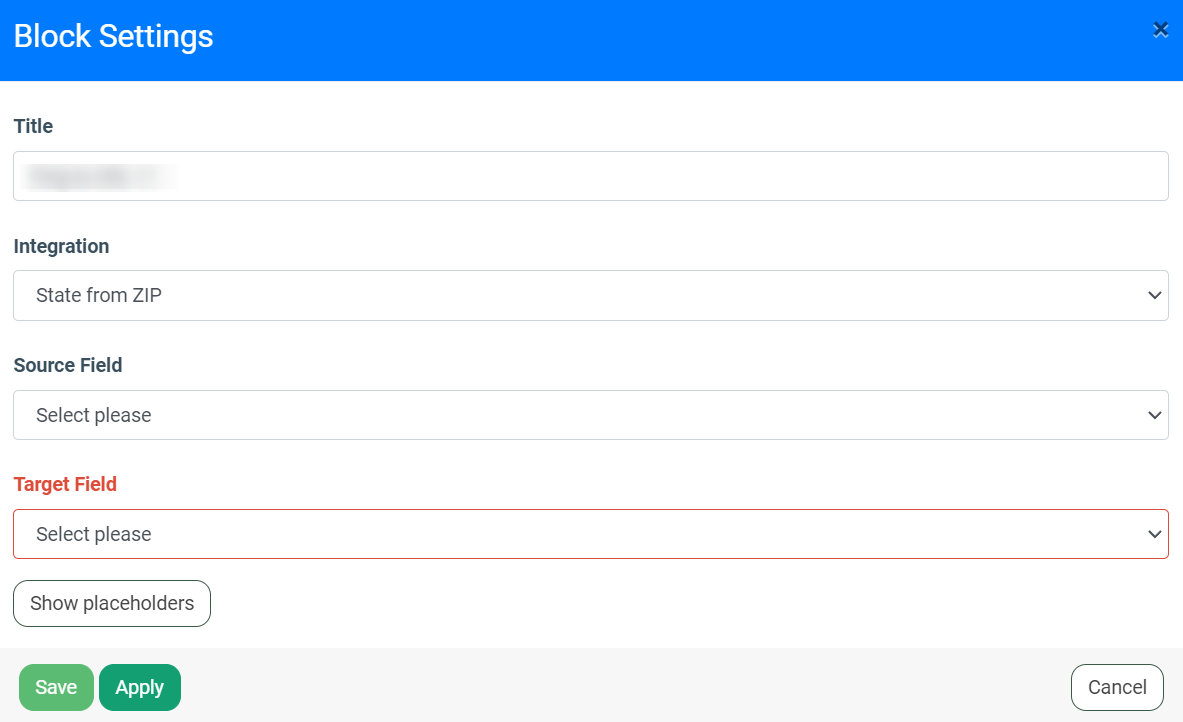
State from ZIP
The “State from ZIP” integration determines the State by the ZIP code and records both values to the Lead body as extra fields.
To set up the “State from ZIP” integration, fill in the following fields in the pop-up window:
- Name: Enter the name of the block.
- Integration: Select the “State from ZIP” integration.
- Source Field: Select the Extra field to obtain the ZIP code.
- Target Field: Select the Extra field to identify the State.
Click the “Save” button to confirm.
Note: If the “Source Field” dropdown list is empty, the value will be recorded from the “User’s Input” block.
Note: You should create two Product Extra Fields in advance.
Read more about the Extra Fields in this Knowledge Base article.
Experianaperture
The “Experianaperture” integration records the ZIP code to the Lead body based on the validation of the caller's phone number. If the integration has not returned or returned an invalid ZIP code, the data is requested on the “User’s Input” block. In case there is no “User’s Input” block, the ZIP code is determined by the system (if the caller’s phone number is valid).
To set up the “Experianaperture” integration, fill in the following fields in the pop-up window:
- Name: Enter the name of the block.
- Integration: Select the “Add to DNPL” integration.
- API Key: Enter the API key for authorization on a third-party service.
Click the “Save” button to confirm.
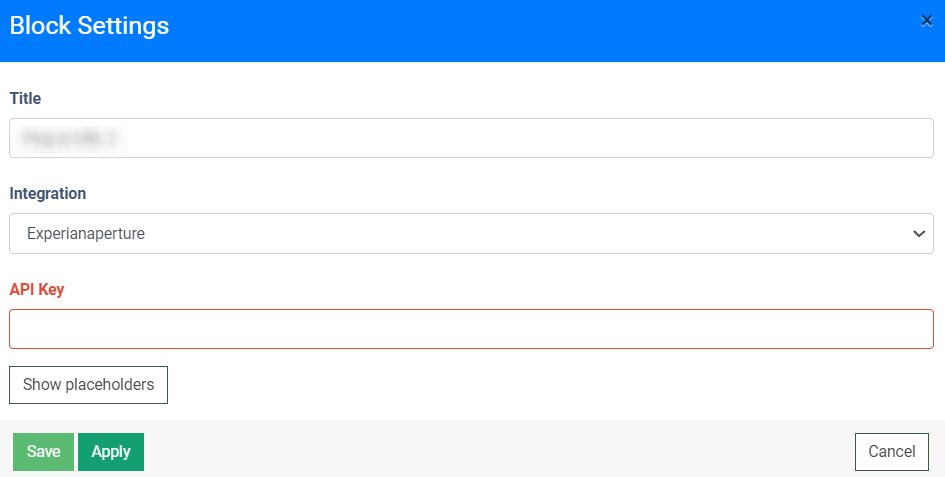
Note: The caller’s approval for the Service is required.
Read about the API Keys in this Knowledge Base article.