To open the Unsubscribe Lists, go to the Suppression Management > Unsubscribe Lists section.
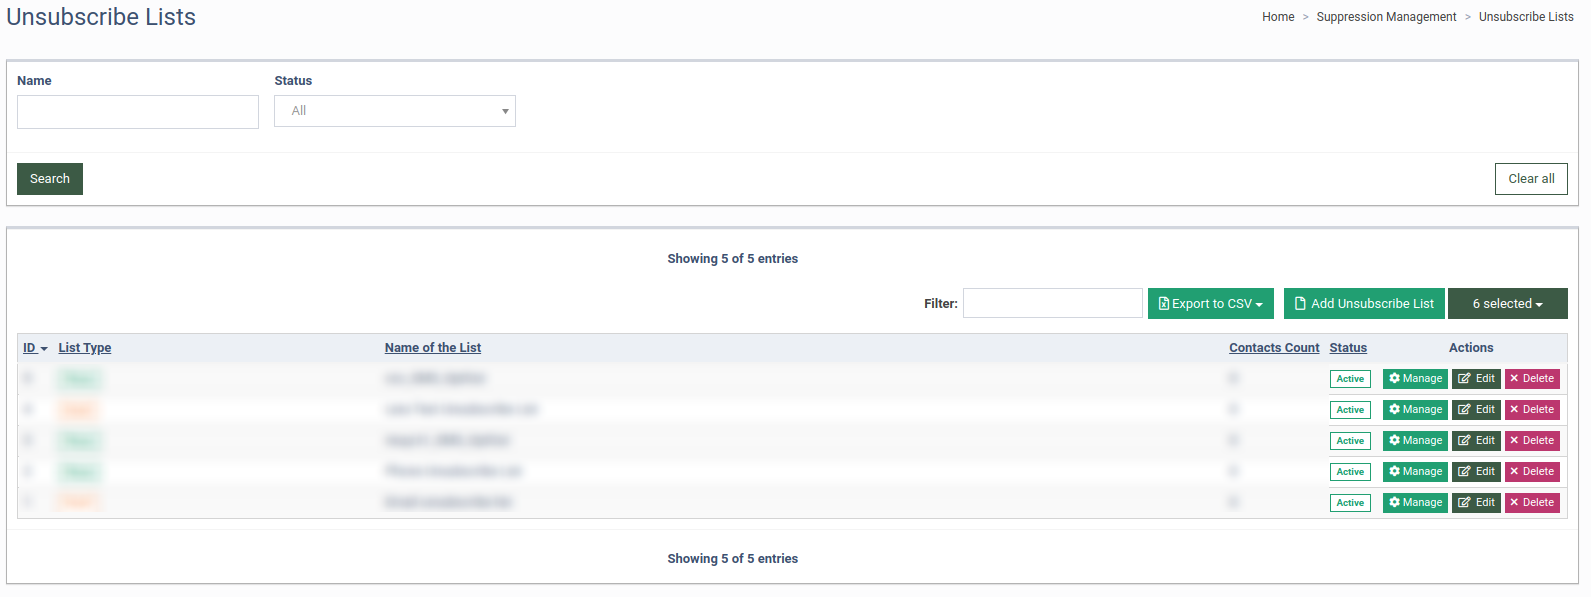
The Unsubscribe List contains the following information:
-
ID: The ID number of the unsubscribe list.
-
List Type: The type of the unsubscribe list (Email, Phone).
-
Name of the List: The name of the unsubscribe list.
-
Contacts Count: The number of contacts in the unsubscribe list.
-
Status: The status of the unsubscribe list.
You can narrow down the search results by using the following filters:
-
Name: Enter the name of the unsubscribe list.
-
Status: Select the status of the unsubscribe list (Draft, Active, In Progress, Deleted).
Click the “Manage” button in the “Actions” column to open the Unsubscribe List Manager. Here you can add, remove or manage the contacts in two tabs:
-
Manage
-
Manage MD5 (Available only for the Email list type).
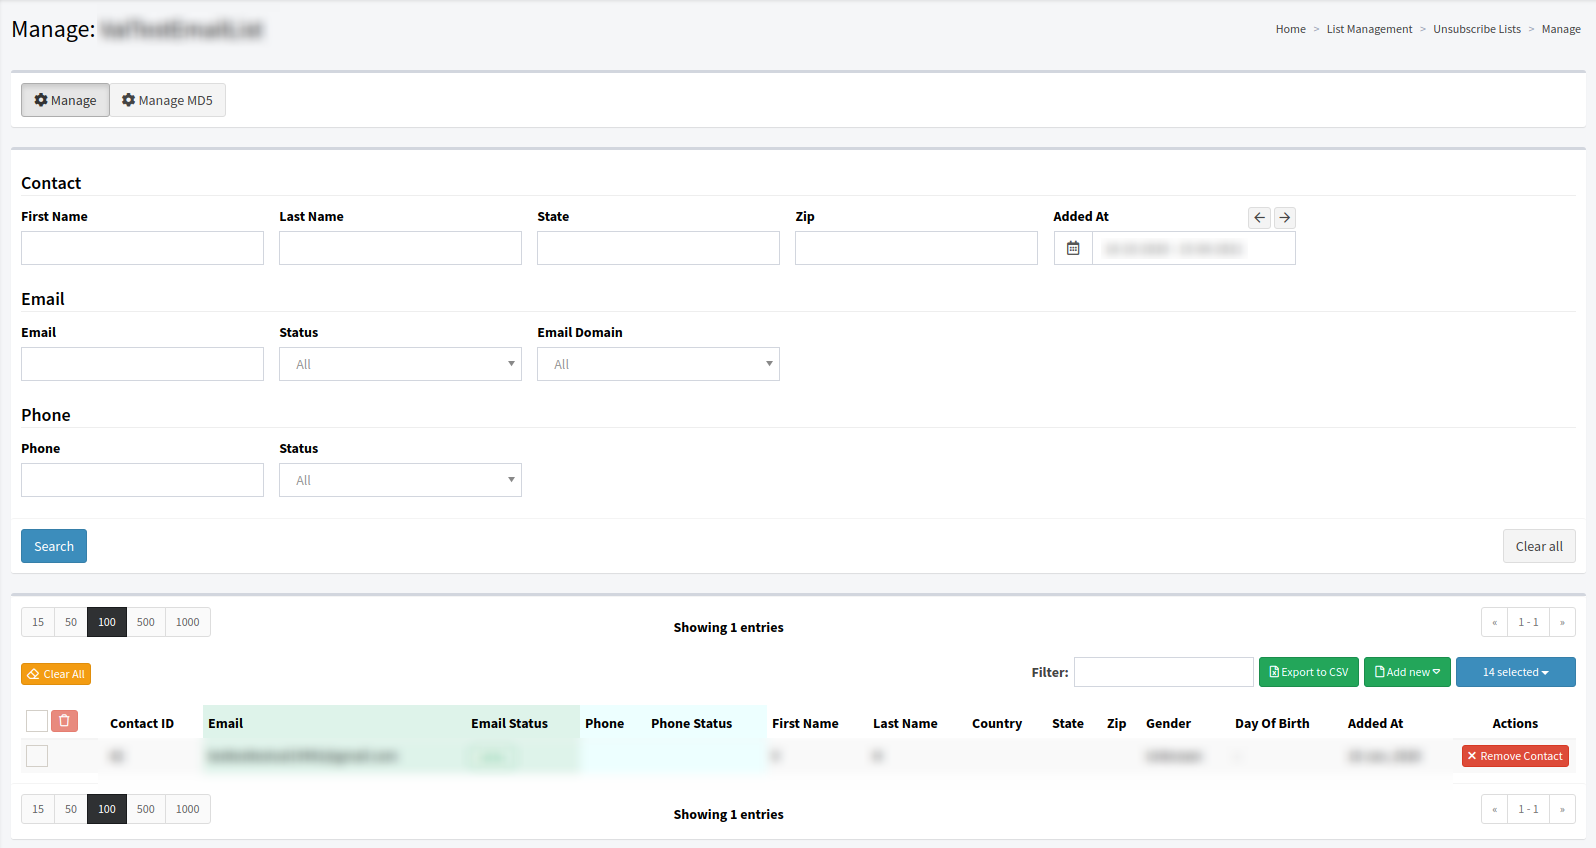
In the “Manage” tab, the main block contains the following information:
-
Contact ID: The ID number of the contact in the list.
-
Email: The contact’s email address.
-
Email Status: The status of the email (Active, Inactive, Bounced, Suppressed).
-
Phone: The phone number of the contact.
-
Phone Status: The status of the phone number (Active, Inactive, Suppressed).
-
First Name: The first name of the contact person.
-
Last Name: The last name of the contact person.
-
Country: The contact’s country.
-
State: The contact’s state.
-
Zip: The contact’s zip code.
-
Gender: The contact’s gender.
-
Day of birth: The contact’s date of birth.
-
Added At: The date and time when the contact was added to the list.
You can narrow down the search results using three filter blocks.
The “Contact” filter block contains the following fields:
-
First Name: Enter the first name of the contact person.
-
Last Name: Enter the last name of the contact person.
-
State: Enter the name of the state.
-
Zip: Enter the zip code of the contact’s area.
-
Added At: Select the time range when the contact was added.
The “Email” filter block contains the following fields:
-
Email: Enter the email address of the contact person.
-
Status: Select the email status (Active, Inactive, Bounced, Suppressed).
-
Email Domain: Select the email domain from the existing list (gmail.com, hotmail.com, etc.).
The “Phone” filter block contains the following fields:
-
Phone: Enter the phone number of the contact person.
-
Status: Select the phone status of the contact person (Active, Inactive, Suppressed).
Click the “Remove Contact” button in the “Actions” column to remove the contact.
To add the contact click the “Add new” button.
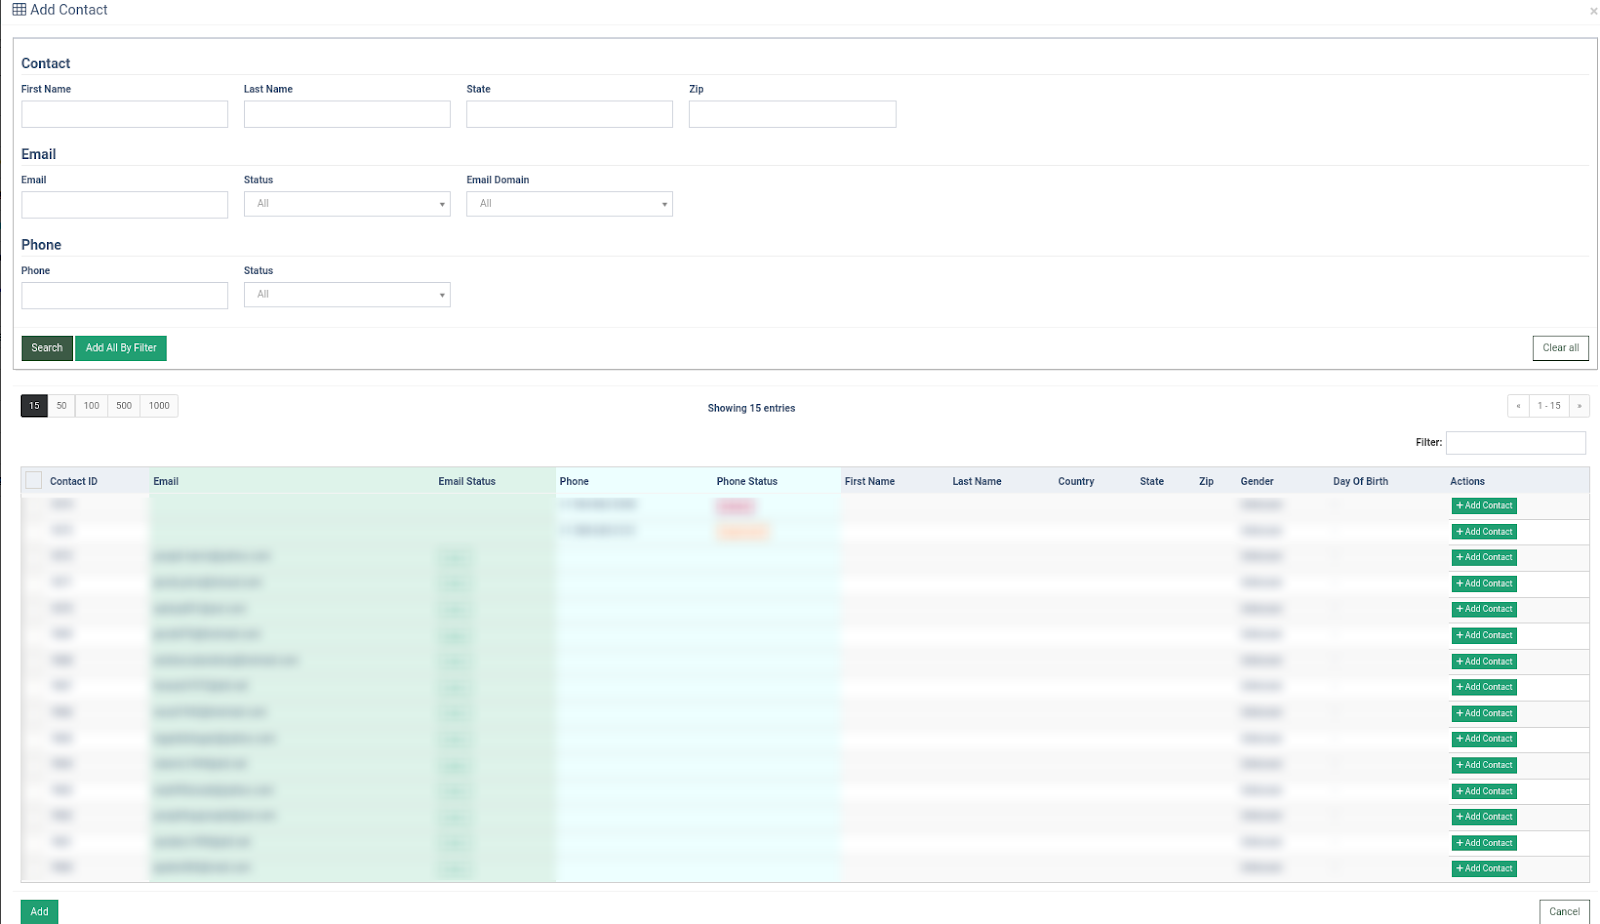
Select the “Add Contact” option to add a new contact manually. The system will redirect you to the “Add Contact” page. Select the required contacts, check the boxes in the corresponding row, and click the “Add” button to complete the action.
To add each contact separately, click the “Add Contact” button in the “Actions” column. You can use different filters to find specific contacts. Fill in all the necessary fields and click the “Search” button.
To add all contacts from the filtered list, click the “Add All By Filter” button.
Click the “Yes” button in the pop-up window to confirm.
Note: Read more about importing contacts via CSV in this Knowledge Base article.
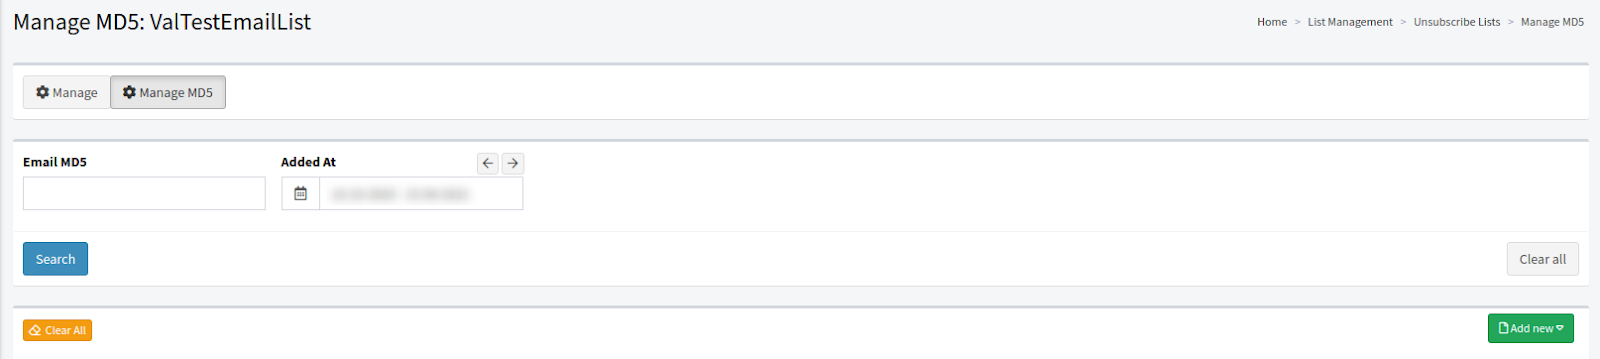
In the “Manage MD5” tab, you can narrow down the search results by using the following filters:
-
Email MD5: Enter the email address of the contact person.
-
Added At: Select the date and time when the contact was added to the list.
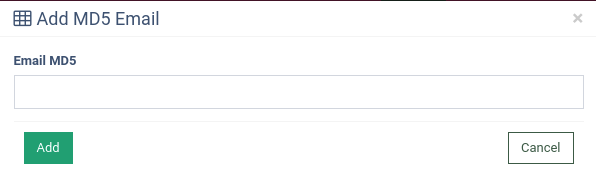
To add the MD5 Email, click the “Add new” button. Fill in the “Email MD5” field and click the “Add” button to confirm.
Note: Read more about importing contacts via CSV in this Knowledge Base article.
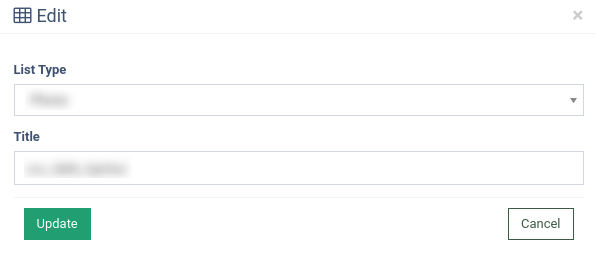
Click the “Edit” button in the “Actions” column to manage the general list settings. You can change the List Type (Email, Phone) and the Title in the pop-up window.
Click the “Update” button to confirm.
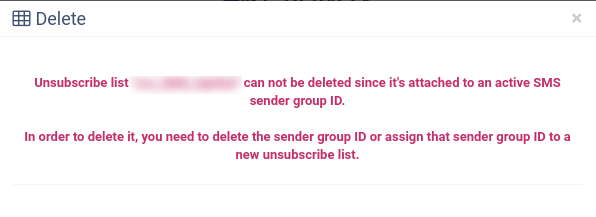
Click the “Delete” button in the “Actions” column to remove the list from the system.
Click the “Delete” button to delete the list from the Contacts List section.
Note: You can still find the list in the All Contacts section.
Click the “Delete List With Contacts” button to delete the list from the system, including the All Contacts section.
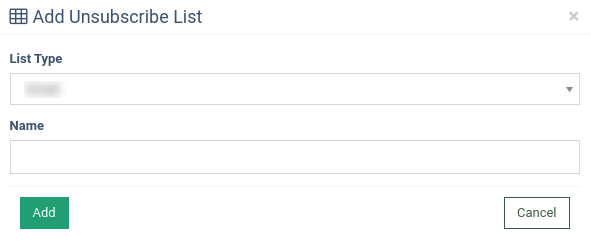
Click the “Add Unsubscribe List” button to create a new list. Select the List Type (Email, Phone) and fill in the “Name” field.
Click the “Add” button to confirm.
Note: Read more about creating an Unsubscribe List in this Knowledge Base article.