Affiliate Management
The Affiliate Management section allows you to search, manage existing Affiliates and create new Affiliates.
- Affiliate Management List
- How to create an Affiliate
- How to view Affiliate information
- How to edit an Affiliate
Affiliate Management List
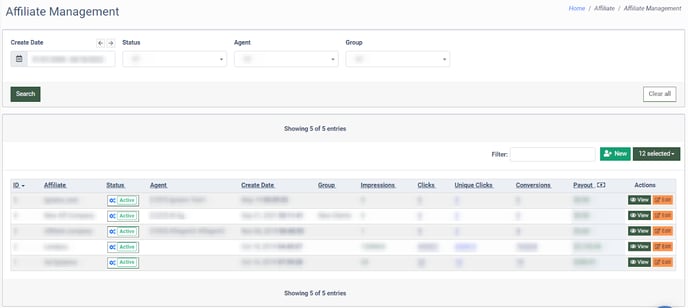
To view the Affiliate Management list, go to the Affiliates > Affiliate Management section.
 The Affiliates Management list contains the following information:
- ID: The unique identification number of the Affiliate.
- Affiliate: The name of the Affiliate.
- Status: The status of the Affiliate (Active, Pending, Blocked, Deleted).
- Agent: The ID number and the name of the connected Agent.
- Create Date: The date and time of the Affiliate creation.
- Group: The Affiliate group. Read more about the Affiliate Groups in this Knowledge Base article.
- Impressions: The number of advertiser links displayed on the websites.
- Clicks: The number of clicks on the advertiser links.
- Unique Clicks: The number of unique clicks on the advertiser links.
- Conversion: The ratio of the number of click-throughs with the following purchase to the total number of clicks.
- Payout: The amount of the Affiliate payout.
You can narrow down the search results by using the following filters:
- Create Date: Select the date range of the Affiliate creation.
- Status: Select the status of the Affiliate (Active, Pending, Blocked, Deleted).
- Agent: Select the Affiliate agent.
- Group: Select the Affiliate group.
How to create an Affiliate
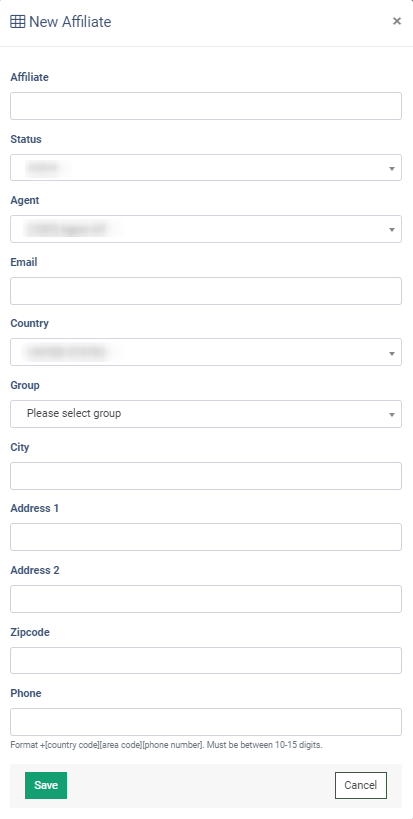
To create a new Affiliate, click the “New” button and fill in the following fields in the “New Affiliate” pop-up window:
- Affiliate: Enter the name of the Affiliate.
- Status: Select the status for the Affiliate (Active, Pending, Blocked, Deleted).
- Agent: Select the Affiliate Agent from the drop-down list.
- Email: Enter the email address.
- Country: Select the country for the Affiliate.
- Group: Select the Affiliate group.
- City: Select the city for the Affiliate.
- Address 1: Enter the address.
- Address 2: Enter the address (not mandatory).
- Zipcode: Enter the zip code.
- Phone: Enter the phone number (Format +[country code][area code][phone number]. Must be between 10-15 digits).

Click the “Save” button to create the Affiliate.
Read more on how to create users for the Affiliate in this Knowledge Base article.
How to view Affiliate information
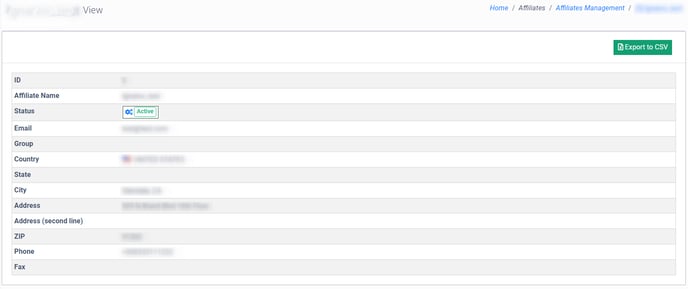
To check the information of the specific Affiliate, click the “View” button in the “Actions” column. The Affiliate view tab contains the following information:
- ID: The unique identification number of the Affiliate.
- Affiliate’s Name: The first and last name of the Affiliate.
- Status: The status of the Affiliate.
- Email: The email address of the Affiliate.
- Group: The Affiliate group.
- Country: The country of the Affiliate.
- State: The state of the Affiliate.
- City: The city of occupation.
- Address: The address of the Affiliate.
- Address (second line): The address of the Affiliate.
- Zip code: The zip code of the Affiliate.
- Phone: The phone number of the Affiliate.
- Fax: The fax number.

How to edit an Affiliate
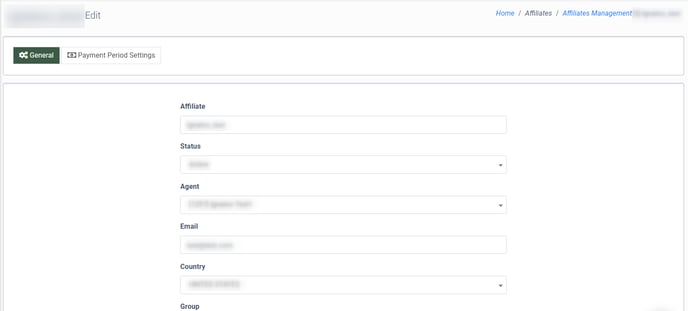
Click the “Edit” button in the “Actions” column to edit information about the Affiliate.
The General tab contains the following fields:
- Affiliate: Enter the name of the Affiliate.
- Status: Select the status for the Affiliate (Active, Pending, Blocked, Deleted).
- Agent: Select the Affiliate Agent from the drop-down list.
- Email: Enter the email address.
- Country: Select the country for the Affiliate.
- Group: Select the Affiliate group.
- City: Select the city for the Affiliate.
- Address 1: Enter the address.
- Address 2: Enter the address (not mandatory).
- Zipcode: Enter the zip code.
- Phone: Enter the phone number (Format +[country code][area code][phone number]. Must be between 10-15 digits).
 The Payment Period Settings tab contains the following fields:
- Hold: The hold time for payout.
- Pay Period: The payout frequency (manual, weekly, biweekly, monthly, semimonthly).
 Click the “Save” button to proceed with the changes.