The “Call info” block
The “Details” tab
The “Data” tab
The “Call Journey” tab
To view detailed information about the call, go to the All Reports > Call Details section, select the call, and click the “Call Info” button in the “Call ID” column. Also, an available option to open the Call Details section via the Call Search report. Go to the All Reports > Call Search section, select the call, and click the “Call Info” button in the “Call ID” column.
Read more information about the Call Details report in the Knowledge Base article.
Read more information about the Call Search report in the Knowledge Base article
The “Call Details” section contains the sidebar block “Call Info” with the general call information about the call and three tabs.
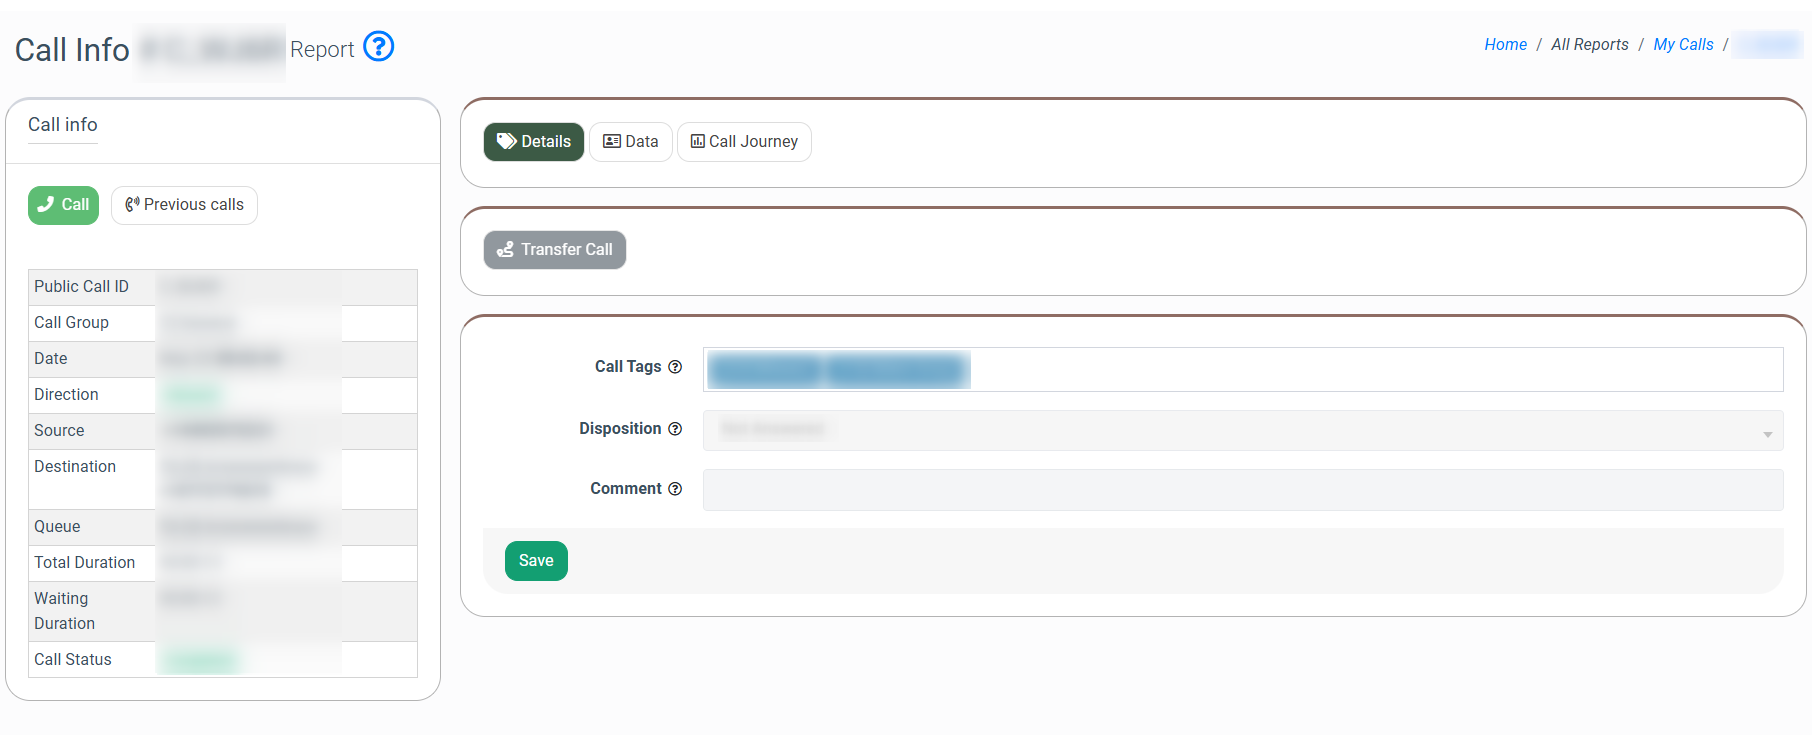
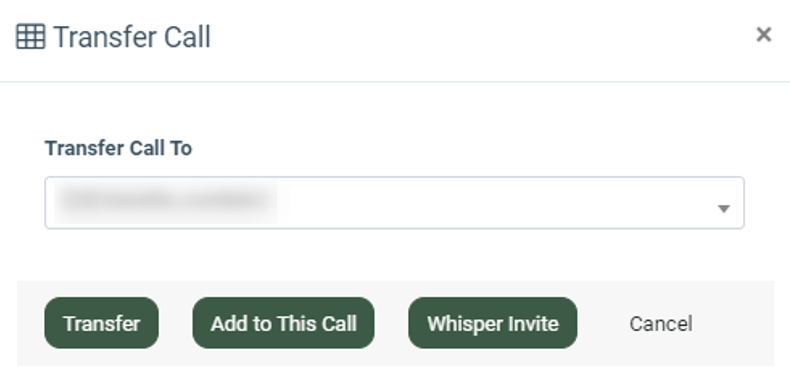
To transfer the active call, click the “Transfer Call” button. Select the option for the call transfer from the list of the predefined transfer routes in the “Transfer Call To” field of the “Transfer Call” pop-up window, and click the “Transfer” button to perform the action.
Note, that this option is available only for active ongoing calls.
Note, that the corresponding predefined transfer route should be set on the Call Group level.
To add additional participants to the ongoing call according to the corresponding predefined route settings, select the option from the list of the predefined transfer routes in the “Transfer Call To” field of the “Transfer Call” pop-up window, and click the “Add to This Call” button to perform the action.
Note that you can add a couple of call participants by using this option, so you can create a phone conference.
Note that the added participant will be able to join the call, hear, and speak during the call processing.
To add additional participants to the ongoing call according to the corresponding predefined route settings with the ability to listen to the call, but without the option to speak to the lead, select the option from the list of the predefined transfer routes in the “Transfer Call To” field of the “Transfer Call” pop-up window, and click the “Whisper invite” button to perform the action.
To re-schedule the time of the callback to the lead, click the “Re-Schedule call” button. Select the option in the “Request callback date” field from the preselected or set a particular date and time to perform the callback.
Click the “Confirm” button to complete the action.
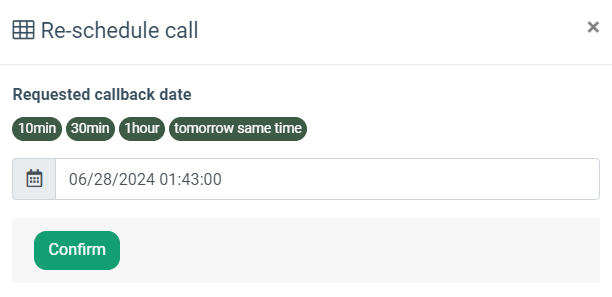
The corresponding callback request will be created in the “Dialing List Requests” section.
The “Call info” block
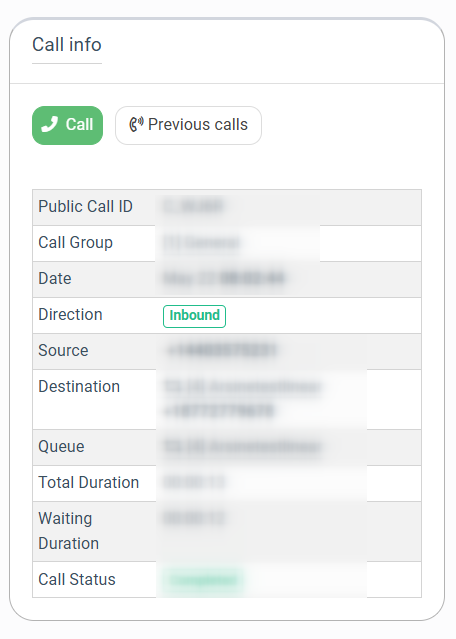
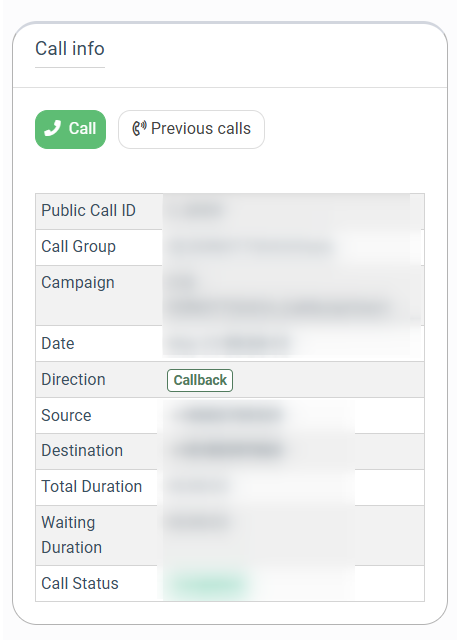
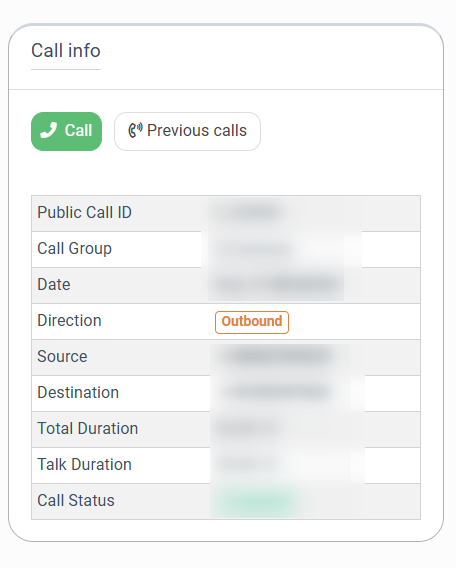
The “Call info” block contains the following information:
- Public Call ID: The public unique identification number of the call.
- Call Group: The related call group.
- Campaign: The related call campaign.
- Date: The date and time when the system received the call.
- Direction: The type of the call according to the destination (Incoming, Outgoing, Local, Callback).
- Source: The phone number of the caller.
- Destination: The destination phone number that the caller reached.
- Queue: The name of the queue to which the call was transferred.
- Operator: The name of the operator who has processed the call.
- Total Duration: The total duration of the call (including the IVR duration and waiting time).
- Waiting Duration: The total duration of the IVR and waiting time during the call.
- Talk Duration: The duration of the conversation itself.
- Call Status: The current status of the call (Ringing, Completed, In Progress, System Error, Cancelled).
To proceed with the callback on the source phone number, click the “Call” button. Note, that this option is available under the Cloud PBX Operator role.
Note: The ongoing status of the operator’s softphone of the SIP account should be online. If the status appears as offline, the operator can not perform the call, and the corresponding message will appear while pointing to the “Call” button: “Your softphone appears to be offline. Before making calls, please check your connection to ensure it is connected”.
To view the information about the latest call from the source phone number, click the “Previous Call” button. You will be redirected to the “Call Search” report, where the latest call from the corresponding phone number will be displayed.
The “Details” tab
The “Details” tab allows you to set the call tag, attach the call disposition, and enter the information about the call processing by the operator.
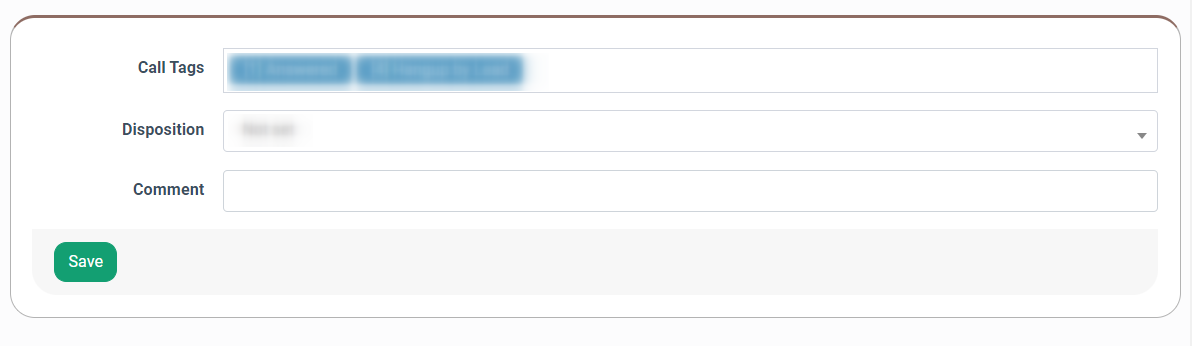 The following fields are available:
- Call Tags: Select the call tag that you would like to attach to the call.
- Disposition: Enter the disposition status that you would like to attach to the call.
- Comment: Enter additional information about the call.
Click the “Save” button to complete the action.
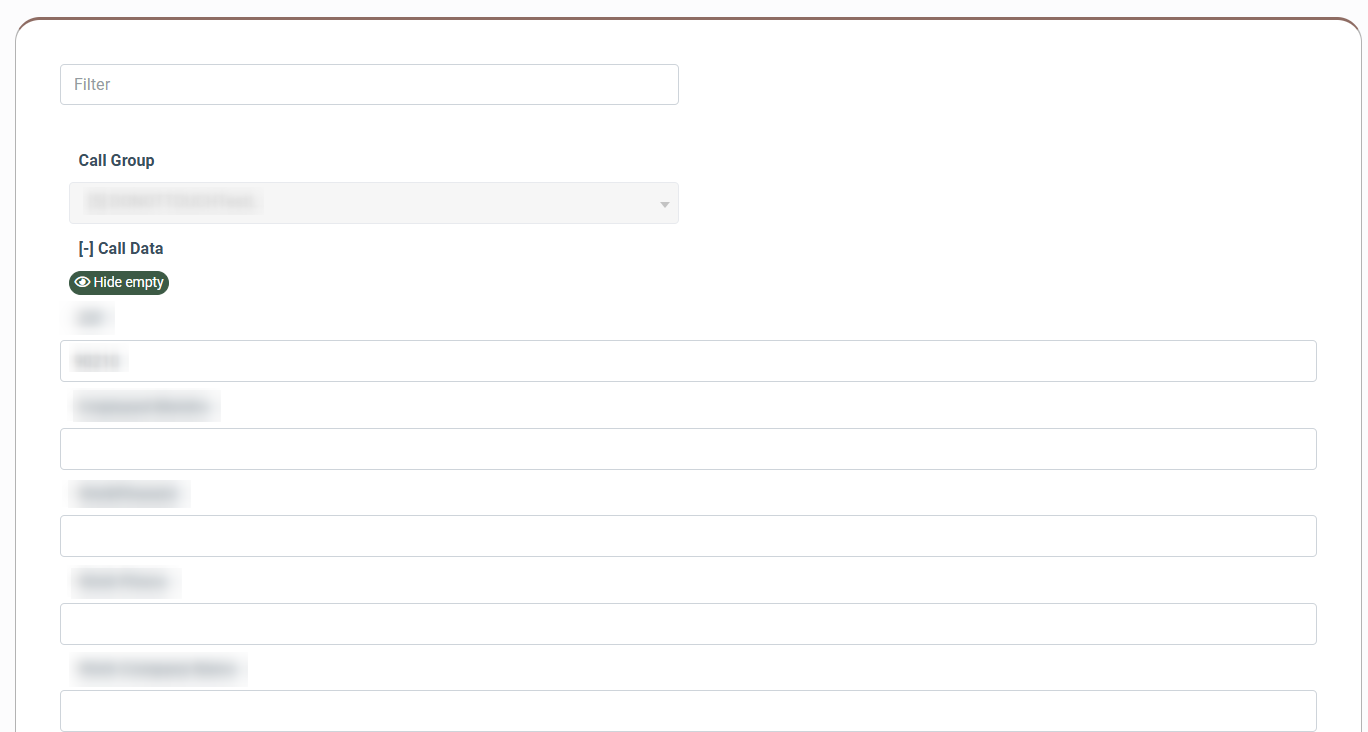
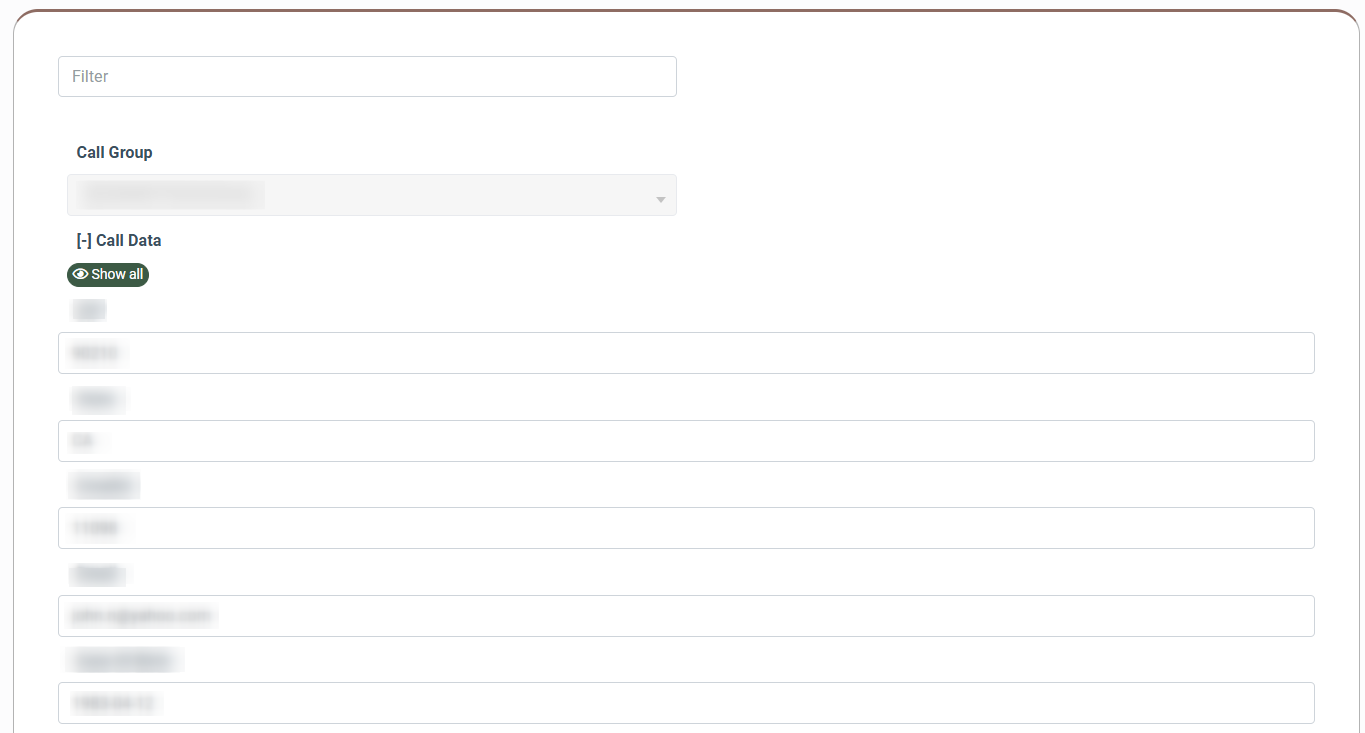
The “Data” tab
The “Data” tab contains general information about the call.
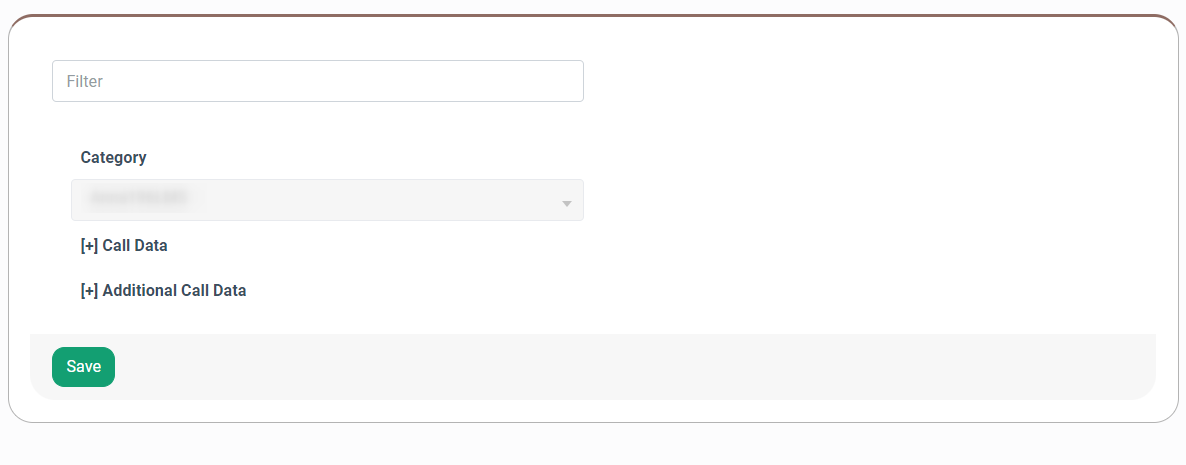 The following fields are available:
- Call Group: The related call group.
If additional information that is placed in the corresponding custom fields is available, it will be displayed in the “Call Data” section. To view this data, click the “Call Data” link.
Note, that these fields should be set and activated on the Call Group level in the “Client Information Form” tab. Read more about these settings in the following Knowledge Base article.
To hide fields that contain no data, click the “Hide Empty” button.
To view all fields that are available for this call, click the “Show All” button.
If additional information about this lead is available in the Lead Stash section, it will be displayed in the “Additional Call Data” section. To view this data, click the “Additional Call Data” link.
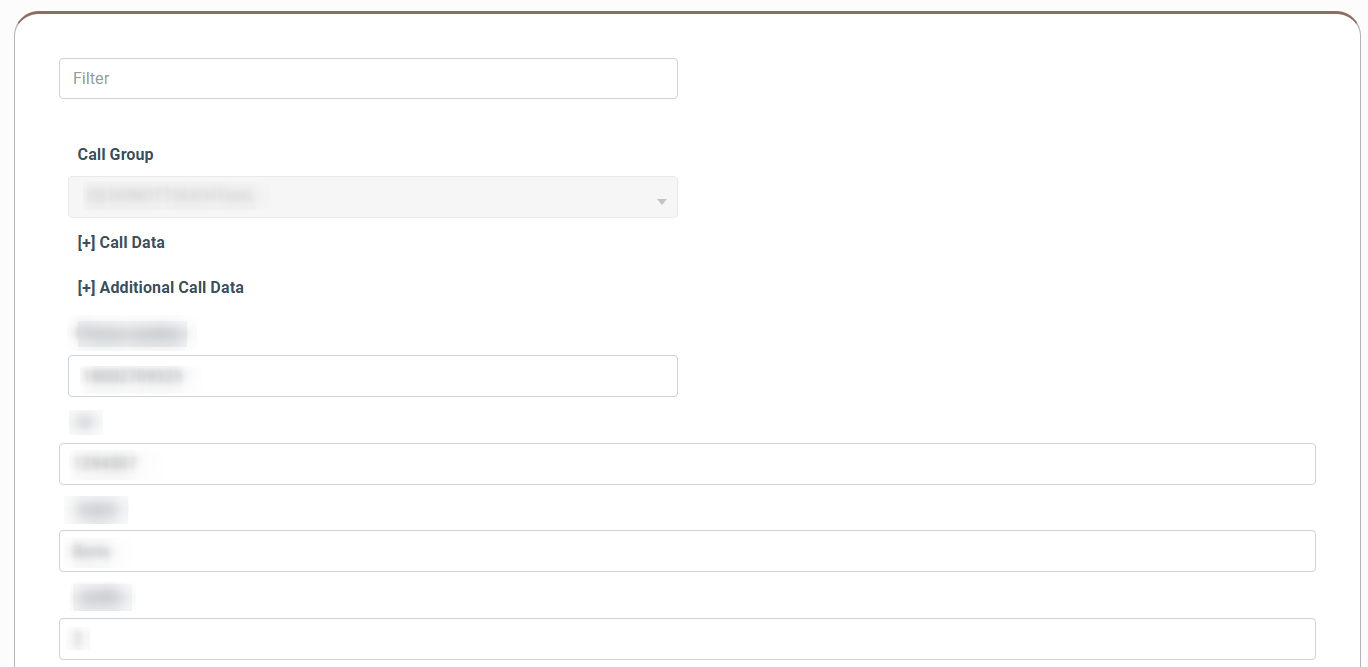
To proceed with the search for the relevant information, enter the details in the “Filter” field.
Also, you can change the general information about the call.
Proceed with necessary amendments in the corresponding fields and click the “Save” button to complete the action.
The “Call Journey” tab
The “Call Journey” tab contains the log information about the call processing steps through the system.
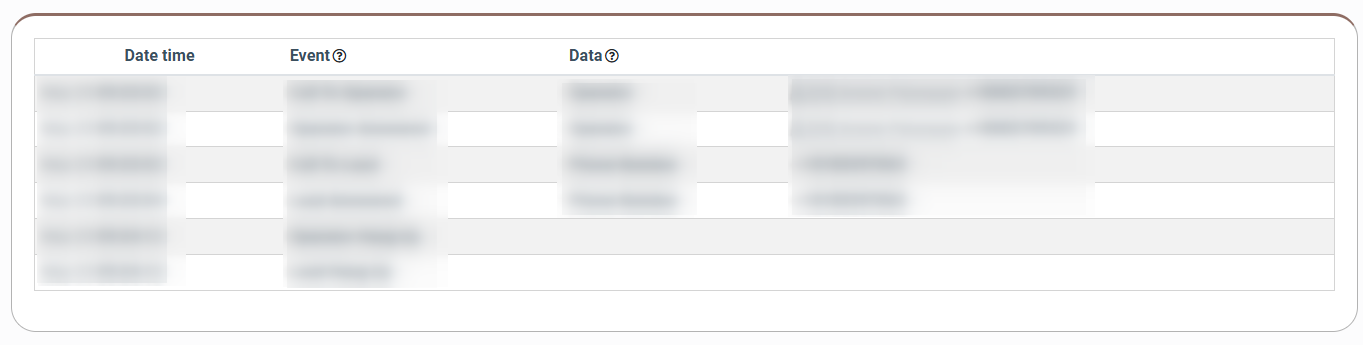
The following fields are available:
- Date time: The date and time of the event creation.
- Event: The name of the call processing event.
- Data: Additional information about the call processing event.