The Callback refers to the record that stores all configuration settings for receiving, handling, and processing the callback requests.
To view the list of available Callbacks, go to the Call Campaign > Callback section.
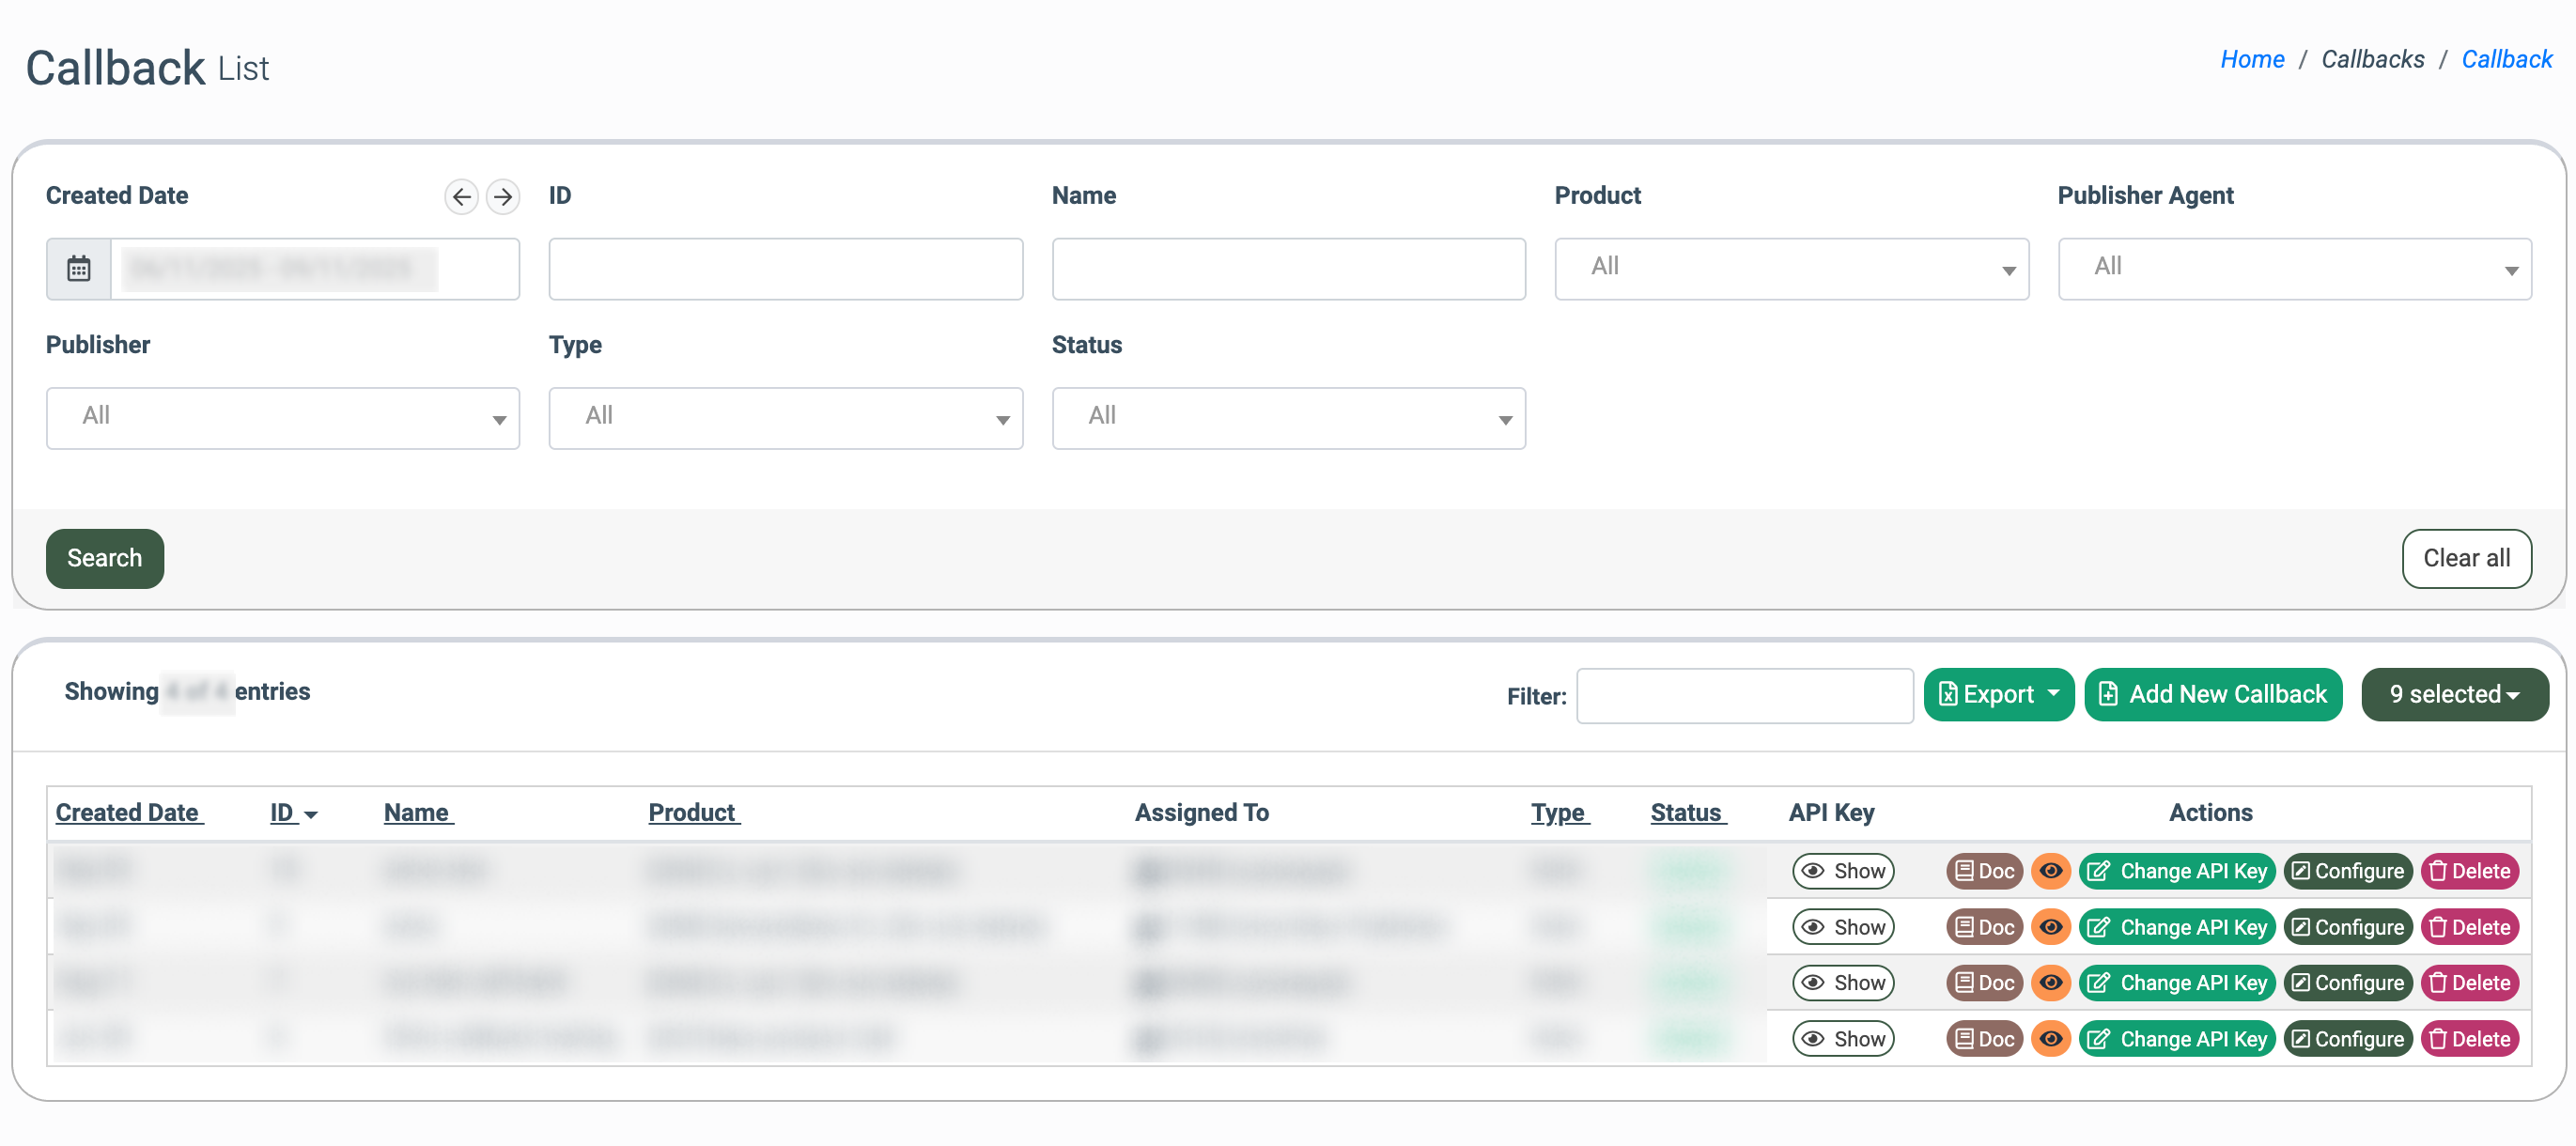
The list of callbacks contains the following information:
- Created Date: The date of the Callback creation.
- ID: The unique identification number of the Callback.
- Name: The name of the Callback.
- Product: The ID and name of the Product the Callback refers to.
- Assigned To: The name of the Publisher to whom the Callback is assigned.
- Type: The type of the Callback (Auto, Manual).
- Status: The status of the Callback (Active, Deleted, Disabled).
You can narrow down the search results by using the following filters:
- Created Date: Select the date range for the Callback creation.
- ID: Enter the unique identification number of the Callback.
- Name: Enter the name of the Callback.
- Product: Select the Product.
- Publisher Agent: Select the Publisher Agent.
- Publisher: Select the Publisher.
- Type: Select the type of the Callback (Auto, Manual).
- Status: Select the status of the Callback (Active, Deleted, Disabled).
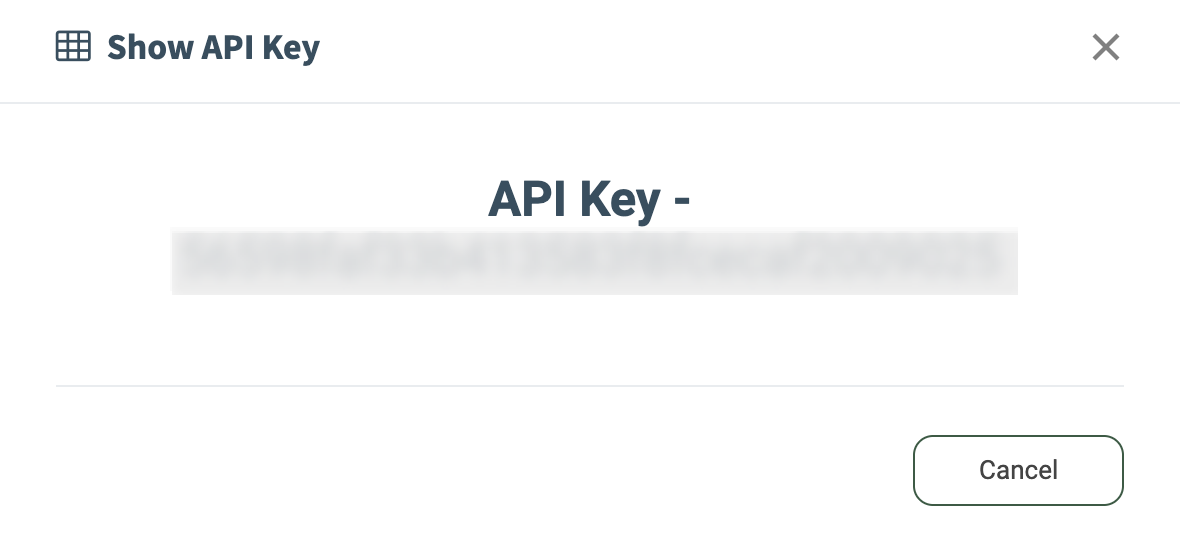
To view the API Key for the Callback, click the “Show” button in the “API Key” column.
Note: The Two-Factor Authentication (2FA) must be enabled to view the API Key.
Read the detailed instructions on how to enable 2FA in the following Knowledge Base article.
To create a new Callback, click the “Add New Callback” button and fill in the following fields in the pop-up window:
- Name: Enter the name of a new Callback.
- Product: Select the Product.
- Publisher: Select the Publisher.
- Source: Select the corresponding Publisher Source.
Click the “Save” button to complete the Callback creation.

To view the information about the API documentation for the existing Callback, click the “Doc” button in the “Actions” column. You will be redirected to the Callback settings API Doc section.
The Callback settings API Doc section contains the following sections:
- Summary: The information endpoint URL, along with the request methods.
- Request Params: The information about parameters that can be used for the API request, such as field name, mandatory requirement, the description of the field, example of the value that can be passed, the data format, and default value.
- PHP Example: The code snippet that demonstrates how to use the API with PHP.
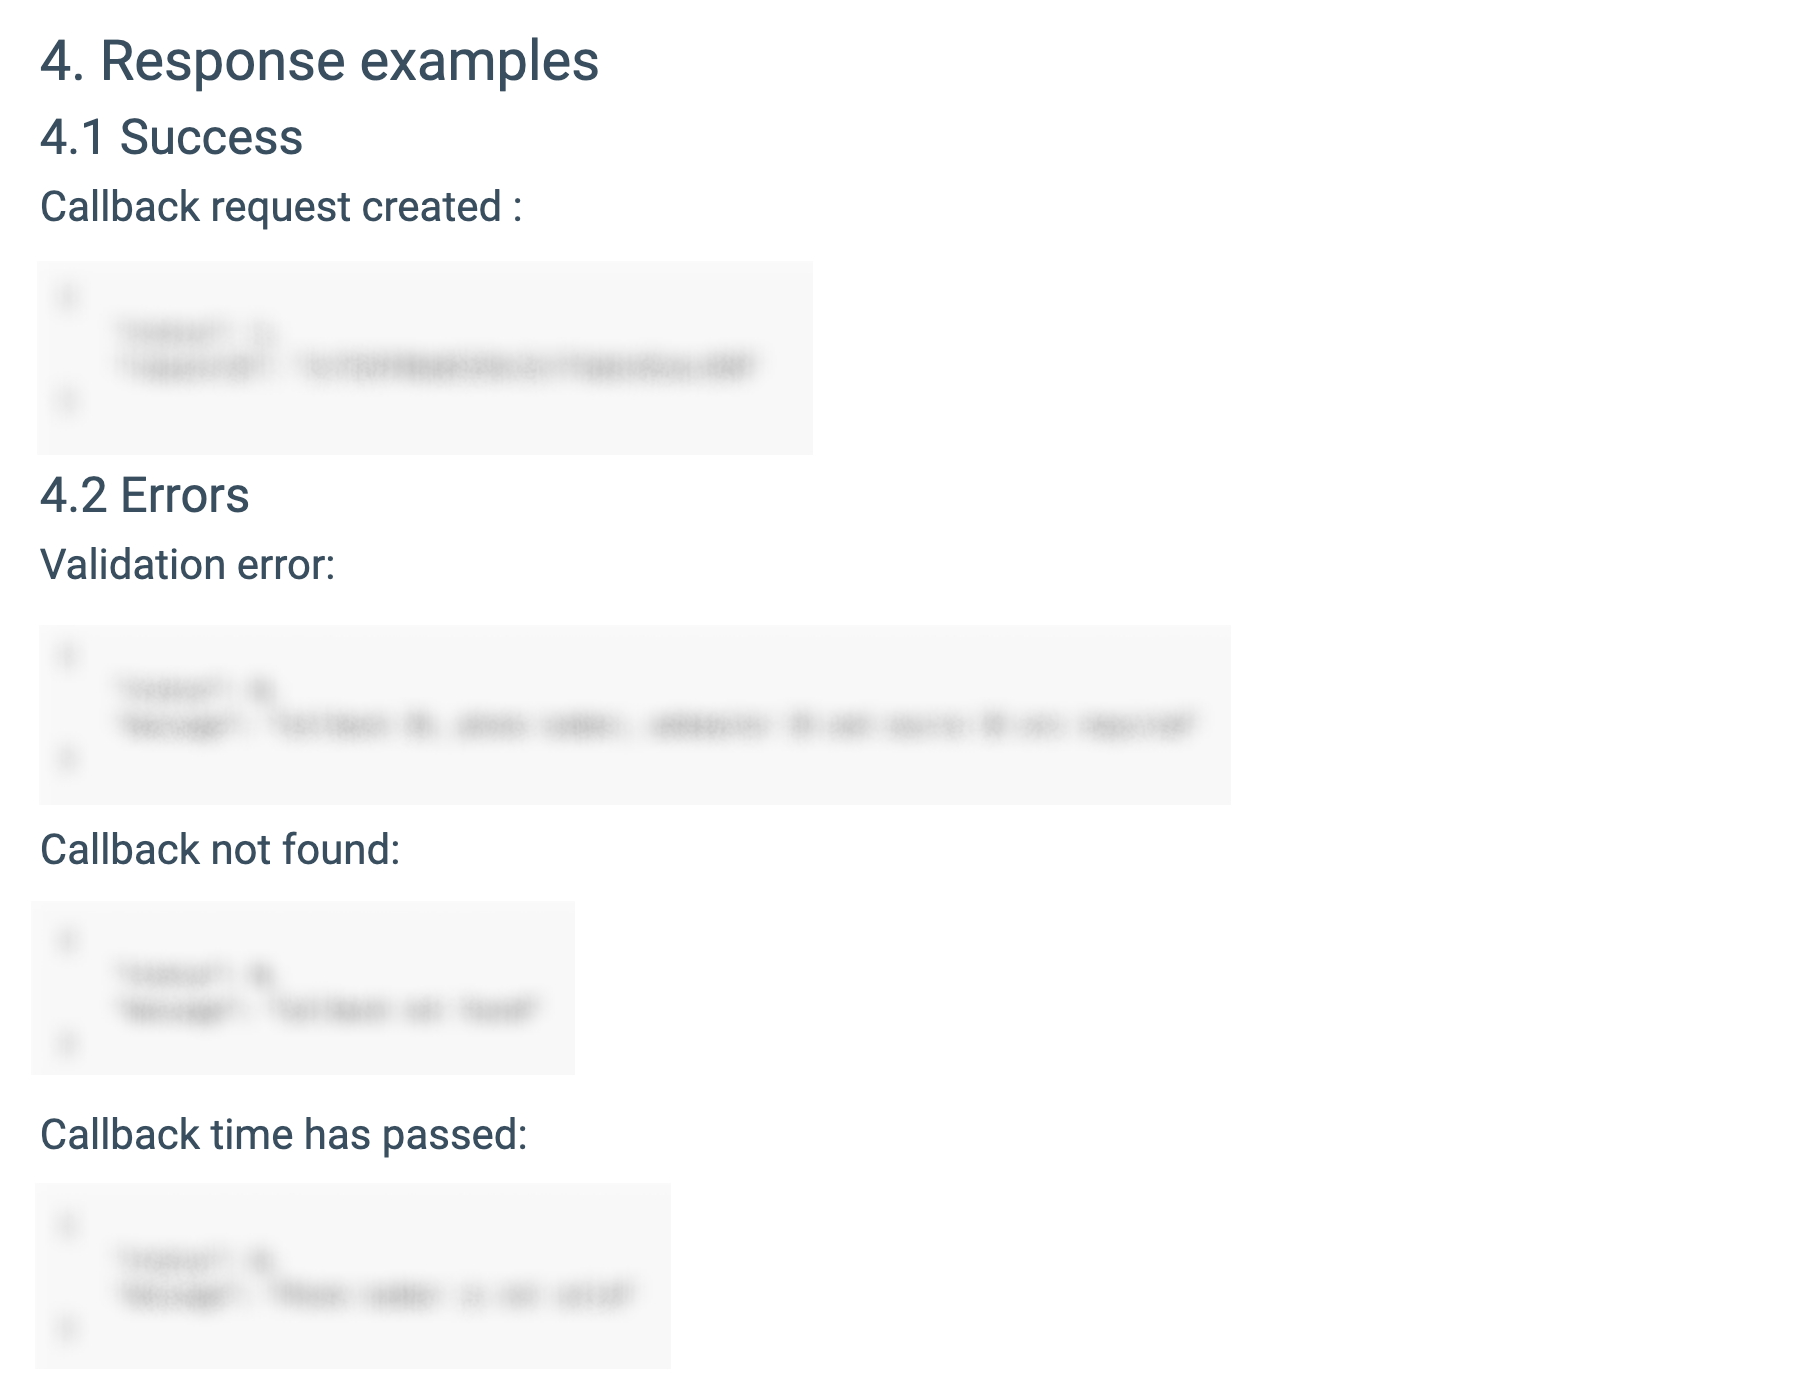
- Response examples: The examples of the responses that can be obtained after sending the API request for a successful request ("Success") and various error scenarios ("Errors").
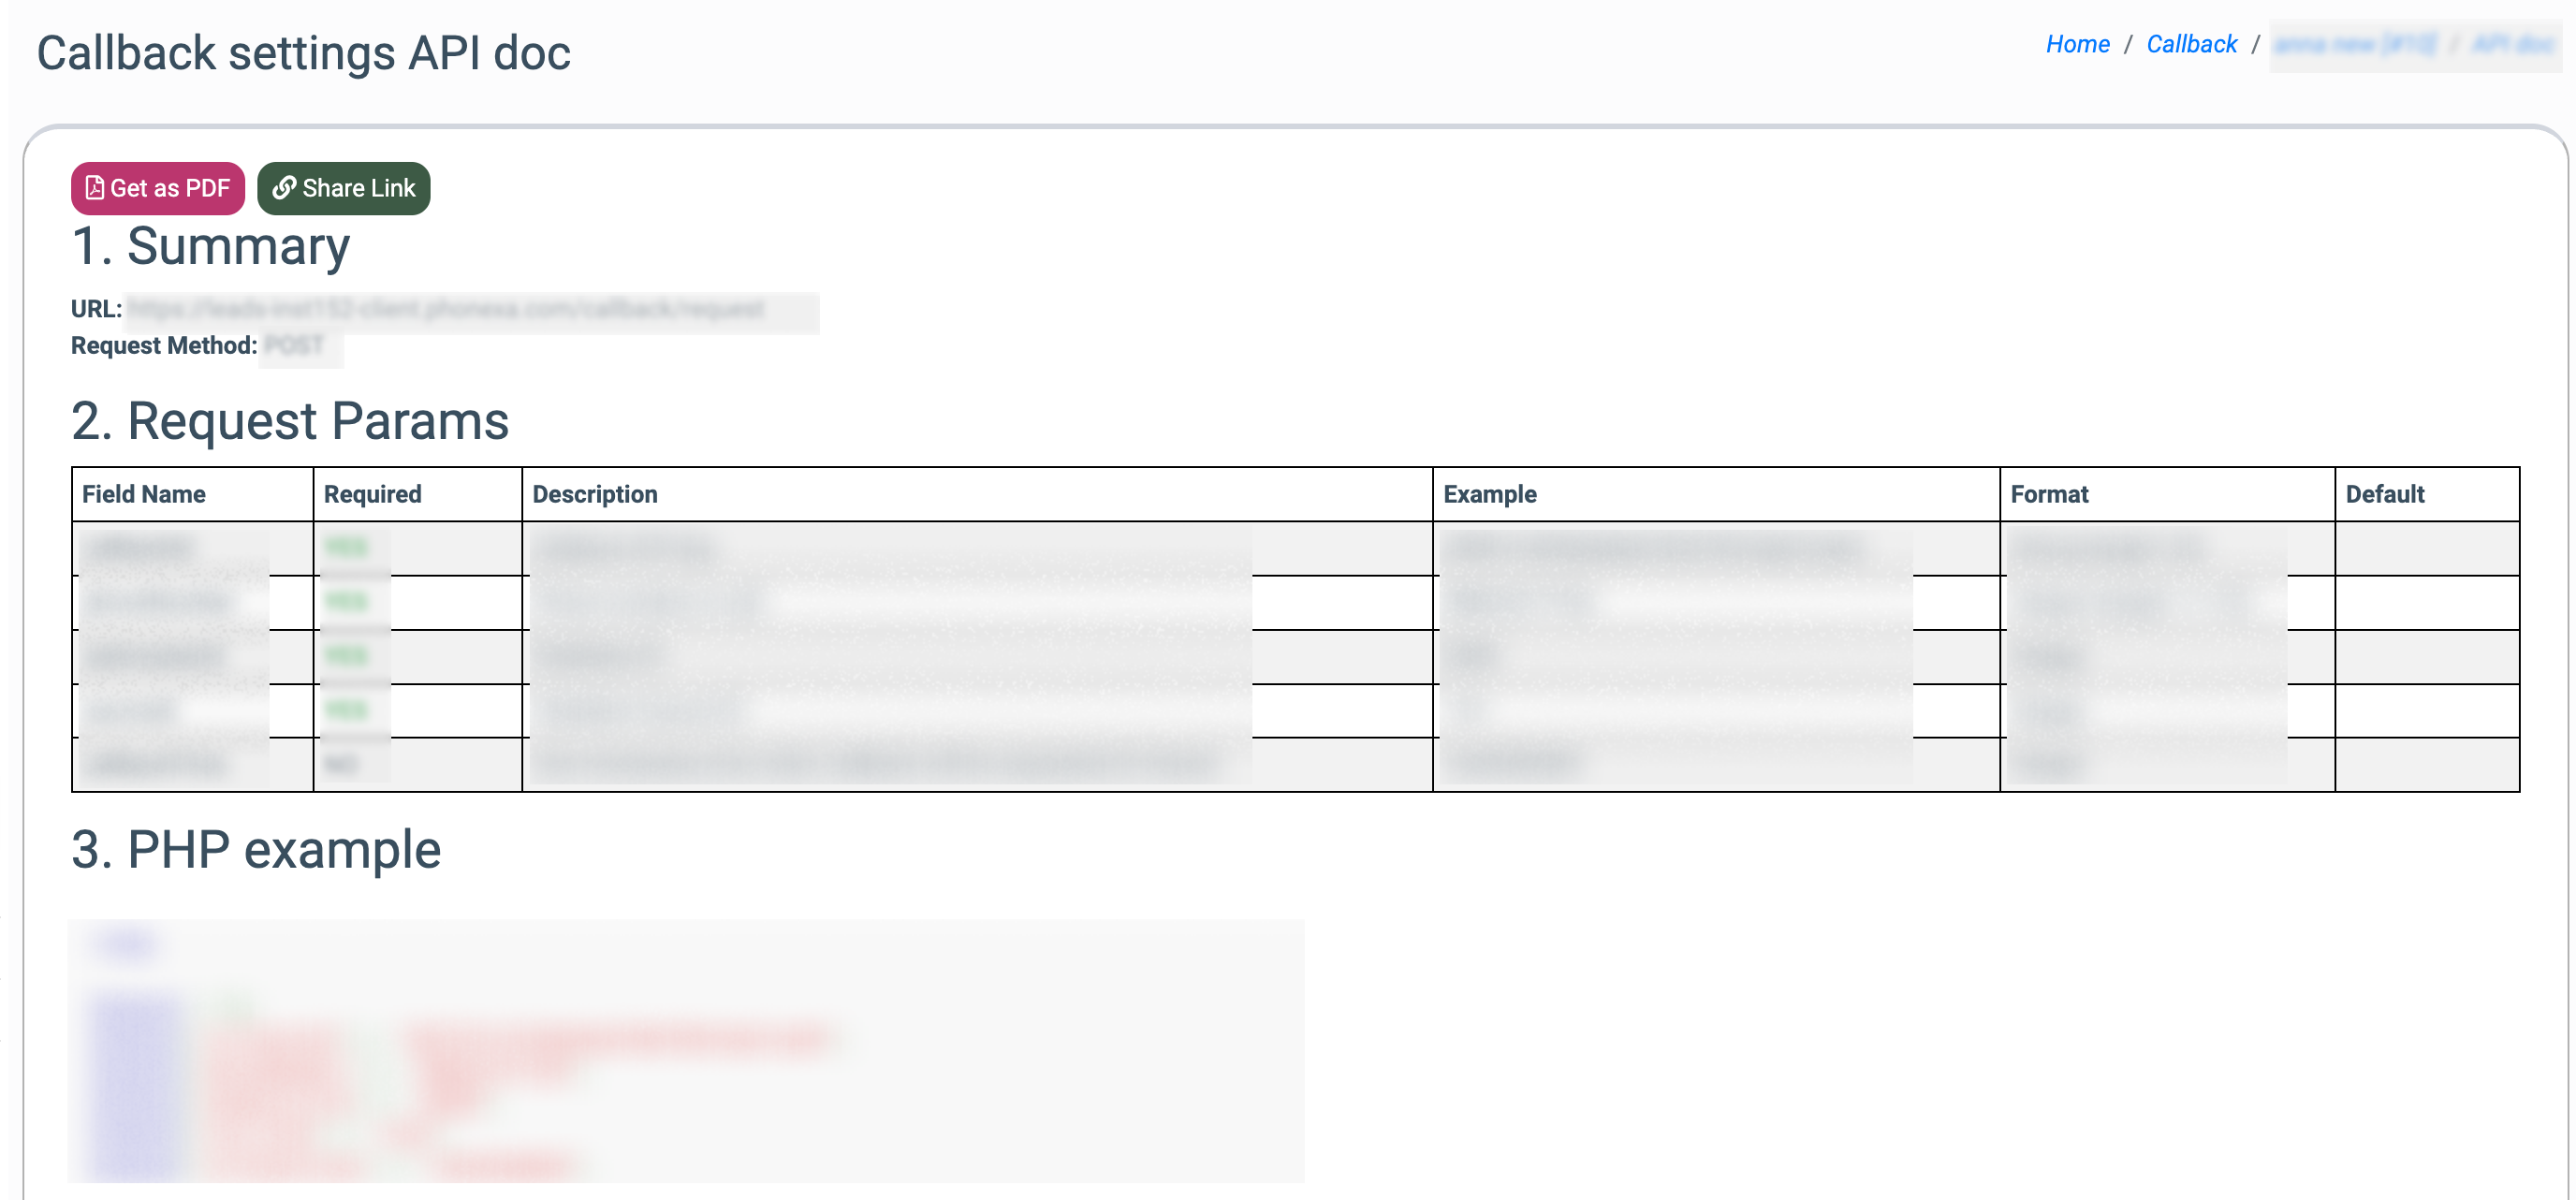
To download the API Doc as a PDF file, click the “Get as PDF” button.
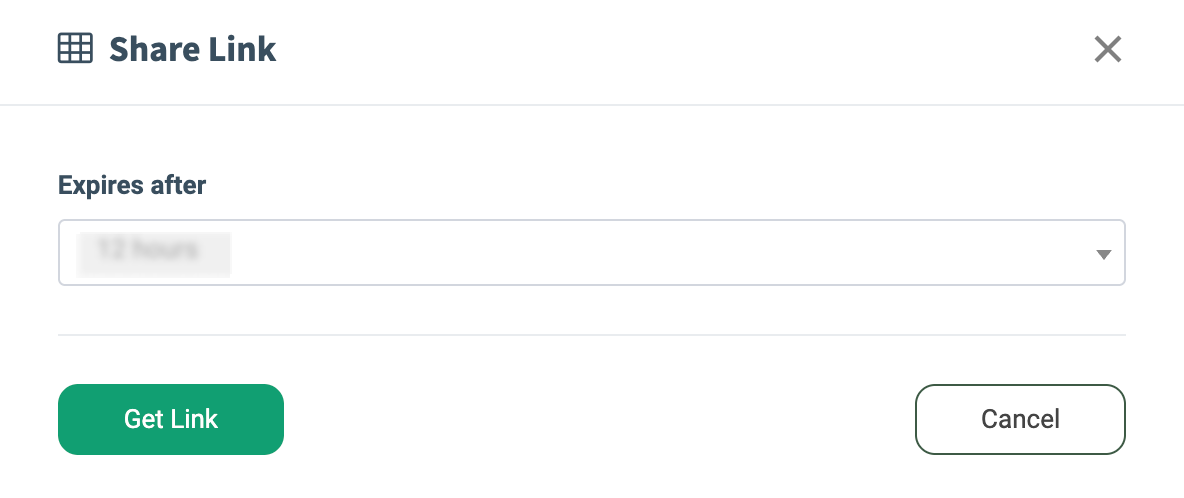
To share the link with access to the particular Callback API Doc, click the “Share Link” button, and select the expiration deadline for the link usage in the “Expires after” field of the “Share Link” pop-up window.
To generate and view the share link, click the “Get Link” button.
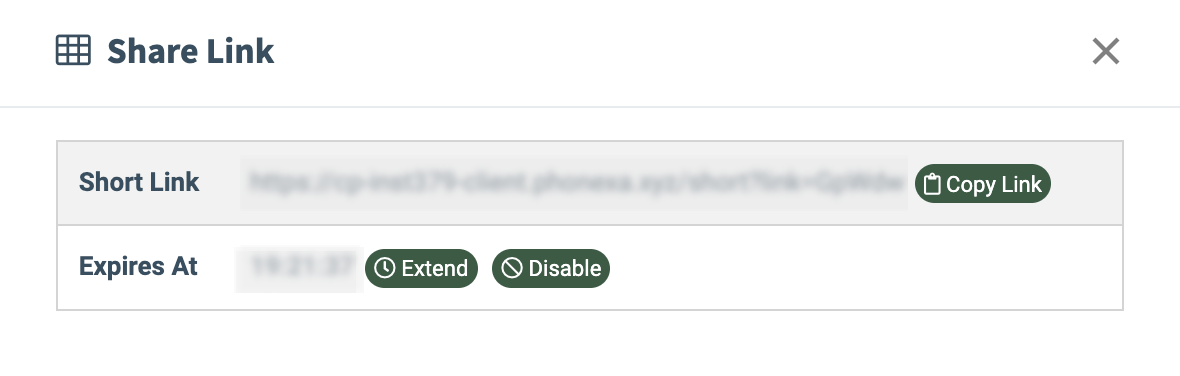
After the share link generation, the following information will be displayed in the “Share Link” pop-up window:
- Short Link: The link to the ongoing Callback API doc itself. To copy this link to the buffer, click the “Copy Link” button.
- Expires At: The date and time of the link expiration.
Note: The short link for the Callback API Doc is temporarily available. It will be valid until the time limitation that is set in the “Expires At” field.
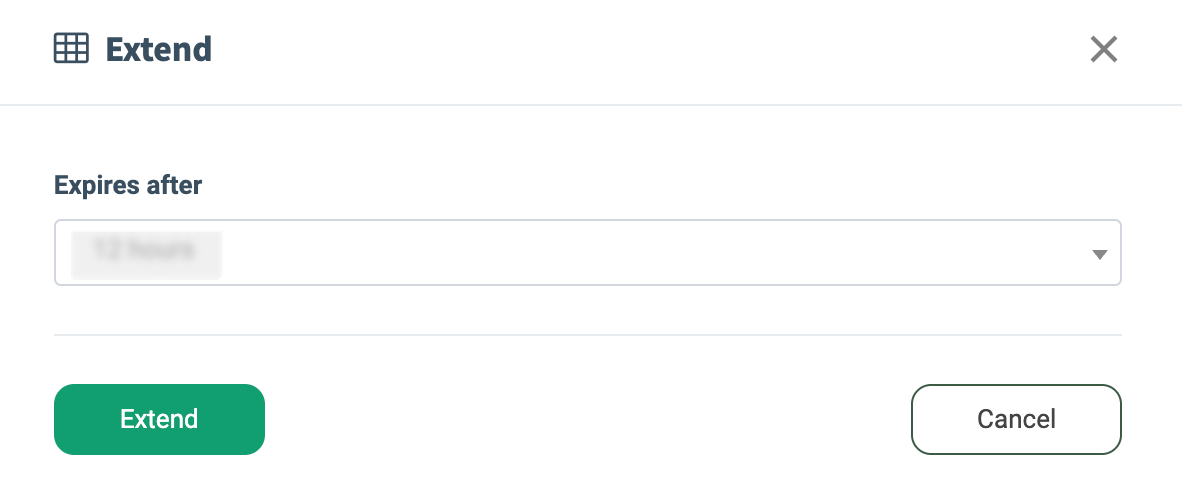
To extend the link's expiration period, click the “Extend” button. Select a new deadline for the link expiration in the “Expires after” field of the “Extend” pop-up window.
Click the “Extend” button to complete the action.
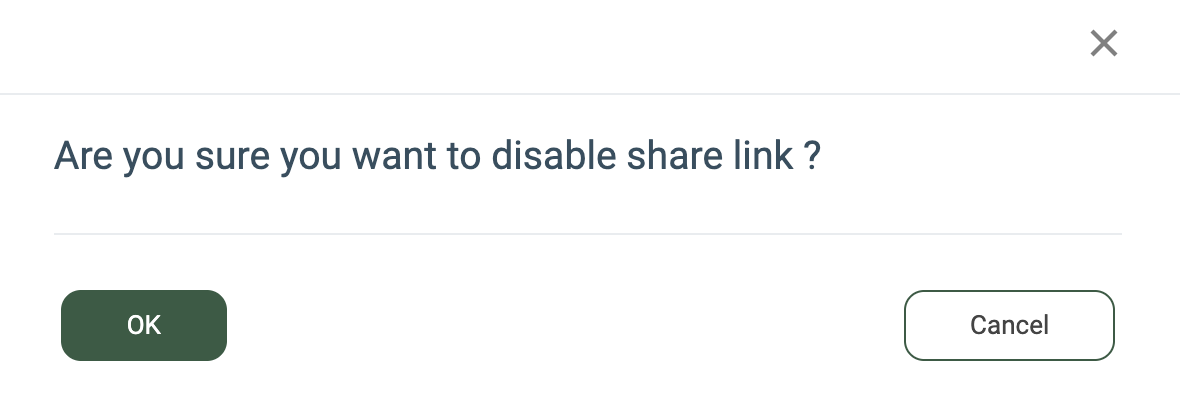
To disable the ongoing valid link, click the “Disable” button. Confirm the link is disabled by clicking the “OK” button in the following pop-up window.
To view the callback requests that are attached to a particular Callback, click the “Callback Requests” button (the eye icon button) in the “Actions” column.
You will be redirected to the Callback Requests section, where the callback requests list will be filtered according to the particular Callback.
Read more about the Callback Requests section in the following Knowledge Base article.
To change the ongoing API Key, click the “Change API Key” button in the “Actions” column.
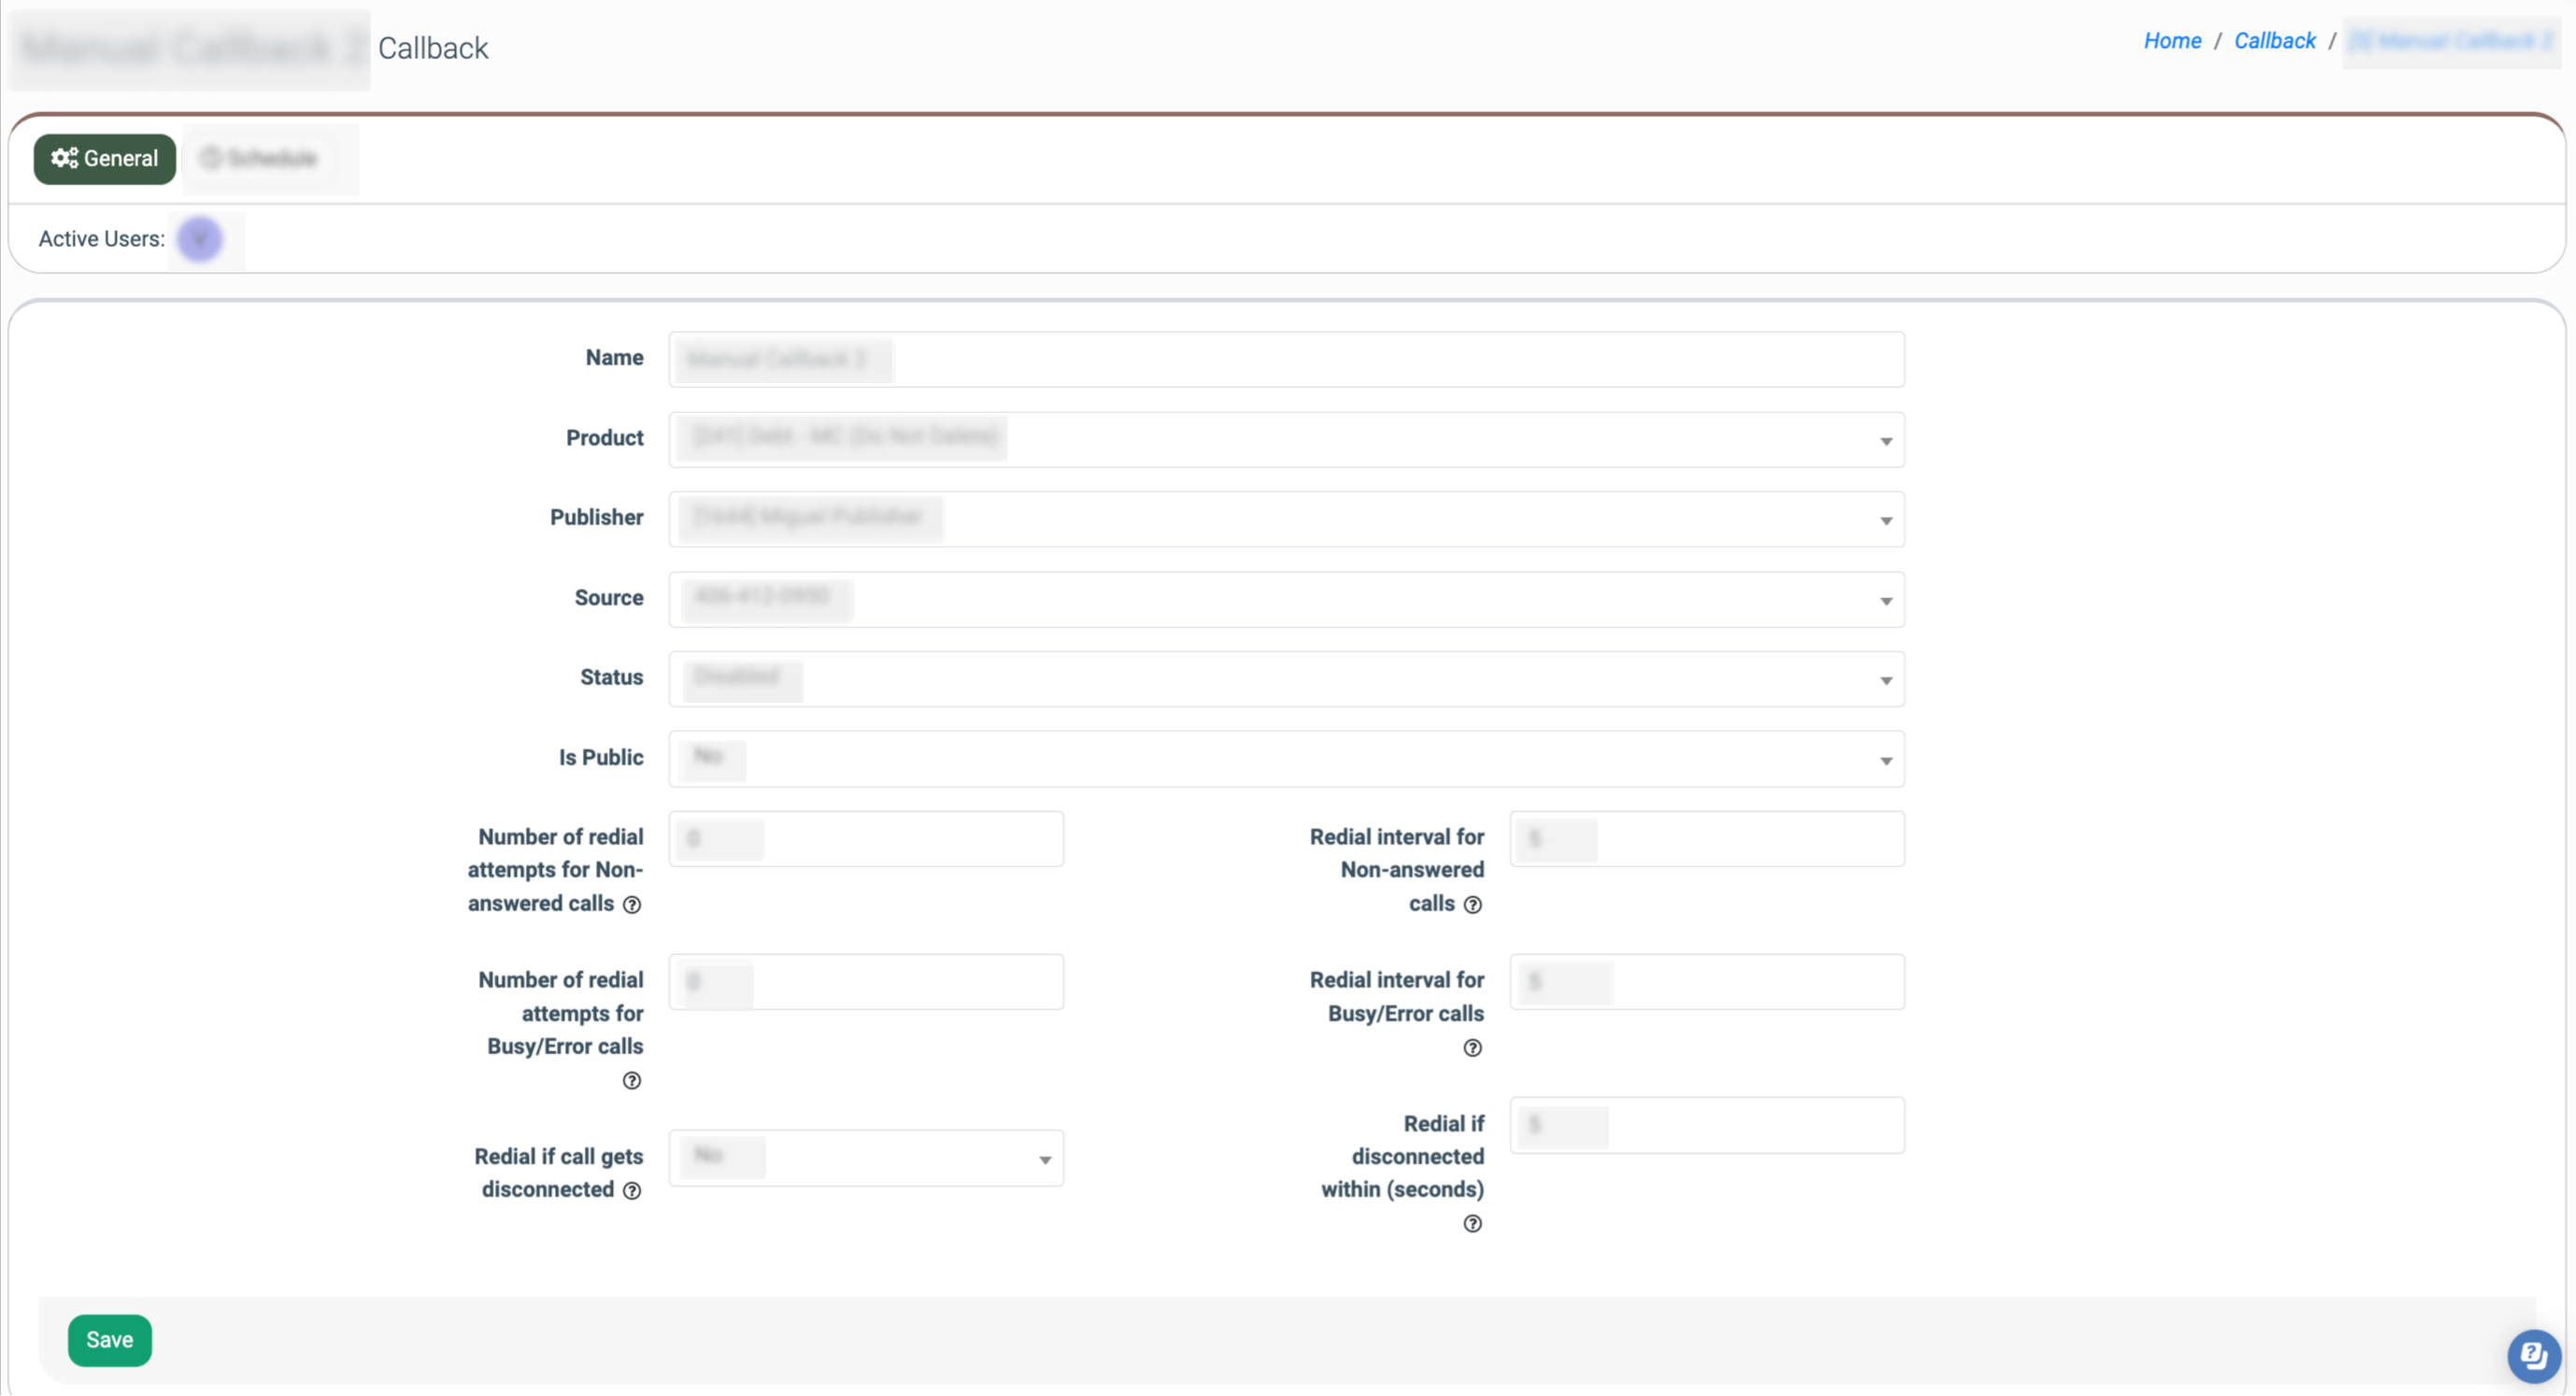
To configure the settings of a particular Callback, click the “Configure” button in the “Actions” column.
You will be redirected to the Callback setup section.
The section contains two tabs.
The “General” tab
The “General” tab contains general information about the Callback, along with settings for handling busy, non-answered, and processed-with-errors calls.
The following settings are available:
- Name: The name of the Callback.
- Product: The name of the Product.
- Publisher: The Publisher assigned to the callback.
- Source: The Publisher’s source (phone number).
- Status: The ongoing status of the Callback (Active, Deleted, Disabled).
- Is Public: Allows management of the Publisher’s access to the callback requests. Set the “Yes” option to allow the callback access settings management. Set the “No” option to deny the callback access settings management. Read more about the “Callback Setting Access” section in this Knowledge Base article.
- Number of redial attempts for Non-answered calls: Enter the number of redial attempts for Non-answered calls.
- Redial interval for Non-answered calls: Enter the value in minutes for the interval between redial attempts for Non-answered calls. When the value is set to “0”, the waiting time will be between 0 and 30 seconds.
- Number of redial attempts for Busy/Error calls: Enter the number of redial attempts for Busy/Error calls.
- Redial interval for Busy/Error calls: Enter the value in minutes for the interval between redial attempts for Busy/Error calls. When the value is set to “0”, the waiting time will be between 0 and 30 seconds.
- Redial if call gets disconnected: Select “Yes” to redial to the same Buyer if the call gets disconnected because of the Buyer within the timeframe specified in the “Redial if disconnected within (seconds)” field.
- Redial if disconnected within (seconds): Enter the call duration in seconds. Must be between 0 and 5 seconds. If a call gets disconnected within the specified timeframe by the Buyer, it will be redialed to the same Buyer.
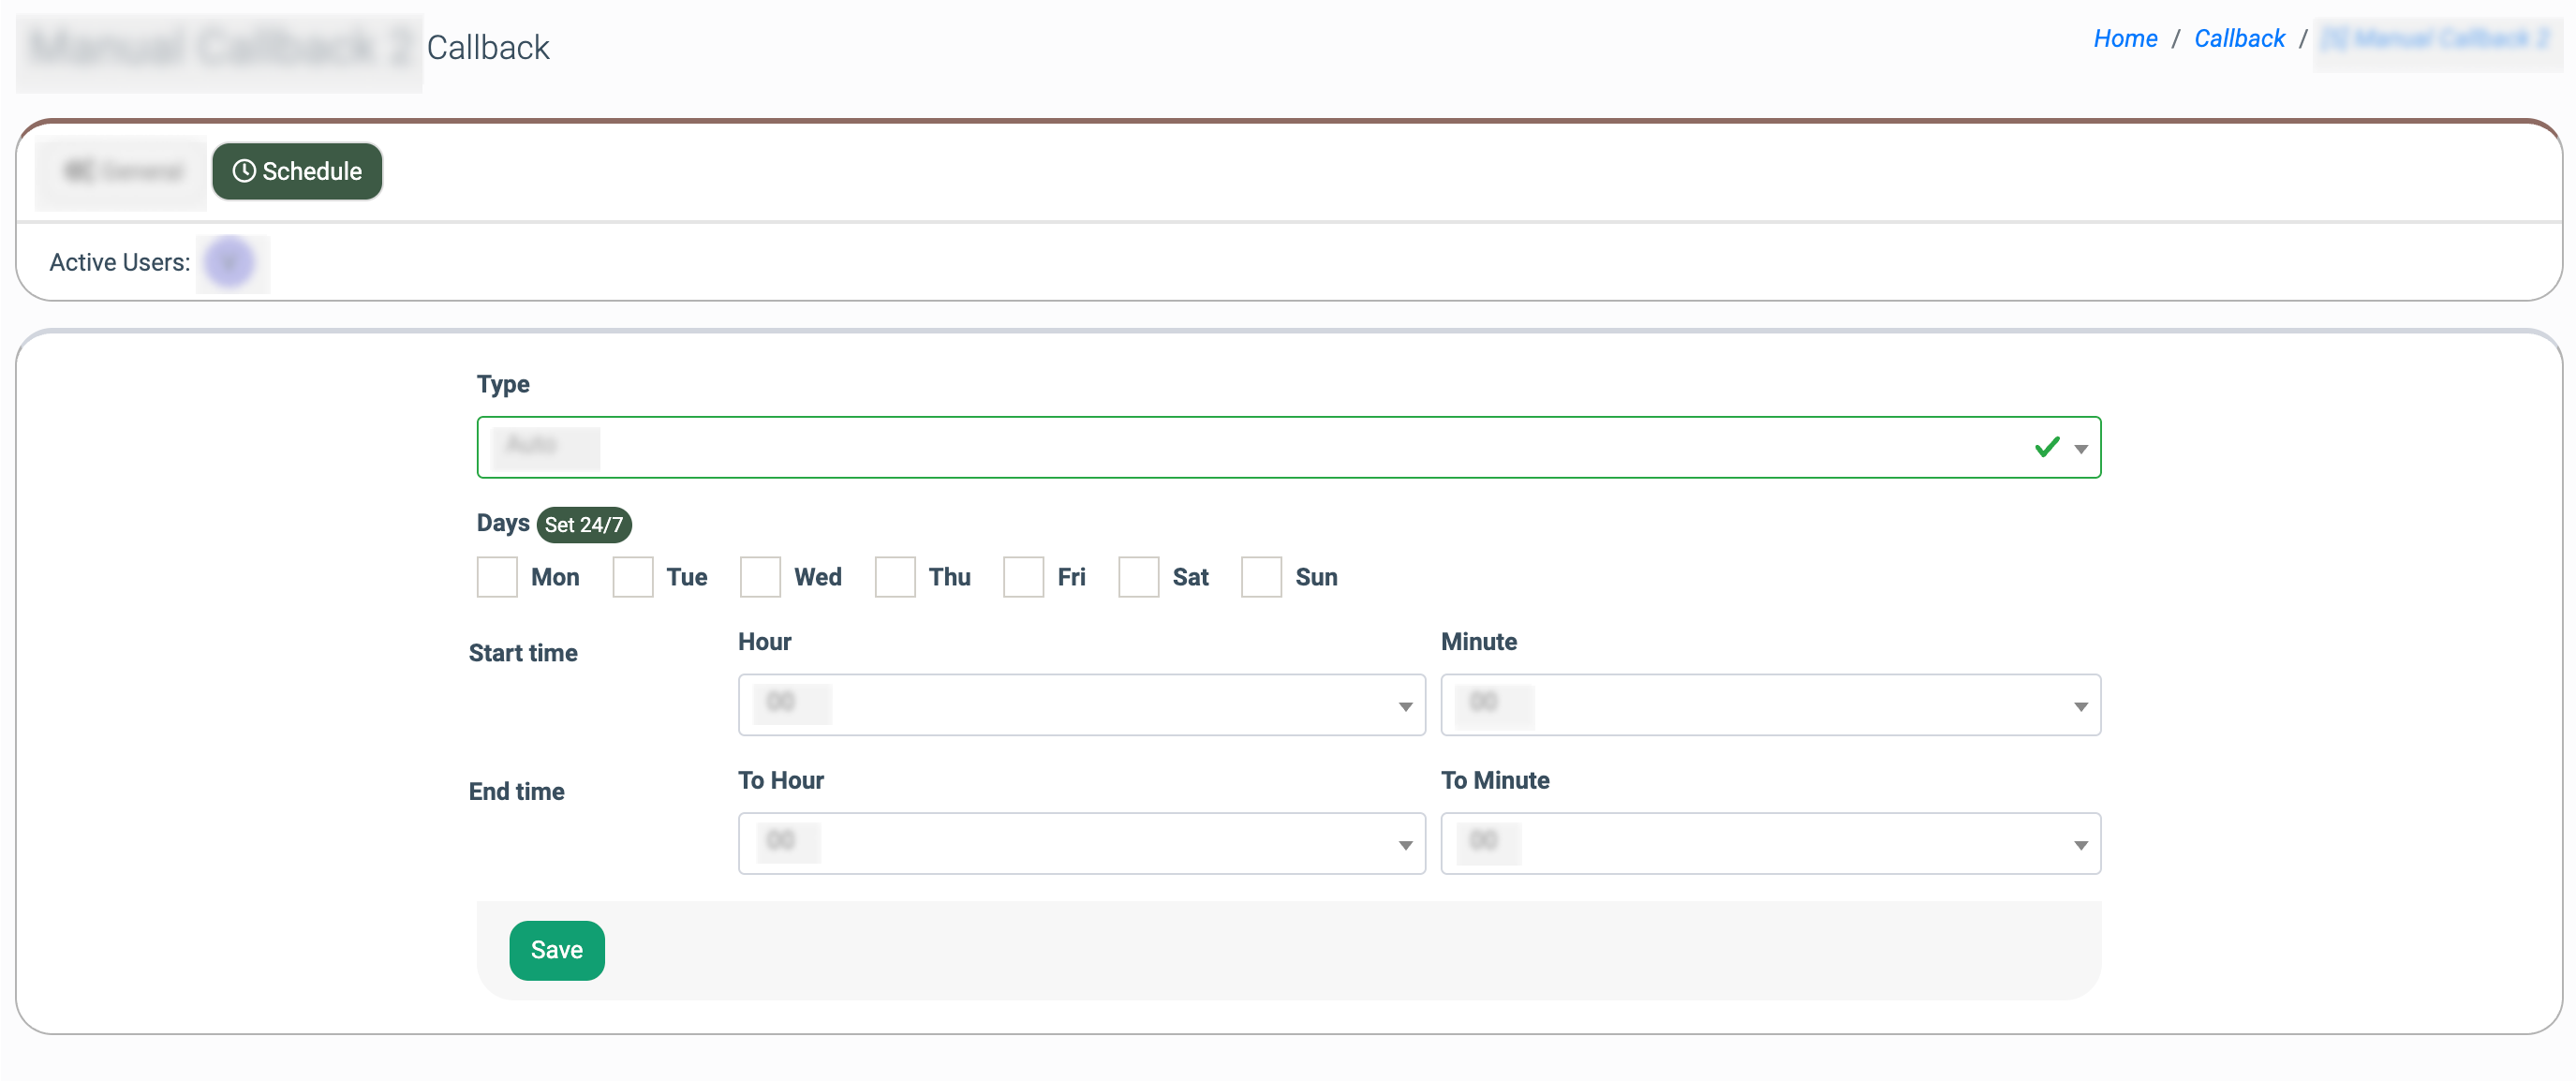
The “Schedule” tab
The “Schedule” tab allows you to change the Callback type (Manual to Auto) and set the schedule for the automated Callback (for the “Auto” type only).
To set the schedule, fill in the following fields:
- Type: The type of the Callback (Manual, Auto). Select the “Auto” type to set a schedule for the automated callback.
- Days: Click the “Set 24/7” button to set the schedule to 24/7, or select the checkboxes next to the weekdays.
- Start Time: Set the hour (00-23) and the minute (00-59) for the start time of the Callback workflow.
- End Time: Set the hour (00-23) and the minute (00-59) for the end time of the Callback workflow.
Click the “Save” button to save the changes.
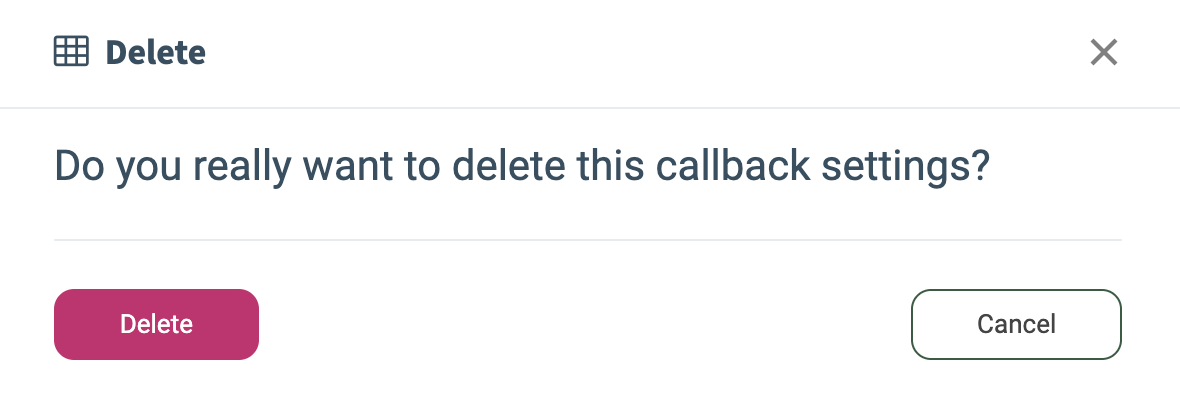
To delete an existing Callback, click the “Delete” button in the “Actions” column. Confirm the deletion by clicking the “Delete” button in the pop-up window below.