Learn how to add, view, and configure a set of conditions to determine a fact of the conversion for each session in this step-by-step guide to the Goals section.
To view that list of goals, go to the Analytics > Goals section.
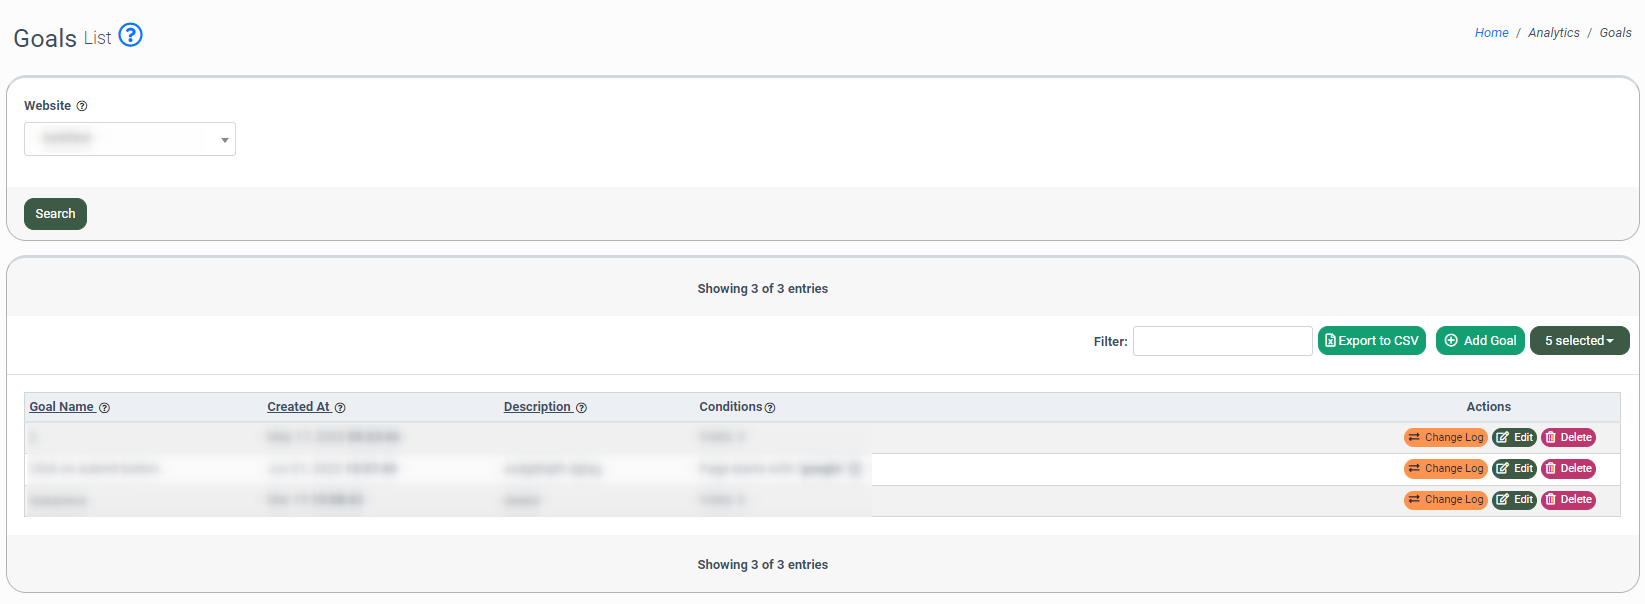
You can narrow down the search results by using the following filters:
- Website: Select a website the goal is assigned to. Read more about Websites in our Knowledge Base article.
The “Goals” list contains the following information:
- Goal Name: The name of the goal.
- Created At: The date and time of the goal creation.
- Description: The description of the goal.
- Conditions: The set of conditions of the particular goal.
To add a new goal, click the “Add Goal” button.
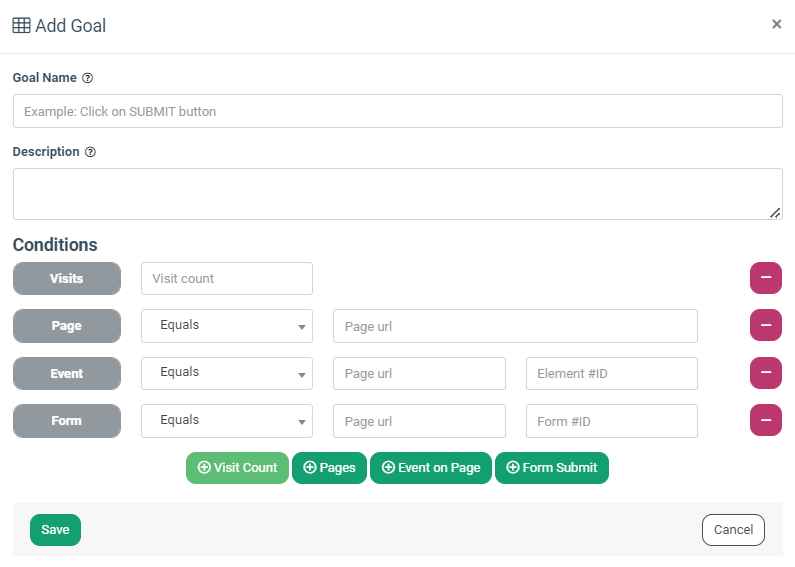
In the “Add Goal” pop-up window, fill in the following fields:
- Goal Name: Enter the name of the goal.
- Description: Enter the description of the goal.
- Conditions: Select one or more conditions from the list under which the goal will be considered completed:
- Visit Count: Enter the number of pages visited for the condition to be counted. All pages on the specified domain with the installed tracking script will be included in the count.
- Pages: Select the condition type and enter the URLs of one or more pages that should be visited to meet the conditions. Everything that comes in the URL after the “/” (slash) is considered the pages. For example: test.com/how-it-works.php — how-it-works.php in this case will be considered the page.
- Event on Page: Select the element on the page that, when clicked, triggers the condition to be counted. A unique ID selector should be used when choosing the element.
- Form Submit: The conditions related to form submission. Enter the URL of the page, and the form’s ID number that, when met, triggers the condition to be counted. A form is an element on a page that has <form> tags, and an <input type=”submit”> element. The element is selected by its unique ID.
The following types of conditions are available in the drop-down list:
- Equals: This condition means full compliance. For example, if the user specifies the URL how-it-works.php, then for the goal to be counted, the URL test.com/how-it-works.php should be opened.
- Starts with: The system compares whether there is a match at the beginning of the URL specified in the condition and the user’s current URL. For example, if the user specifies how-it in the condition and goes to the how-it-works.php page, the goal will be counted.
- Ends with: The system compares whether there is a match at the end of the URL specified in the condition and the user’s current URL. For example, if the user specifies it-works in the condition and goes to the how-it-works.php page, the goal will be counted.
- Does not equal: The condition checks the page mismatches. The goal will be counted if the user goes to any URL of the specified site that does not correspond to the URL specified in the condition. For example, if the user specifies the how-it-works.php page in the condition, then the conversion for the goal will be counted if he goes to the test-and-tests.php page.
- Does not start with: The system compares whether there is no match at the beginning of the URL specified in the condition and the user’s current URL. For example, if the user specifies test-it in the condition and goes to the how-it-works.php page, the goal will be counted.
- Does not end with: The condition compares whether there is no match at the end of the URL specified in the condition and the user’s current URL. For example, if the user specifies how-to in the condition and goes to the how-it-works.php page, the goal will be counted.
- Regex: The condition written using regular expression language. For example: .(php|html)$ — the URL ends with the extension .php or .html
Click the “—” button next to the corresponding condition to remove it from the goal.
To edit the goal, click the “Edit” button in the “Actions” column.
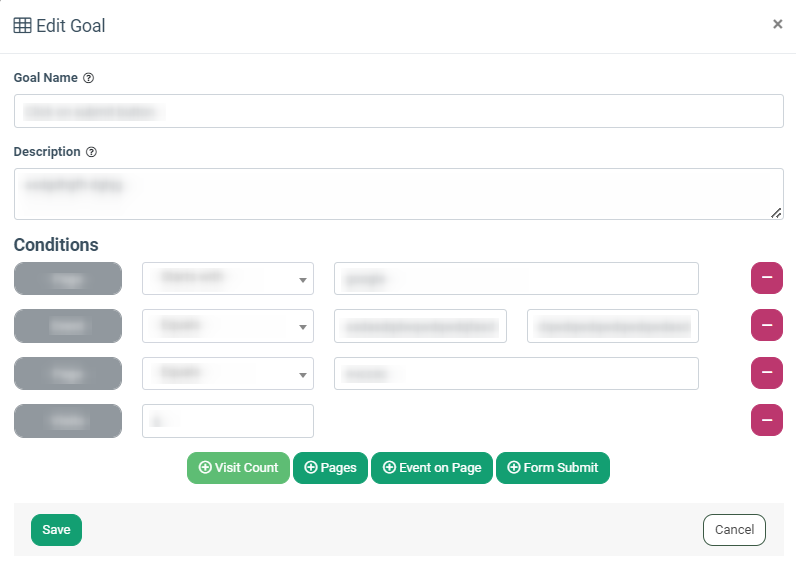
In the “Edit Goal” pop-up window, click the “Save” button to apply changes.
To view the log of the Goal changes, click the “ChangeLog” button in the “Actions” column.
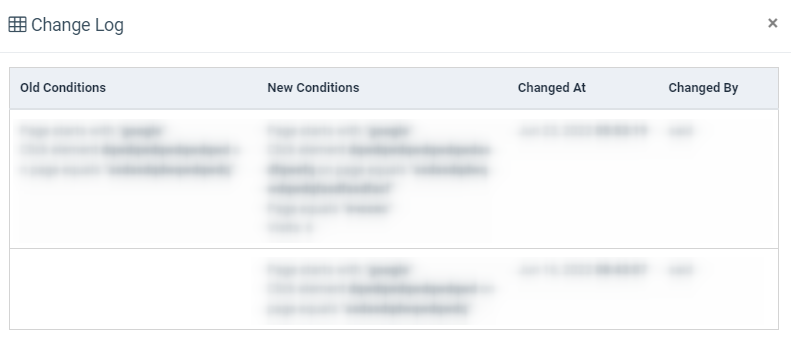
The “ChangeLog” pop-up window contains the following information:
- Old Conditions: The set of old conditions.
- New Conditions: The set of new conditions.
- Changed At: The date and time of the goal change.
- Changed By: The name of the user who made changes.
To delete the goal, click the “Delete” button in the “Actions” column.
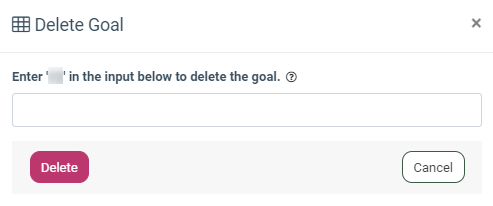
In the “Delete Goal” pop-up window, enter the required text in the field below, and click the “Delete” button to confirm your intention.
To view the records of the goal counts, you should use the “Conversions” report. Read more on the Knowledge Base article.
To export data to the CSV file, click the “Export to CSV” button.