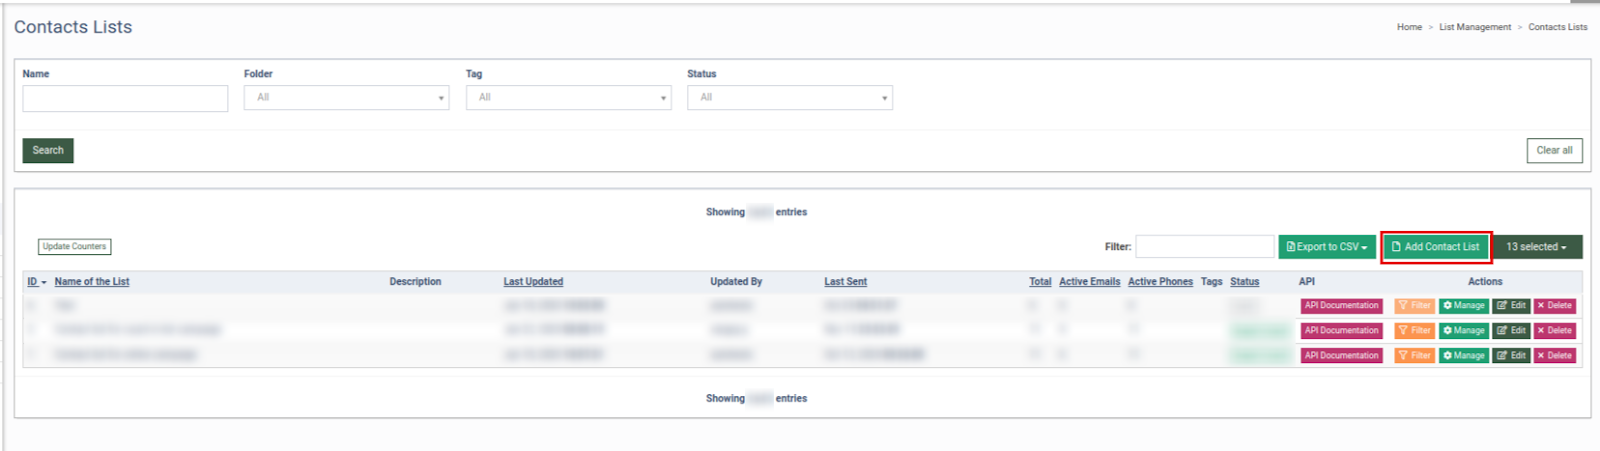
To create a contact list with API documentation, go to the List Management > Contact Lists section and click the “Add Contact List” button.
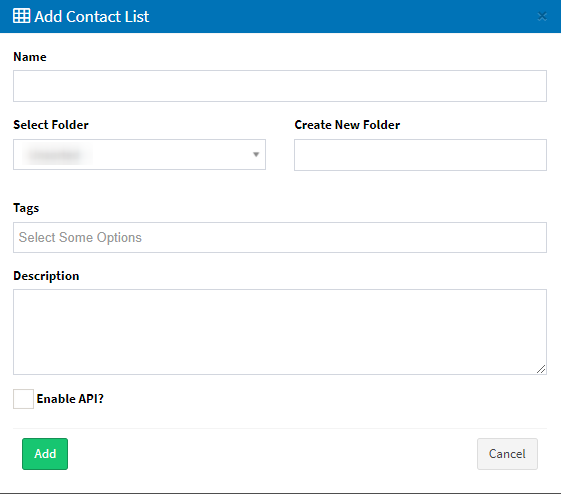
In the Add Contact List pop-up window, fill in the following fields:
-
Name: Enter the name of the contact list.
-
Select Folder: Select the related folder for the list.
-
Create New Folder: Enter the name of the new folder.
-
Tags: Select the list tag.
-
Description: Enter an additional description for the contact list.
-
Enable API?: Check the box to enable the API for the contact list, and generate API Documentation that contains the information on how to add a contact to the list through the API.
Click the “Add” button to complete the action.
When the “Enable API” checkbox is enabled, it automatically generates API documentation for the contact list. To check the documentation, click the “API Documentation” button in the “API” column.
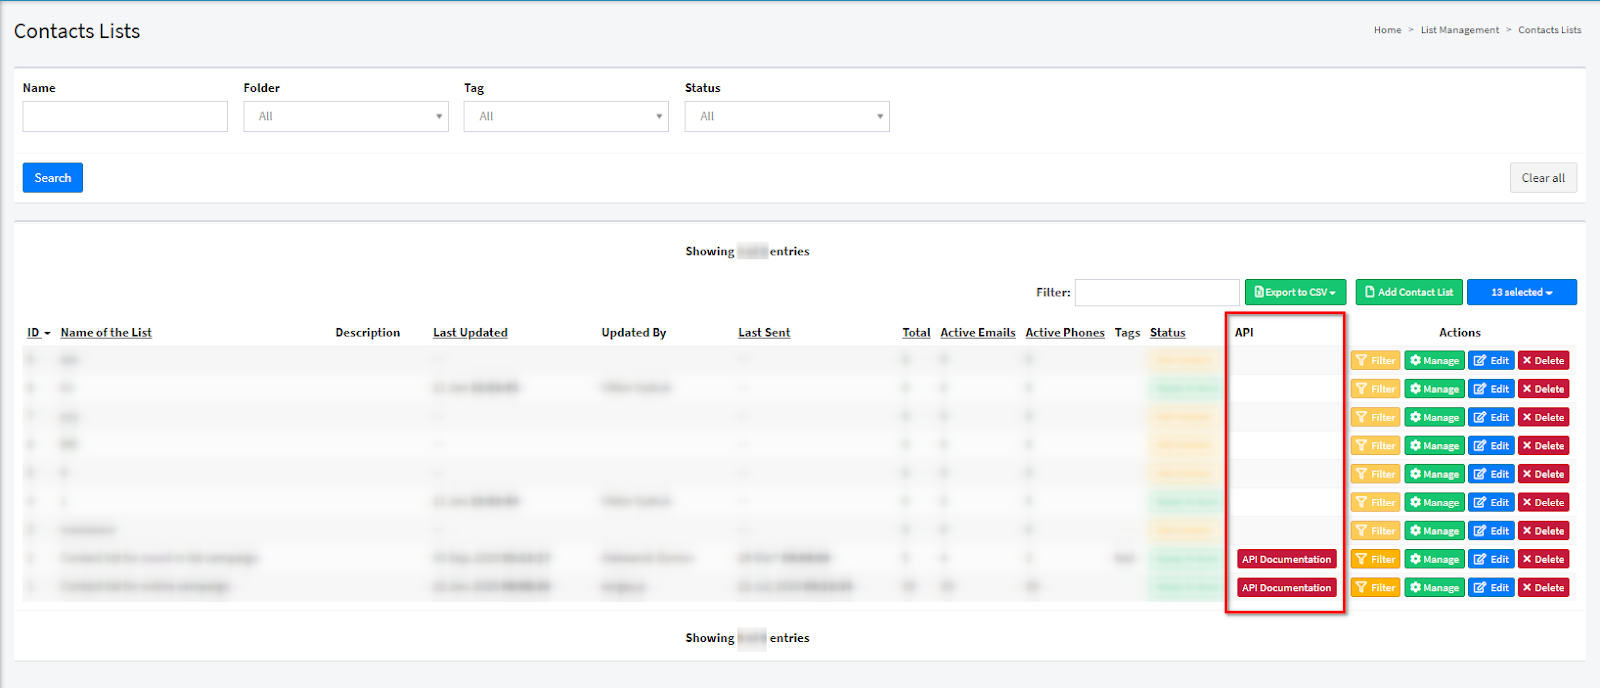
To set up the API access for the contact list, you will need the API key and ID of the list. This information can be found in the “Request Fields” section. The API Documentation key is displayed in the “authKey” field, and the ID number of the list - in the “list_id” field. These credentials could be used when setting up the E-Delivery integration for LMS or Call Logic.
Note: E-delivery integration could be used for a silent campaign for LMS and Call Logic. Read more about the silent Campaign setup process in this Knowledge Base article.
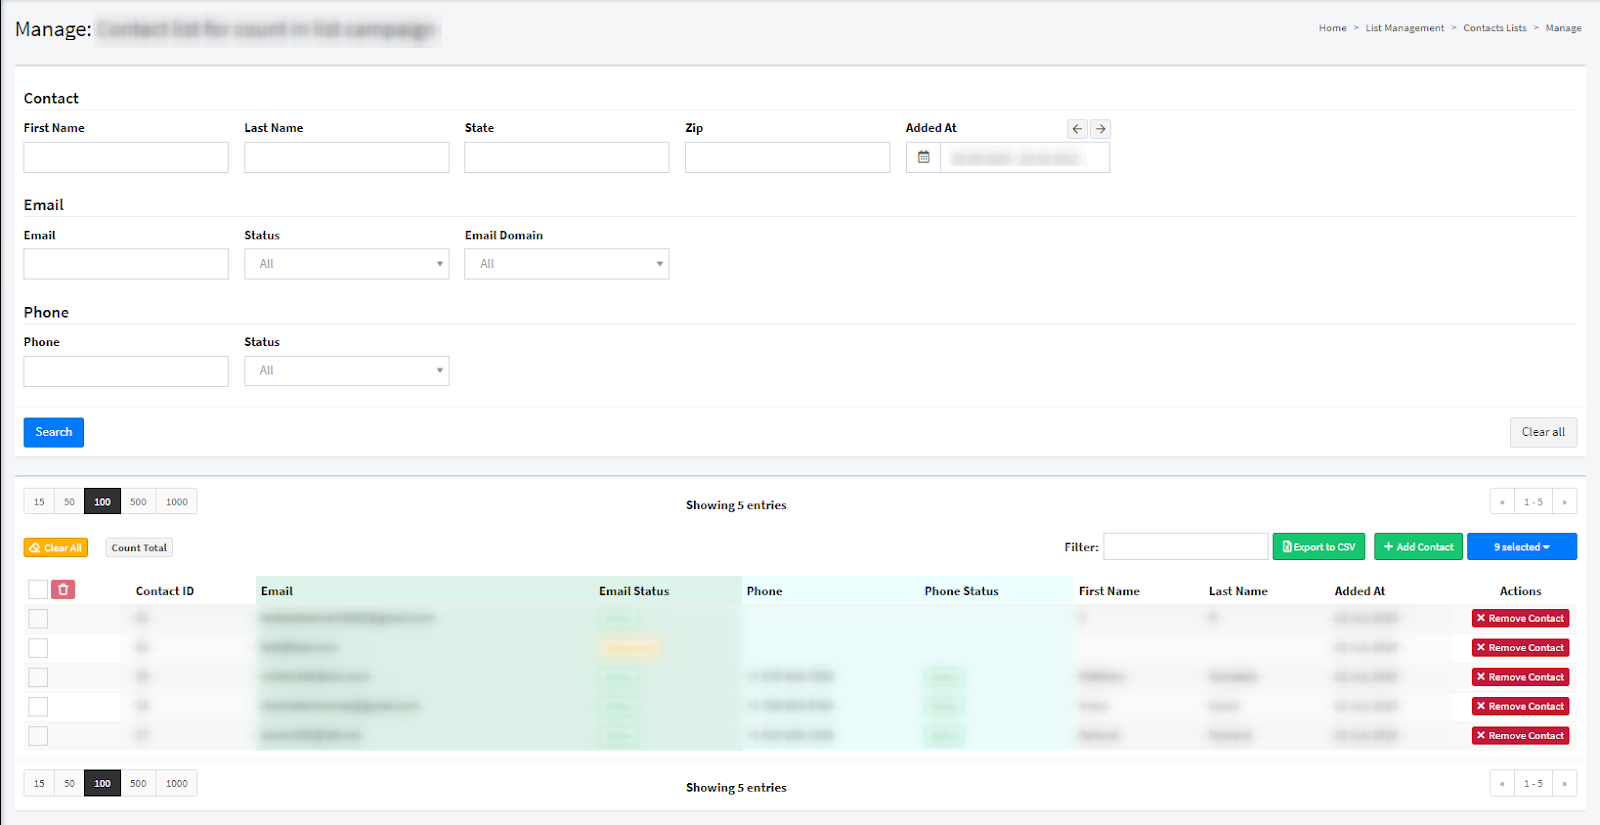
To add and manage the Contacts for the particular list, click the “Manage” button in the “Action” column.
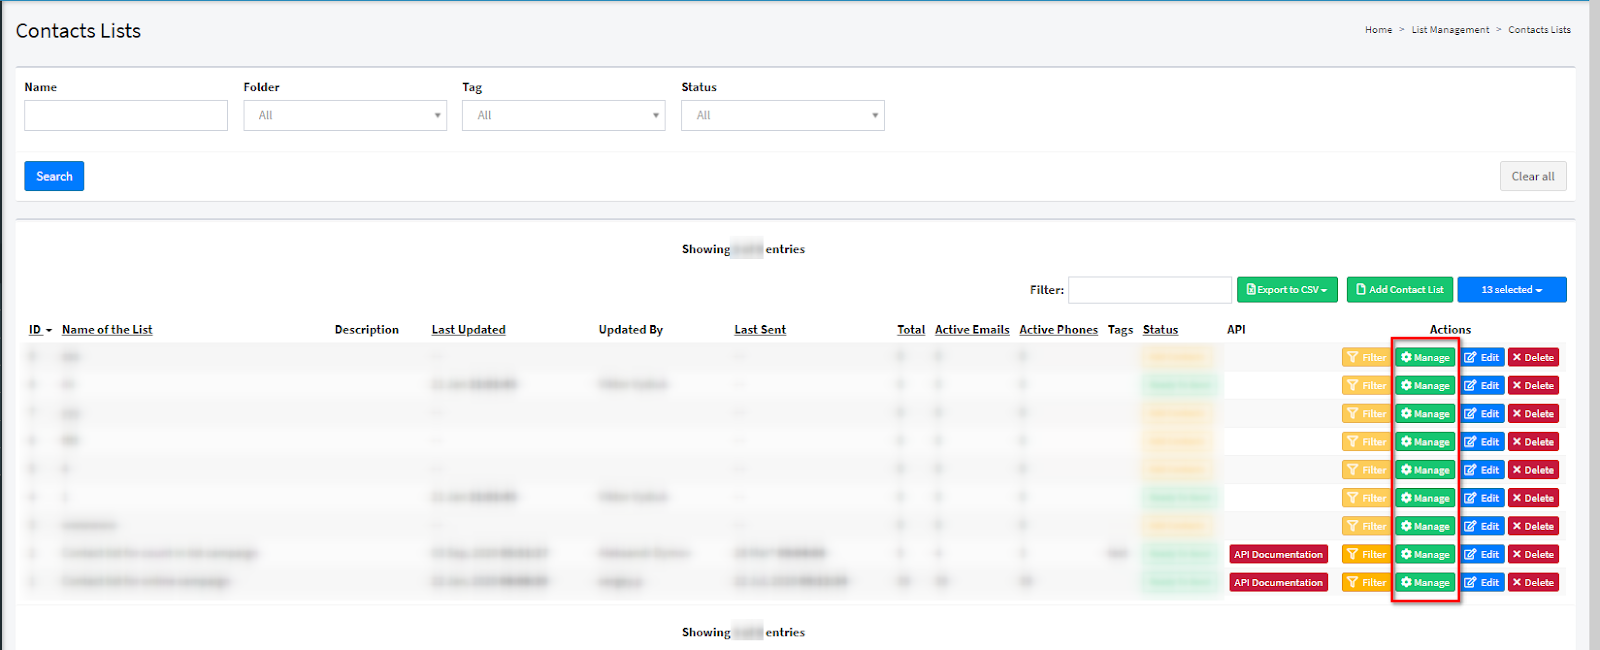
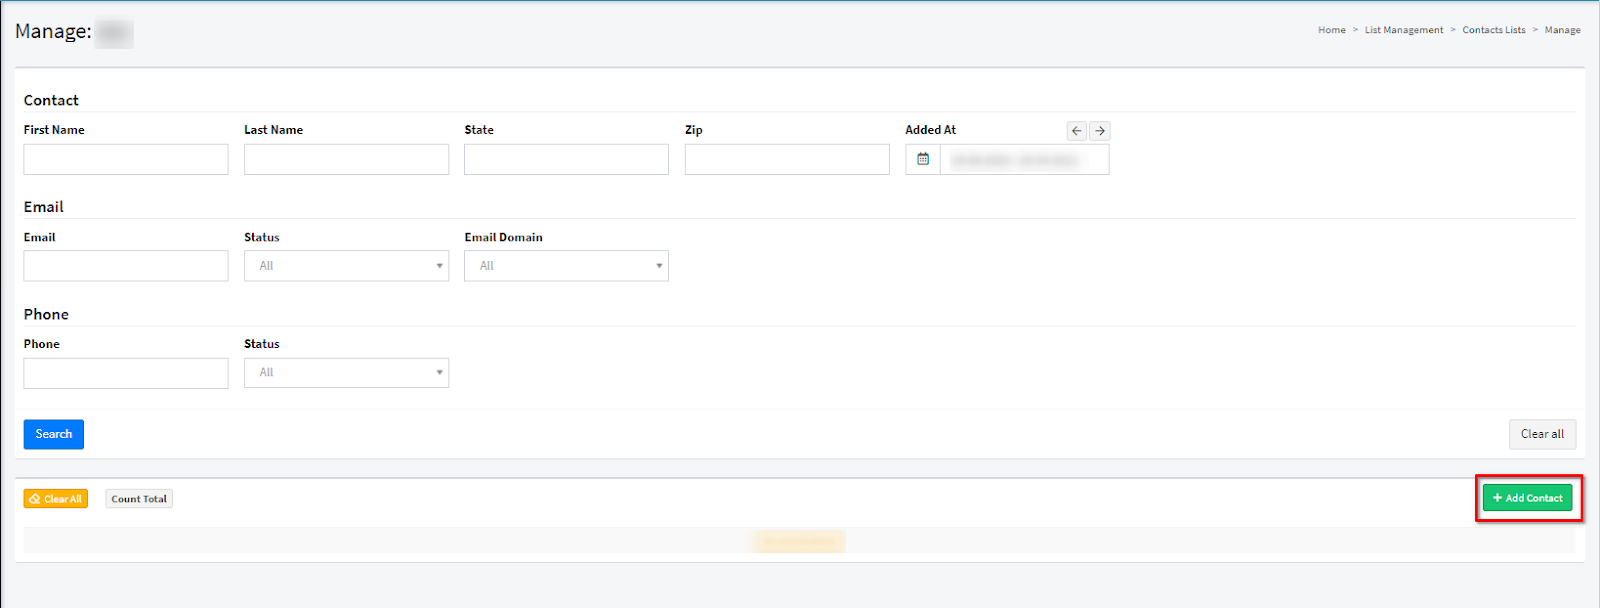
To add an existing Contact to the list, click the “Manage” button in the “Actions” column and click the “Add Contact” button.
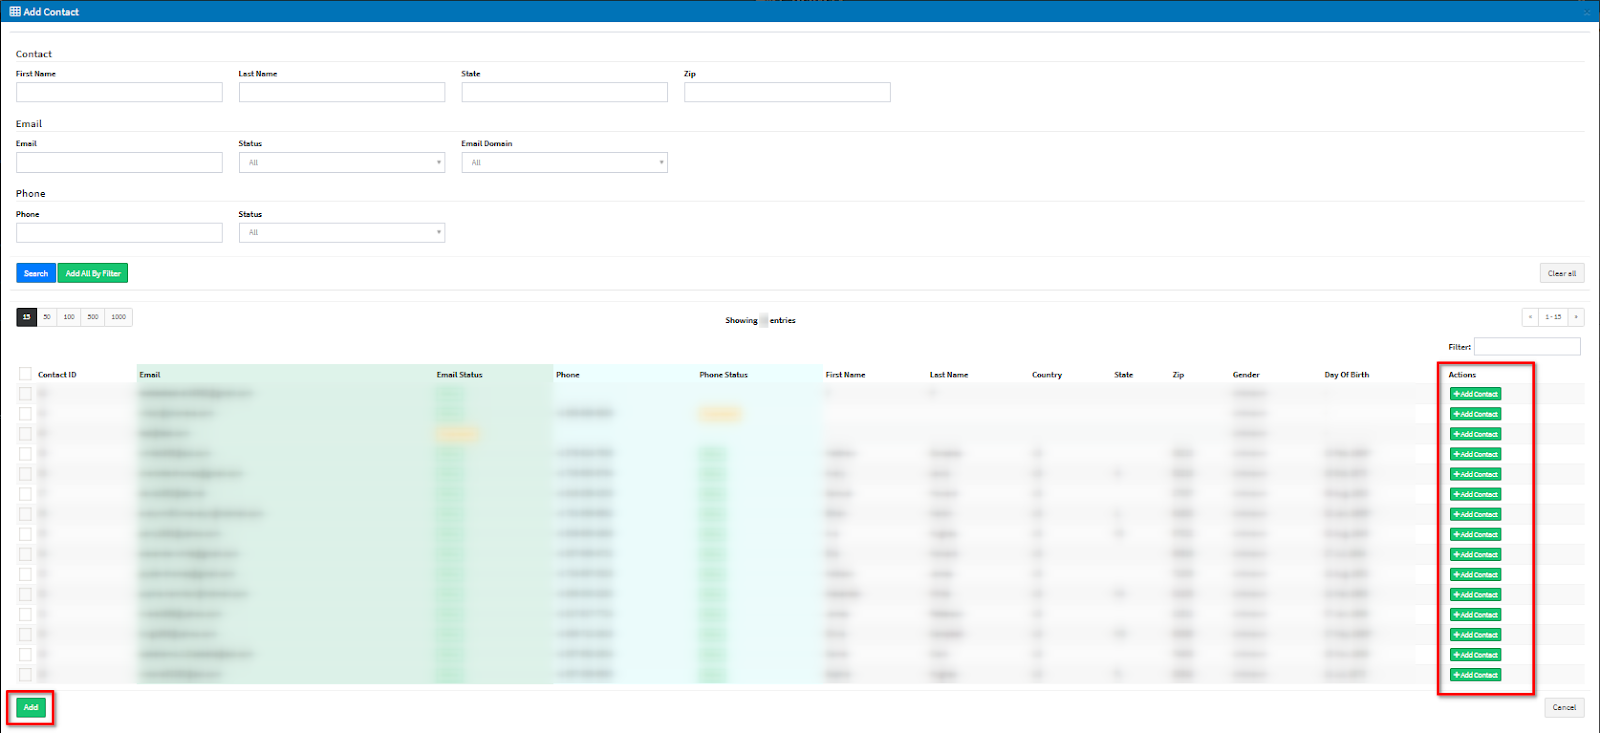
Select the contact that you would like to add from the list in the “Add Contact” pop-up window and click the “Add New” contact button in the “Action” column. Please note that only contacts previously added in the “All Contacts” section are available for selection. Read more about the “All Contacts” section in this Knowledge Base article.
Click the “Save” button to complete the action.
You can narrow down the search results by using the following filters:
-
Contact
-
First Name: Enter the first name of the contact record.
-
Last Name: Enter the last name of the contact record.
-
State: Enter the state of the contact.
-
Zip: Enter the Zip code of the contact.
-
-
Email
-
Email: Enter the email address of the contact record.
-
Status: Select the current status of the contact (Active, Inactive, Bounced, Suppressed).
-
Email Domain: Select the domain of the contact’s email address.
-
-
Phone
-
Phone: Enter the phone number of the contact record.
-
Status: Select the current status of the contact’s phone number (Active, Inactive, Suppressed).
-
To add all your contacts to the list click the “Add All By Filter” button.
Once you add contacts to the list, the list will be displayed in the main block of the Contact List: Manage section. To view the section, click the “Manage” button for the selected list.
Read more about the Contact List: Manage section in this Knowledge Base article.