To create a Campaign, go to the SMS Campaigns > Campaigns section.
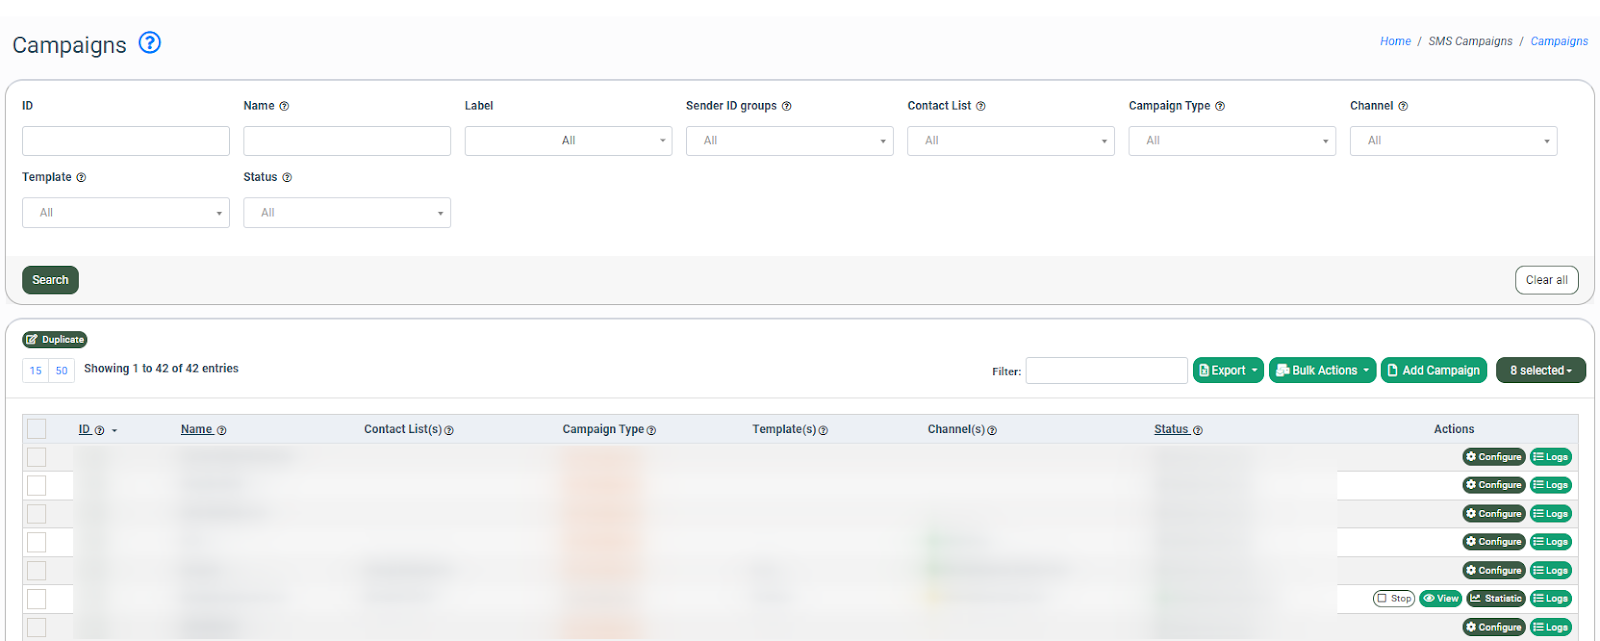
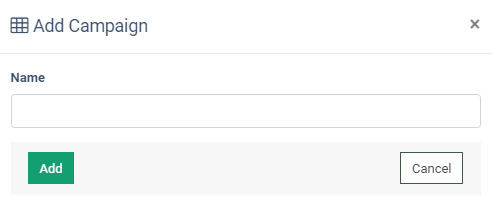
Click the “Add Campaign” button and fill in the name of the campaign in the “Name” field. Click the “Add” button to complete.
Click the “Configure” button in the “Actions” column to open the campaign setup page.

The Campaign Setup page contains the following tabs:
Global
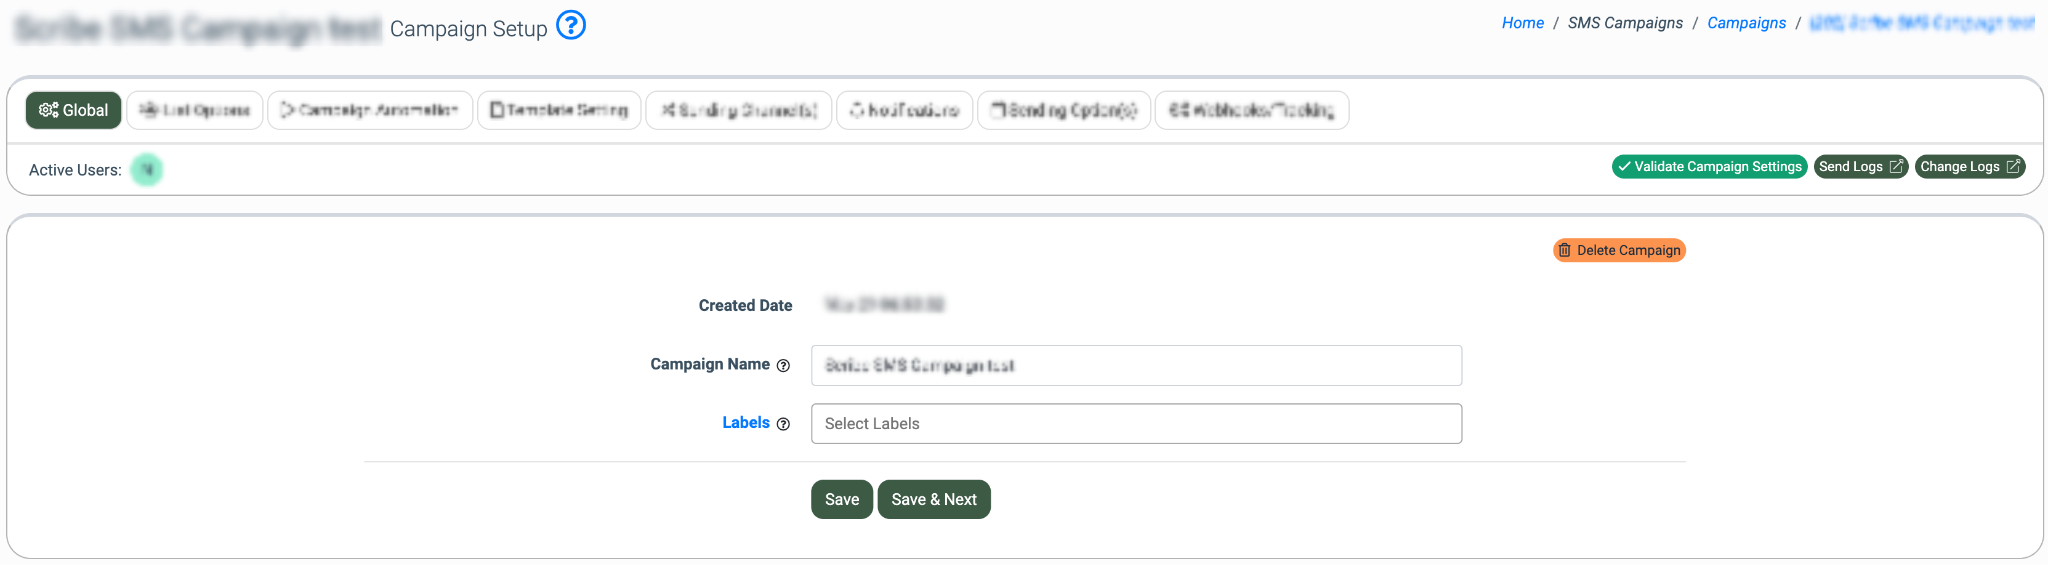
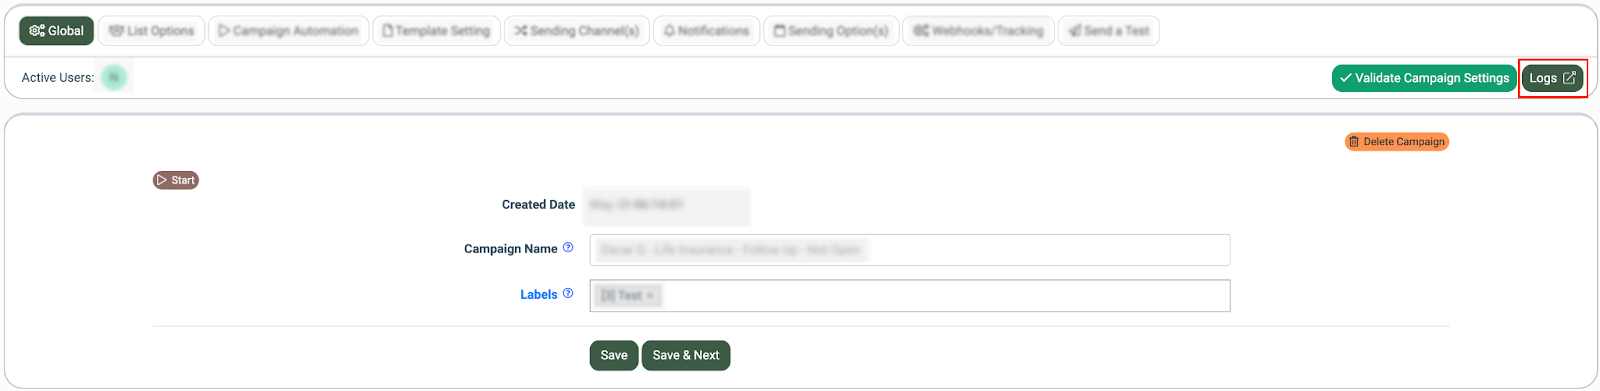
The “Global” tab allows you to view and manage general campaign settings. The “Global” tab contains the following information:
- Created Date: The date and time when the campaign was created.
- Campaign Name: The name of the campaign.
- Labels: Select labels from the existing list.
Fill in the information and click the “Save” button to complete. You can also use the “Save and Next” button to complete the settings and be redirected to the next tab.
Click the “Validate Campaign Settings” button to verify that you have completed all steps necessary to make this campaign go live.
To remove a campaign from the system, click the "Delete Campaign" button. After a campaign has been deleted, you have the option to click the "Restore Campaign" button to bring it back. However, please note that a campaign in the restored status cannot be sent out. This status only allows you to view and edit the deleted campaign.
List Options
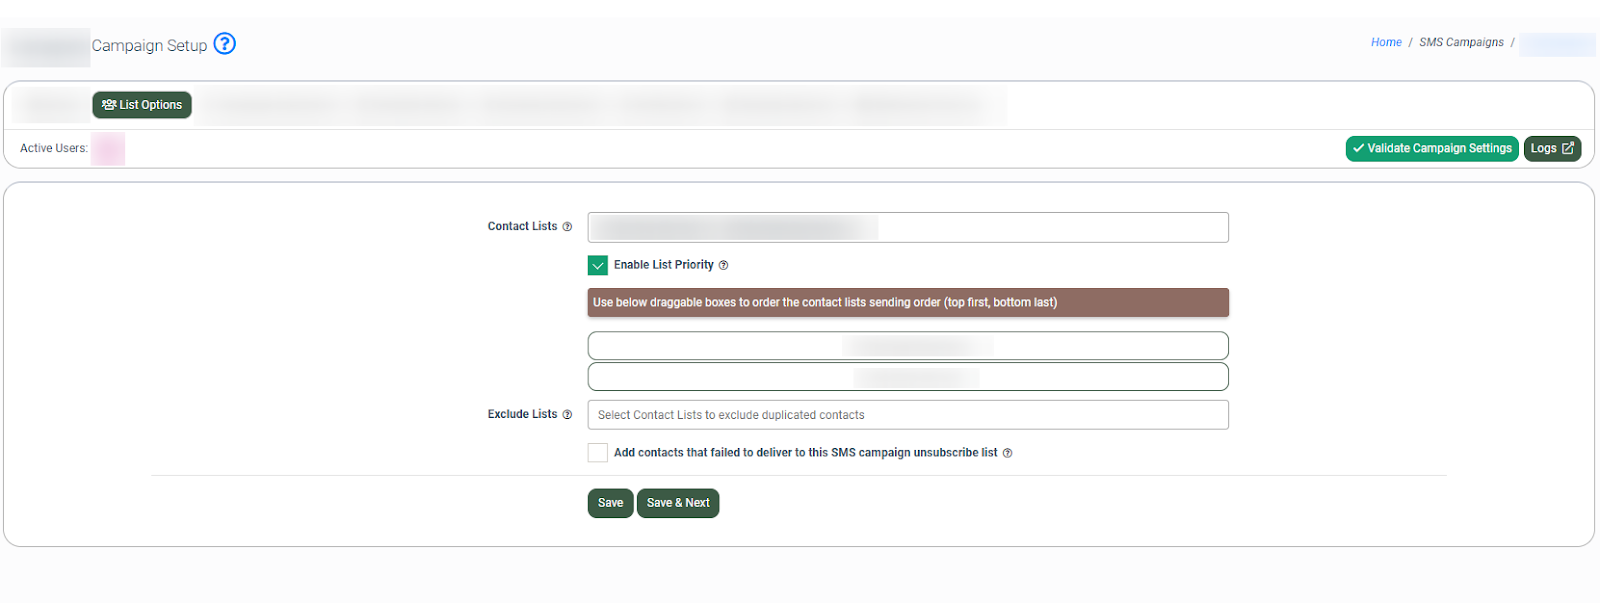
The “List Options” tab allows you to configure the campaign’s contact options. The tab contains the following data fields:
- Contact Lists: Select the contact list(s) for the campaign. (To create a list, go to the List Management > All Contacts section. Click the “Add New” button and choose “Create New List”).
Note: Read more about How to Create a Contact List in this Knowledge Base article. - Enable List Priority: Check the box to prioritize the contact lists sending orders (top first, bottom last).
Note: You need to have two or more lists to enable this option. - Exclude Lists: Select the lists to exclude from the campaign (To create a list, go to the List Management > All Contacts section. Click the “Add New” button and choose “Create New List”).
Note: Read more about How to Create A Contact List in this Knowledge Base article. - Add Contacts that failed to deliver to this SMS campaign unsubscribe list: Check this box to automatically unsubscribe contacts from your list if they didn't receive your campaign. This can include invalid phone numbers and contacts that have opted out.
Click the “Save” button to complete. You can also use the “Save and Next” button to save the settings and be redirected to the next tab.
Campaign Automation
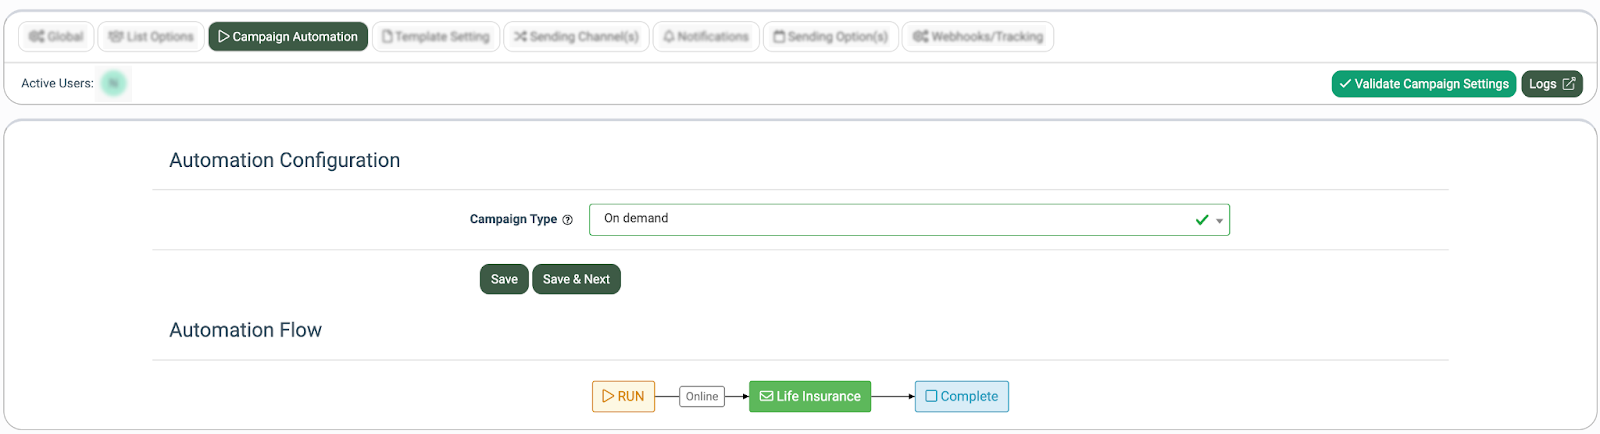
The “Campaign Automation” tab allows you to manage automation configurations and flows.
You can select the “Campaign Type” in the pop-up window:
Note: The Automation Flow is displayed as a hierarchical tree that shows the relationship between parent and child campaigns. Child campaigns are always connected to their parent campaign, and each connection displays the trigger event and the configured time delay (if applicable). If a child campaign is deleted, it is automatically removed from the Automation Flow. If a parent campaign is paused or deleted, it remains in the diagram and is marked as Offline to preserve the automation hierarchy.On Demand
The "On demand" campaign type allows you to run your campaign based on your specific needs. After you complete the setup process, the campaign will not start automatically. Instead, it will initiate SMS distribution only when you request it, and then it will be completed.
Click the “Save” button to complete. You can also use the “Save and Next” button to confirm the changes and be redirected to the next tab.
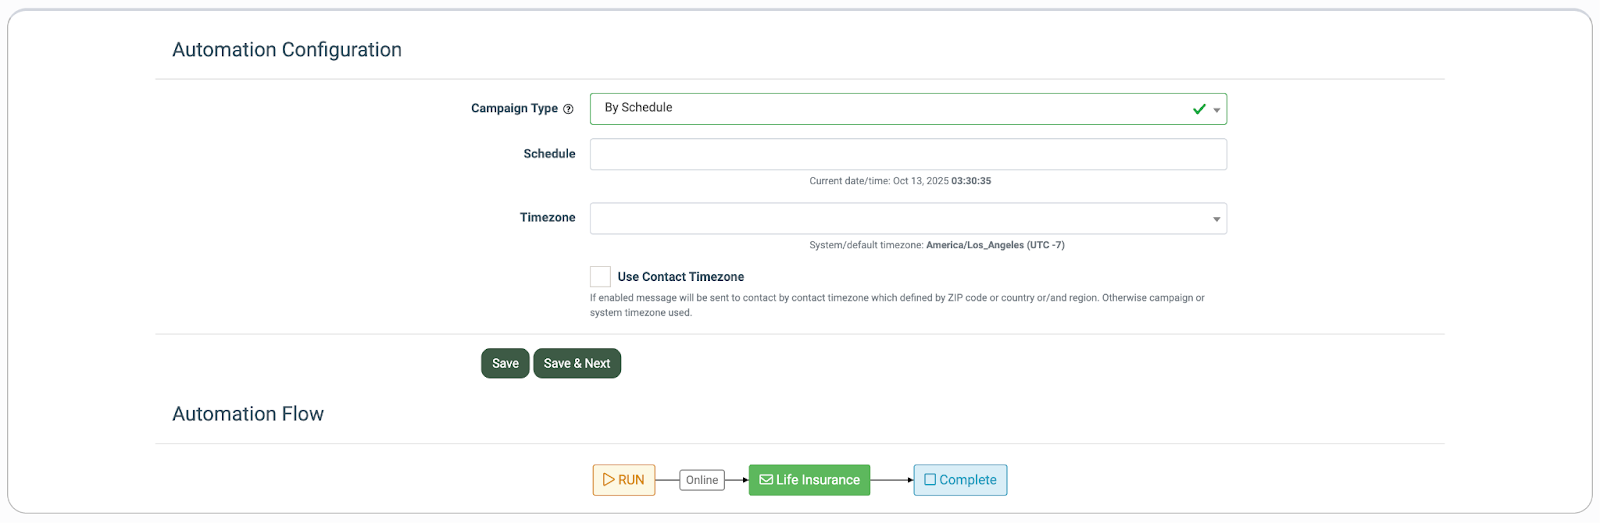
By Schedule
The “By Schedule” campaign type allows you to run the campaign on a set schedule. Fill in the following settings to set up the schedule:
- Schedule: Select the date and the time.
- Timezone: Select the timezone.
- Use Contact Timezone: Check the box to enable sending messages to the contacts according to their time zone. Otherwise, the campaign’s or system’s timezone will be applied.
Click the “Save” button to complete. You can also use the “Save and Next” button to confirm the changes and be redirected to the next tab.
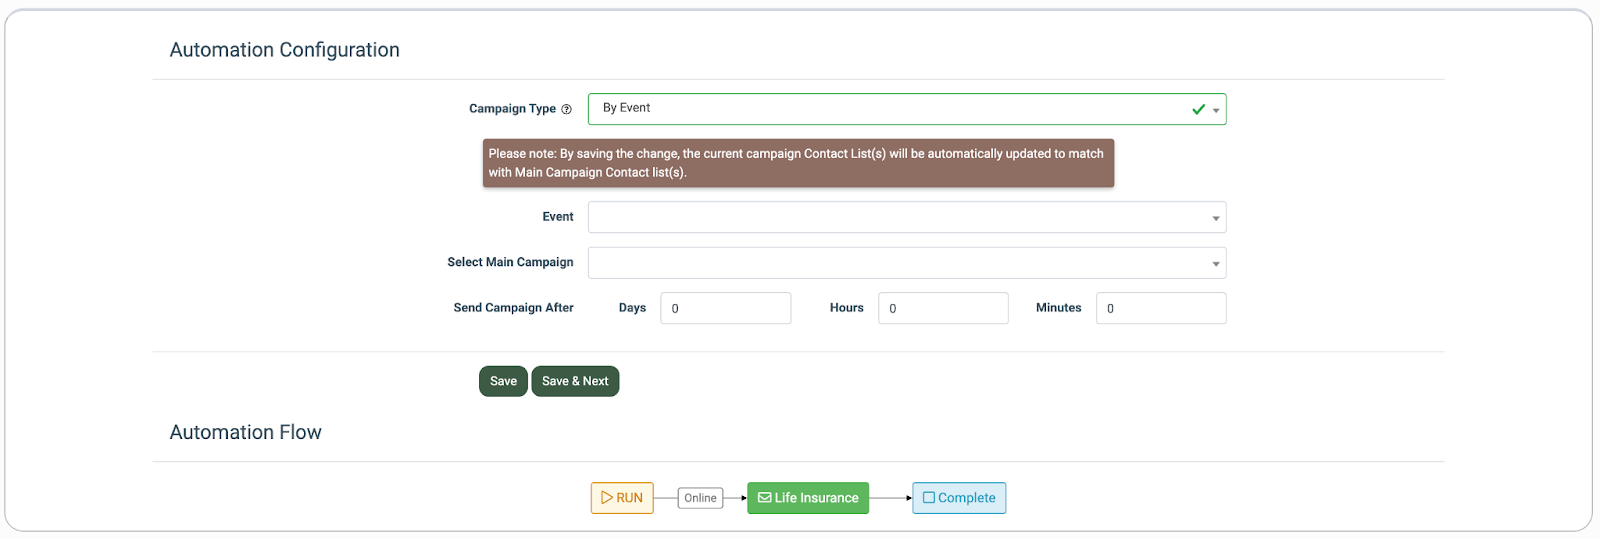
By Event
The “By Event” campaign type allows you to run the campaign based on certain delivery events. You can configure the following data fields:
- Event: Choose an event (Click, Open, Not Open, Open Not Click).
- Select Main Campaign: Select the main campaign from the list.
- Send Campaign After: Specify Days, Hours, and Minutes after which your campaign will send the email.
Click the “Save” button to complete. You can use the “Save and Next” button to confirm the changes and be redirected to the next tab.
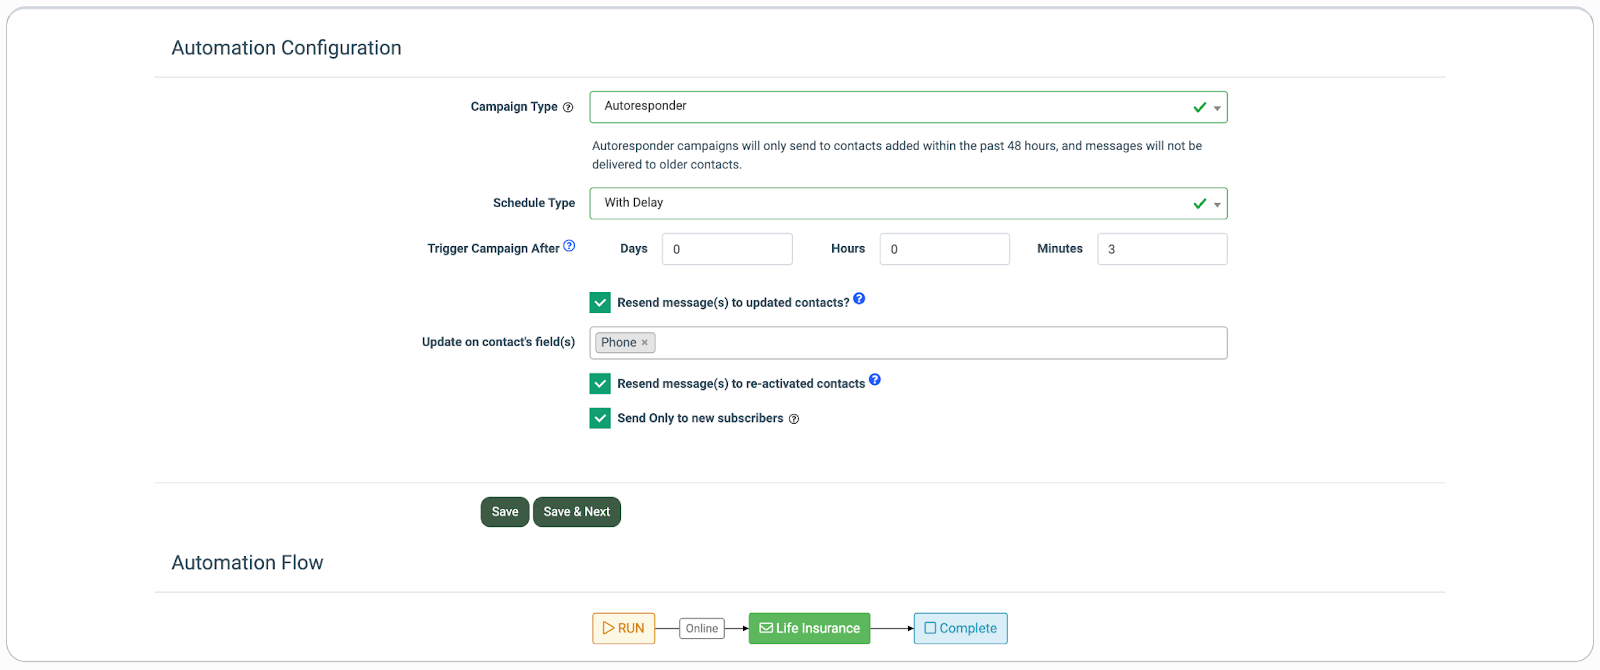
Autoresponder
The "Autoresponder" campaign type allows you to run a campaign based on the length of time a contact has been on a specific list.
Note: When using the Autoresponder campaign type, it will only include contacts that have been added to the list within the last two days.
Fill in the following settings to configure:
- Schedule Type:
- Instantly: The campaign will run right after the contact is added.
Note: If there are third-party processing rules for a contact list, the campaign will be triggered after processing is complete. - With Delay: The campaign will run right after the selected timeframe.
- Trigger Campaign: Specify Days, Hours, and Minutes to trigger and run the campaign after the contact was added to the list (only for the “With Delay” schedule type).
- Resend message(s) to updated contacts: Check the box to resend the message to the same contact based on the field update trigger. Select the field(s) to trigger the messages in the field below.
- Update on contact's field(s): Select the specific field from the drop-down list to trigger resending the message.
- Resend message(s) to re-activated contacts: Check the box to resend the message to the same contact if their status is reactivated from Inactive to Active.
- Send Only to new subscribers: Check the box to send the messages only to new subscribers in the contact list.
Click the “Save” button to complete. You can also use the “Save and Next” button to confirm the changes and be redirected to the next tab.
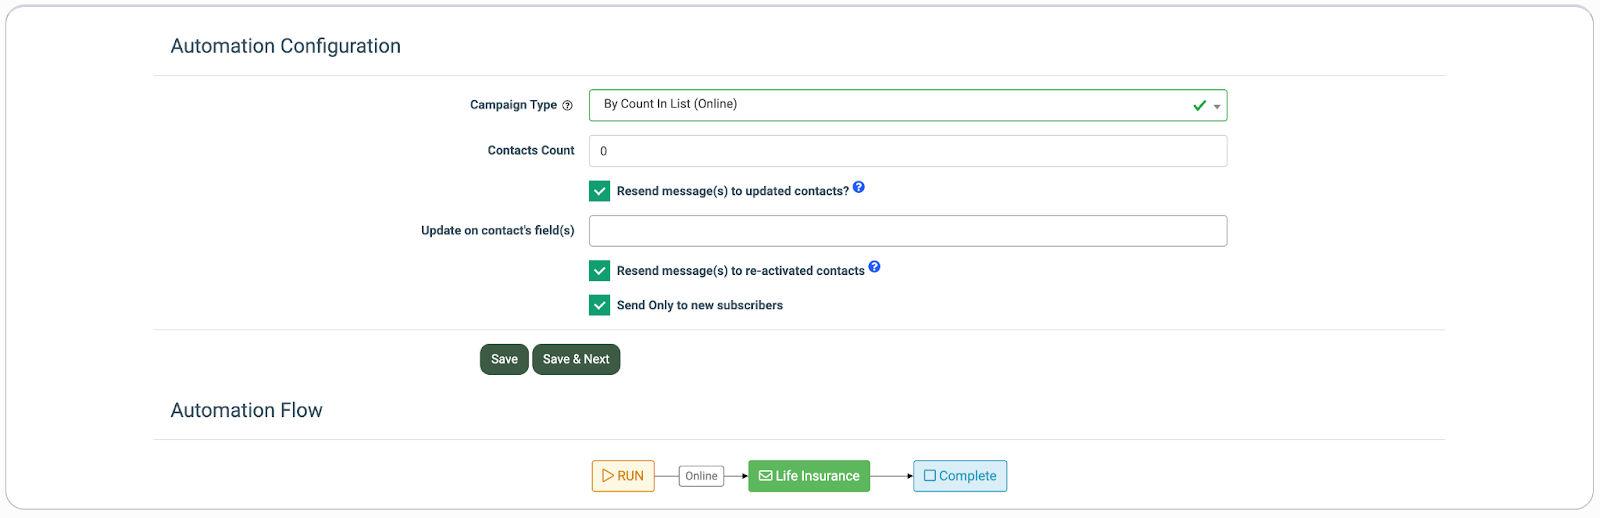
By Count In List (Online)
The “By Count In List (Online)” campaign type allows you to run the campaign based on the number of contacts you have in a contact list. Fill in the following settings to configure:
- Contacts Count: Specify the number of contacts upon reaching which the campaign will be run.
- Resend message(s) to updated contacts: Check the box to resend the message to the same contact based on the field update trigger. Select the field(s) to trigger the messages in the field below.
- Update on contact's field(s): Select the specific field from the drop-down list to trigger resending the message.
- Resend message(s) to re-activated contacts: Check the box to resend the message to the same contact if their status is reactivated from Inactive to Active.
- Send Only to new subscribers: Check the box to send messages only to new subscribers in the contact list.
Click the “Save” button to complete. You can also use the “Save and Next” button to confirm the changes and be redirected to the next tab.
Recurring
The “Recurring” campaign type allows you to automatically send messages to your entire contact list at a fixed, repeating interval. With this configuration, the campaign runs continuously in cycles. After each send, the campaign pauses and resumes only when the next scheduled interval is reached.
When the campaign is launched, messages are sent to all contacts currently in the list. After completion, the campaign switches to the “Scheduled for Delivery” status and waits for the next trigger period. Any new contacts added to the list after the campaign run will not receive messages immediately. Instead, they will be included in the next scheduled campaign cycle along with all existing contacts.
Note: The “Use Contact Timezone” option is not available for this campaign type.
Fill in the following settings to configure:
- Trigger Period: Specify the interval between campaign runs by setting the number of Days, Hours, and Minutes.

Click the “Save” button to complete. You can also use the “Save and Next” button to confirm the changes and proceed to the next tab.
Template Settings
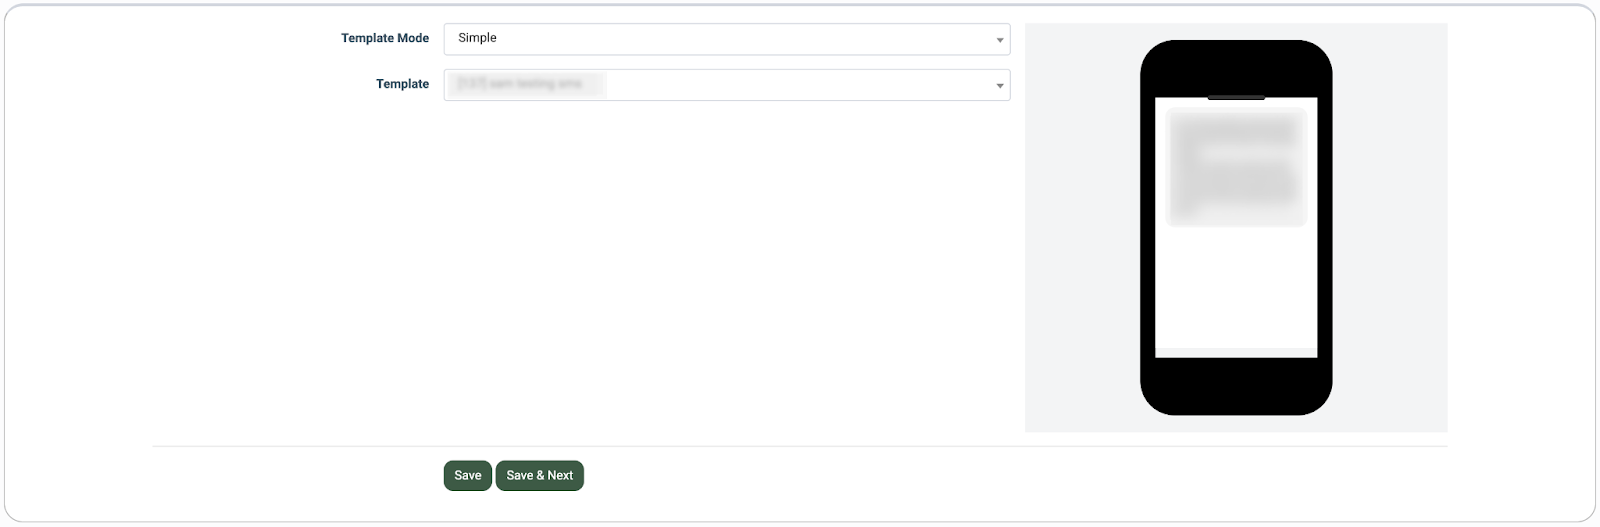
The "Template Setting" tab allows you to manage and customize your SMS templates. To get started, choose the preferred scheme from the "Template Mode" drop-down list:
- Simple: This mode allows you to select and edit a single template for your campaign.
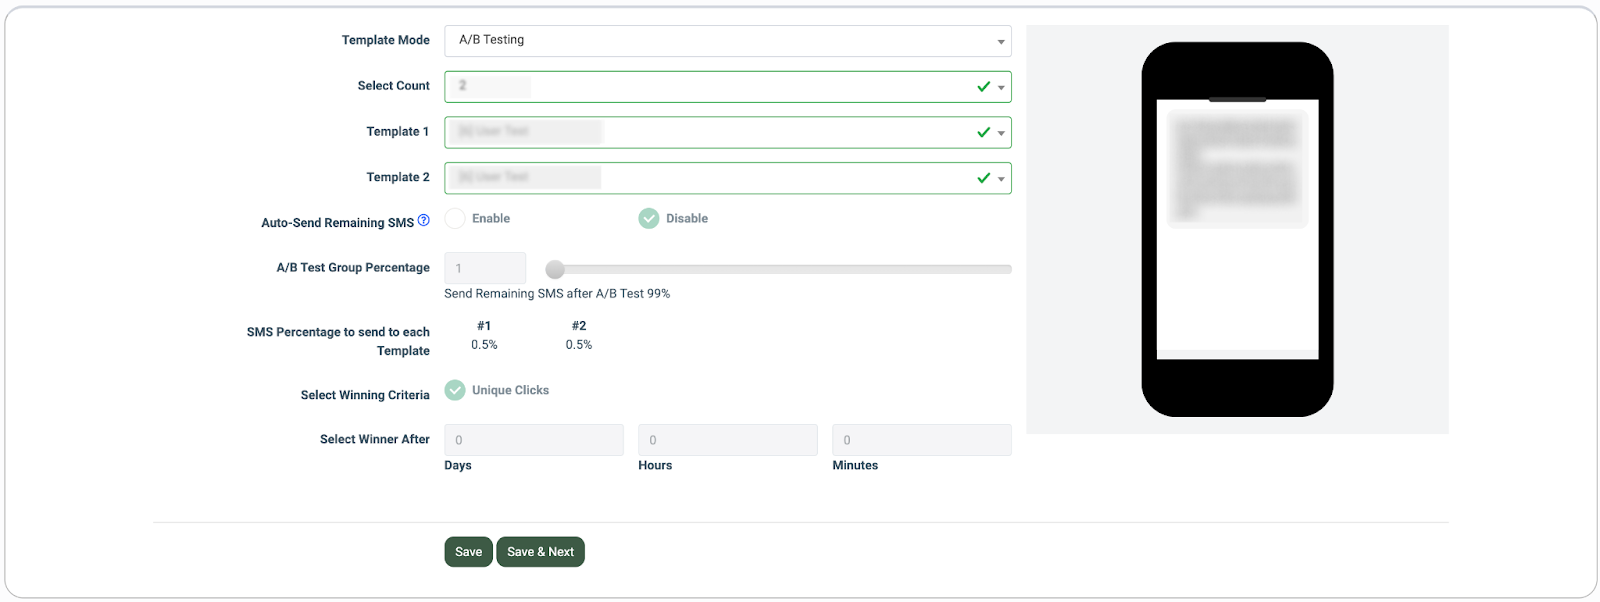
- A/B Testing: This mode allows you to choose and edit multiple templates for your campaign.
For the “Simple” template mode, fill in the following data fields:
- Template: Select a template from the existing list.
For the “A/B Testing” template mode, fill in the following data fields:
- Template Count: Enter the number of templates that will be used.
- Template (1, 2, …): Select an existing template from the drop-down list. Note: The number of templates to configure depends on the template count selected in the field above.
- Auto-Send Remaining SMS: Select the “Enabled” option to send remaining messages based on the “A/B Testing” setup you choose. Select the “Disabled” option to send each message from each template one by one.
- A/B Test Group Percentage: Enter the number of messages and set the percentage ratio for the A/B test, after which the remaining messages will be sent.
- SMS Percentage to send to each Template: The percentage of messages that go to each template.
- Select Winning Criteria: The parameter that will define the winning criteria (Unique Clicks).
- Select Winner After: Indicate the number of days, hours, and minutes after which the winner will be determined.
Click the “Save” button to complete. You can use the “Save and Next” button to confirm the changes and be redirected to the next tab.
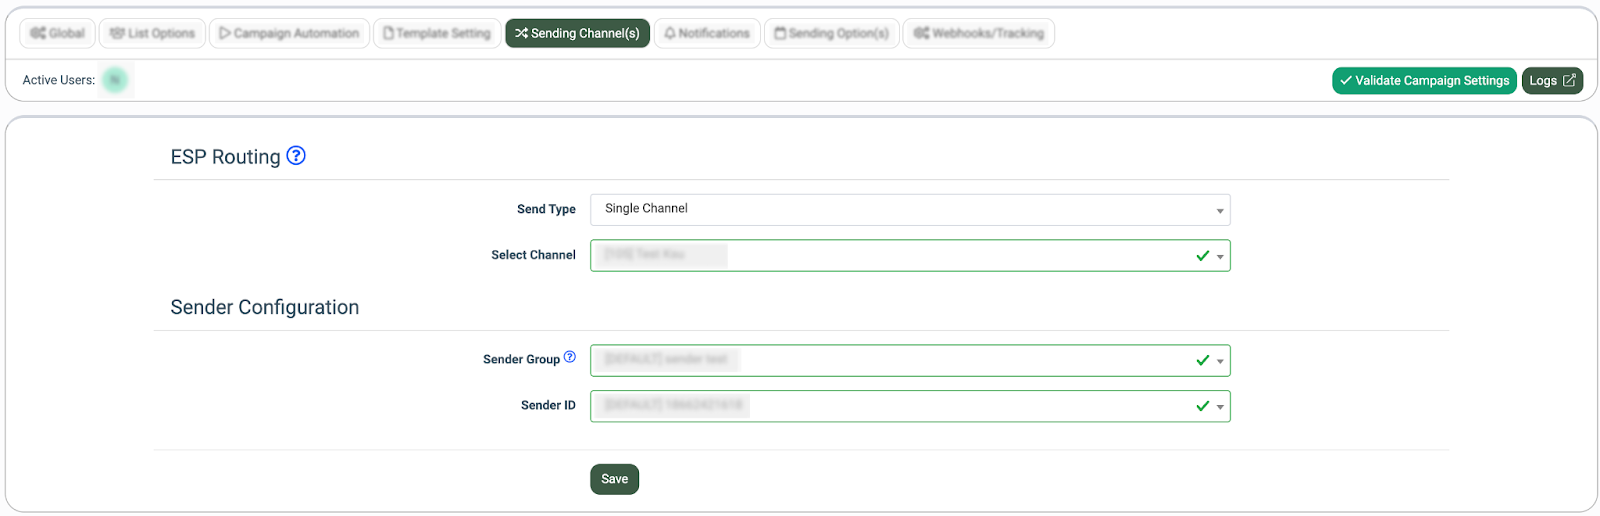
Sending Channel(s)
The “Sending Channel(s)” tab allows you to set the sender configuration. To manage the setup, make a selection via the “Send Type” field to determine the routing:
- Single Channel
- Multiple Channels
For the “Single Channel” configuration, fill in the following fields:
- Select Channel: Select the existing channel from the drop-down list.
Then fill in the information via the “Sender Configuration” block:
- Sender Group: Select the existing sender group.
- Sender ID: Select the sender.
Click the “Save” button to confirm the changes.
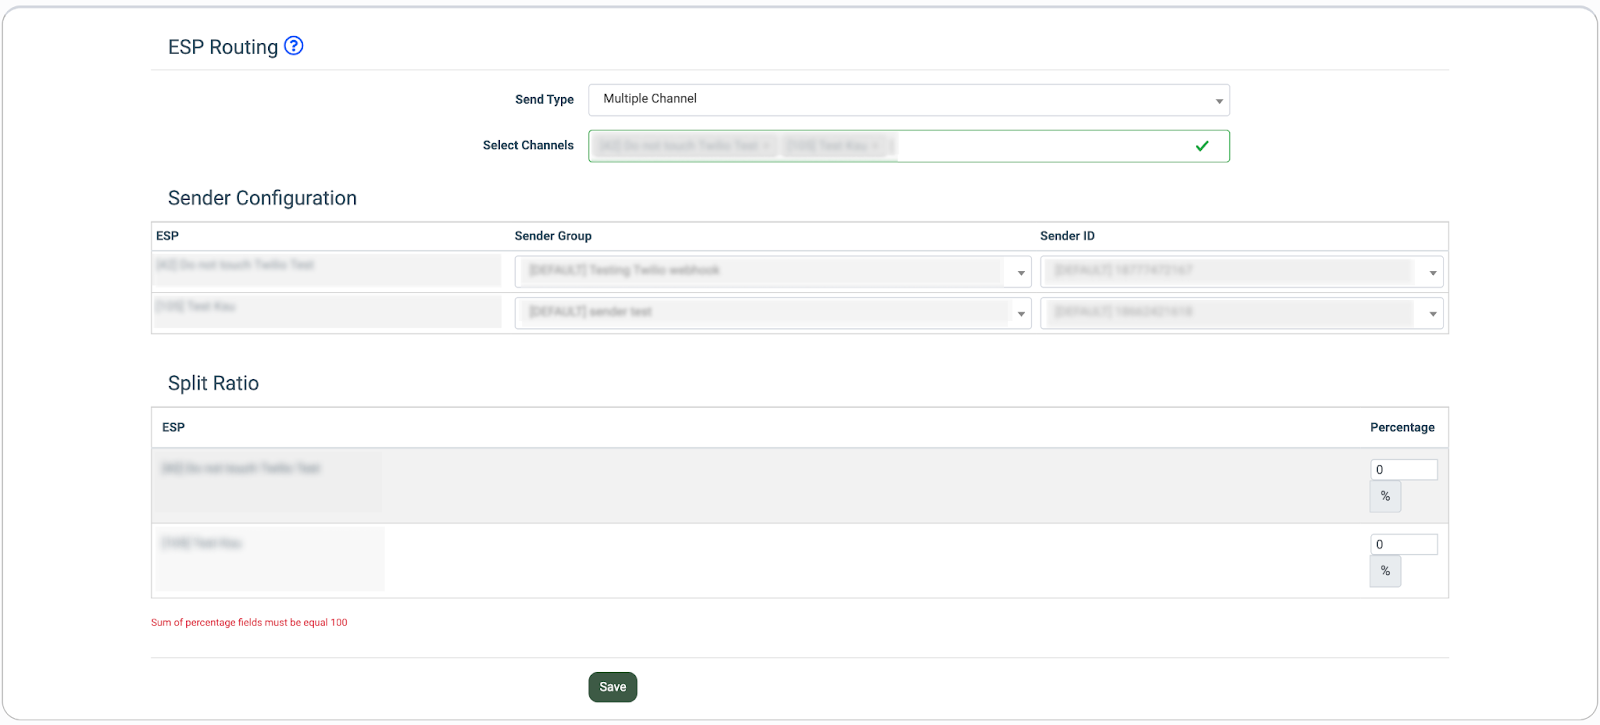
For the “Multiple Channel” configuration, fill in the following fields:
- Select Channels: Select the existing channels from the drop-down list.
Then fill in the information via the “Sender Configuration” block:
- Sender Group: Select the existing sender group.
- Sender ID: Select the sender.
Set up the distribution ratio for each selected channel via the “Split Ratio” block:
- Percentage: Enter the distribution ratio as a percentage.
Click the “Save” button to confirm the changes.
Notifications
The “Notifications” tab allows you to set up notifications for when the campaign is not sending any messages within a specific timeframe.
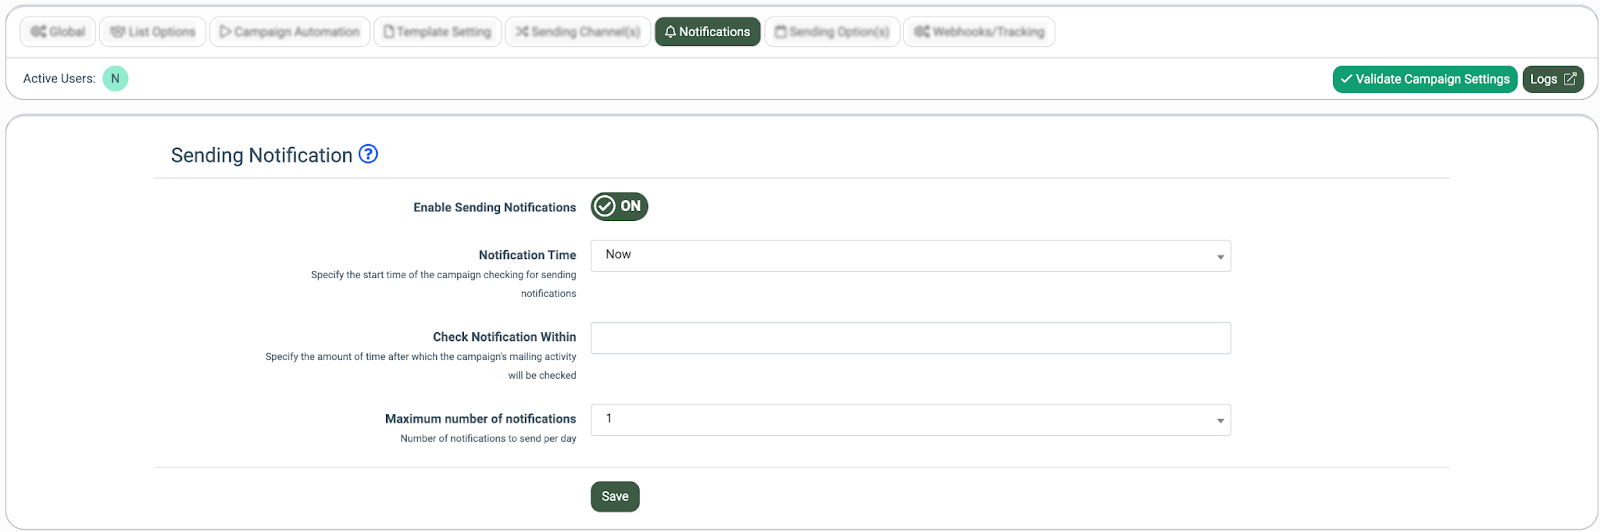
To configure, fill in the following fields via the “Sending Notification” block:
- Enable Sending Notifications: Switch the toggle to the “On” position to enable the notifications.
- Notification Time: Select the timeframe after which the system will begin checking the campaign and sending notifications (Now, After 1 day(s), etc.).
- Check Notification Within: Select a time frame for the system to check if this campaign failed to send any messages (between one and ten hours).
- Maximum number of notifications: Select the maximum number of notifications to be sent per day (one or two times per day).
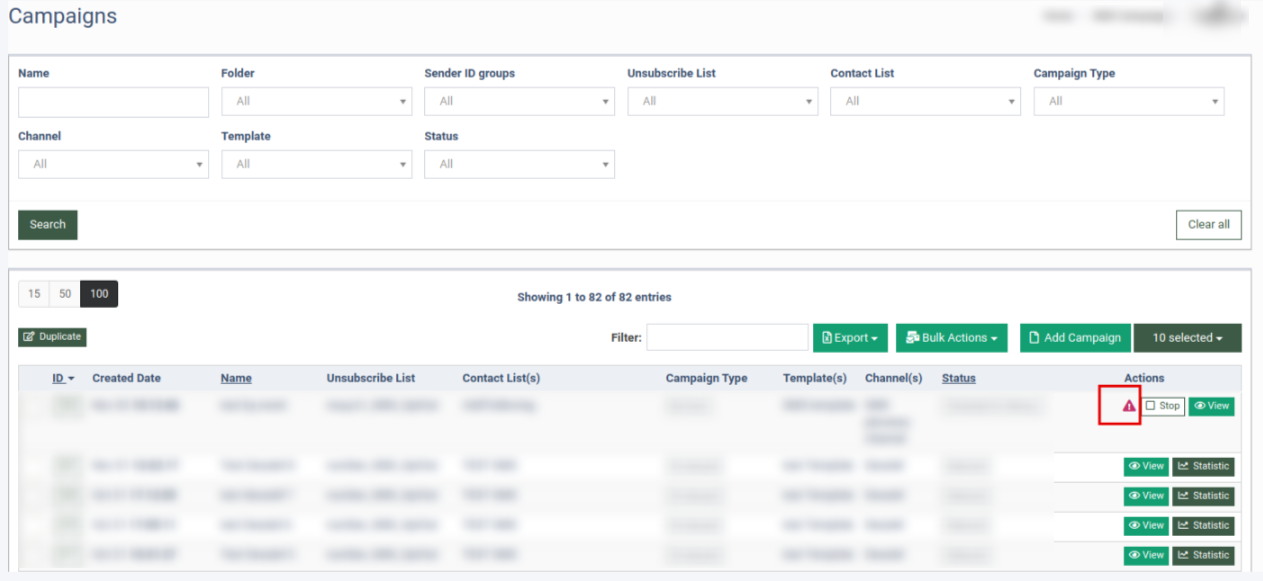
If there are new notifications for the Campaign, they will appear as a red warning icon in the “Actions” column under the “Campaigns” section. The system will also send a notification message to your email address.
Sending Option(s)
The "Sending Option(s)" tab allows you to set the campaign's sending parameters, including a specific time and an hourly limit on emails sent.
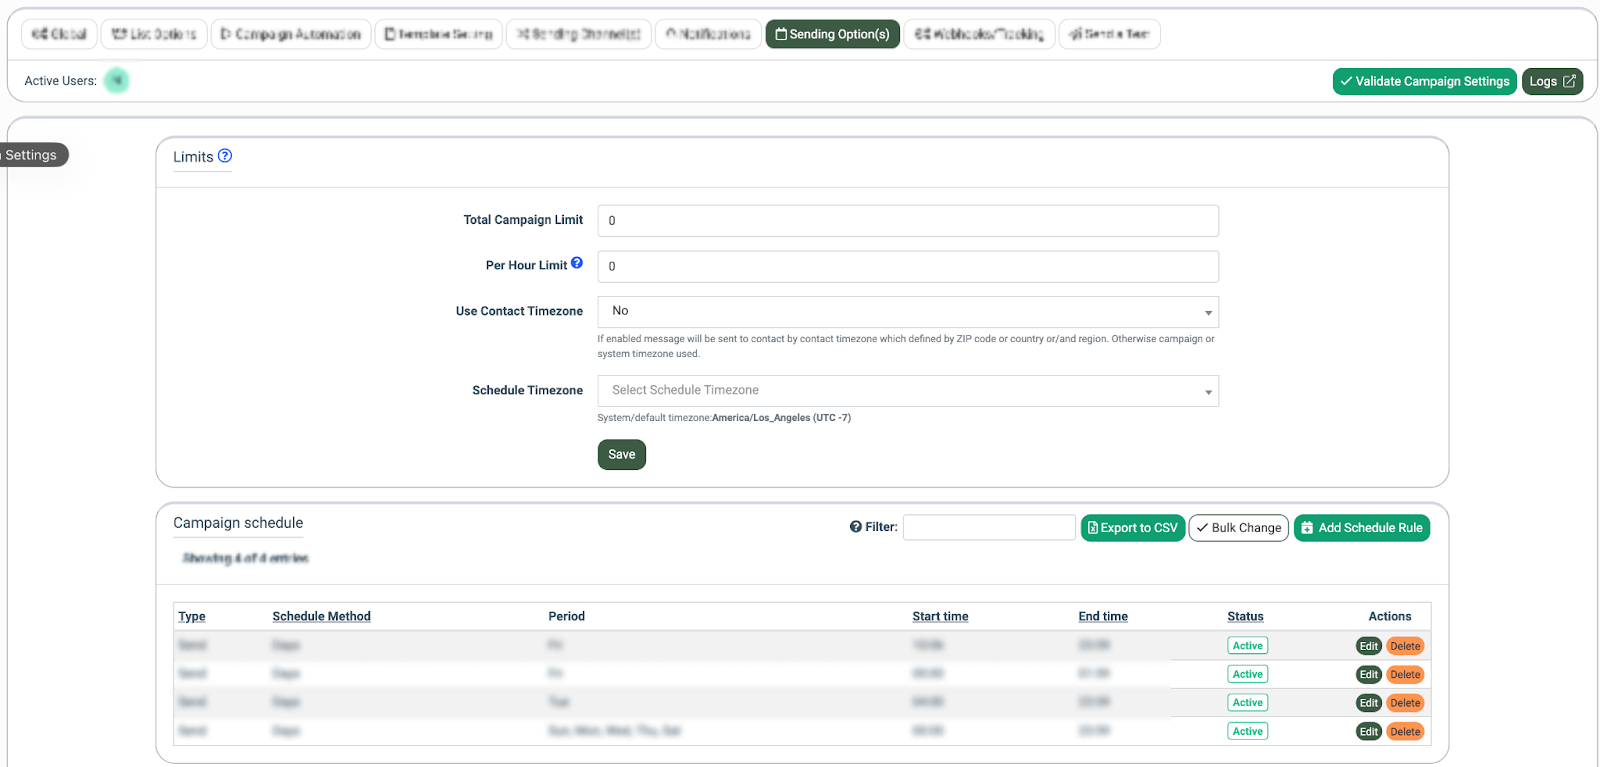
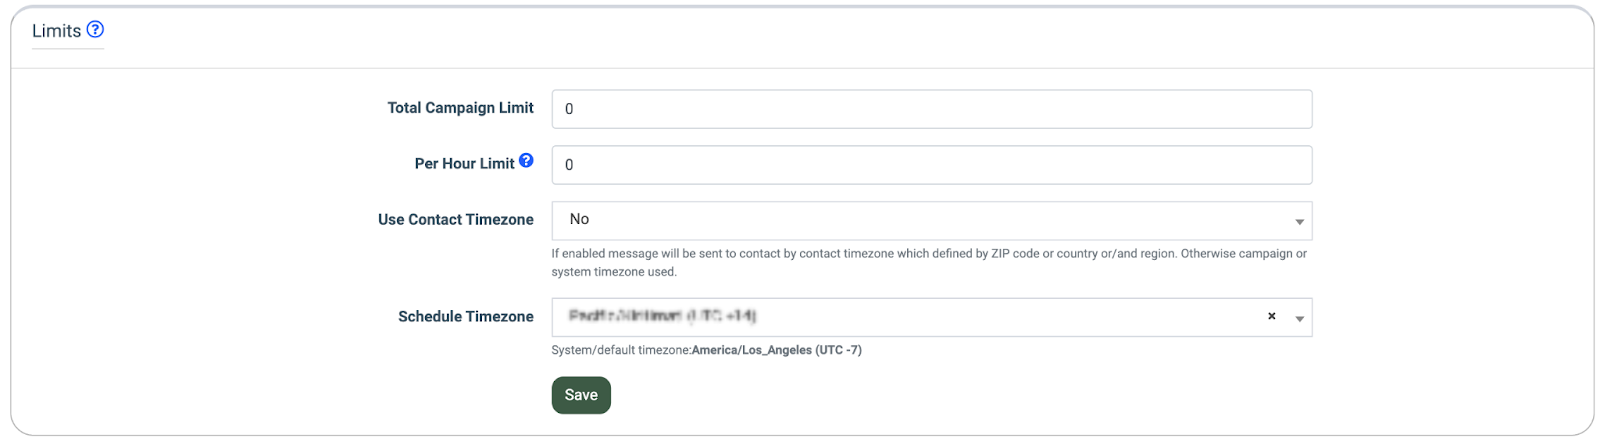
The “Limits” block allows you to send to a limited number of contacts by the Campaign total. Configure the following settings to set this feature up:
- Total Campaign Limit: Enter the total number of messages that can be sent during the whole campaign duration.
- Per Hour Limit: Enter the number of messages that can be sent per hour.
- Use Contact Timezone: Select the "Yes" option to send messages based on the recipient's time zone, which is determined by their ZIP code or country/region. If you select this option, messages will be sent according to the recipient's local time. Select the "No" option to send messages based on a predefined time zone specified in the field below.
- Schedule Timezone: Select the time zone according to which you prefer to send the messages.
The “Campaign Schedule” allows you to set a specific schedule for sending out the messages. The list of schedule rules contains the following settings:
- Type: The action type (Send / Do not send).
- Schedule Method: The schedule rule method.
- Period: The selected days of the week.
- Start Time: The exact start time of sending.
- End Time: The exact end time of sending.
- Status: The schedule rule status (Active / Disabled).
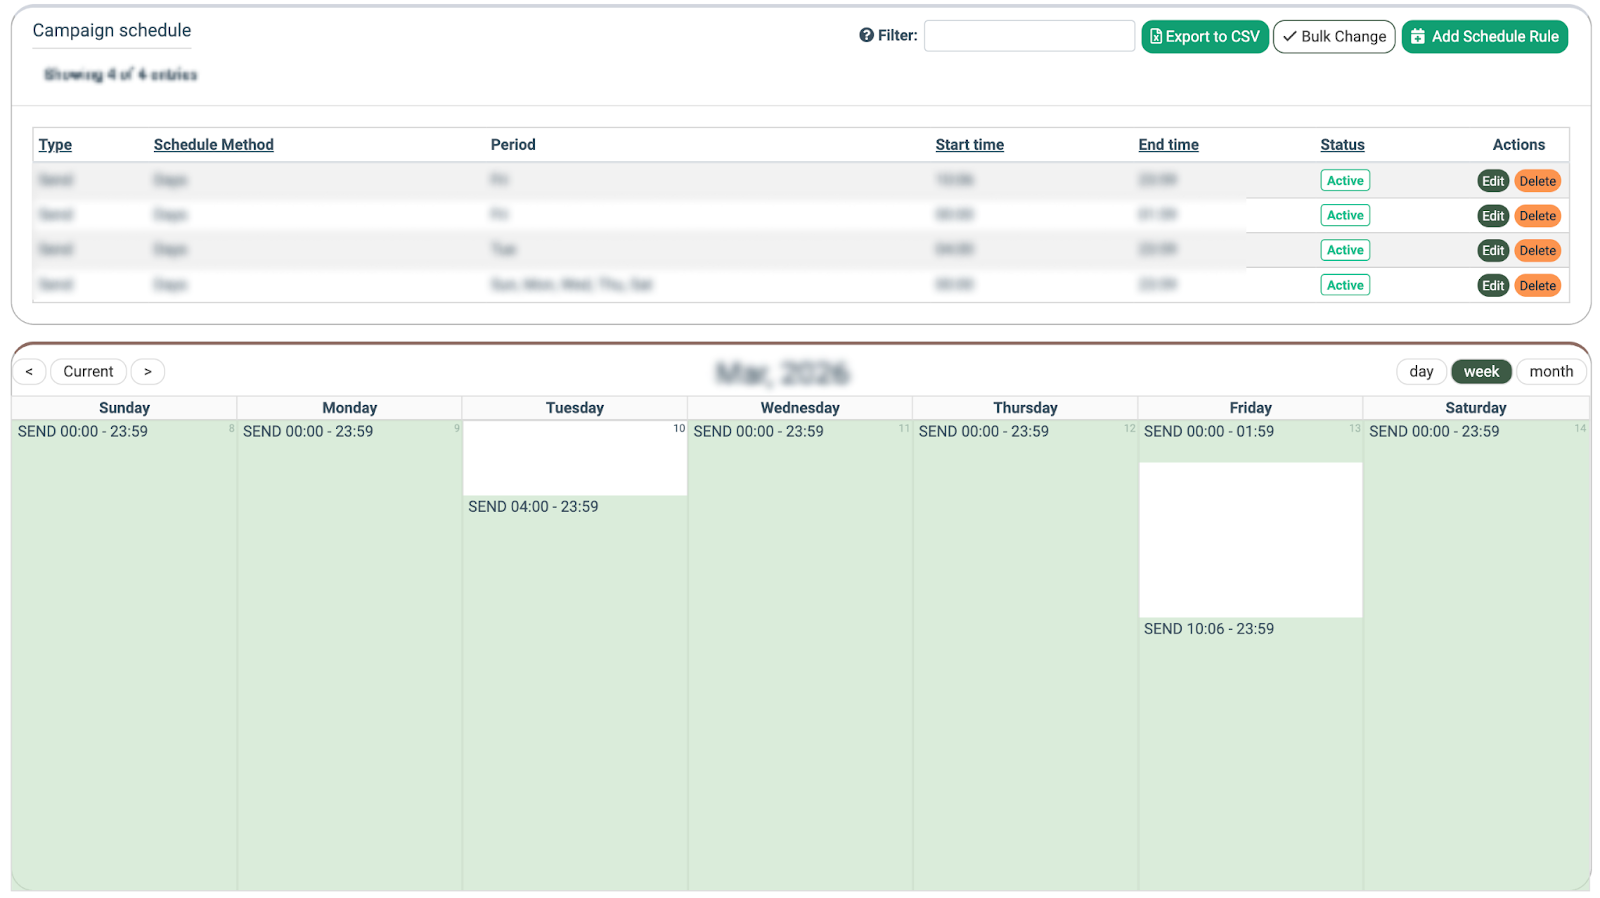
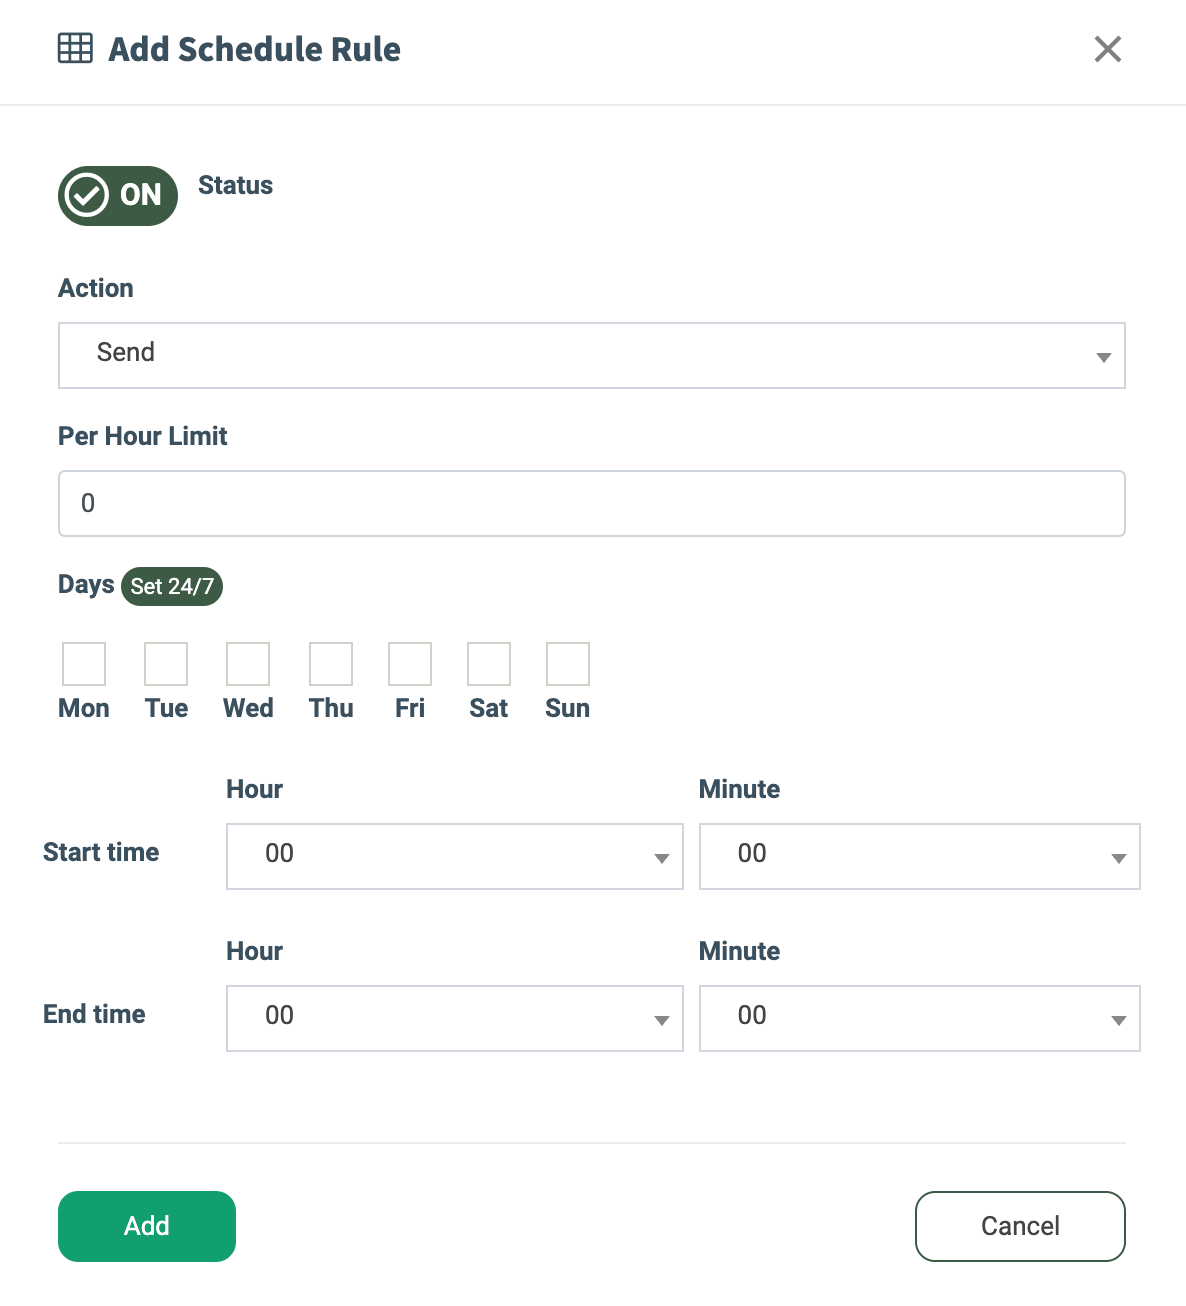
To add a new schedule rule, click the “Add Schedule Rule” button and fill in the following information in the pop-up window:
- Status: Switch the toggle to the “ON” position to enable the schedule rule.
- Action: Select the preferred action for the sсhedule rule (Send / Do not send).
- Per Hour Limit: Enter the number of messages that can be sent per hour.
- Days: Check the boxes for your preferred days of the week, or click the “Set 24/7” button to select all days.
- Start time: Select a specific hour to begin sending out messages.
- End time: Select a specific hour to finish sending out messages.
Click the “Add” button to confirm the schedule rule.
Webhooks/Tracking
The “Webhooks/Tracking” tab allows you to set up the event tracking feature depending on the status of the campaign. The “Tracking Rules” list contains the following information:
- ID: The unique identification number of the rule.
- Trigger: The name of the trigger that is set in the rule.
- Trigger Settings: The list of settings for the trigger.
- Action: The action to perform according to the rule.
- Action Settings: The list of settings for the action.
- Status: The status of the rule (Active/Disabled).
- Created At: The date and time when the rule was created.
- Author: The name of the user who created the rule.

To create a new tracking rule, click the “Add Rule” button and select the required options in the pop-up window:
- Trigger: Select the event that triggers the action.
- [E-Delivery] Sent: The message is sent.
- [E-Delivery] Sent Failed: The message could not be sent.
- [E-Delivery] Delivered: The message is delivered.
- [E-Delivery] Delivery Failed: The message was not delivered.
- [E-Delivery] Clicked: The recipient has interacted with the message.
- [E-Delivery] Unsubscribe: The recipient has unsubscribed.
- [E-Delivery] Subscribe: The recipient has subscribed.
- Action: Select the event tracking type.
After selecting your preferred event, click the “Next” button to continue with the setup. Follow the instructions provided in the corresponding article to configure the selected action. Read more about how to configure each event tracking type in this Knowledge Base article.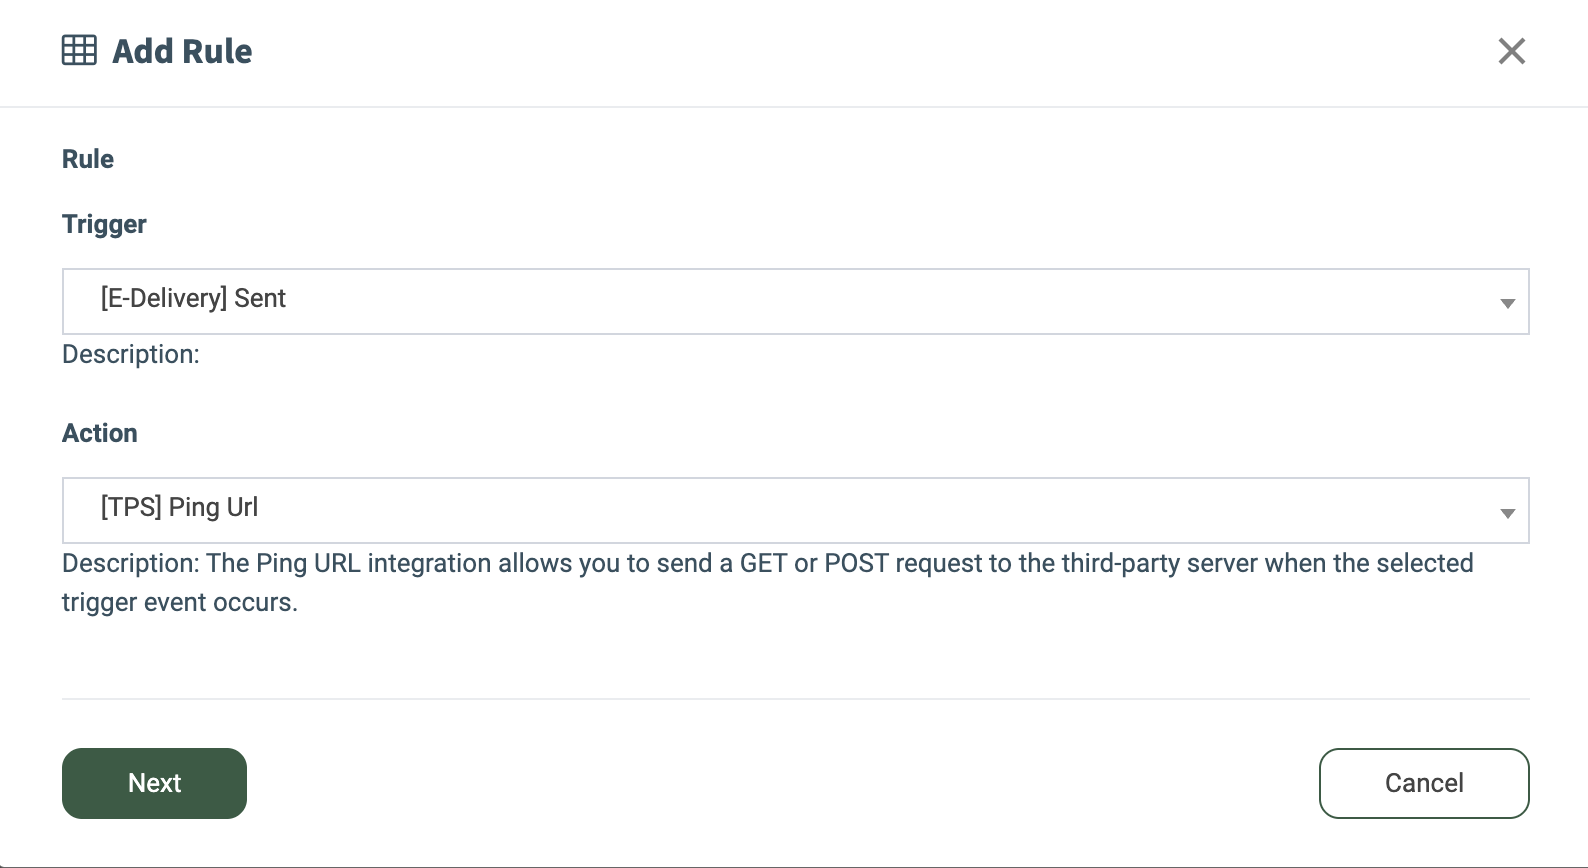
To test the existing tracking rule configuration, click the “Test Run” button in the “Actions” column. Fill in the test data in the provided fields (not mandatory) that match the tracking rule configuration placeholders. Click the “Confirm” button to complete the test run. 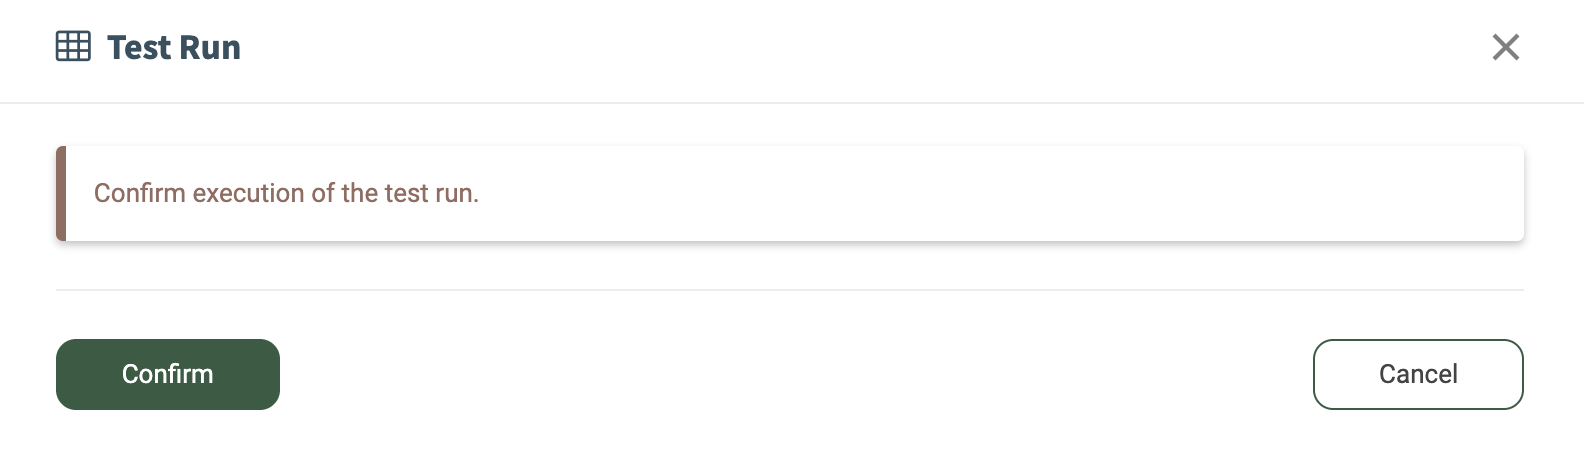
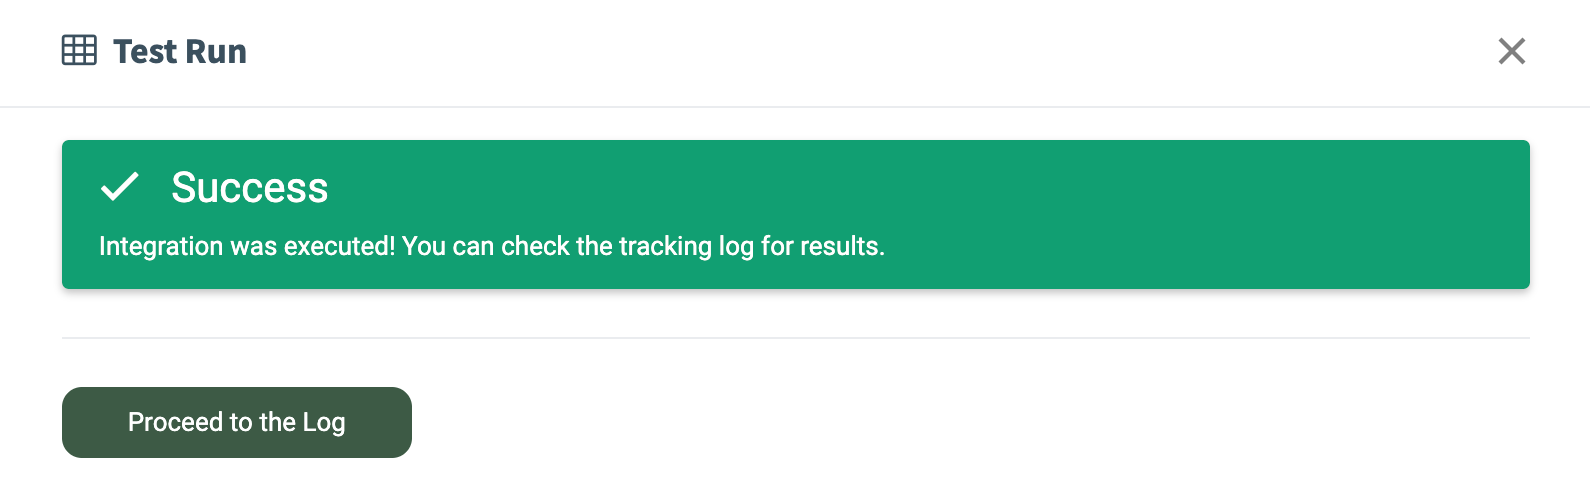
Once the test run is executed, click the “Proceed to the Log” button to check the test results.
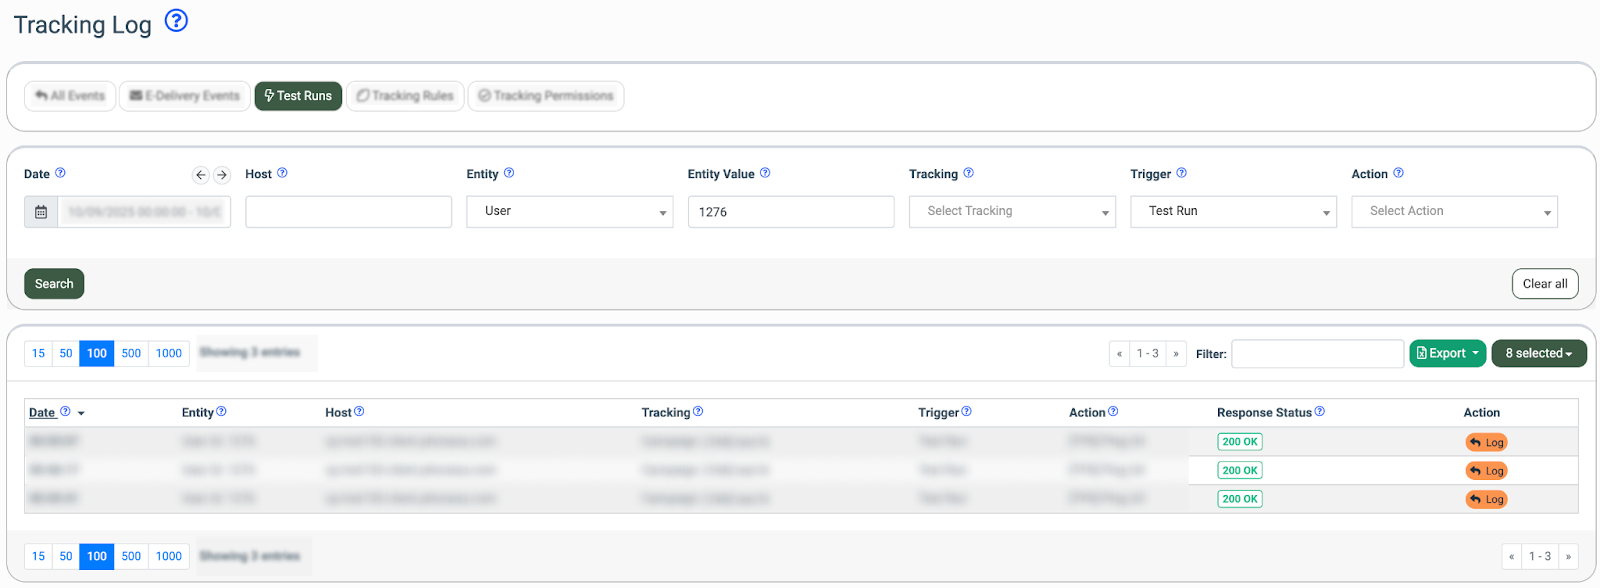
You may also navigate to the “Test Runs” tab of the “Tracking Log” report manually via the System Management > Logs > Tracking Log section.
Logs
The “Logs” report allows you to view the SMS campaign status changes and updates. To access, click the “Logs” button within the Campaign Setup page.
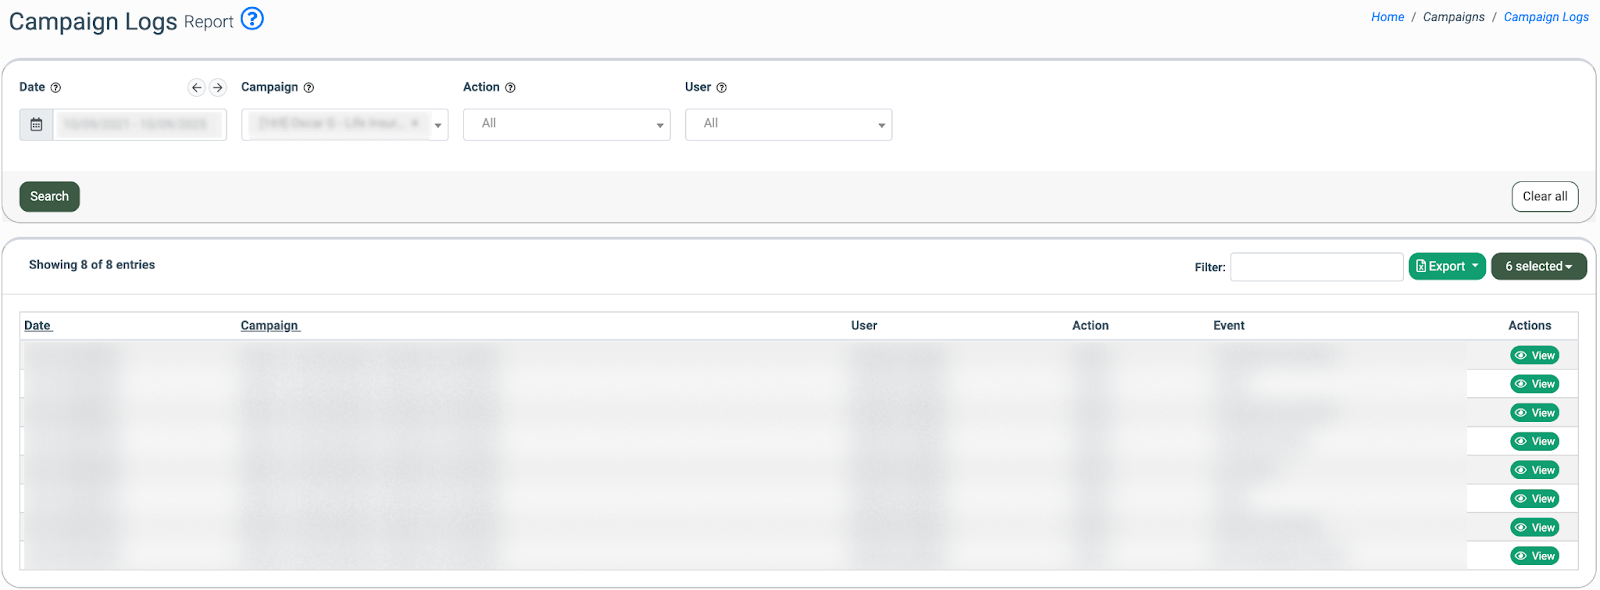
Note: Read more about the Campaign Logs in this Knowledge Base article.