To access this tab, go to the Account Settings > My Profile section, then select the Account Settings tab. Alternatively, you can access it through the My Profile Modal Window in the upper-right corner of the page. The Account Settings tab contains three blocks:
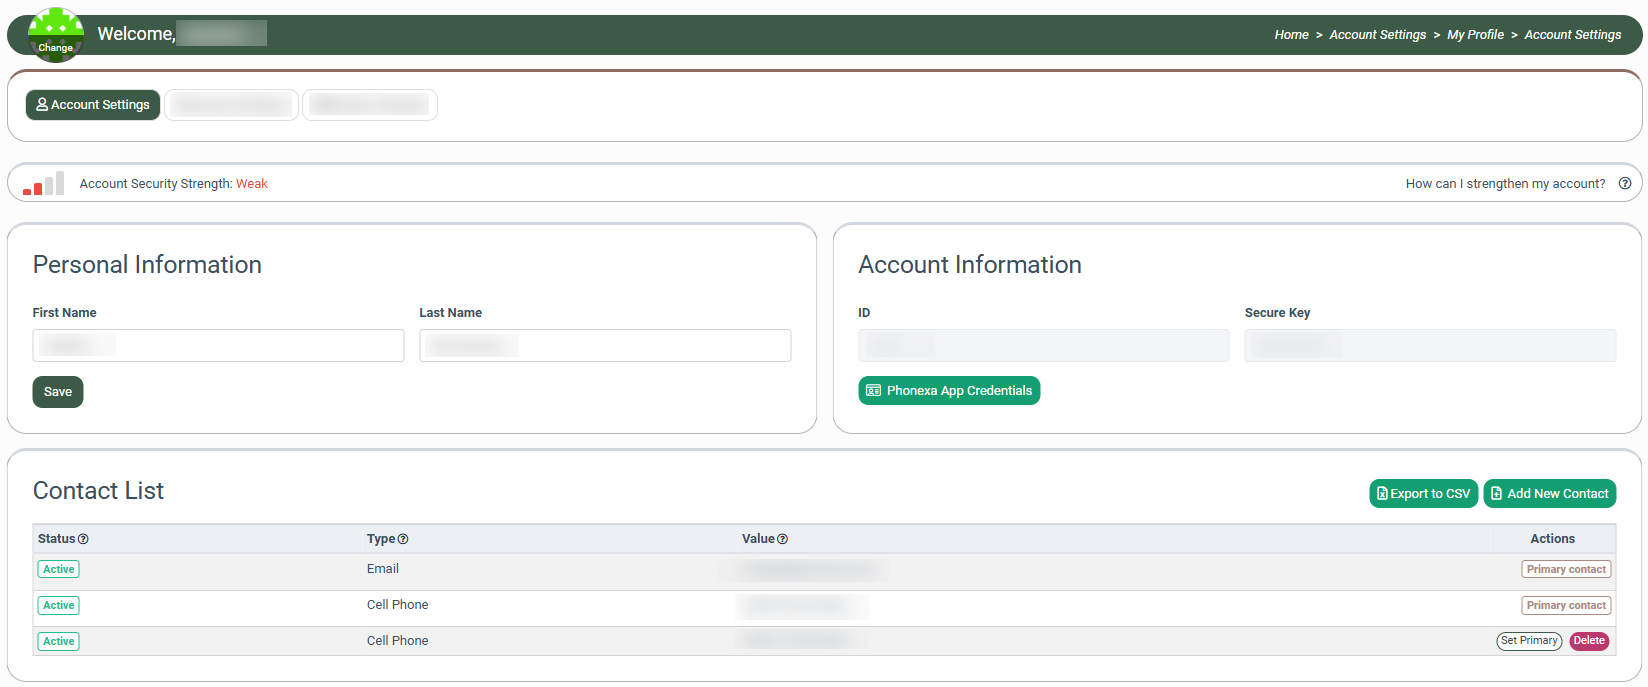
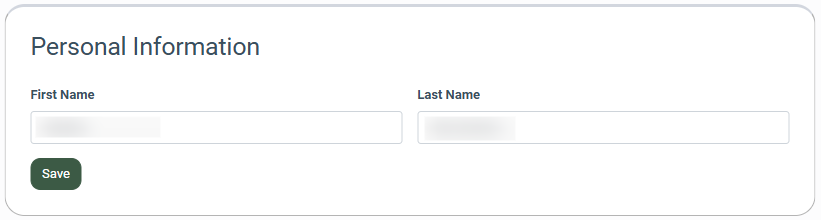
The “Personal Information” block contains the information about your first and last name. You can update your personal details here by entering your new name into the respective fields and clicking the “Save” button to ensure your profile information is accurate.
The “Account Information” block includes key details related to your account, such as:
- ID: The unique identification number of your user. This field cannot be changed.
- Secure Key: The unique secure key of the user used to verify user identity and ensure secure access to specific services. This field cannot be changed.
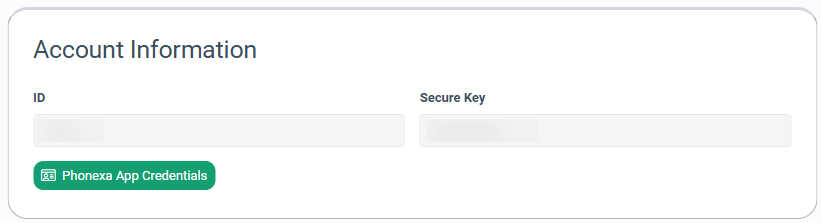
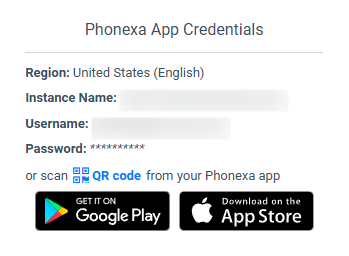
- Phonexa App Credentials: Your Phonexa’s account credentials, used to authenticate and authorize your access to your Phonexa account through the Phonexa’s mobile application. To view the credentials as well as access Phonexa’s mobile application download links, click the “Phonexa App Credentials” button.
Read more about the Phonexa mobile application in this Knowledge Base article.
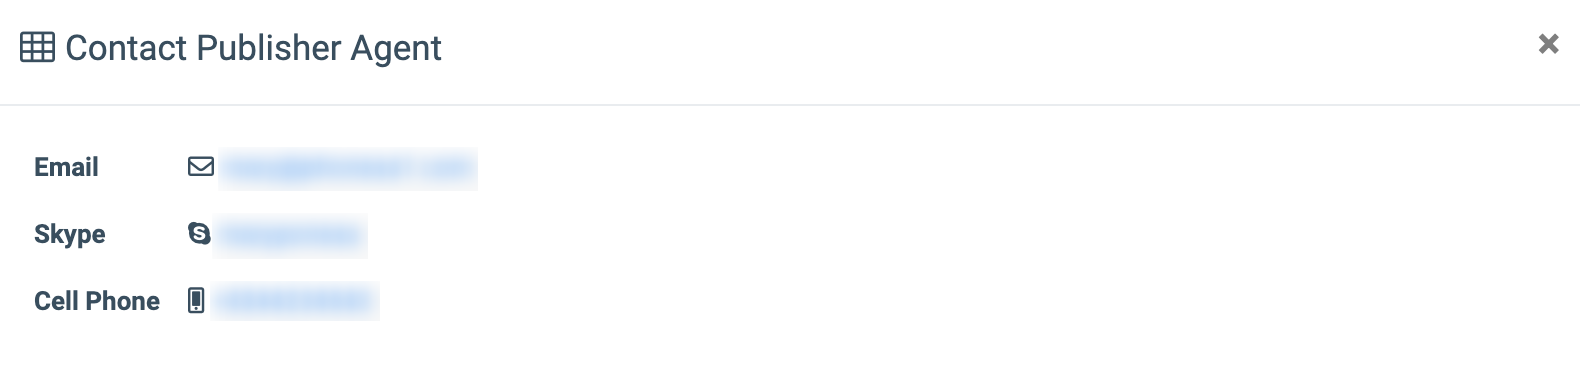
If you log in as a Publisher, you can contact your Publisher Agent from the interface by clicking the “Contact Publisher Agent” button.

In the pop-up window, choose your preferred contact channel and click on the agent’s information to start the connection.
When you log in as a Buyer Representative user, you'll have access to the same option. To contact your Buyer Agent, click the "Contact Buyer Agent" button. This will open the same pop-up window where you can select your preferred method of communication to initiate the connection.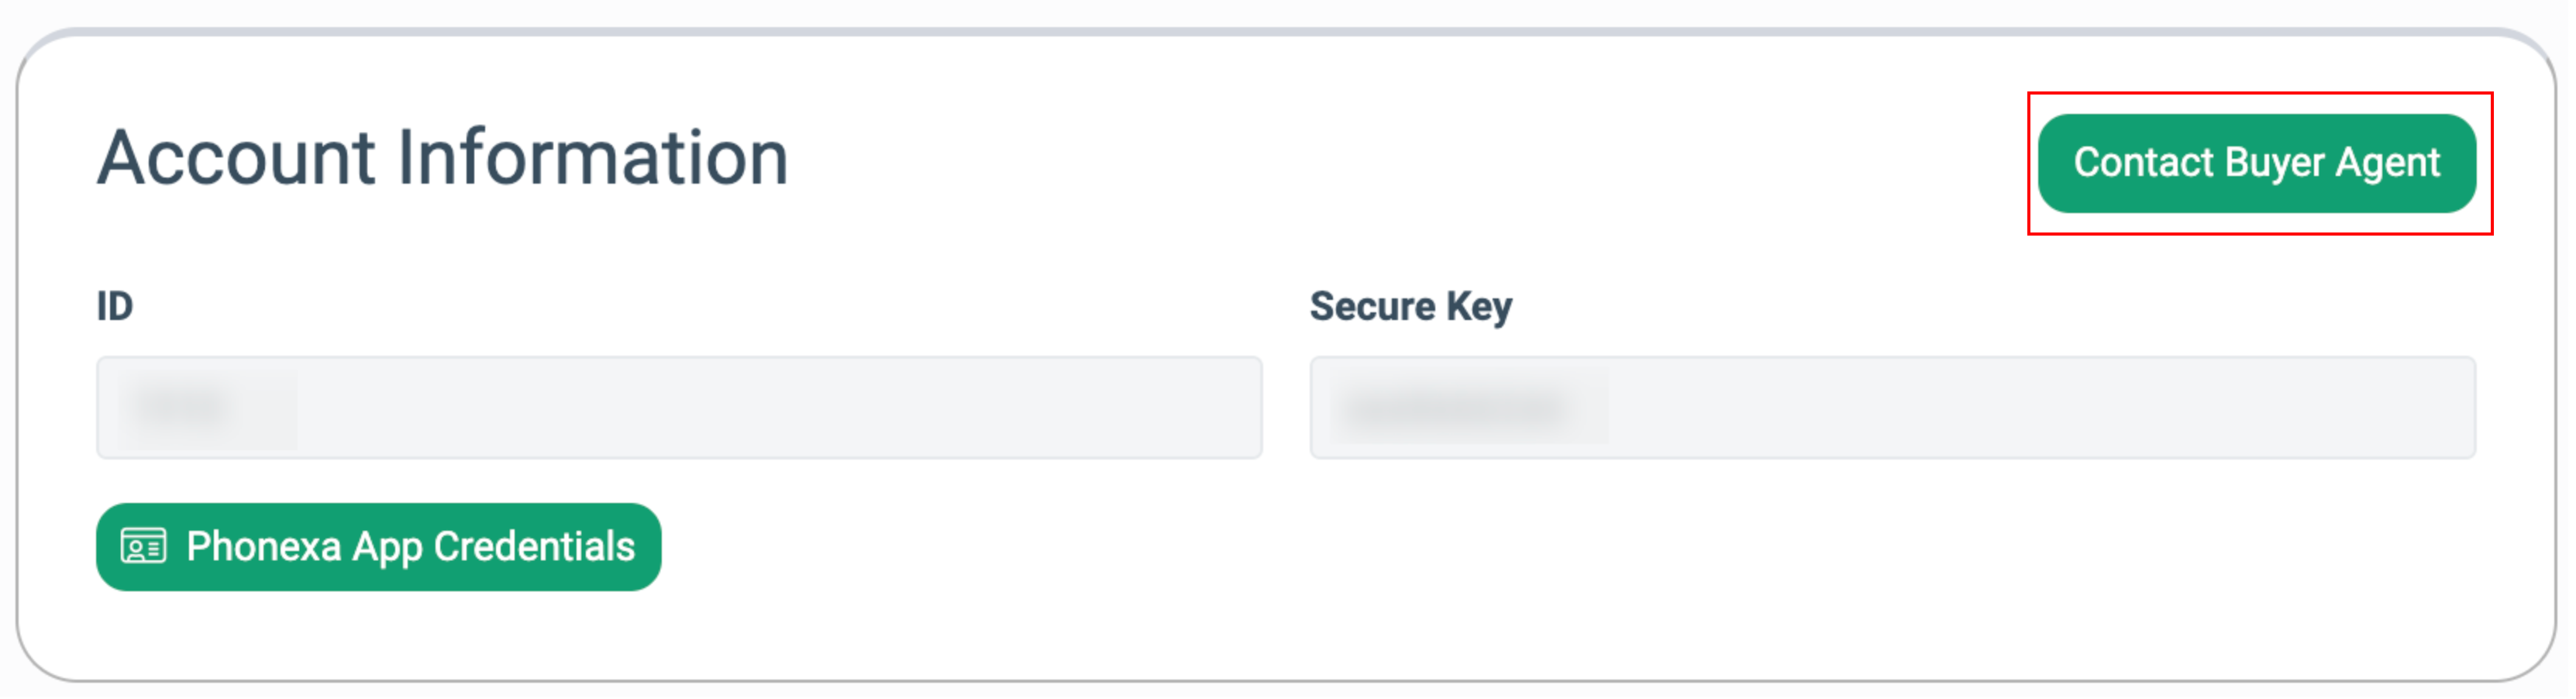
The “Contact List” block allows you to view, add, edit, and remove your contact information, including your email addresses, phone numbers, and more, as well as assign your primary contacts.

The contact list contains the following information:
- Status: The status of the contact.
- Type: The type of contact.
- Value: The contact information.
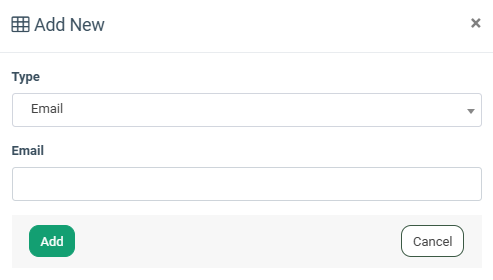
To add a new contact, click the “Add New Contact” button. In a pop-up window, select the type of contact (Email / Cell Phone / Landline / Physical Address / Microsoft Teams / Website), and fill in the corresponding fields below. Click the “Add” button to confirm.
Note: The system creates Cell Phone and Email types of contacts with the “Disabled” status. You should verify the corresponding contact to convert its status to “Enabled”.
To verify the contact with a Cell Phone type, click the “Verify” button next to the corresponding contact in the “Actions” column.
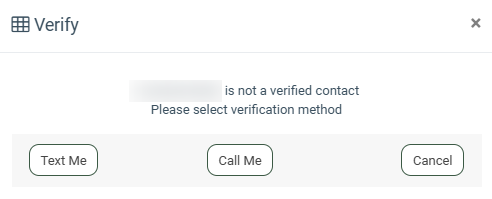
In a pop-up window, select the verification method:
- Click the “Text Me” button to receive the verification code via a text message. The system will display the next pop-up window, and you will receive a message on the phone with your verification code. Put the code in the “Enter verification code” field, and click the “Verify” button to finish.
.png?width=593&height=357&name=unnamed%20(19).png)
- Click the “Call Me” button to receive the verification code in a phone call. The system will display the next pop-up window, and you will receive a phone call with an auto-message saying your verification code. Put the code in the “Enter verification code” field, and click the “Verify” button to finish.
Note: Press 1 to repeat the verification code (available up to 3 times). The verification code is valid for 5 minutes..png?width=592&height=356&name=unnamed%20(20).png)
To verify the contact with an Email type, click the “Verify” button next to the corresponding contact in the “Actions” column. Put the verification code from your email box in the “Enter Verification Code” field, and click the “Verify” button to finish.
.png?width=666&height=402&name=unnamed%20(21).png)
To set a contact as primary, click the “Set Primary” button in the “Actions” column.
In the pop-up window, click the “Set Primary” button to proceed.
.png?width=668&height=240&name=unnamed%20(22).png)
To delete the contact, click the “Delete” button next to the corresponding record in the “Actions” column. In the pop-up window, click the “Delete” button to confirm the action.
.png?width=592&height=262&name=unnamed%20(23).png) Note: To delete the primary contact, you must first assign another of the same type as the primary contact.
Note: To delete the primary contact, you must first assign another of the same type as the primary contact.