The Offer is the Advertiser's proposal of advertisement placement on any web source to the Affiliates. The Offer allows Advertisers to increase the conversion rate.
To access these settings, go to the Offers > Manage Offers section, select the Offer from the list, and click the “Configure” button in the “Actions” column. Select the required tab on the Offer Setup page to configure the corresponding settings:
- Global
- Revenue
- Payout
- Goals
- Tracking
- Targeting
- Caps
- History
- Cover Images
- Creative
- Postbacks
- Event Tracking
- Test Links
Global
The Global tab allows you to manage and configure the general settings of the Offer.
-2.png?hsLang=en)
The Global tab contains the following information:
- Status: Select the Offer status (Active, Paused, Disabled).
- Advertiser: The name of the Advertiser to which the Offer is assigned. Note: This field can not be configured, as the Advertiser can be chosen only during the Offer creation process.
- Name: Enter the name of the Offer.
- Offer type: Select the type of the Offer.
- Default: The default type of the Offer.
- LMS+Call Logic: The type of the Offer that is created to avoid double payments to Books360 in case the traffic is generated and paid in the LMS component and transferred to the LYNX component.
- Vertical type: Select the industry the offer relates to.
- Category: Select the category of the offer that is used to filter offers in the Manage Offers section.
- Expiration Date: Select the expiration date. To activate the field, switch the provided below “Make Infinite” toggle to the ‘Off” position.
- Make Infinite: Switch the toggle to the “On” position so the offer has no expiration date.
- Timezone: Select the timezone.
- Preview URL: Enter the link that gives a preview of the offer link. This is the url the affiliate users will see instead of the actual Offer URL if they have access to the system.
- Offer URL: Enter the offer link for the Advertiser website.
- Add Parameters to Offer URL: Include essential tracking parameters to the offer link for the Advertiser website.
- Parameter Name: Enter the parameter name. Note: Click on “Show All Parameters” to view all the available parameters for selection. The names of the parameters should be used correctly for mapping purposes.

-
- Macros: Select the Macros from the drop-down list.
Click the “Add to Offer URL” button to complete the action.
- Cookie Time Limit: Select the session cookie expiration option (Default (browser settings) / 1 day / 7 day / 28 days / Custom).
- Cookie Expiration Date: Select the cookie expiration date. Note: This field displays only for the selected “Custom” option in the “Cookie Time Limit” field.
- Enabled Goals: Switch the toggle to the “On” position to activate offer goal tracking. Note: Once the offer goal tracking has been activated, the “Payout” and “Revenue” tabs will be displayed on the Goal Setup page.
- Private: Switch the toggle to the “On” position to make it a private offer, and enter the affiliate name/names in the “Affiliate” field for the offer to be available to this affiliate/affiliates only.
- Enabled Deep Links: Switch the toggle to the “On” position to enable affiliate users to specify a link for redirection after the click. A deep link directs users straight to a specific page, allowing them to skip the homepage and access the exact content they want. This offers a more efficient and user-friendly browsing experience.
- Description: Enter the Offer description.
Click the “Save” button to proceed with changes.
Revenue
The Revenue tab allows you to manage the revenue settings of the Offer.

The Revenue tab contains the following information:
- Type: Select the revenue type:
- Revenue per Conversion (RPA): The amount admin gets for a successful conversion from an Advertiser, also known as Cost per Action.
- Revenue per Sale (RPS): The percentage you earn from total sales from the conversions.
- Revenue per Conversion plus % per Sale (RPAS): Both RPA and RPS combined.
- Revenue per Click (RPC): The amount you earn for a unique click from an Advertiser. Note: This option is available only when the offer goal tracking is disabled.
- Revenue per Thousand Impressions (RPI): The amount you earn for every 1,000 impressions from an Advertiser. Note: This option is available only when the offer goal tracking is disabled.
- Method: Select the payout method (Default, Tiered by Groups, Revenue Groups).
- The Default method means that each type of payment corresponds to a certain amount paid by all Advertisers.
- The Tiered by Groups method allows to collect different revenue from Advertisers depending on the group the affiliates are assigned to.
- The Revenue Groups method implies that some Affiliates are divided into groups following specific rules and each group is assigned its own amount of revenue paid by Advertisers, and those who are not in the group are assigned payments according to the Default method. Note: To create a new rule, go to the Affiliates > Rules section and click the “+ New” button.
- Revenue from an Advertiser: Enter the amount paid by advertisers per conversion. (Applicable to RPA, RPAS)
- Percent revenue of Sale: Enter the percentage of a sale per conversion paid by advertisers (Applicable to RPS, RPAS).
- Revenue per Click: Enter the amount paid by advertisers per click (Applicable to RPC only).
- Revenue per thousand impressions: Enter the amount paid by advertisers per thousand impressions (Applicable to RPI only).
Payout
The Payout tab allows you to manage the payout settings of the Offer.
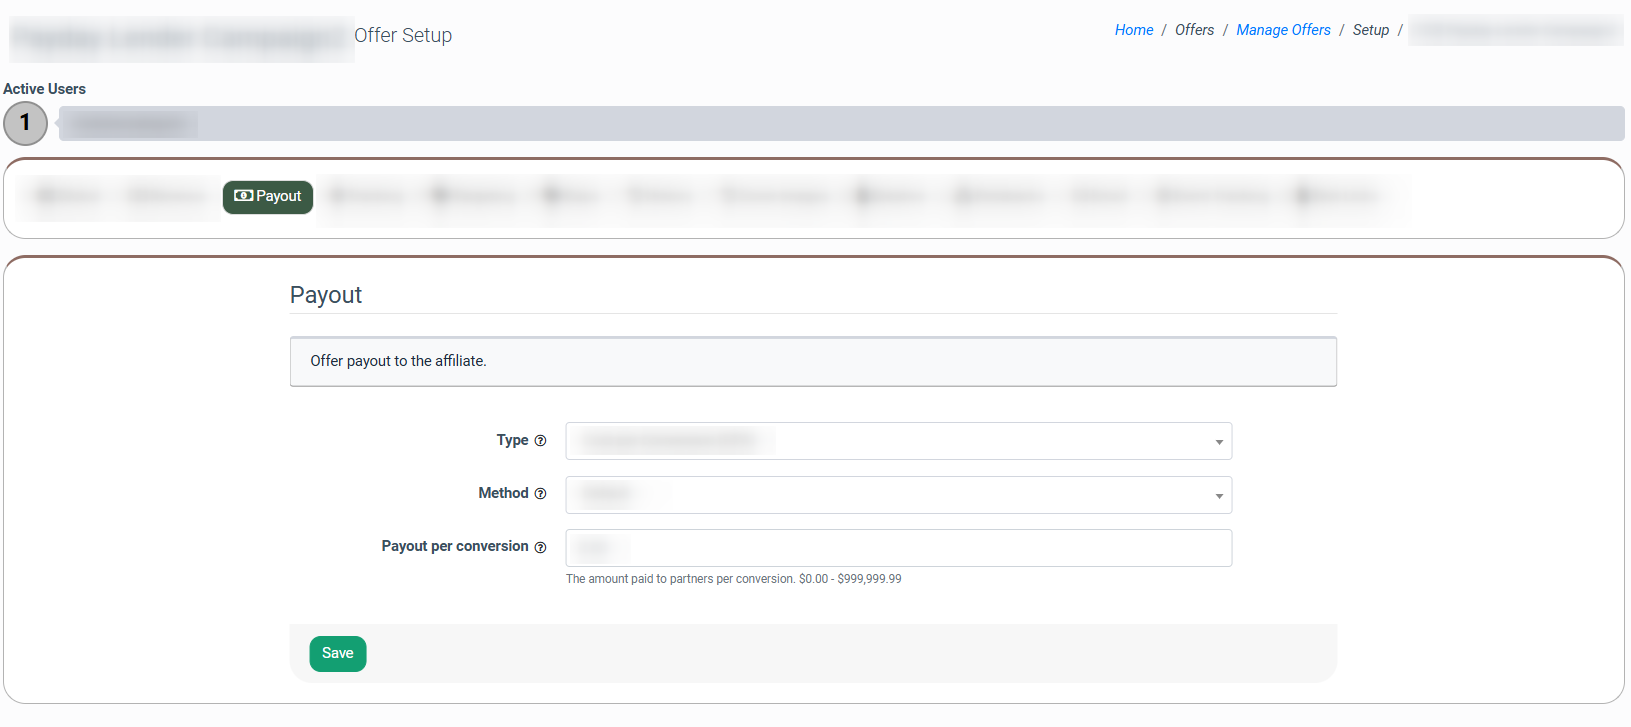
Fill in the following information to configure:
- Type: Select the payout type:
- Cost per Conversion (CPA): The amount of income an affiliate earns for a successful conversion (or similar action) also known as Cost per Action.
- Percentage of Sale (PSV): The percentage amount an affiliate earns of total sales from conversions. This is a set percentage of the total sales of a conversion. When this type is set, the offer will dynamically calculate the revenue and payout of the conversion.
- Cost per Conversion plus % per Sale (CPAS): Both CPA and PSV combined.
- Percentage of Revenue (PRV): The percentage of the revenue received by the owner of the system.
- Cost per Conversion plus % per Revenue (CPAR): Both CPA and PRV combined.
- Cost per Click (CPC): The amount of income an affiliate earns for a unique click from an Advertiser. Note: This option is set by default as the Revenue per Click (RPC) option is selected in the Revenue tab.
- Method: Select the payout method (Default, Tiered by Groups, Payout Groups):
-
- The Default method means that each type of payment corresponds to a certain amount paid to all Affiliates.
- The Tiered by Groups method implies that Affiliates have been divided into groups, and each group is assigned its own amount of payments.
To create a new group, go to the Affiliates > Groups section and click the “+ New” button. - The Payout Groups method implies that some Affiliates are divided into groups following specific rules and each group is assigned its own amount of payments, and those who are not in the group are assigned payments according to the Default method.
To create a new rule, go to the Affiliates > Rules section and click the “+ New” button.
- Payout per conversion: Enter the amount paid to affiliates per conversion (Applicable for CPA, CPAS, CPAS).
- Percent payout per sale: Enter the percentage of sales per conversion paid to affiliates (Applicable for PSV, CPAS).
- Percent payout per revenue: Enter the percentage of revenue per conversion paid to affiliates (Applicable for PSV, CPAR).
Click the “Save” button to proceed with the changes.
Goals
- How to Create an Offer Goal
- How to Change the Priority for the Offer Goal
- How to Confirm a Conversion with HTML/URL
- How to Configure the Offer Goal
- How to Delete the Offer Goal
- Mobile Tracking for Mobile Offer Type
- How to Set Up the Direct Linking Feature
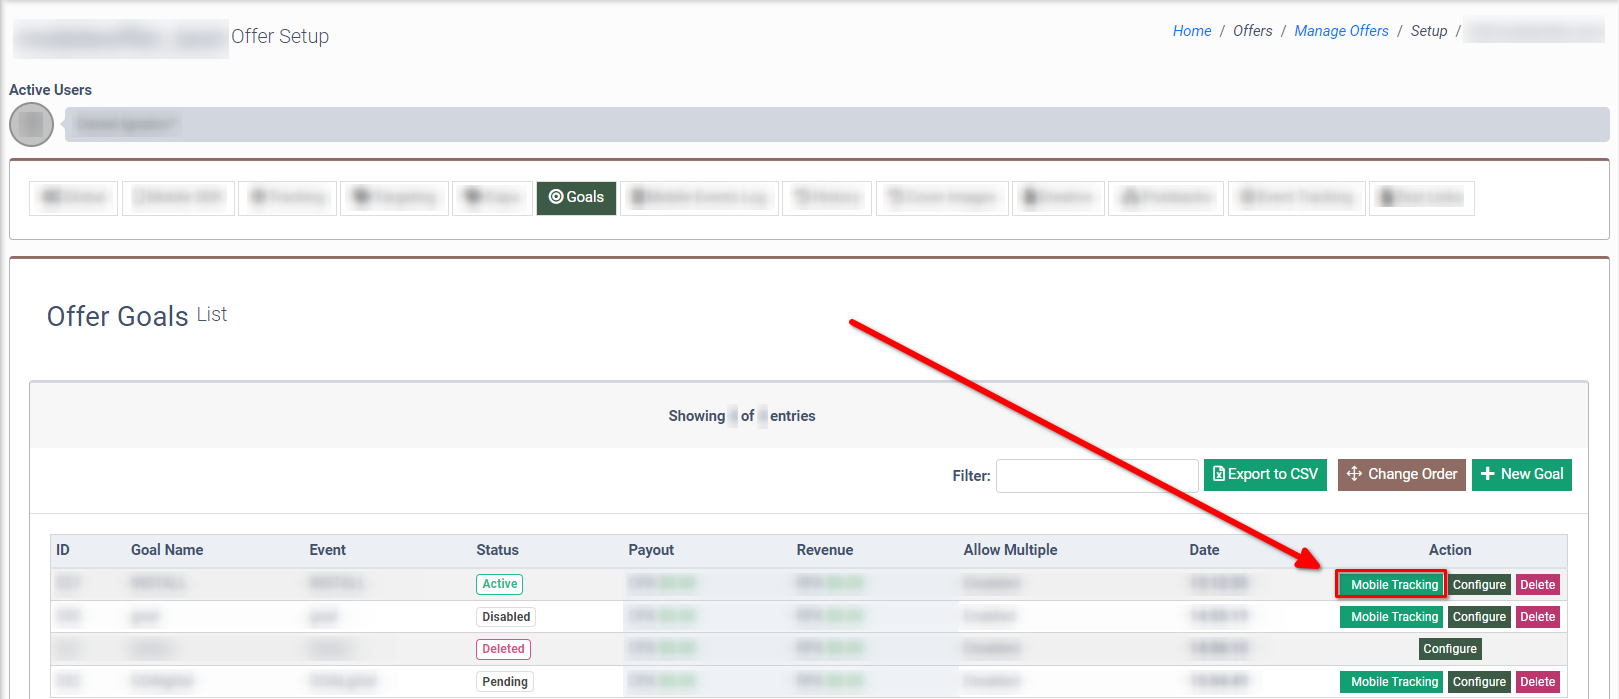
The Goals tab allows you to view the Offer Goals list and to create, delete, and manage Offer Goals. It`s visible when the “Enable Goals” toggle is set to the “On” position in the “Global tab” on the Offer Setup page.
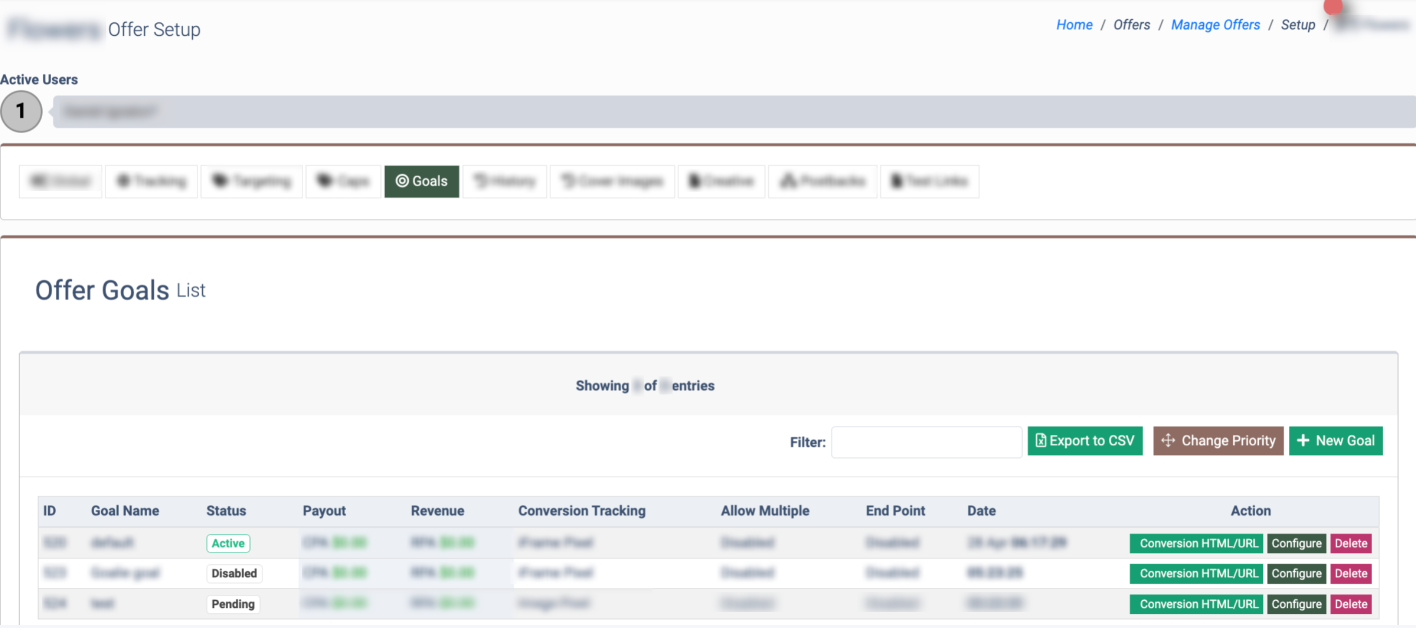
The Offer Goals list contains the following information:
- ID: The unique identification number of the Offer Goal.
- Goal Name: The name of the Offer Goal.
- Status: The status of the Offer Goal (Active, Disabled, Pending, Deleted).
- Payout: The Affiliate payout amount.
- Revenue: The revenue amount from the Advertiser.
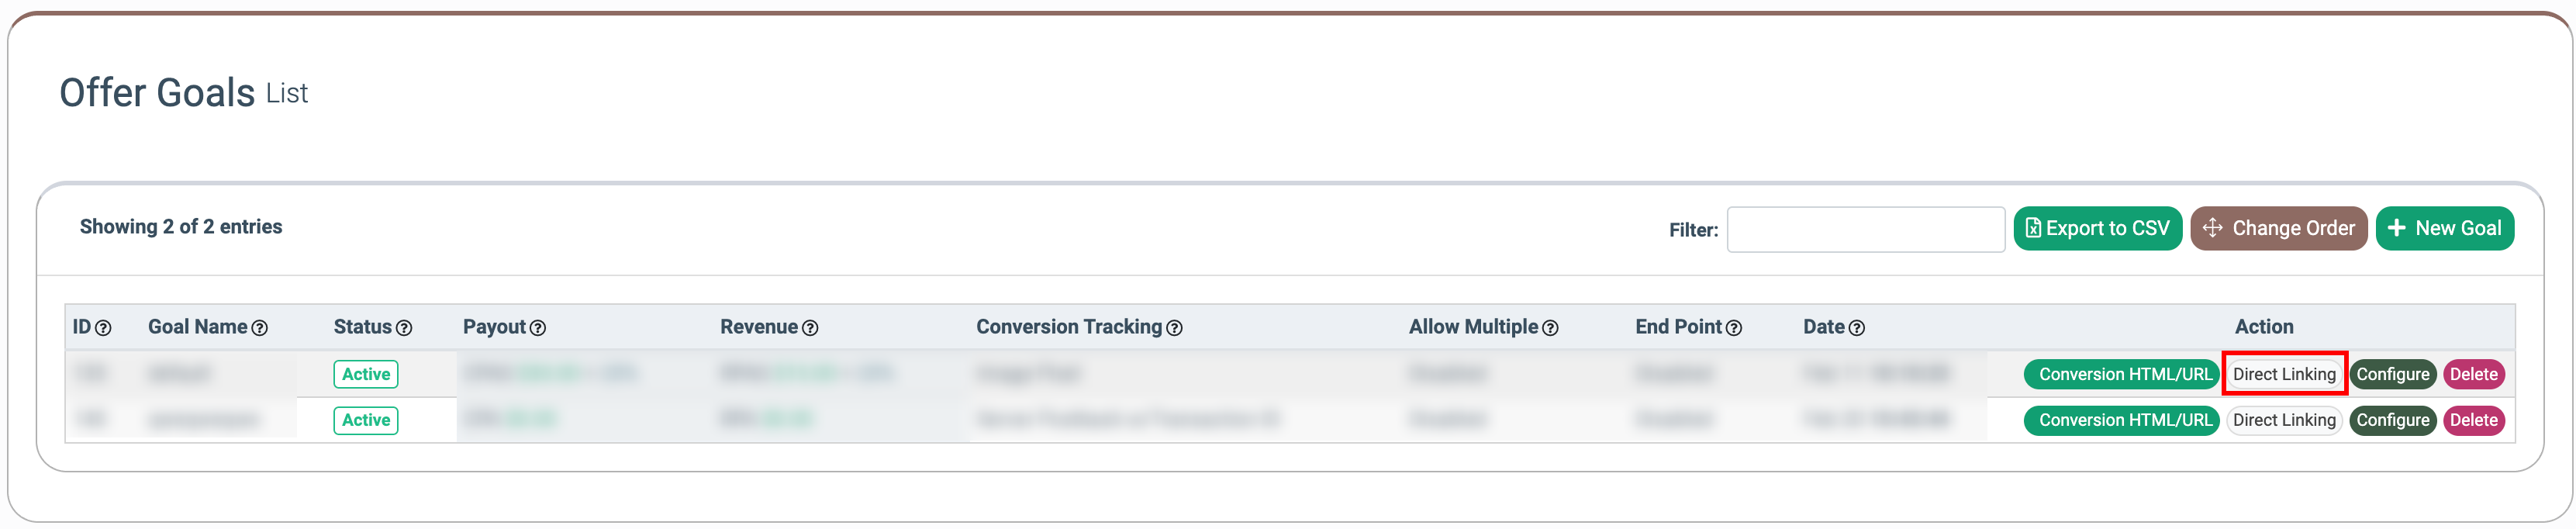
- Conversion Tracking: The name of a service for conversion tracking (iFrame Pixel, Image Pixel, Server Postback w\Transaction ID).
- Allow Multiple: The column shows if the recording of multiple conversions per user for only one active session is enabled or disabled (Enabled, Disabled). Note: An active session is created each time a user clicks on a tracking link.
- End Point: The column shows if the setting that closes an active session when the goal is converted is enabled or disabled (Enabled, Disabled). Note: This prevents the user from further converting on the offer unless another active session is started.
- Date: The date and time when the Offer Goal was created.is started.
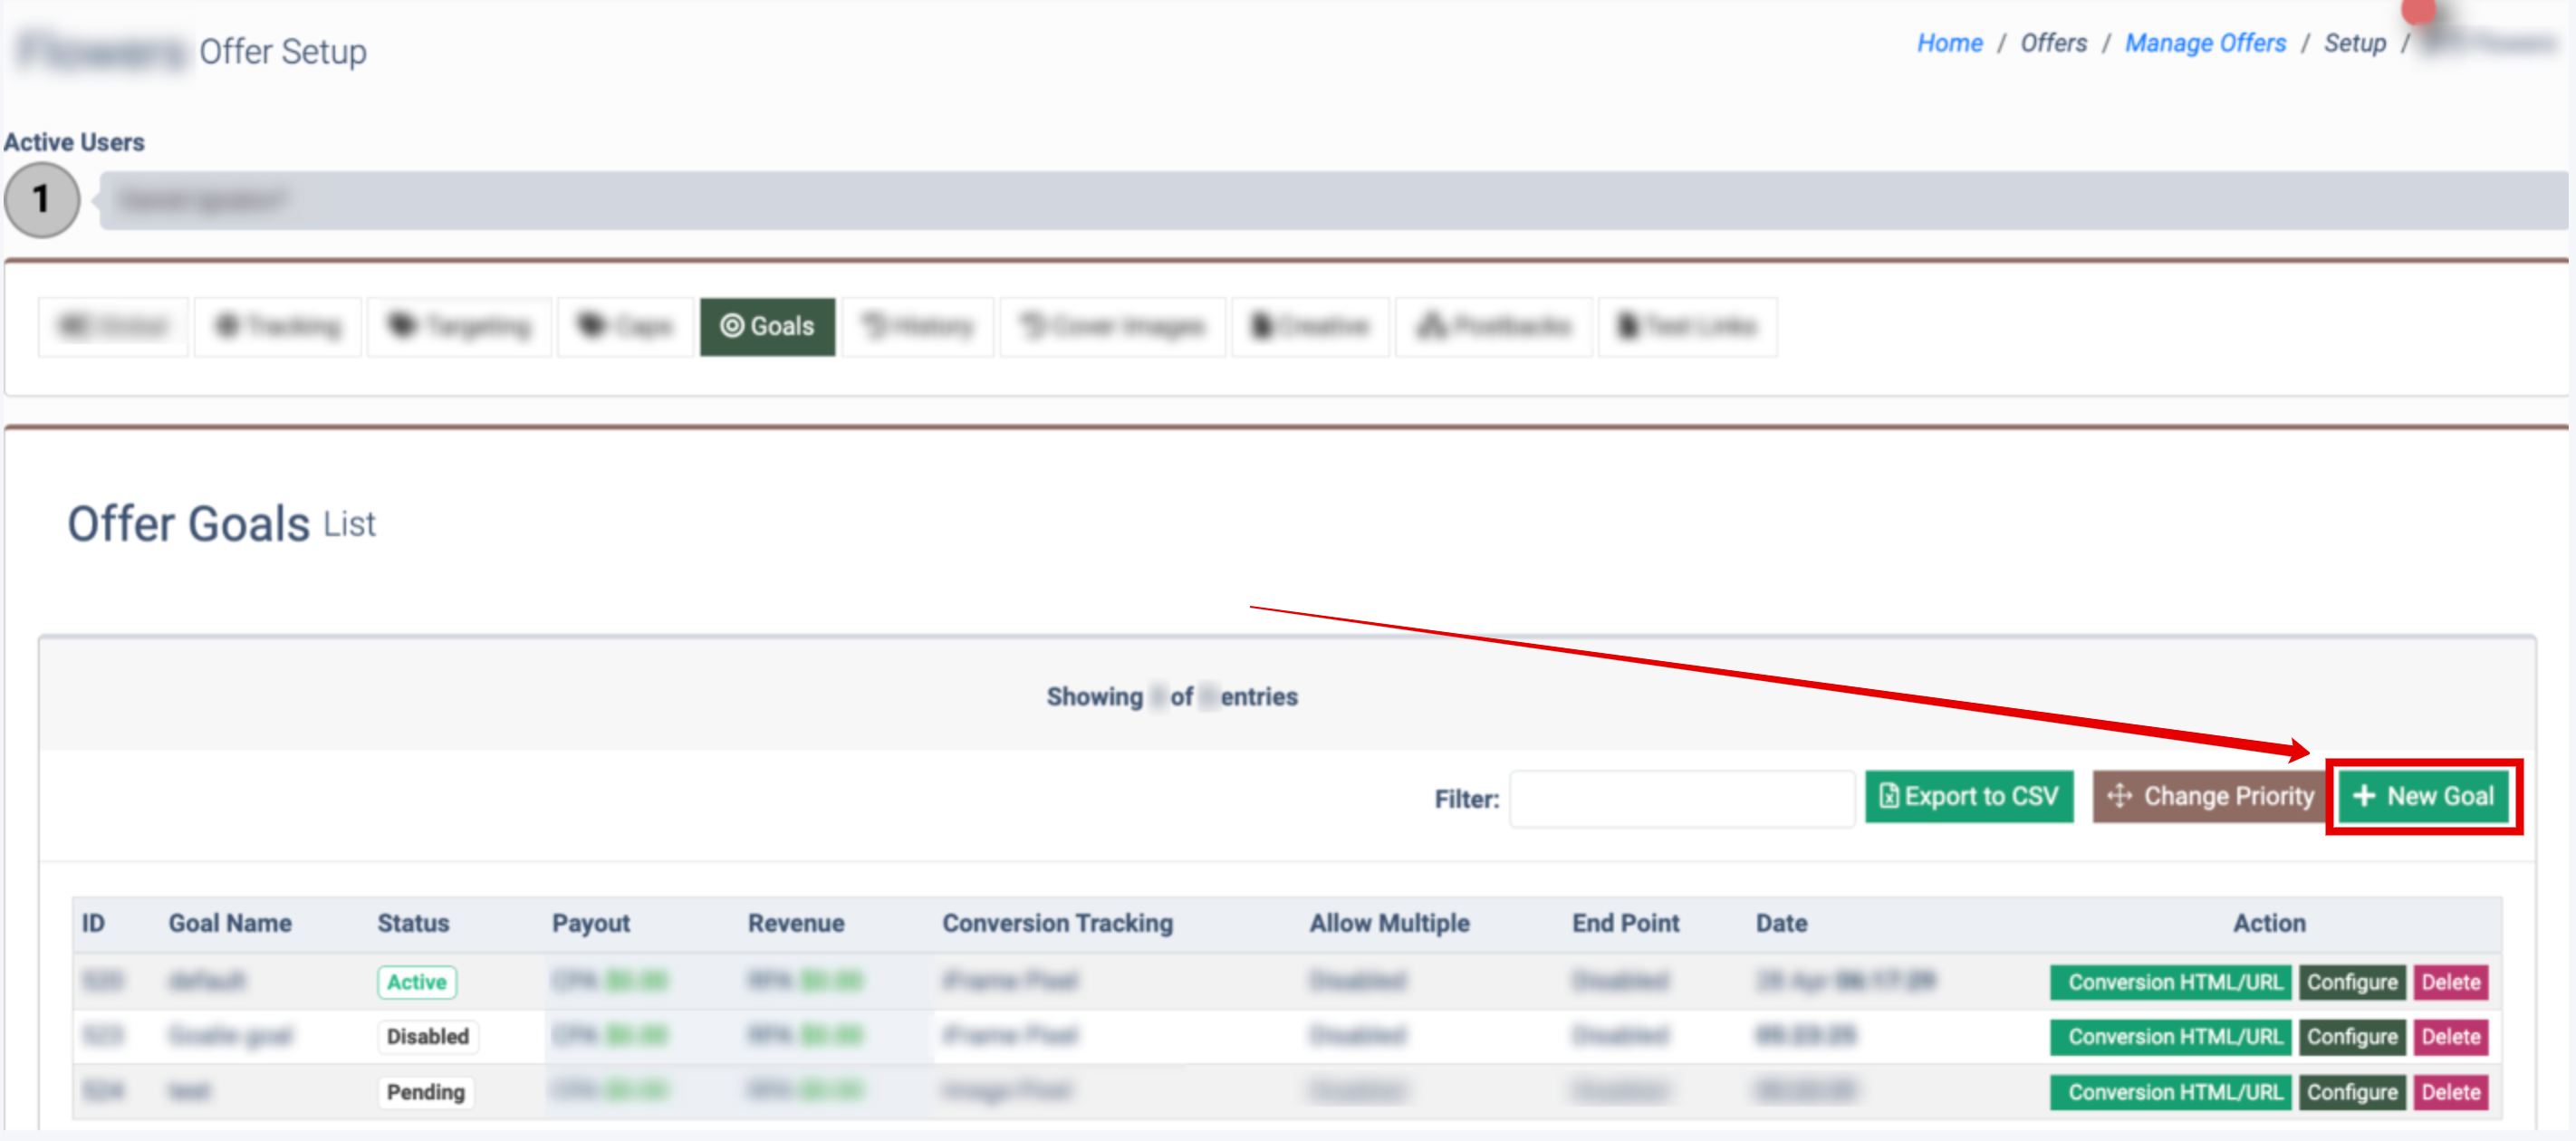
How to Create an Offer Goal
To create a new Offer Goal, click the “+ New Goal” button.
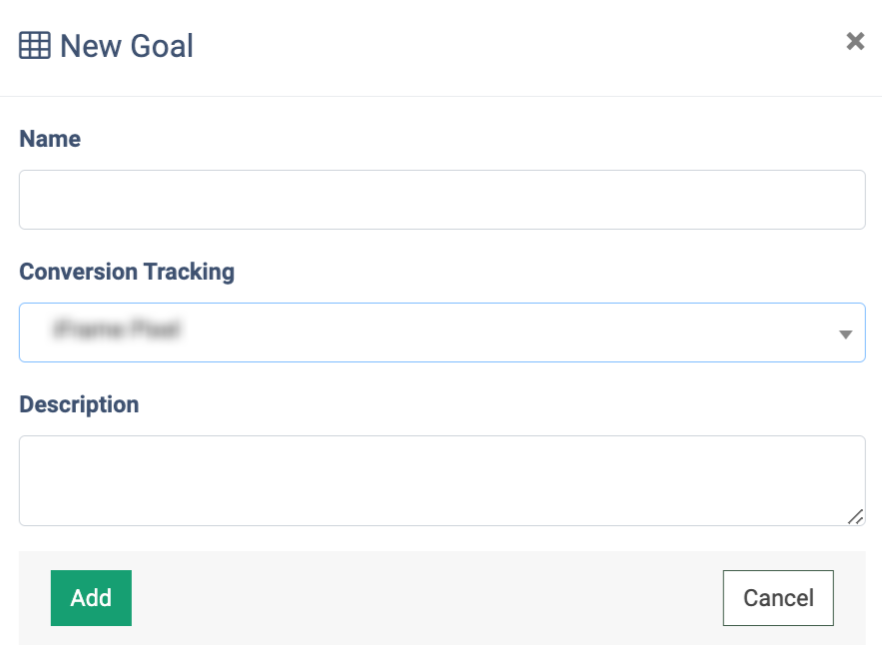
Fill in the following fields in the “New Goal” pop-up window:
- Name: Enter the name of the Offer Goal.
- Conversion Tracking: Select a service for conversion tracking (iFrame Pixel, Image Pixel, Server Postback w\Transaction ID).
- Description: Enter the description of the Offer Goal.
Click the “Add” button to complete, or click the “Cancel” button to close the window.
How to Change the Priority for the Offer Goal
To change the order of the Offer Goals, click the “Change Order” button.
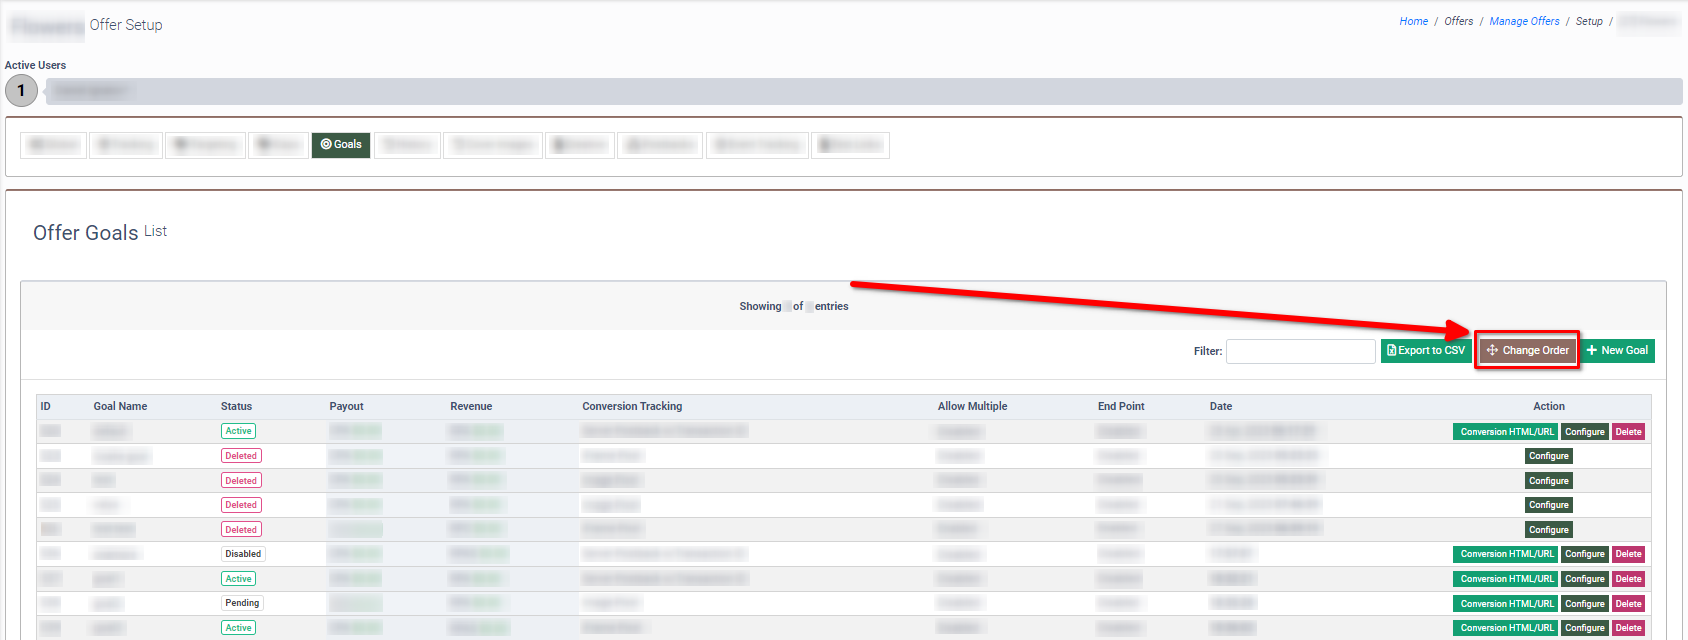
Use drag and drop to move blocks and change the priority. The higher the group is, the higher the level of priority.
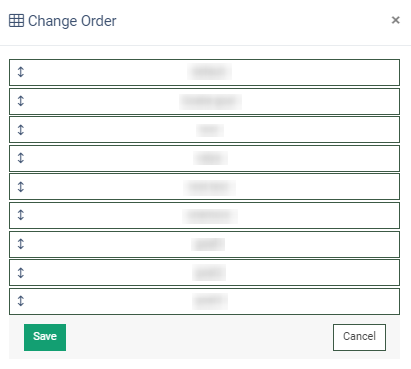
Click the “Save” button to complete, or click the “Cancel” button to close the “Change Order” pop-up window.
Click the "Export to CSV" button to export data to a CSV file.
How to Confirm a Conversion with HTML/URL
To confirm a conversion by placing HTML code on a page or by sending a post-request for conversion confirmation manually, click the “Conversion HTML/URL” button in the “Action” column.
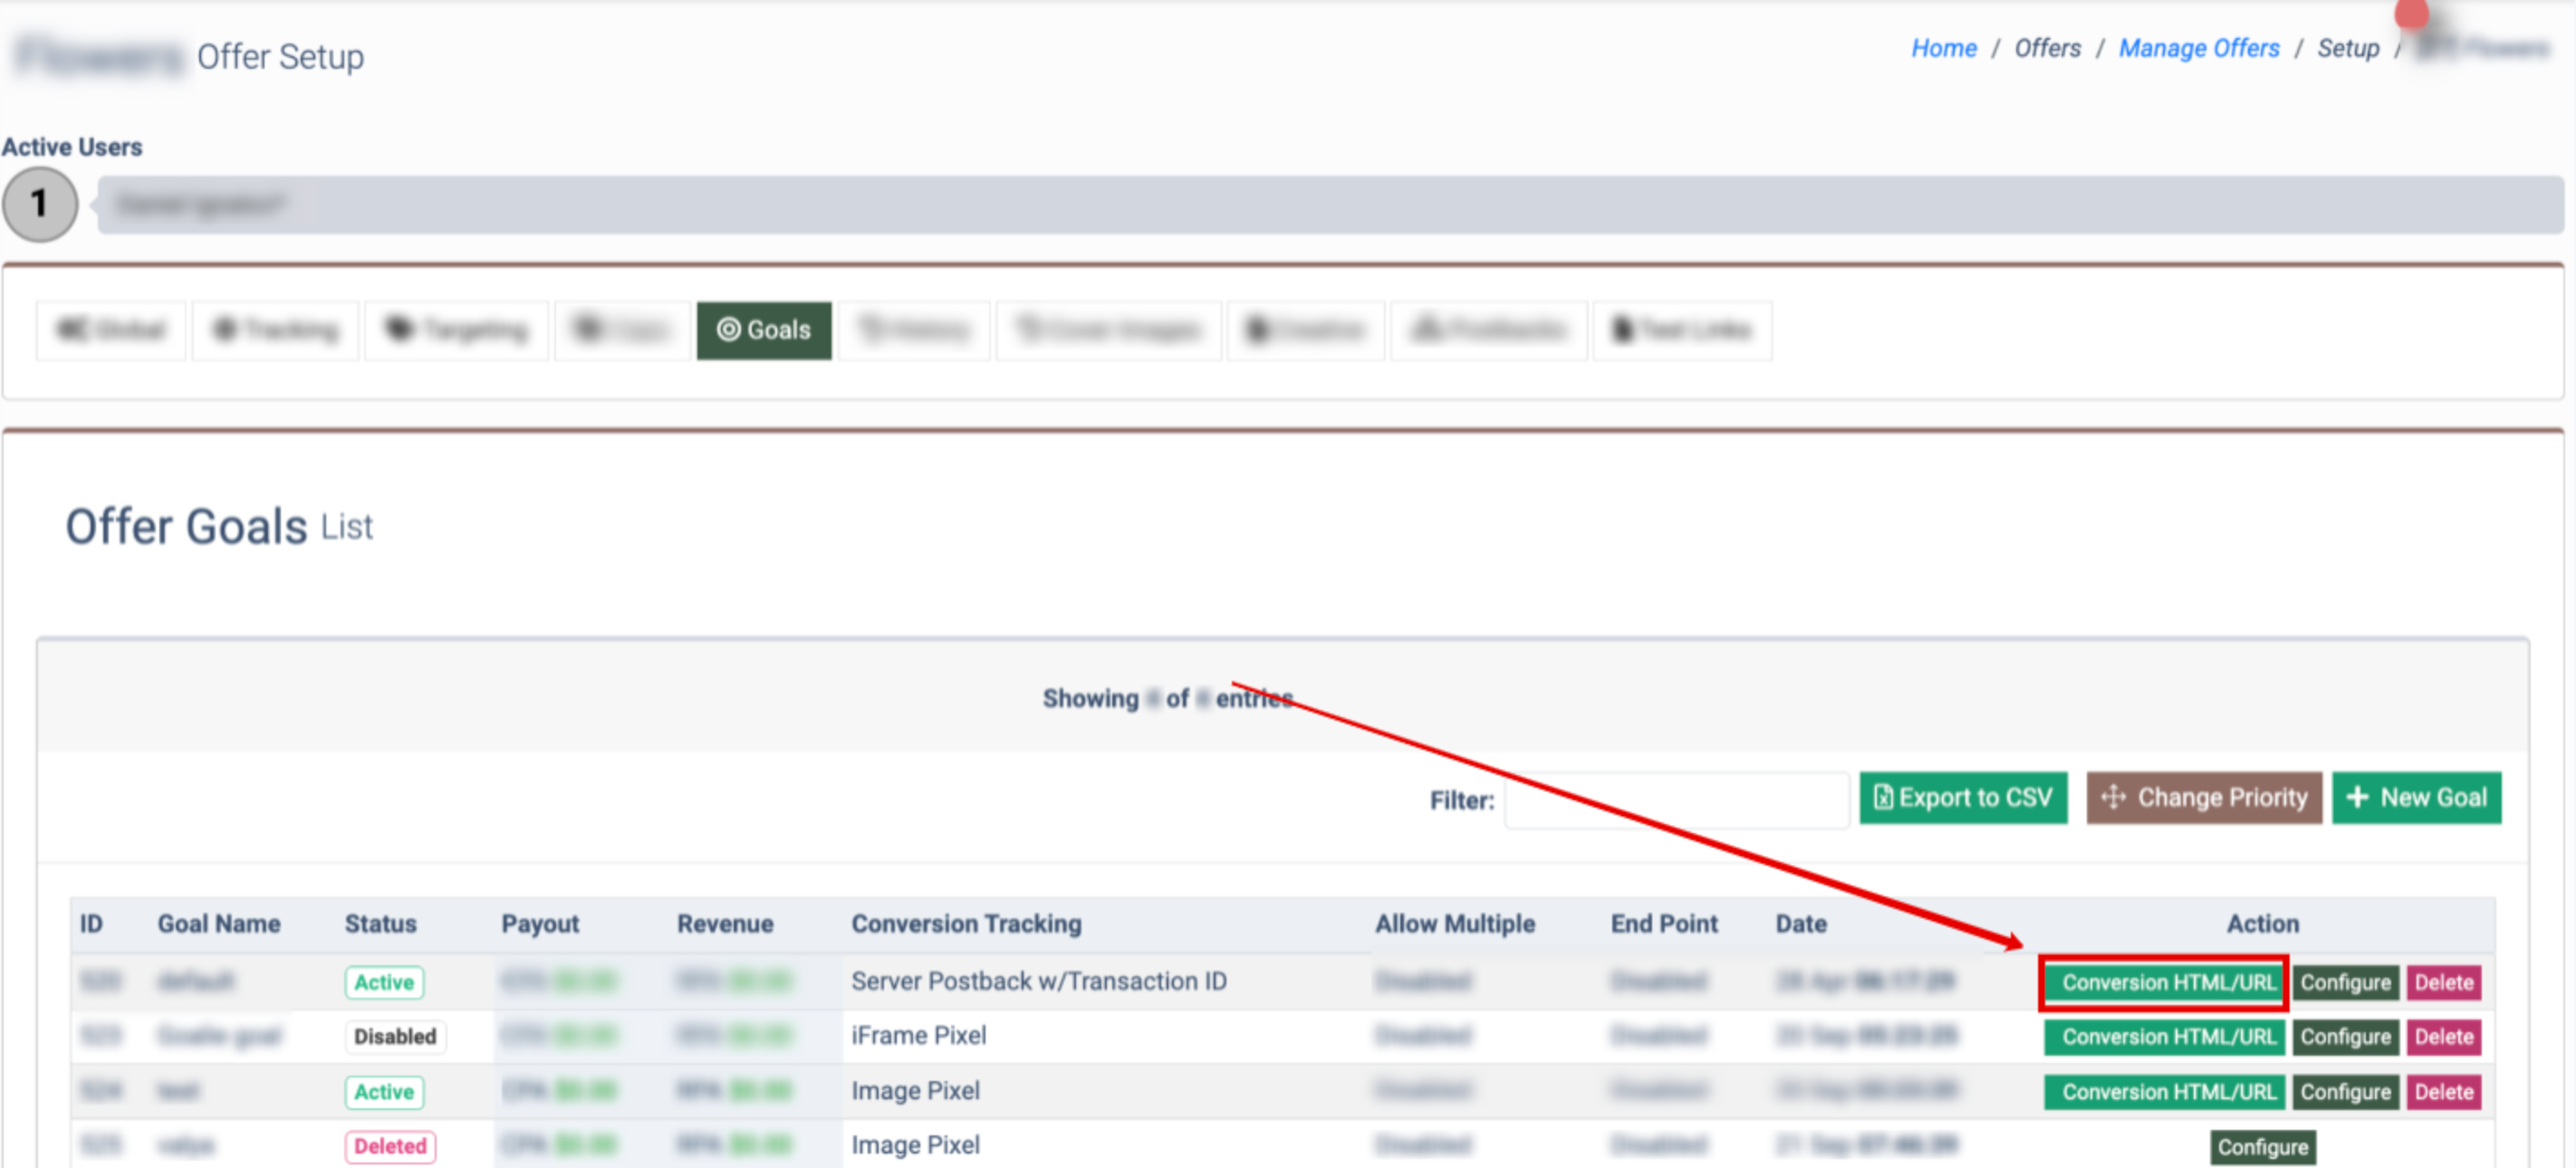
Follow the instructions in the “Conversion HTML/URL” pop-up window provided depending on the conversion tracking service you use for the current Offer Goal (iFrame Pixel, Image Pixel, or Server Postback w\Transaction ID).
How to Configure the Offer Goal
To configure the Offer Goal, click the “Configure” button in the “Action” column and you will be redirected to the Goal Setup page. Select the required tab on the Goal Setup page to configure the corresponding settings:
Main
The Main tab allows you to manage the main settings of the Offer Goal.
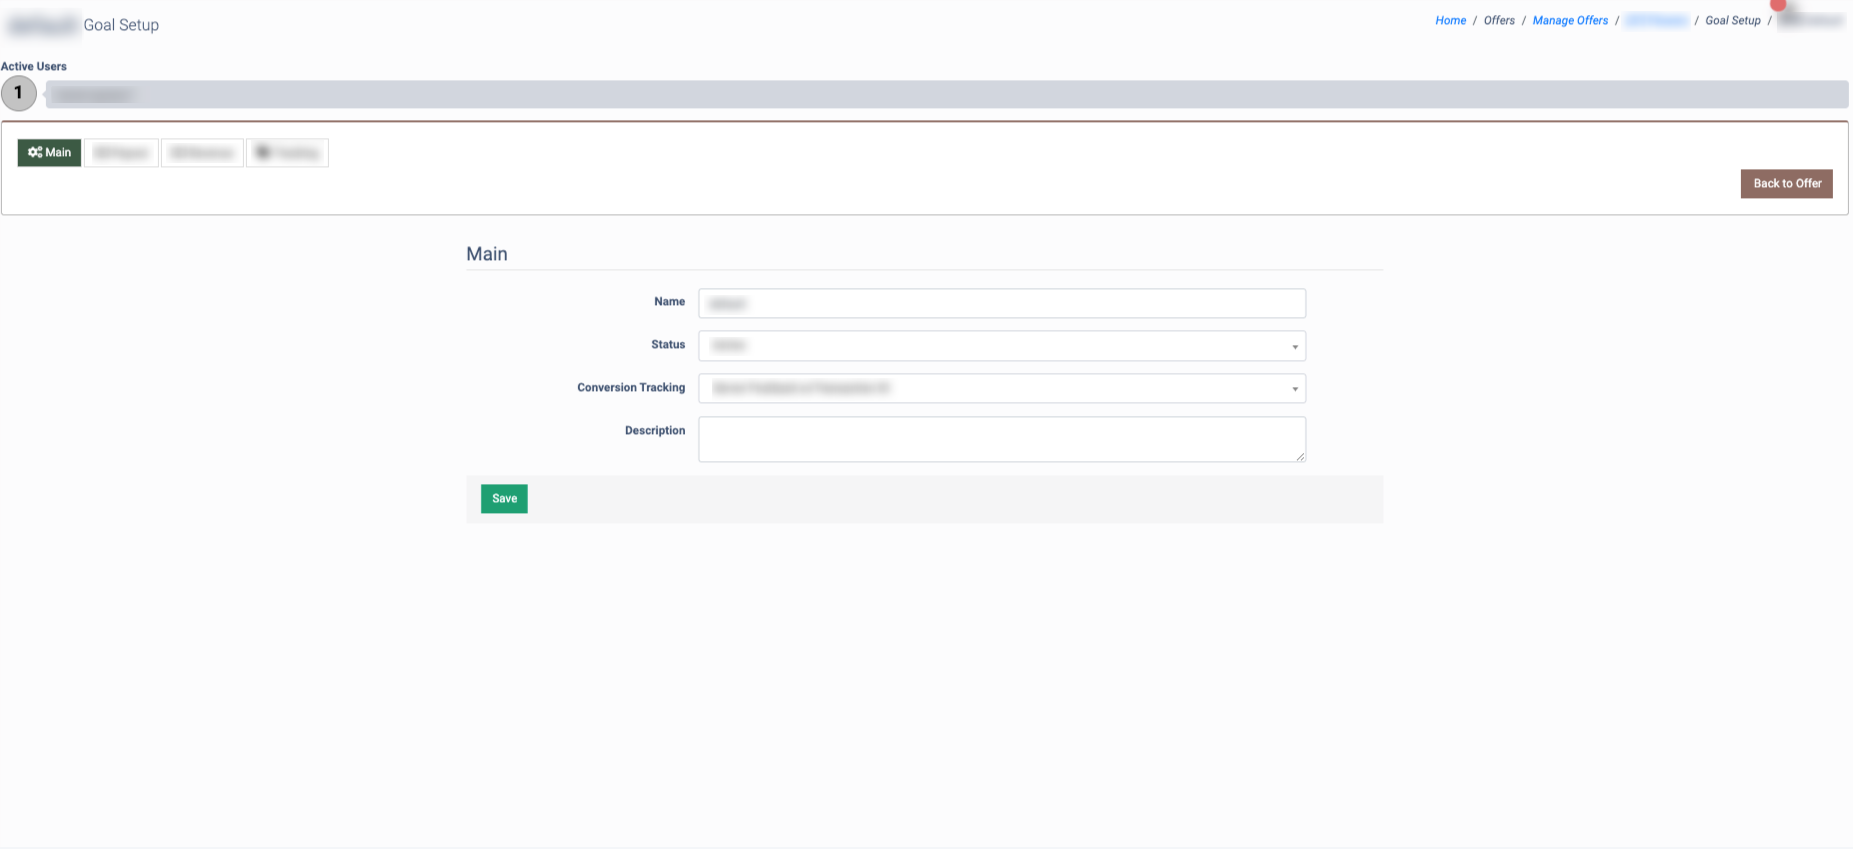
The Main tab contains the following information:
- Name: Enter the name of the Offer Goal.
- Status: Select the status for the Offer Goal (Active, Disabled, Deleted). Note: You cannot change the status of the only active goal.
- Conversion Tracking: Select a service for conversion tracking (iFrame Pixel, Image Pixel, Server Postback w\Transaction ID).
- Description: Enter the description of the Offer Goal.
Click the “Save” button to proceed with changes.
Click the “Back to Offer” button to return to the Offer Setup page.
Revenue
The Revenue tab allows you to manage the revenue settings of the Goal.
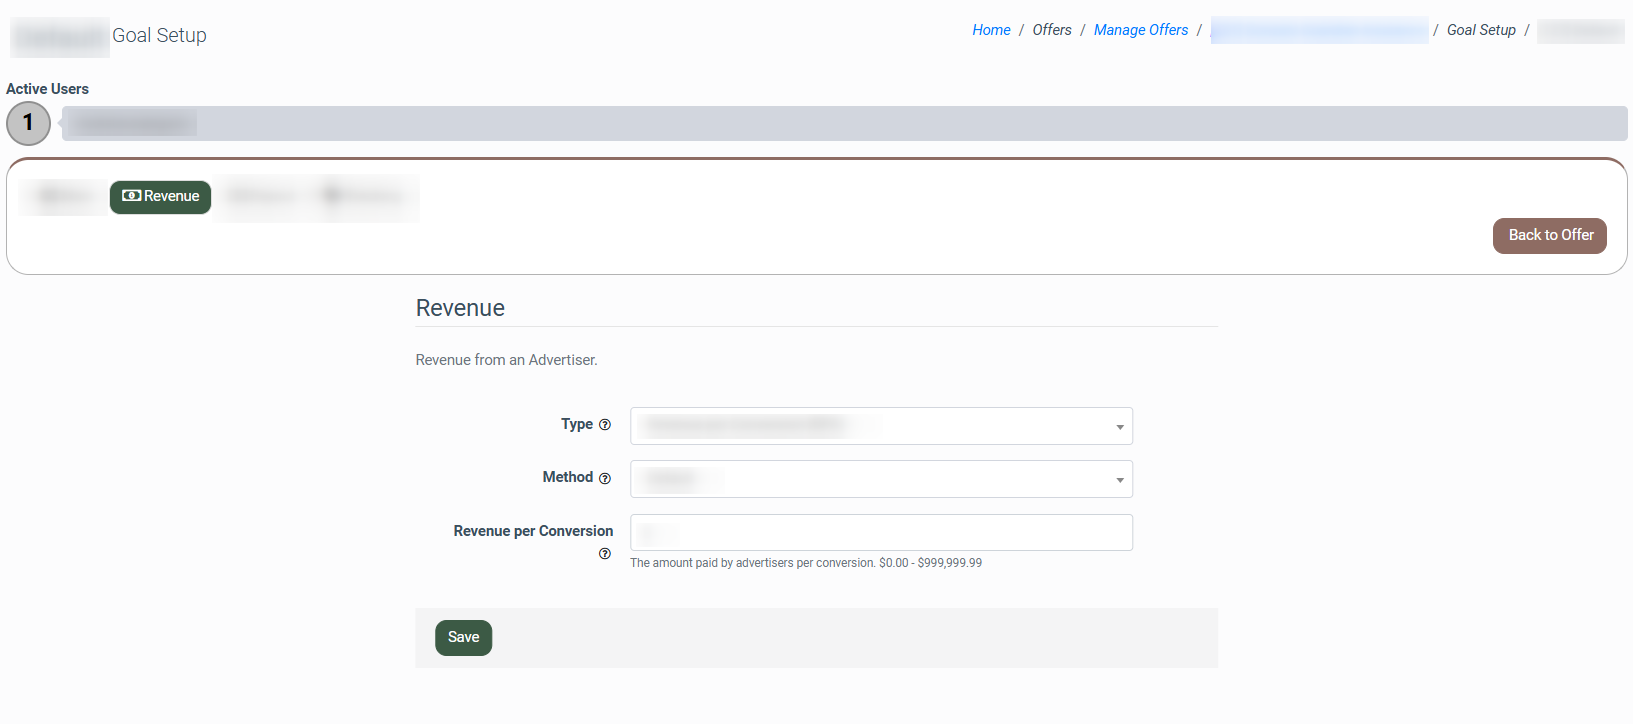
The Revenue tab contains the following information:
- Type: Select the revenue type:
- Revenue per Conversion (RPA): The amount you get for a successful conversion from an Advertiser, also known as Revenue per Action.
- Revenue per Sale (RPS): The percentage you earn from total sales from the conversions.
- Revenue per Conversion plus % per Sale (RPAS): Both RPA and RPS combined.
- Method: Select the payout method (Default, Tiered by Groups, Payout Rules).
- The Default method means that each type of payment corresponds to a certain amount paid by all Advertisers.
- The Tiered by Groups method allows to collect different revenue from Advertisers depending on the group the affiliates are assigned to.
- The Payout Rules method implies that some Affiliates are divided into groups following specific rules and each group is assigned its own amount of revenue paid by Advertisers, and those who are not in the group are assigned payments according to the Default method. Note: To create a new rule, go to the Affiliates > Rules section and click the “+ New” button.
- Revenue per Conversion: Enter the amount paid by advertisers per conversion.
- Percent revenue of Sale: Enter the percentage of a sale per conversion paid by advertisers.
Click the “Save” button to proceed with changes.
Click the “Back to Offer” button to return to the Offer Setup page.
Payout
The Payout tab allows you to manage the payout settings of the Goal.
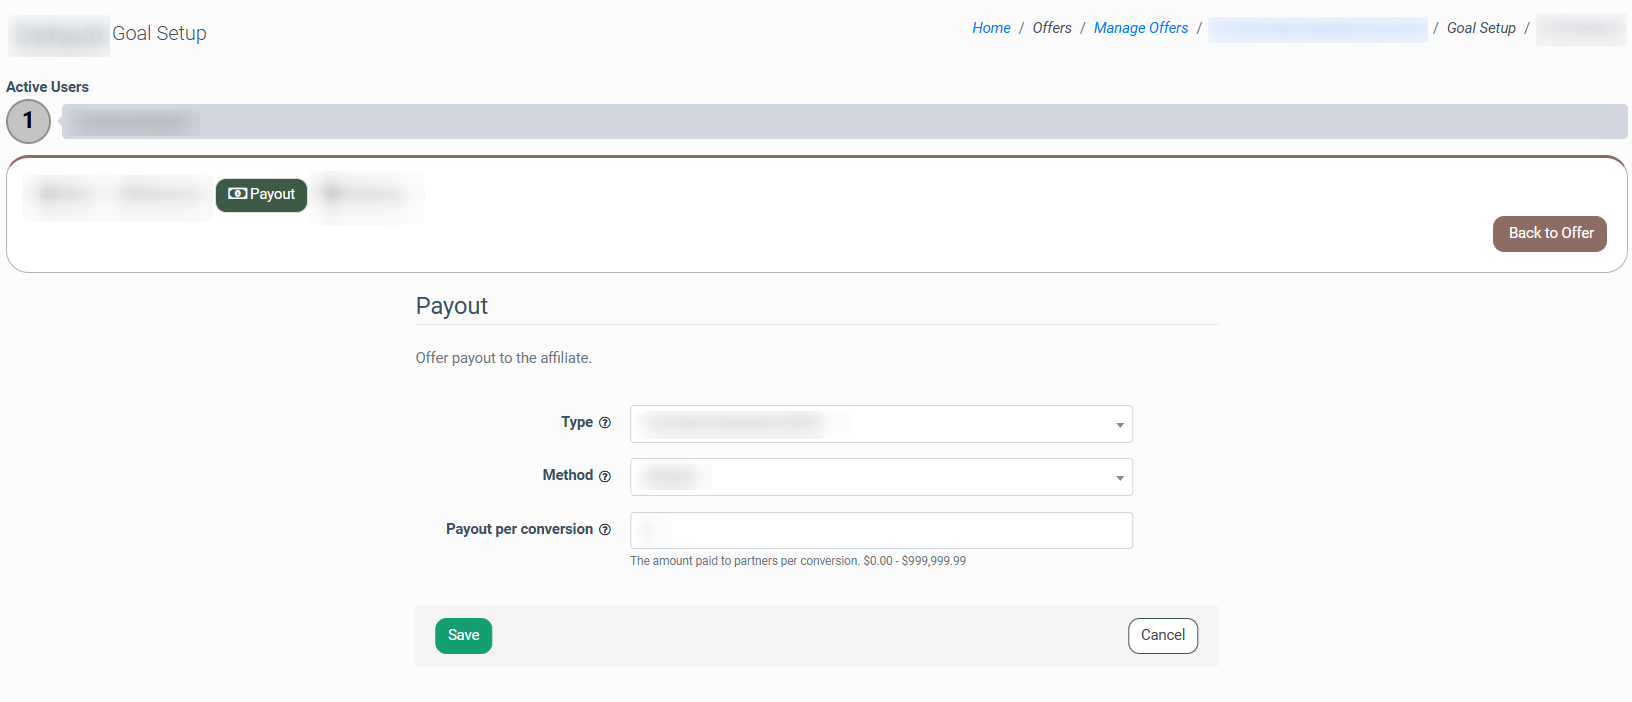
The Payout tab contains the following information:
- Type: Select the payout type:
-
- Cost per Conversion (CPA): The amount of income that an affiliate earns for a successful conversion (or similar action), also known as Cost per Action.
- Cost per Conversion plus % per Revenue (CPAR): Both CPA and PRV combined.
- Cost per Conversion plus % per Sale (CPAS): Both CPA and PSV combined.
- Percentage of Revenue (PRV): The percentage of the revenue received by the owner of the system.
- Percentage of Sale (PSV): The Percentage amount an affiliate earns of total sales from conversions. This is a set percentage of the total sales of a conversion. When this type is set, the offer will dynamically calculate the revenue and payout of the conversion.
- Cost per Click (CPC): The amount of income an affiliate earns for a unique click from an Advertiser. Note: This option is set by default as the Revenue per Click (RPC) option is selected in the Revenue tab.
- Method: Select the payout method (Default, Tiered by Groups, Payout Rules):
- The Default method means that each type of payment corresponds to a certain amount paid to all Affiliates.
- The Tiered by Groups method implies that Affiliates have been divided into groups, and each group is assigned its own amount of payments.
To create a new group, go to the Affiliates > Groups section and click the “+ New” button. - The Payout Rules method implies that some Affiliates are divided into groups following certain rules and each group is assigned its own amount of payments, and those who are not in the group are assigned payments according to the Default method.
To create a new rule, go to the Affiliates > Rules section and click the “+ New” button.
- Payout per conversion: Enter the amount paid to affiliates per conversion.
- Percent payout per sale: Enter the percentage of sales per conversion paid to affiliates.
- Percent payout per revenue: Enter the percentage of revenue per conversion paid to affiliates.
Read more about the payouts in this Knowledge Base article.
Click the “Save” button to proceed with changes.
Click the “Back to Offer” button to return to the Offer Setup page.
Tracking
The Tracking tab allows you to manage the tracking settings of the Goal.
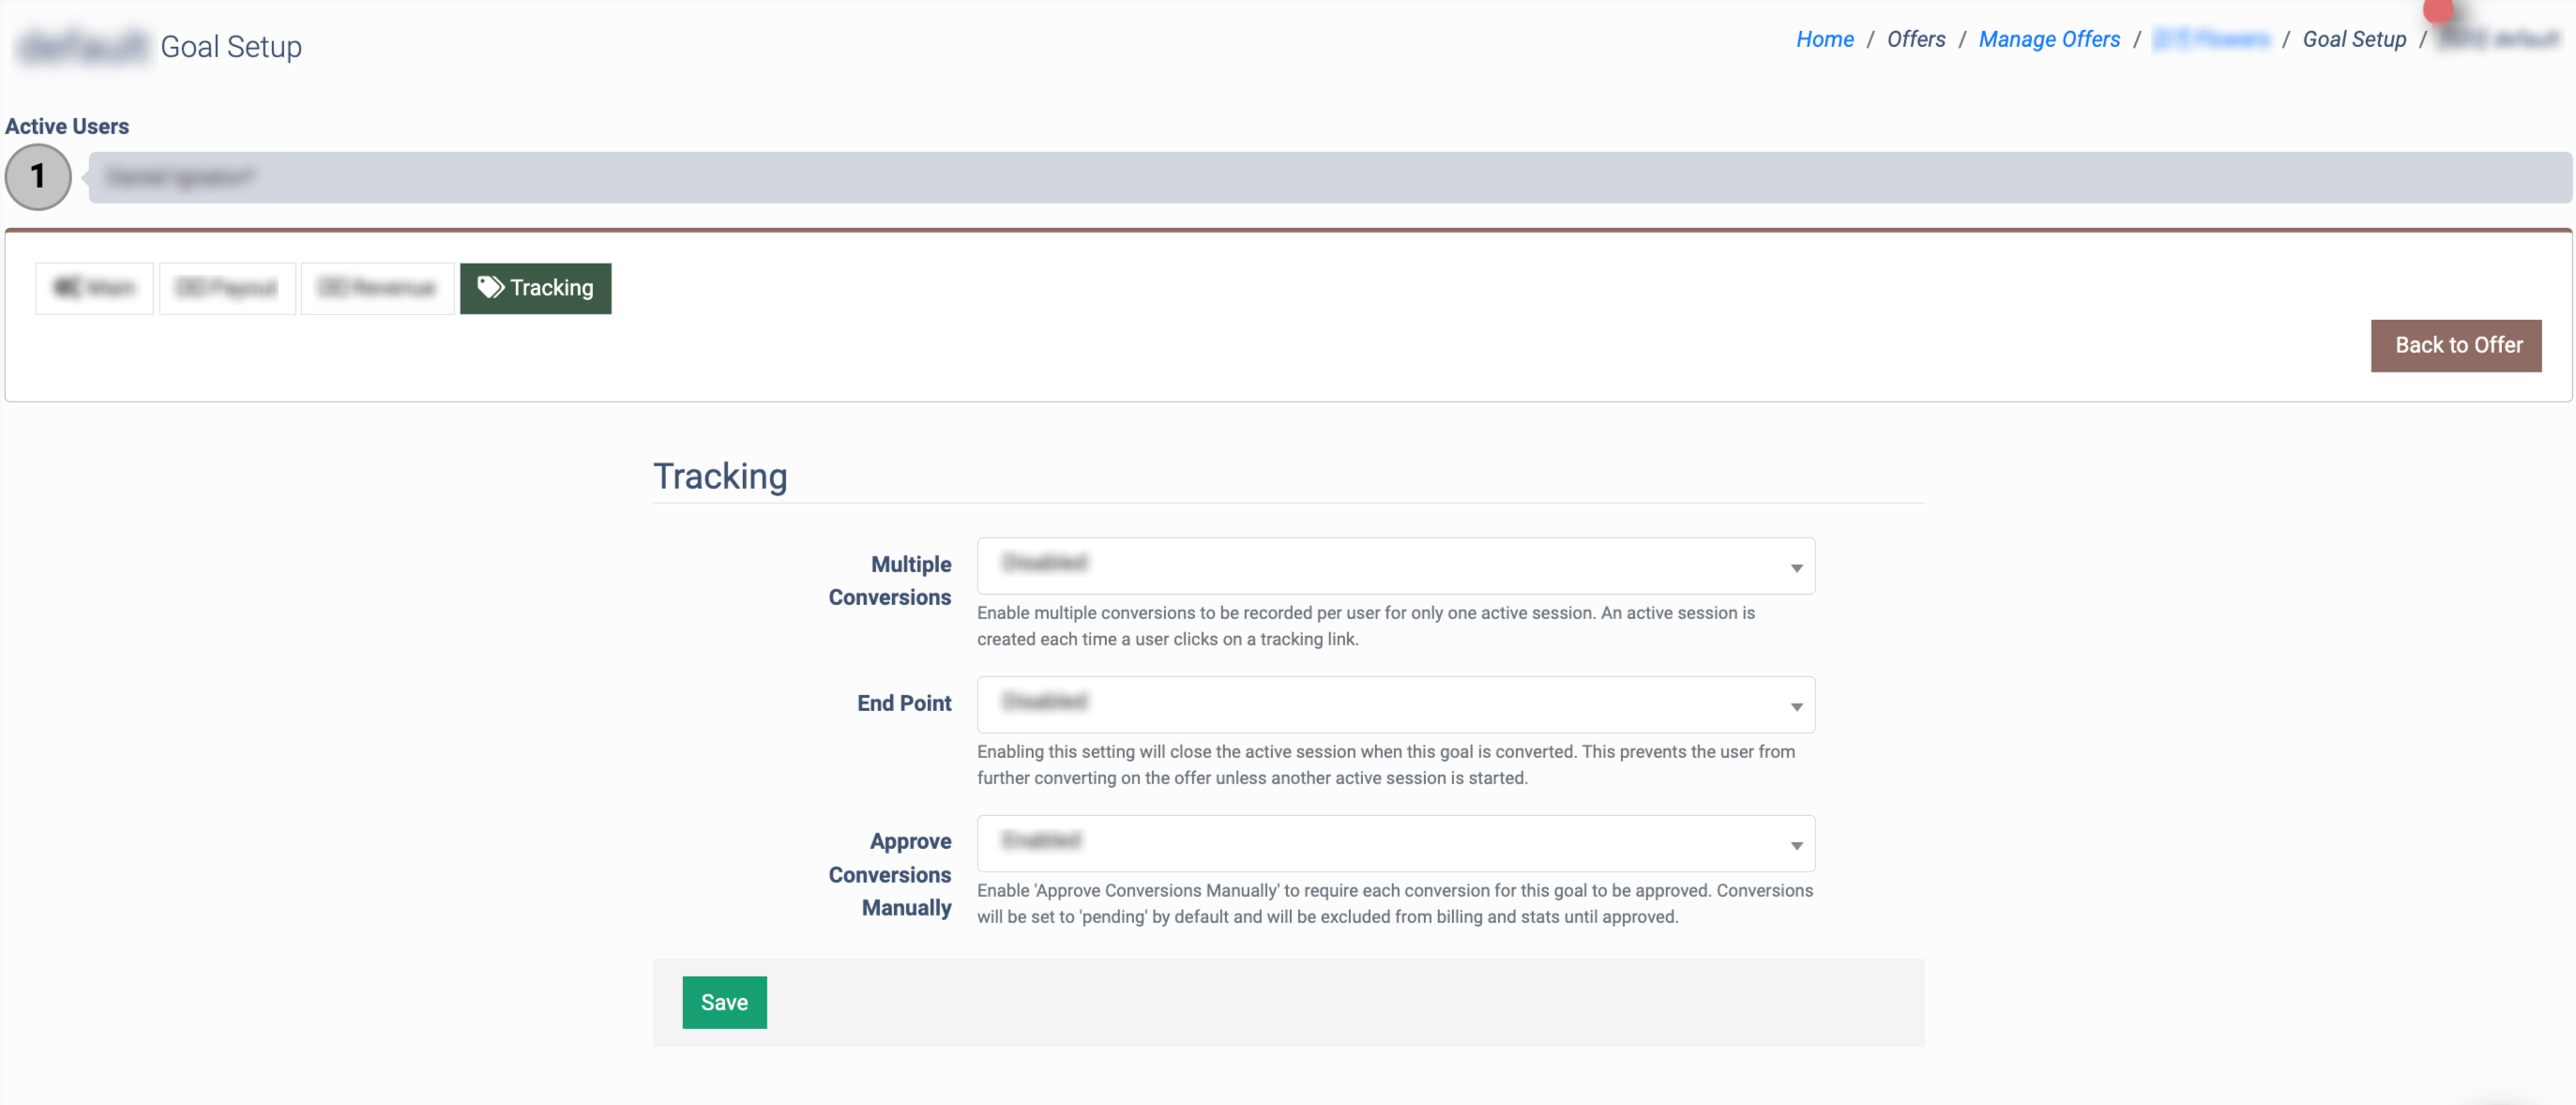
The Tracking tab contains the following information:
- Multiple Conversions: Select the status to enable or disable the recording of multiple conversions per user for only one active session (Enabled, Disabled). Note: An active session is created each time a user clicks on a tracking link.
- End Point: Select the status to enable or disable to close an active session when the goal is converted (Enabled, Disabled). Note: This prevents the user from further converting on the offer unless another active session is started.
- Approve Conversions Manually: Select the status for the setting that requires each conversion for this goal to be approved manually (Enabled, Disabled). Note: Conversions will be set to “Pending” by default and will be excluded from billing and stats until approved.
Click the “Save” button to proceed with changes.
Click the “Back to Offer” button to return to the Offer Setup page.
How to Delete the Offer Goal
To delete the Offer Goal, click the “Delete” button in the “Action” column. Click the “Delete” button in the “Delete record” pop-up window, or click the “Cancel” button to close the window. Note: You cannot delete the only active goal as well as to change its status.
Mobile Tracking for the Mobile Offer Type
The Mobile Offer has the same functionality as the Offer but with placement differences. It is used for mobile tracking and transfers users to the Google/Apple store depending on the operating system instead of web sources. You can set the different APIs for receiving information about installations and other events from mobile applications and bind them with the offer goals.
To view the Mobile Tracking settings for the Mobile type of the Offer, click the “Mobile Tracking” button in the Goals sub-tab.
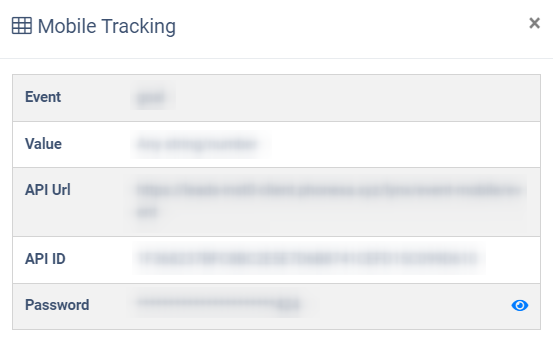
The “Mobile Tracking” pop-up window contains the following information:
- Event: The name of the Event.
- Value: Any string/number.
- API Url: The API link.
- API ID: The unique identification number of the API record.
- Password: The password of the API record. Note: you can change the password in the “Mobile SDK” sub-tab.

How to Set Up the Direct Linking Feature
The Direct Linking feature enables you to monitor user activity on your website without needing to redirect through a tracking link. It allows you to send conversion actions back to Lynx using the JavaScript SDK. This feature is especially useful when third-party links are not permitted or when using third-party cookies is not practical, such as Facebook and Google. It allows you to pass the offer ID and Affiliate ID values directly to the landing page, rather than initiating a tracking session on click. This approach sends users straight to the advertiser’s site, enhancing SEO value and minimizing unnecessary redirects. It also enables you to pass affiliate-specific IDs via the URL, eliminating the need to email tracking links or require partners to log in to retrieve them.
To view how to set up this feature for your offer, click the “Direct Linking” button in the “Action” column within the Offer setup Goals tab.
Then follow the instructions provided in the pop-up window and switch between the tabs based on the setup you need: impression tracking, click tracking, or conversion tracking.

Tracking
The Tracking tab allows you to manage the Tracking features.
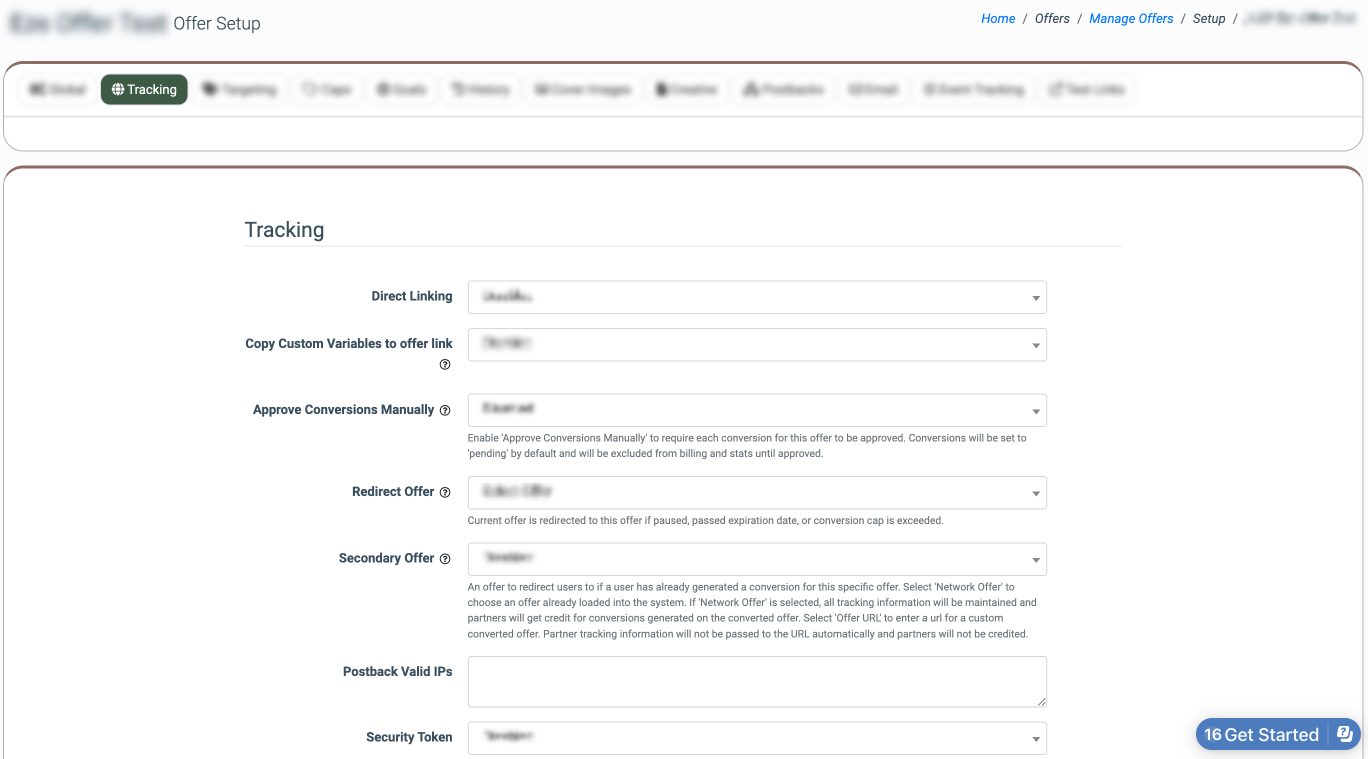
The Tracking tab contains the following information:
- Direct Linking: Select the status to enable or disable the direct linking option.
- Conversion Track Type: Select a method for conversion tracking (iFrame Pixel, Image Pixel, Server Postback w\Transaction ID). Note: This field is available only when the Goals for the Offer are disabled in the Global tab.
- Copy Custom Variables to offer link: Select the status to enable or disable the possibility of copying custom variables to the Offer link.
- Approve Conversions Manually: Select the status for the setting that requires each conversion for this offer to be approved manually (Enabled, Disabled). Note: Conversions will be set to “Pending” by default and will be excluded from billing and stats until approved.
- Redirect Offer: Select the Offer to redirect the user to if the current offer is paused, expired, capped out, or has been off target.
- Secondary Offer: Select the Offer to redirect users if the Redirect Offer is not set up, paused, expired, capped out, or has been off target:
- Network Offer: Select this option to choose an offer already loaded into the system. If this option is selected, all tracking information will be maintained and partners will get credit for conversions generated on the converted offer.
- Offer URL: Select this option to enter a URL for a custom-converted offer. Partner tracking information will not be passed to the URL automatically and partners will not be credited.
When the Goals are enabled for the Offer in the Global tab, the following configurations are available:
- Postback Valid IPs: Enter a list of allowed IP addresses from which conversions will be received. For example, IPs of your servers from which conversions will be sent. In this case, conversions will not be accepted from other IP addresses.
- Security Token: Select the status to enable or disable the Security Token feature (Enabled, Disabled). Security Token is a feature that authenticates each conversion with a token string that is unique for the Advertiser of the Offer. With this enabled, you can expect to have another level of security from any potential fraud by partners attempting to force-fire any postback URLs. To copy the security token, click the “Copy” button.
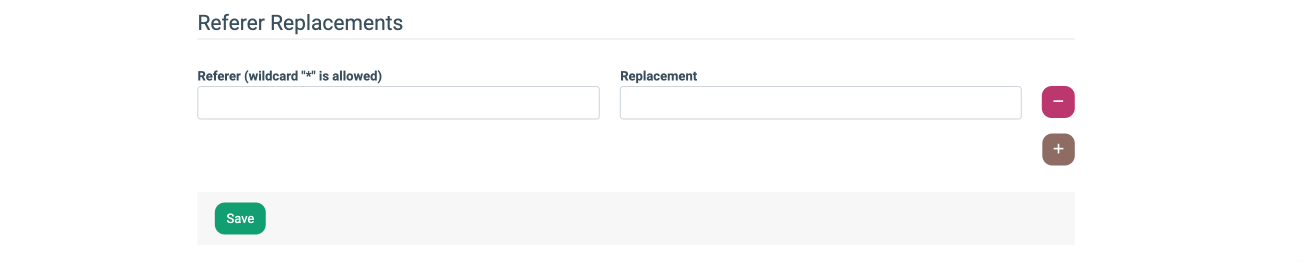
The “Referer Replacements” block allows you to manage the referrer URL replacement. This replacement helps to pass the hardcoded URL to the advertisers instead of the original referrer URL domain value. This approach prevents the affiliate landing page URLs from being sent directly to the advertiser. Hiding the original URL of the affiliate’s landing page helps you to prevent the revealing of the sensitive information that may be placed in the original URL. Also, you can reduce the information noise from the original URL and make a clear labeling system for smooth reporting operations, improve readability, and the ability to group traffic in reports
You can add or remove the replacement records by clicking the “+” or “-” buttons, respectively.
The following settings are available:
- Referer (wildcard "*" is allowed): Enter the original referrer domain URL that should be replaced. The "*" wildcard acts as a placeholder for any sequence of characters. Examples:
- facebook.com* matches any referrer starting with facebook.com (for example, facebook.com/page1, facebook.com?param=1).
- *.facebook.com matches any subdomain of facebook.com (for example, m.facebook.com, l.facebook.com).
- *campaign* matches any referrer containing the word "campaign" anywhere in the string.
- Replacement: Enter the hardcoded value (URL, domain, or label) that should replace the matched value set in the “Referer (wildcard "*" is allowed)” field. This replacement value will be added when the click or impression is tracked. The replaced value will be stored in the reporting system instead of the original referrer URL.
Targeting
The Targeting tab allows you to manage groups and countries for Offer targeting, as well as configure the IP Scoring and Anura services to effectively filter out fraudulent and bot clicks.
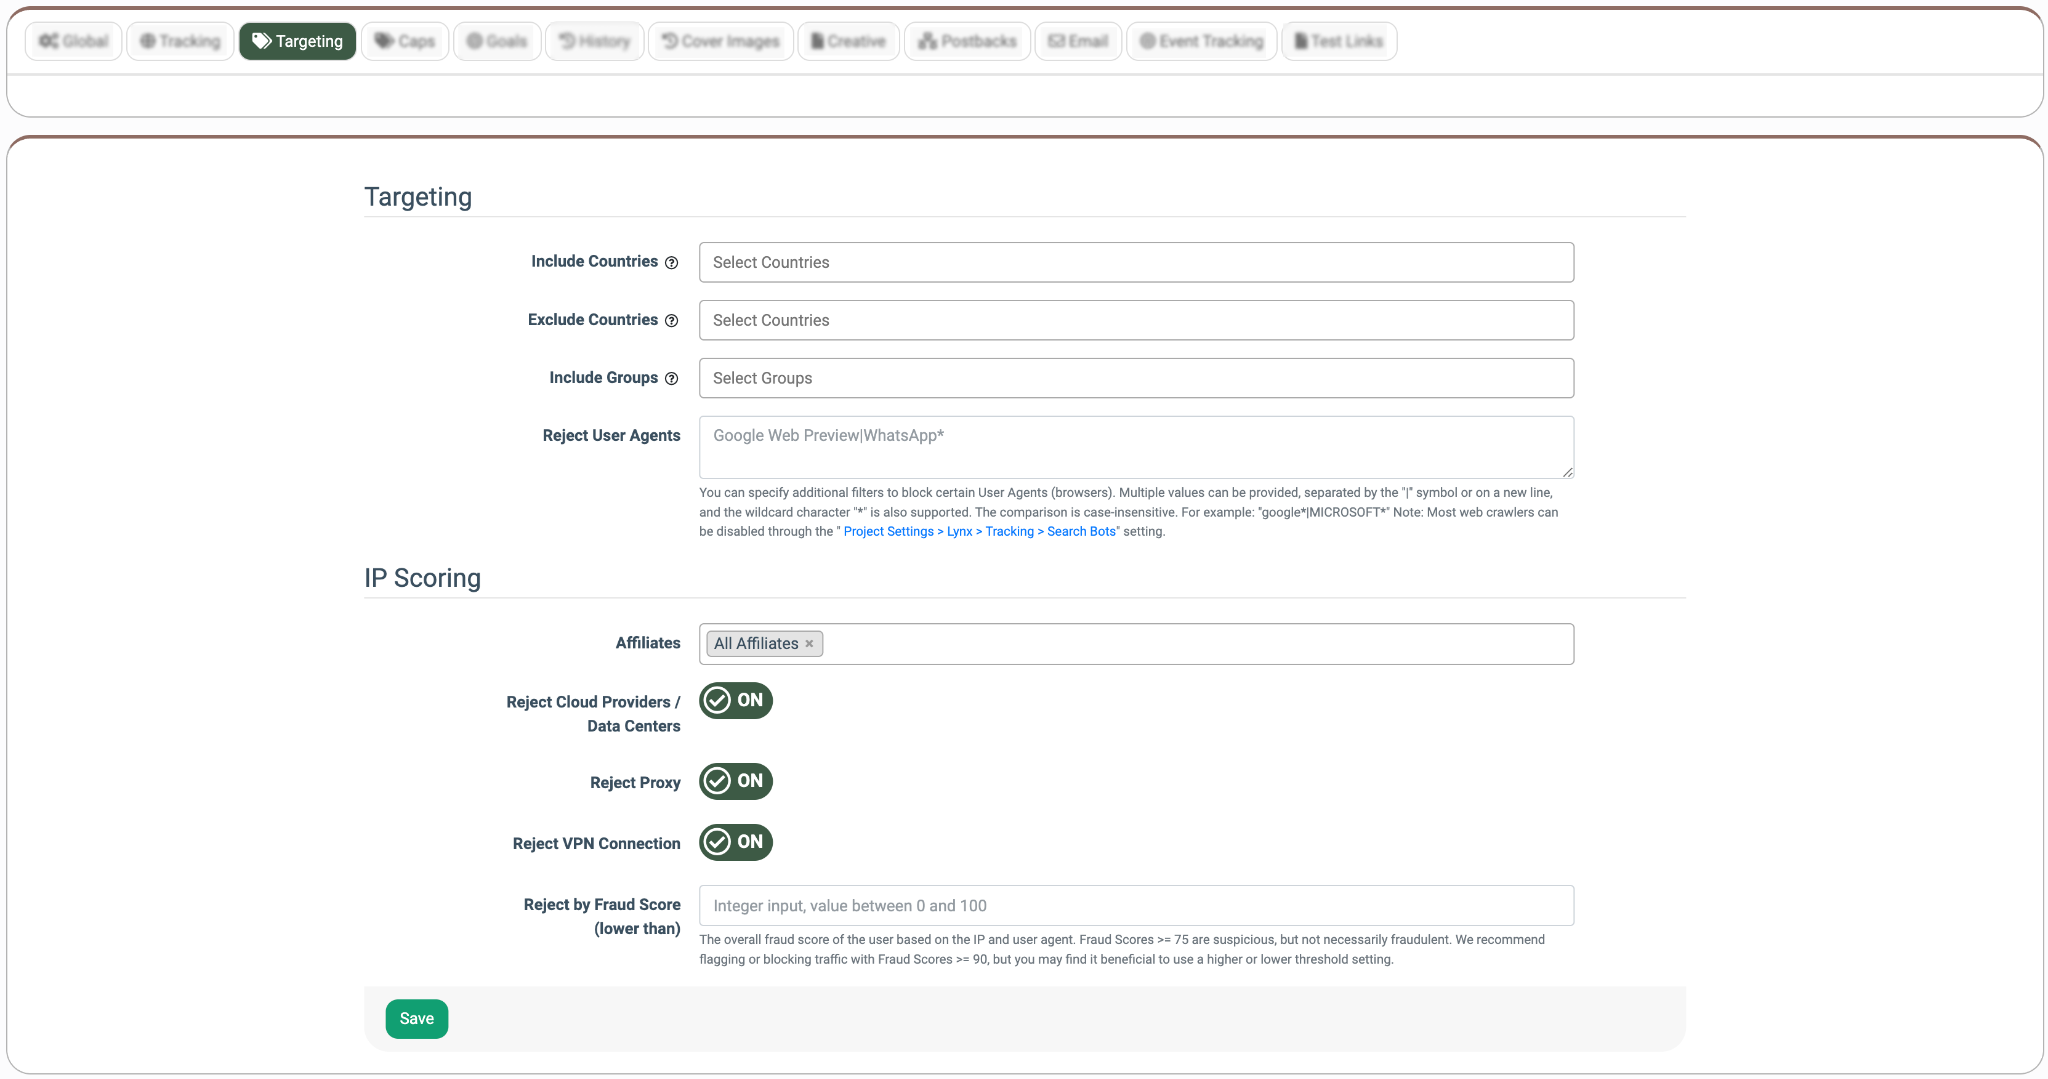
The Targeting tab contains the following information:
- Include Countries: Select one or more countries to target the Offer to a relevant country(ies).
- Exclude Countries: Select one or more countries to exclude the Offer from an irrelevant country(ies).
- Include Groups: Select one or more groups to target the Offer to a relevant group(s). Offer Groups allow combining several offers with different Geo Targeting settings to send users to any suitable offer from the Offer Groups where they meet the required Geo Targeting settings.
- Reject User Agents: Specify additional filters to block certain User Agents (browsers). Note: Most web crawlers can be disabled through the Project Settings > Lynx > Tracking > Search Bots setting.
The IP Scoring block allows you to configure the following settings:
- Affiliates: Select the Affiliates to apply the IP Scoring service to.
- Reject Cloud Providers / Data Centers: Switch the toggle to the “On” position to filter out any data center and cloud provider clicks.
- Reject Proxy: Switch the toggle to the “On” position to filter out any proxy clicks.
- Reject VPN Connection: Switch the toggle to the “On” position to filter out clicks made through the VPN connection.
- Reject by Fraud Score (lower than): Set a maximum fraud score ranging from 0 to 100 for filtering out fraudulent clicks. Any score below this threshold will lead to a rejection.
Note: The IP Scoring third-party service is a paid feature that must be enabled through the System Management > System Subscriptions section in advance.
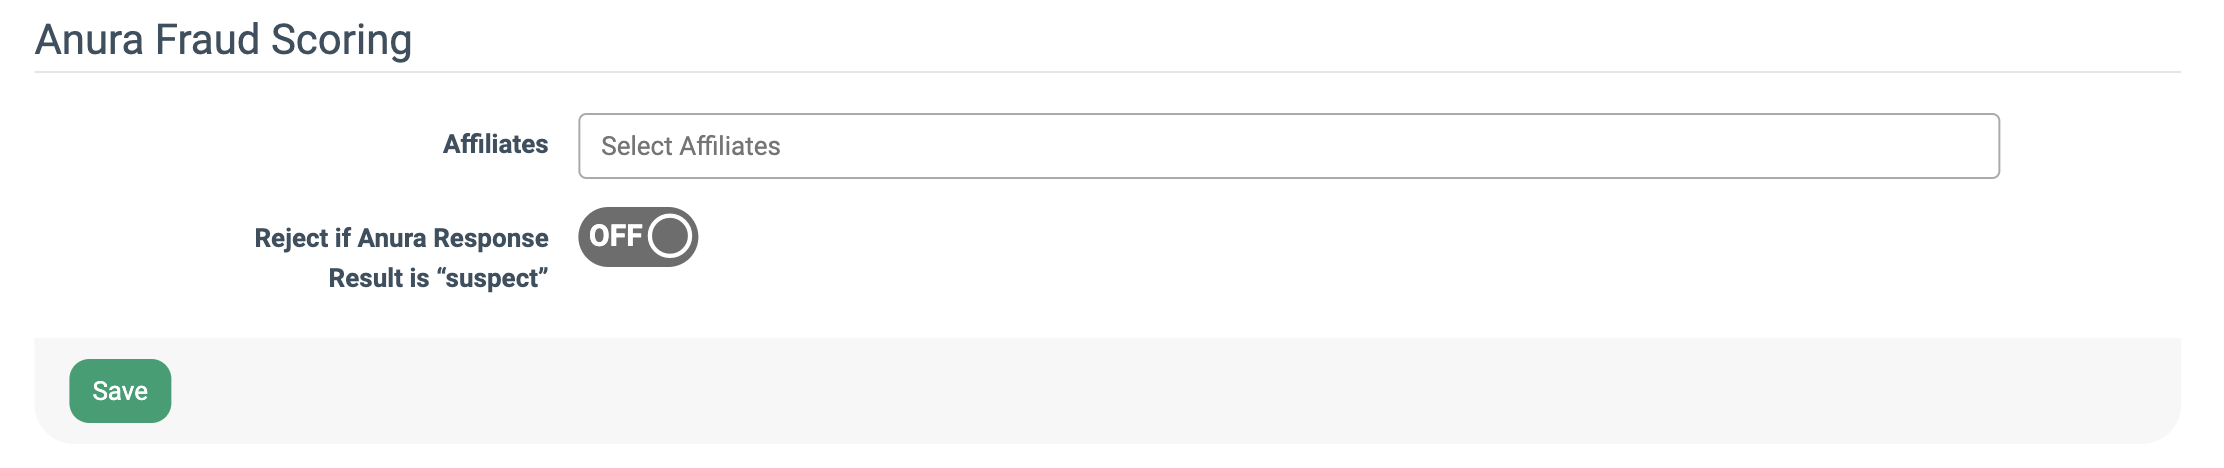
The Anura Fraud Scoring block allows you to configure the following settings:
- Affiliates: Select the Affiliates to apply the Anura service to.
- Reject if Anura Response Result is “suspect”: Switch the toggle to the “On” position to filter out any traffic that is labeled by the service as Suspicious.
Click the “Save” button to confirm the changes.
Note: The Anura Fraud Scoring third-party service is a paid feature that must be enabled through the System Management > System Subscriptions section in advance.
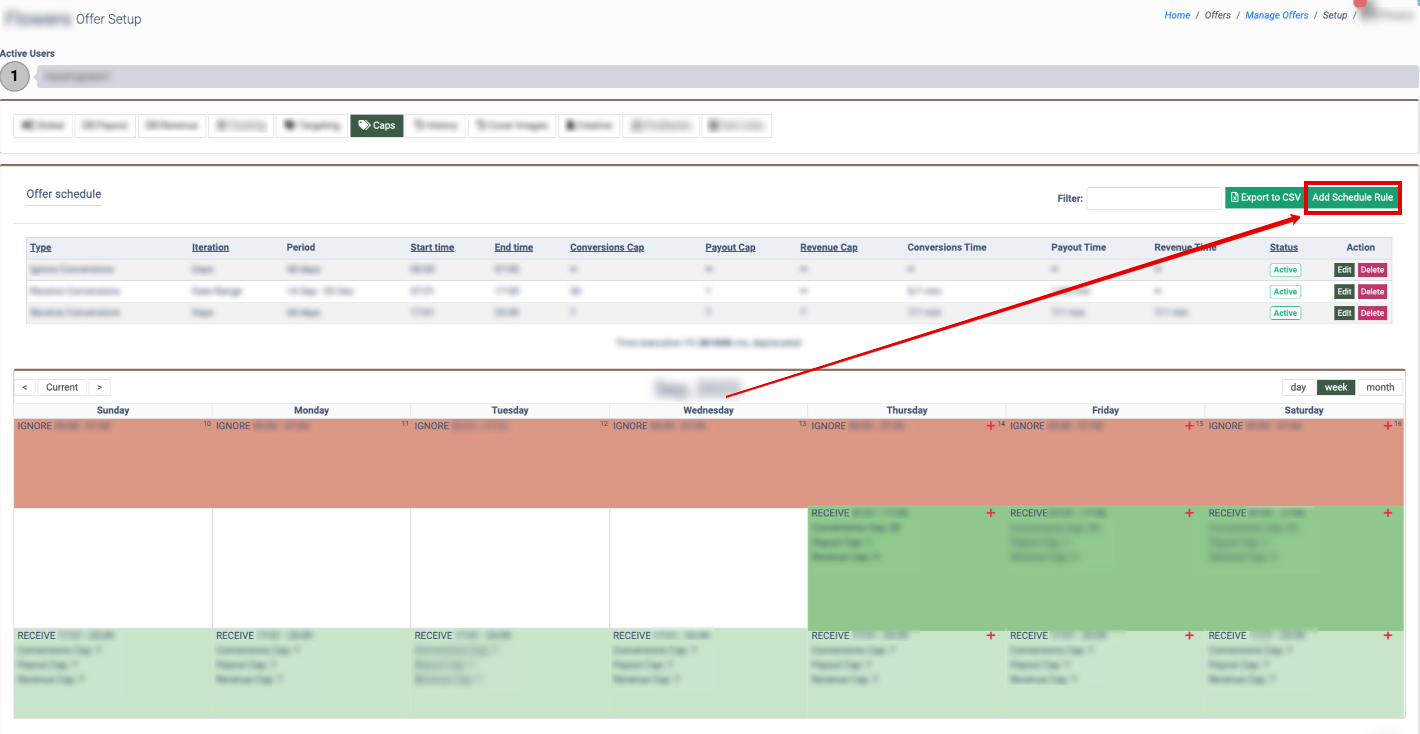
Caps
- How to Add a New Schedule Rule
- How to Configure the Schedule Rule
- How to Delete the Schedule Rule
- How to Create a Cap Override
The Caps tab allows you to set the maximum number of conversions an offer can receive per day, and manage the time and limitations for accepting conversions per day.
Note: If the offer is capped out or out of schedule and the Goals are disabled for the Offer, alternatives are searched in the following order: Redirect Offer, Secondary Offer, Default Redirect URL. If no alternatives are available or set up, an error will be displayed and the user won't be redirected.
In case when the Goals are enabled for the Offer, the conversion can only be accepted or rejected, as the Offer and its goals are defined in advance for the conversion and consequently, the search for alternatives for this Offer won't be performed.
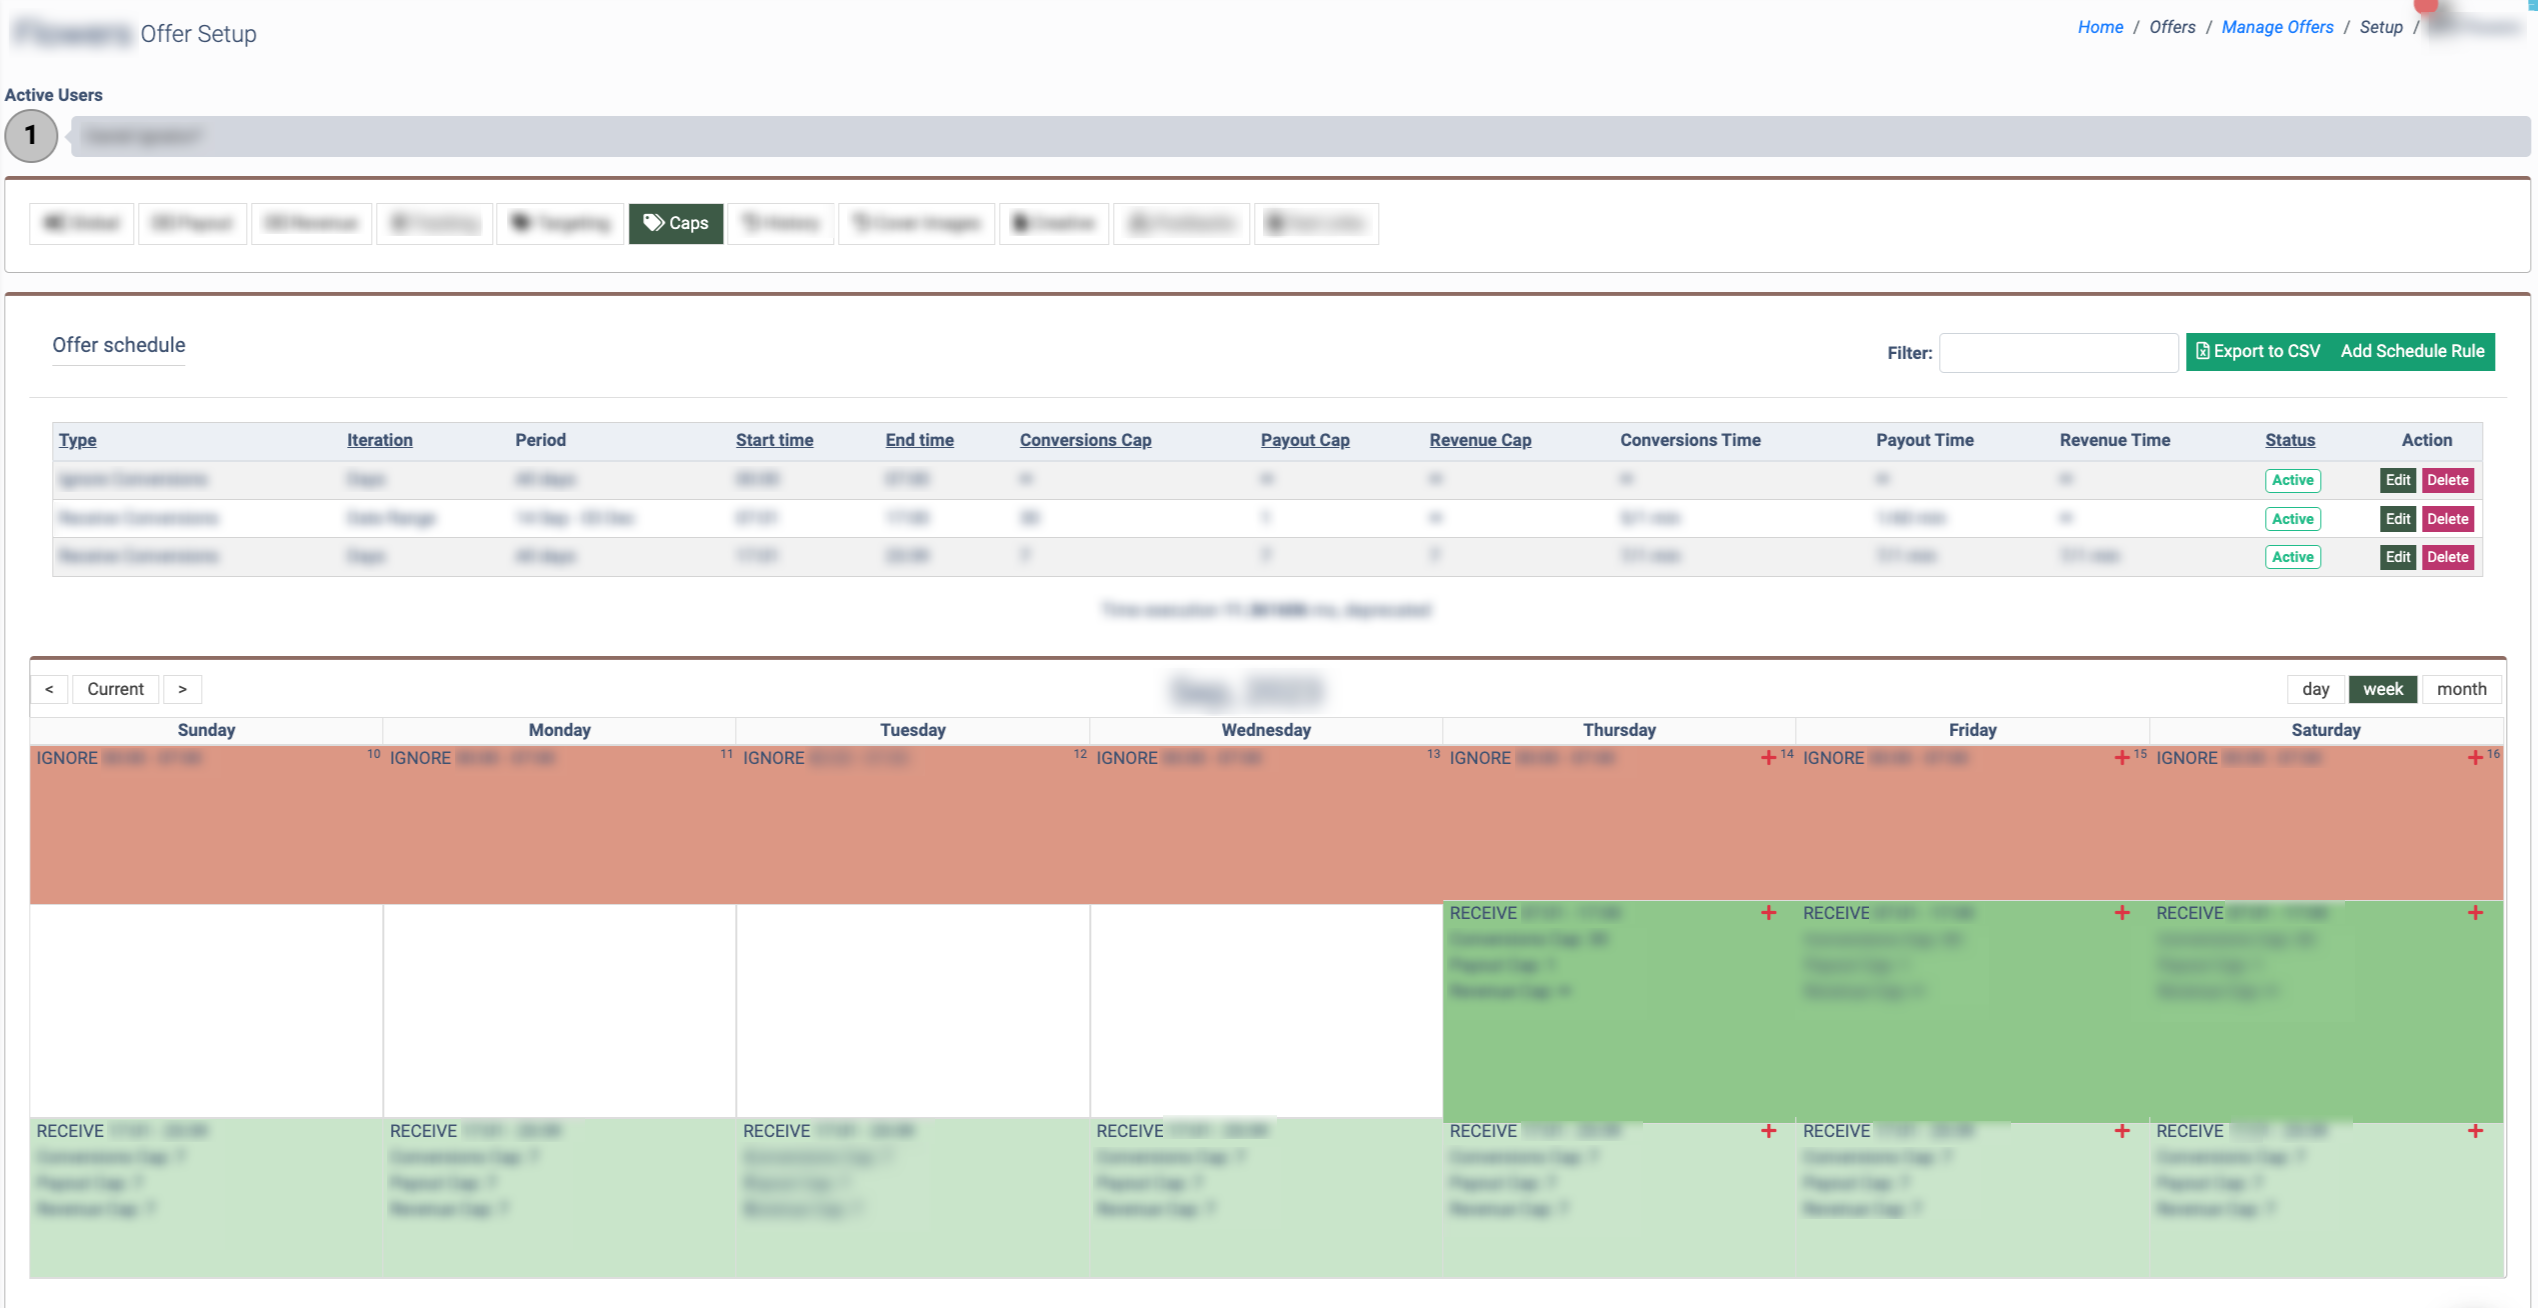
The Offer schedule list contains the following information:
- Type: The type of action for the Cap (Receive Conversions, Ignore Conversions).
- Iteration: The iteration type for the scheduling method (Days, Date range).
- Period: The period the Cap is active for (specific days, date range, All Days).
- Start time: The time for the Cap when it is started.
- End time: The time for the Cap when it is stopped.
- Conversions Cap: The conversions limit per day for the Schedule rule.
- Payout Cap: The payout limit per day for the Schedule rule.
- Revenue Cap: The revenue limit per day for the Schedule rule.
- Conversions Time: The additional limit for conversions per period of time as the Schedule rule is active. Note: The time value is given in minutes.
- Payout Time: The additional limit for payouts per period of time as the Schedule rule is active. Note: The time value is given in minutes.
- Revenue Time: The additional limit for revenue per period of time as the Schedule rule is active. Note: The time value is given in minutes.
- Status: The status of the Schedule rule (Active, Disabled).
How to Add a New Schedule Rule
To add the new Schedule rule, click the “Add Schedule Rule” button.
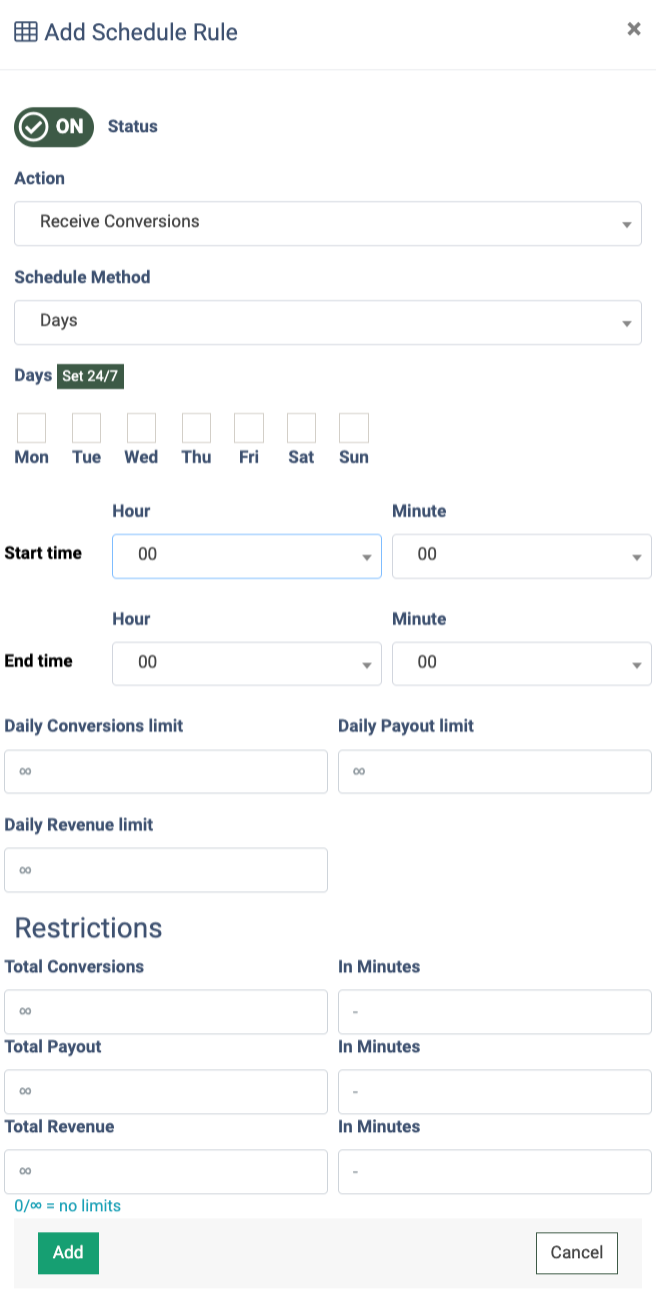
 In the “Add New Schedule Rule” pop-up window fill in the following field:
- Status: Switch the toggle to the “On” position to activate the Schedule rule or switch the toggle to the “Off” position to disable the Schedule rule.
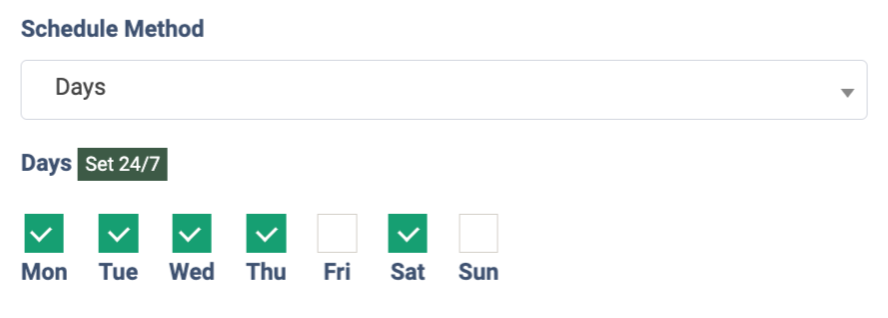
- Schedule method: Select one of the scheduling methods from the drop-down list:
- Select the “Days” option to accept conversions on specific days. Check the box to add a day to the Schedule rule or uncheck the box to remove a day from the Schedule rule. To set the Schedule rule for 24/7, click the “Set 24/7” button.

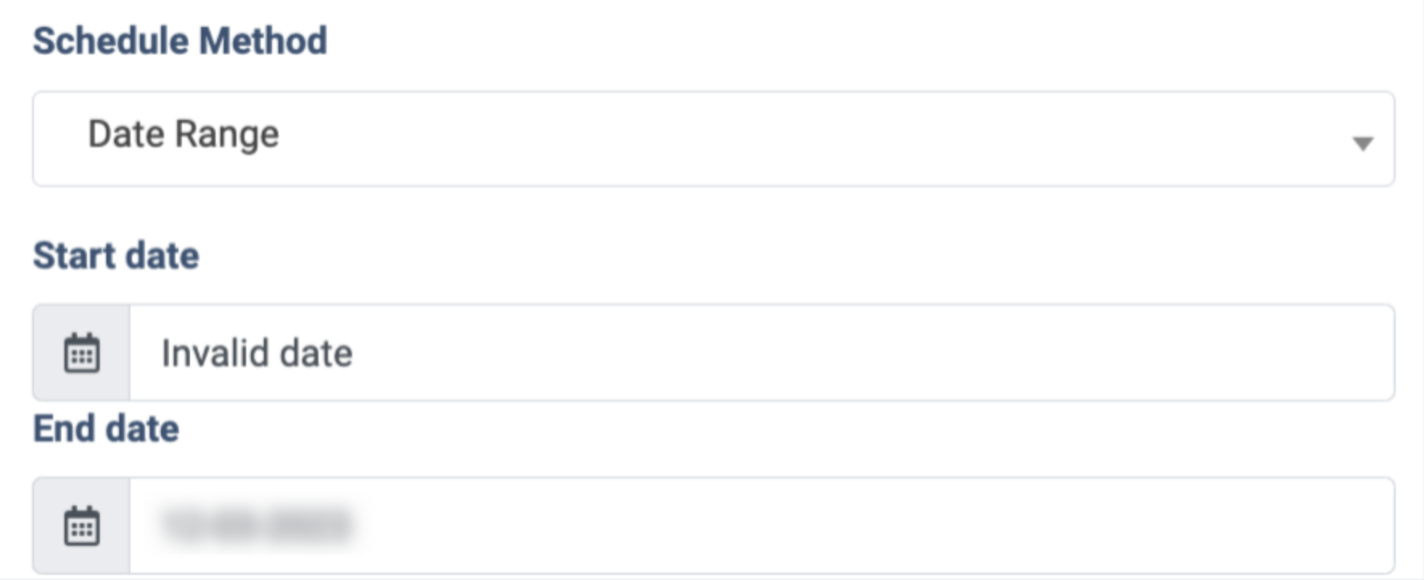
- Select the “Date Range” option to accept conversions on a specific date range.
- Start date: Select the start date of the Schedule rule.
- End date: Select the end date of the Schedule rule.
- Select the “Days” option to accept conversions on specific days. Check the box to add a day to the Schedule rule or uncheck the box to remove a day from the Schedule rule. To set the Schedule rule for 24/7, click the “Set 24/7” button.
- From: Enter the start time of the Schedule rule within a day.
- Till: Enter the end time of the Schedule rule within a day.
- Daily Conversions limit: Enter the numerical limit for daily conversions.
- Daily Payout limit: Enter the numerical limit for the daily payout ($).
- Daily Revenue limit: Enter the numerical limit for daily revenue ($).
- Total Conversions: Enter the numerical limit for total conversions.
- Total Payout: Enter the numerical limit for the total payout.
- Total Revenue: Enter the numerical limit for total revenue.

Click the “Add” button to complete, or click the “Cancel” button to close the “Add Schedule Rule” pop-up window.
How to Configure the Schedule Rule
To configure the Schedule rule, click the “Edit” button in the “Action” column.
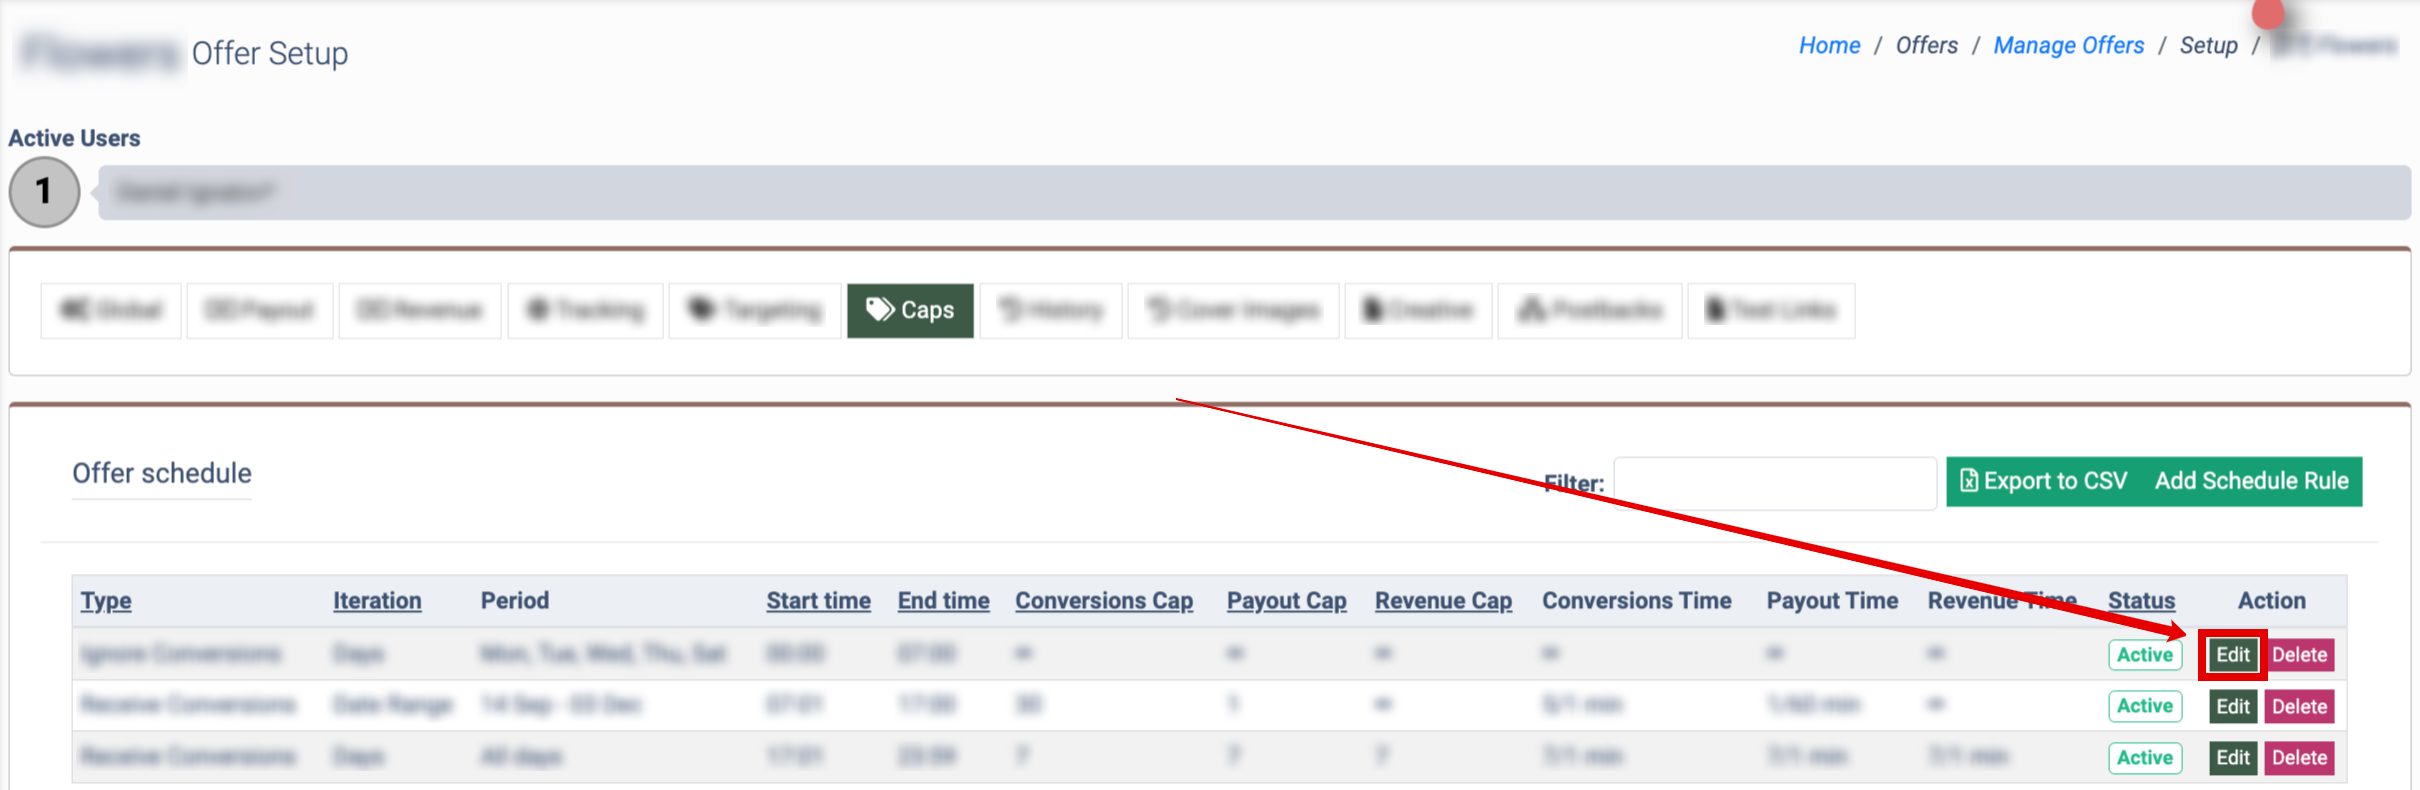
Make the required changes and сlick the “Save” button to proceed with changes, or click the “Cancel” button to close the “Edit record” pop-up window.
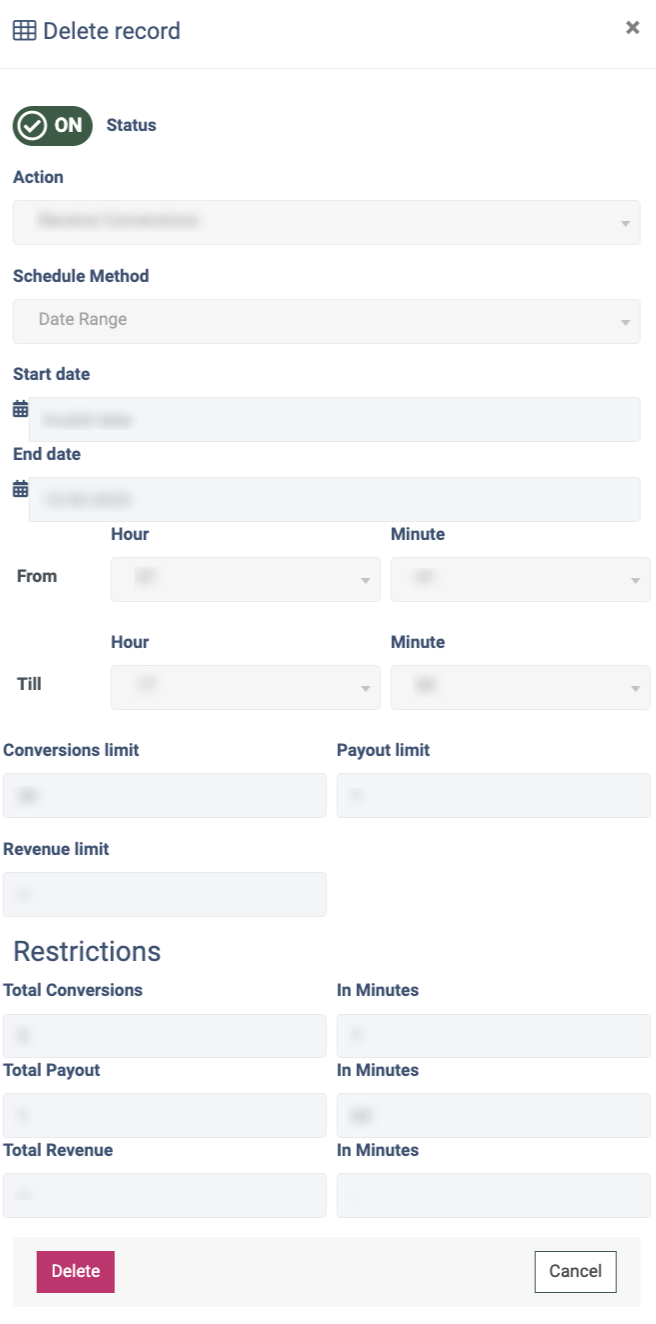
How to Delete the Schedule Rule
To delete a Schedule rule, click the “Delete” button in the “Action” column.
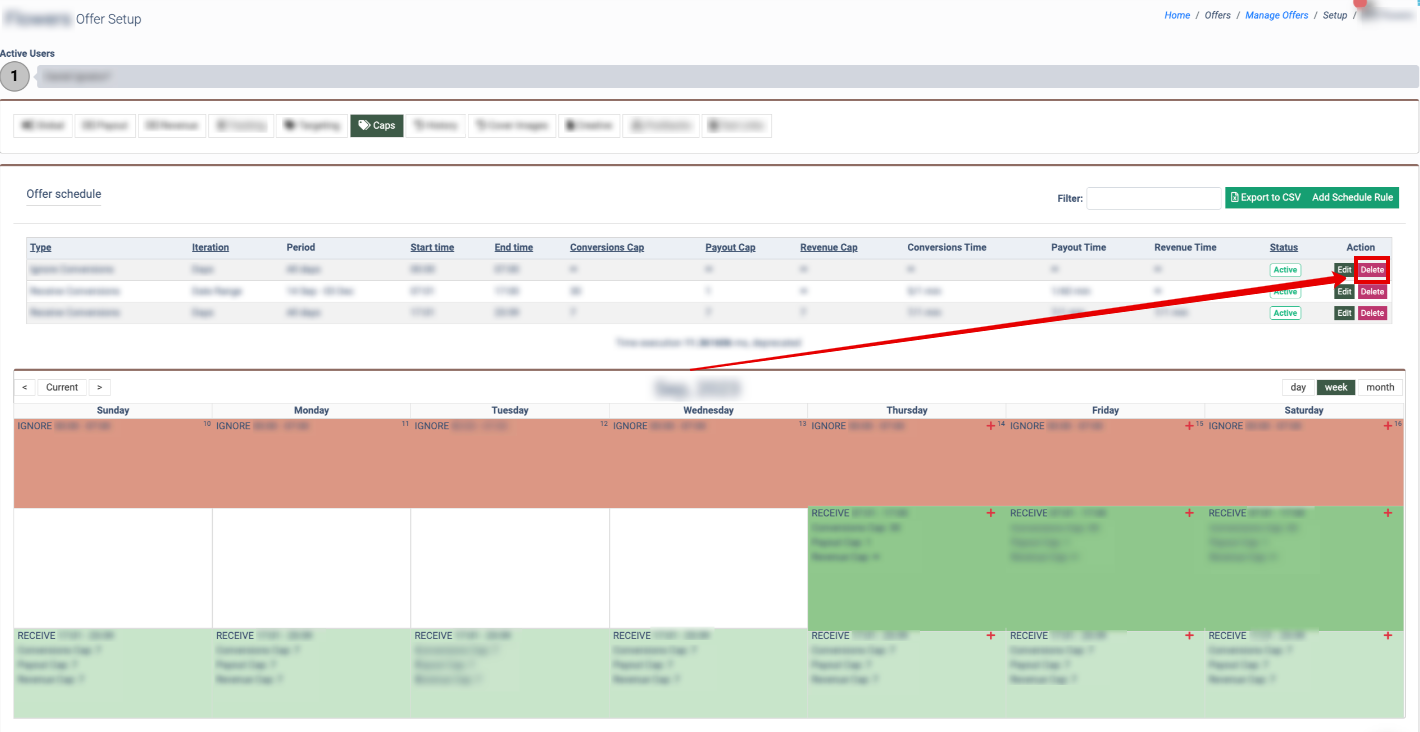
To confirm the action, click the “Delete” button in the “Delete record” pop-up window, or click the “Cancel” button to close the window.
How to Create a Cap Override
To create a cap override, click the “+” button in the calendar section to override the Schedule rule for the specific day only.
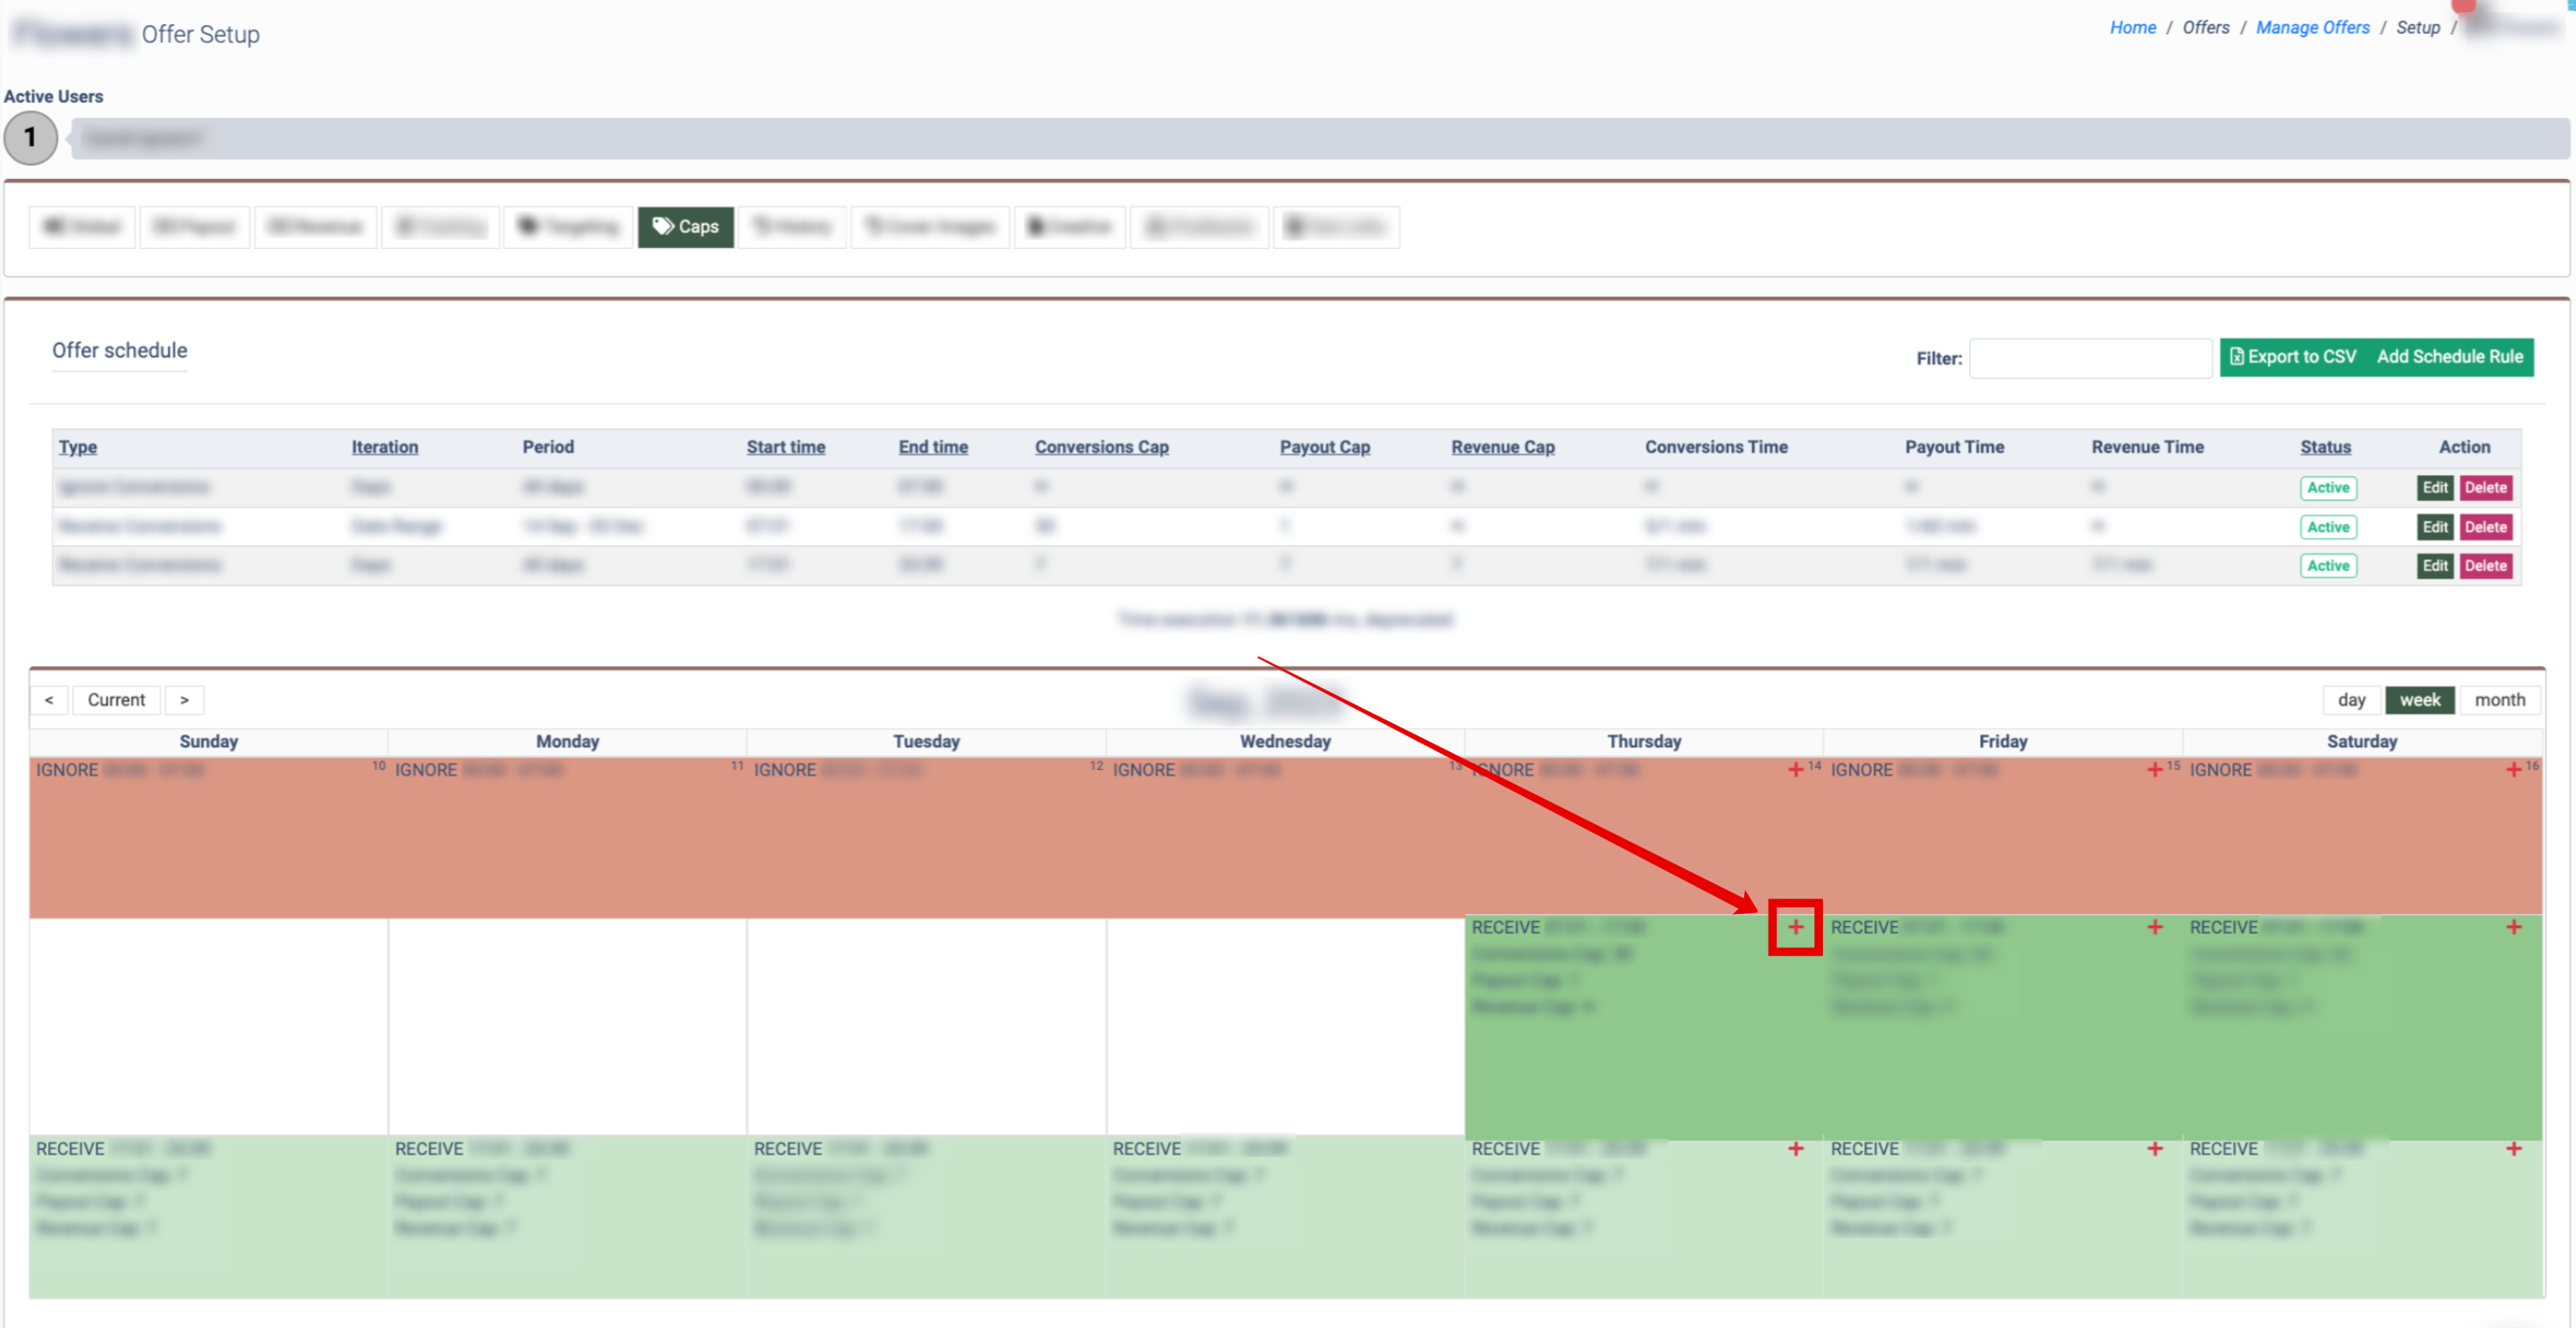
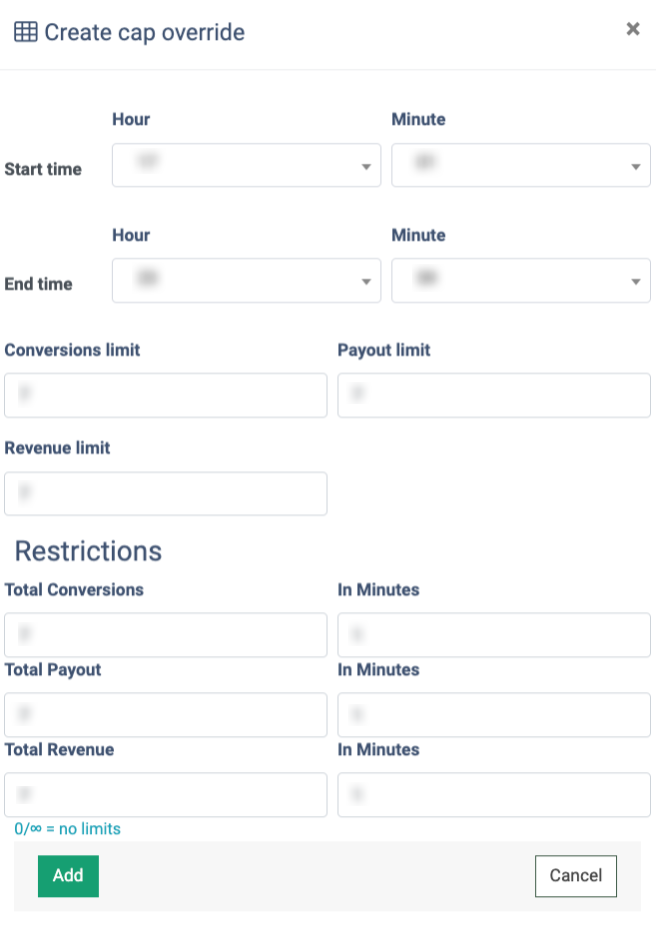
In the “Create cap override” pop-up window fill in the following information:
- Start time: The time for the Cap override when it is started.
- End time: The time for the Cap override when it is stopped.
- Conversions limit: Enter the numerical limit conversions for this specific day.
- Payout limit: Enter the numerical limit for the payout for this specific day.
- Revenue limit: Enter the numerical limit for revenue for this specific day.
- Total Conversions: Enter the numerical limit for total conversions for this specific day.
- Total Payout: Enter the numerical limit for the total payout for this specific day.
- Total Revenue: Enter the numerical limit for total revenue for this specific day.
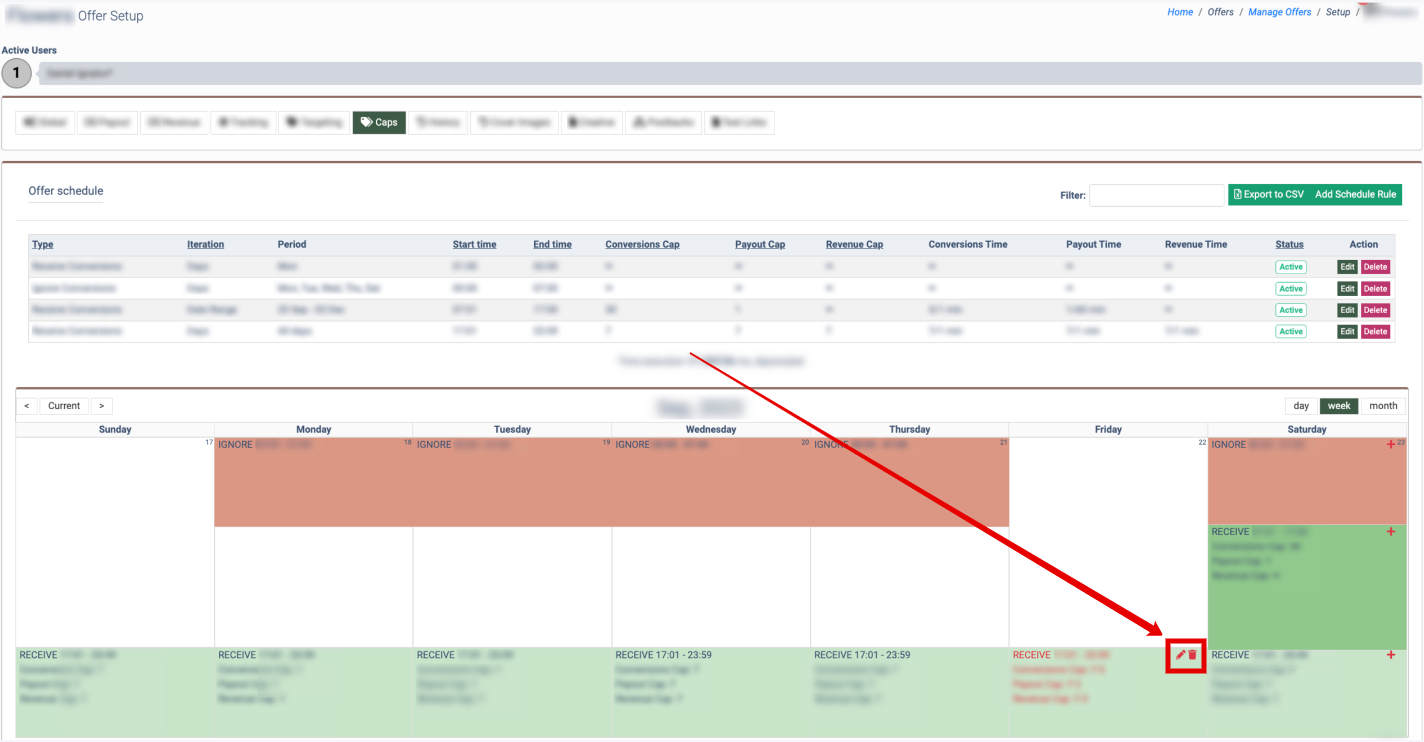
Once the Cap is overridden for a specific day, you will be able to change its parameters or delete the Cap override:
- To change the Cap override settings, click the "Change cap override" button with the pencil icon on it. Fill in the fields in the “Change cap override” pop-up window, click the “Save” button to proceed with the changes, or click the “Cancel” button to close the window.
- To delete the Cap override settings, click the “Delete cap override” button with the bucket icon on it. To confirm the action click the “Delete” button in the “Delete cap override” pop-up window, or click the “Cancel” button to close the window. As you complete this action, the Cap will return to its original settings.
To change the calendar view, click the “day”, “week”, or “month” buttons.
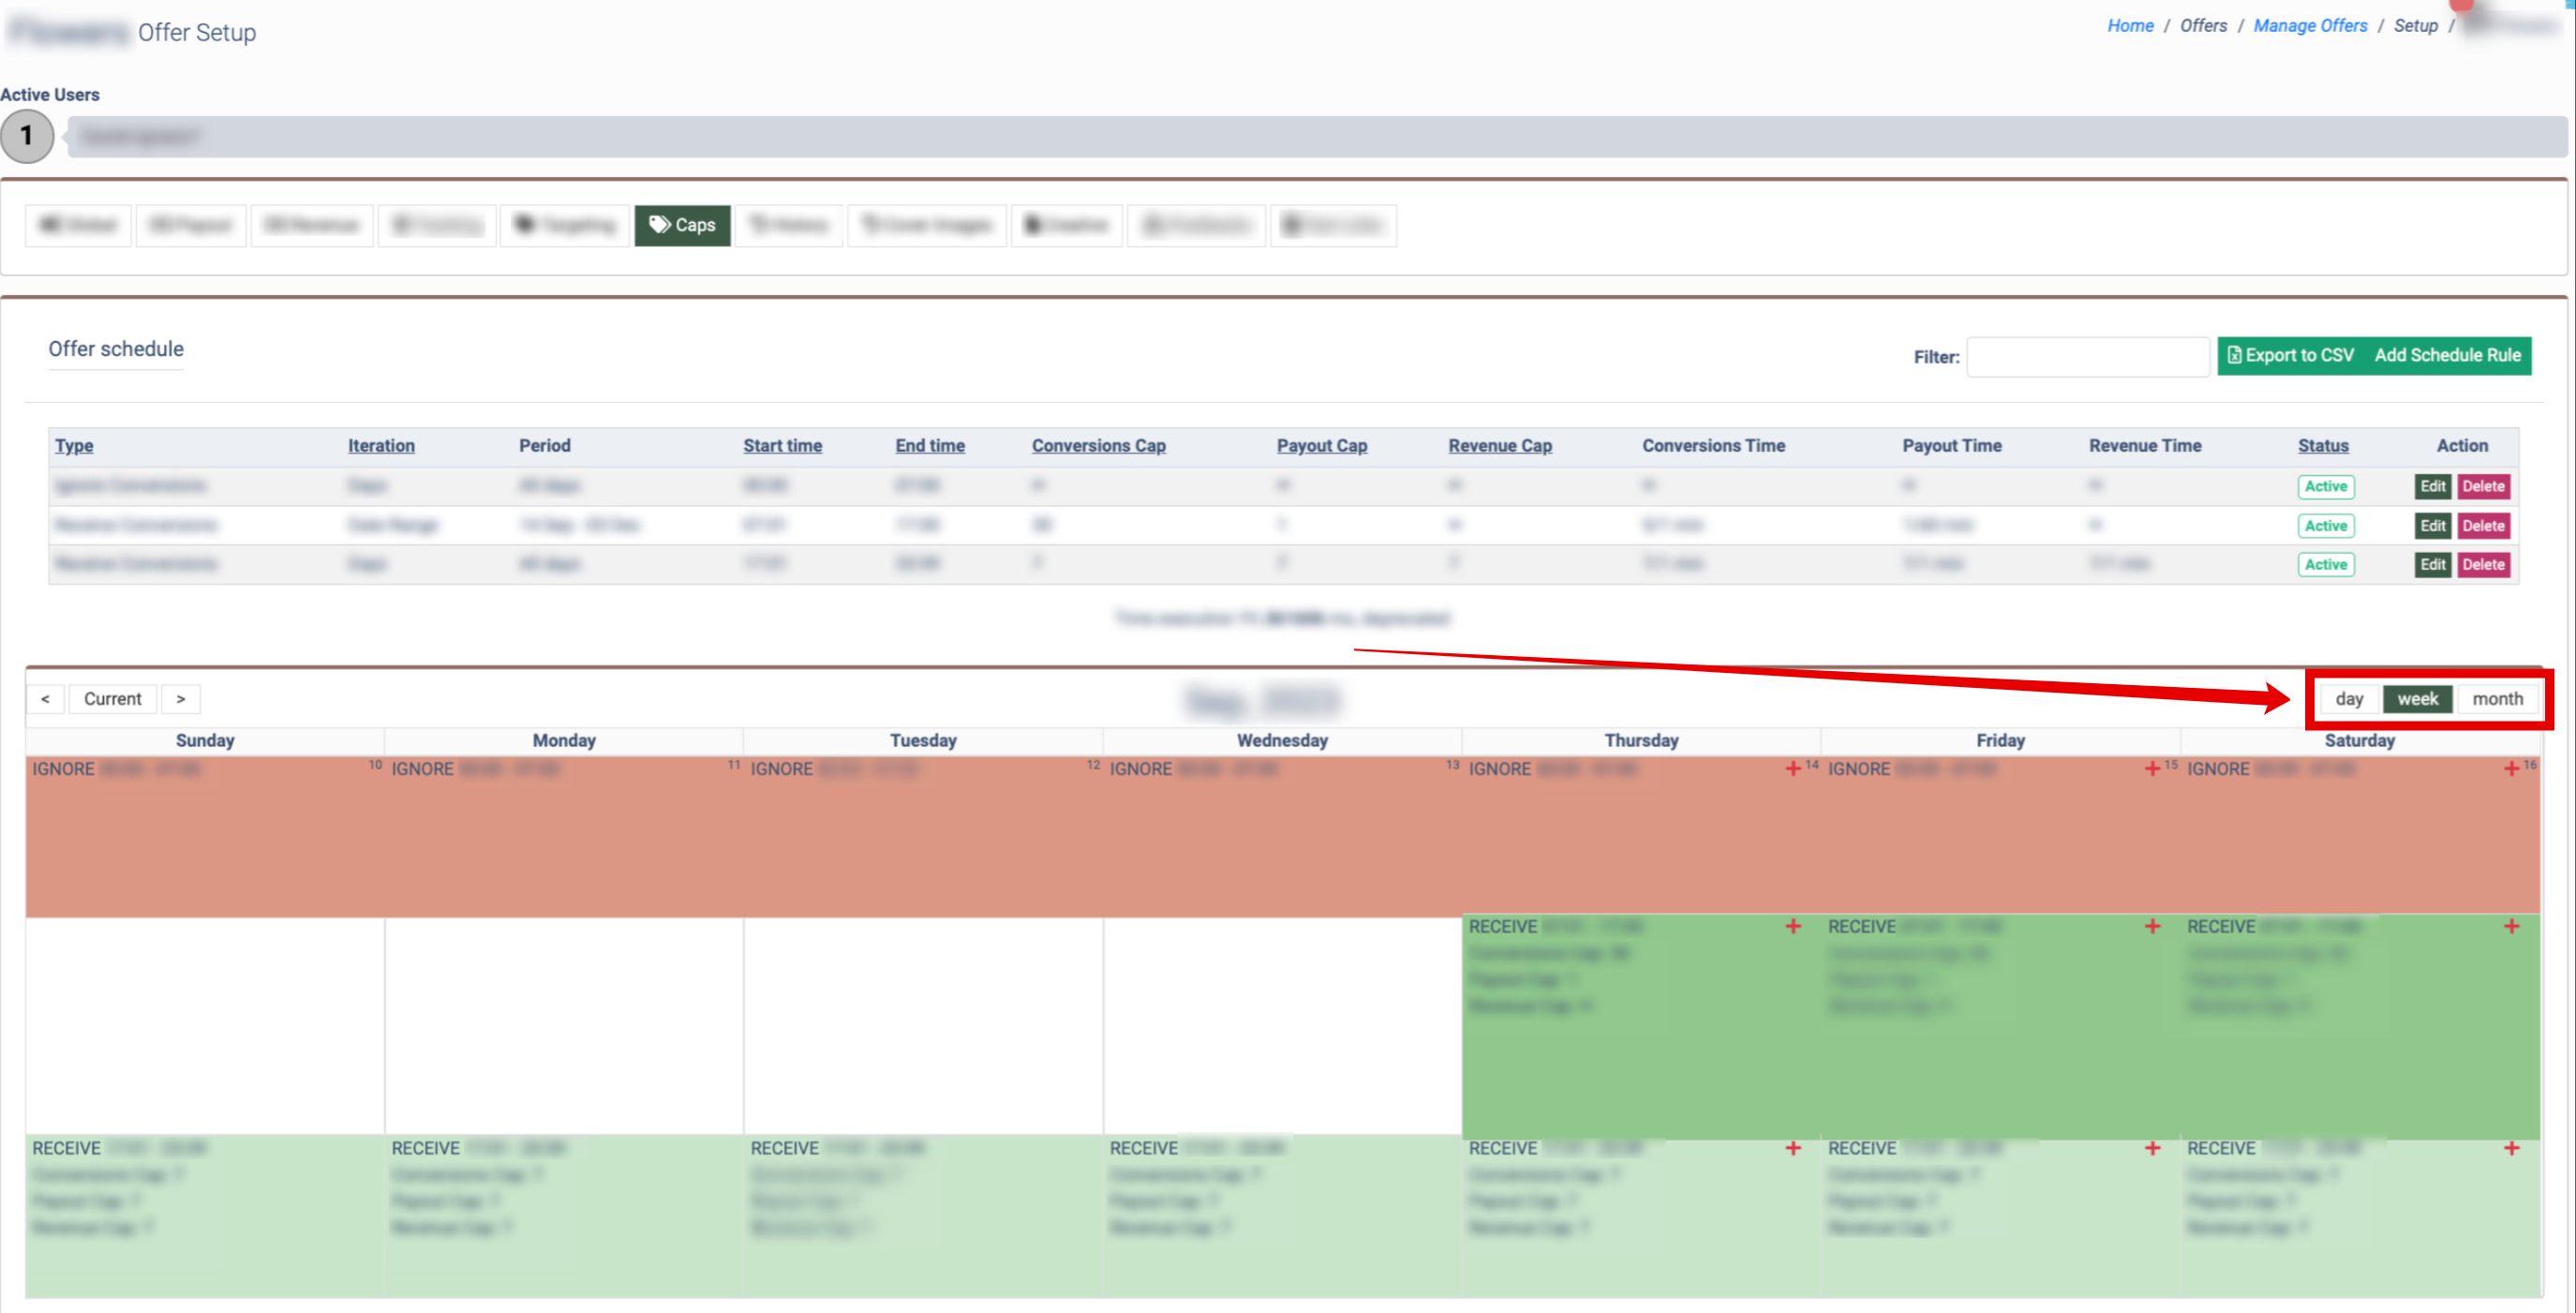
To export data to the CSV file, click the "Export to CSV" button.
History
The History tab allows you to view all of the actions towards the Offer setup by the system users.
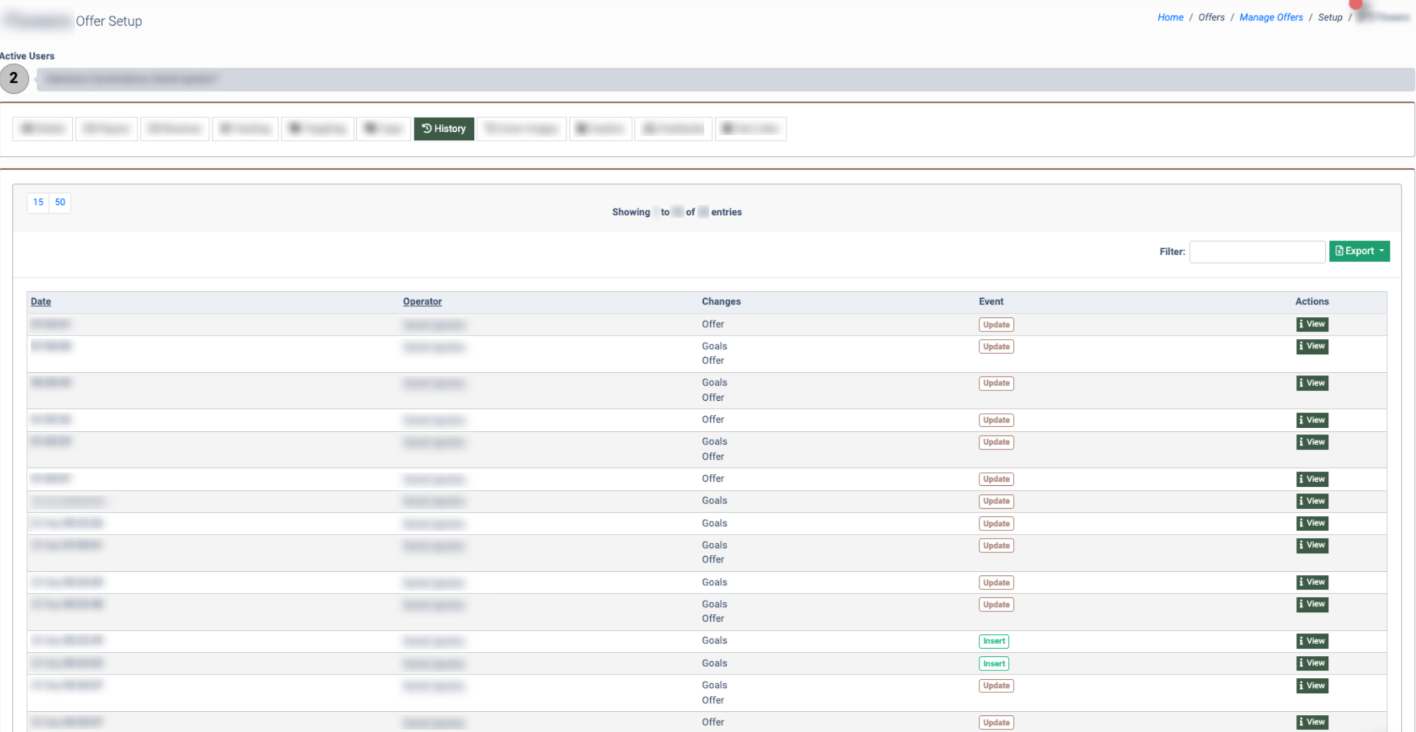
The History tab contains the following information:
- Date: The date and time when the user has made changes to the Offer.
- Operator: The name of the user that has made changes.
- Changes: The name of the section where the change has been made.
- Event: The type of action that the user has committed (Insert, Update, Delete).
To view detailed information about the changes that have been made by the user, click the “View” button in the “Actions” column.
Click the "Export" button to export data to the CSV file.
Cover Images
The Cover Images tab allows you to upload and assign the image for an Offer.
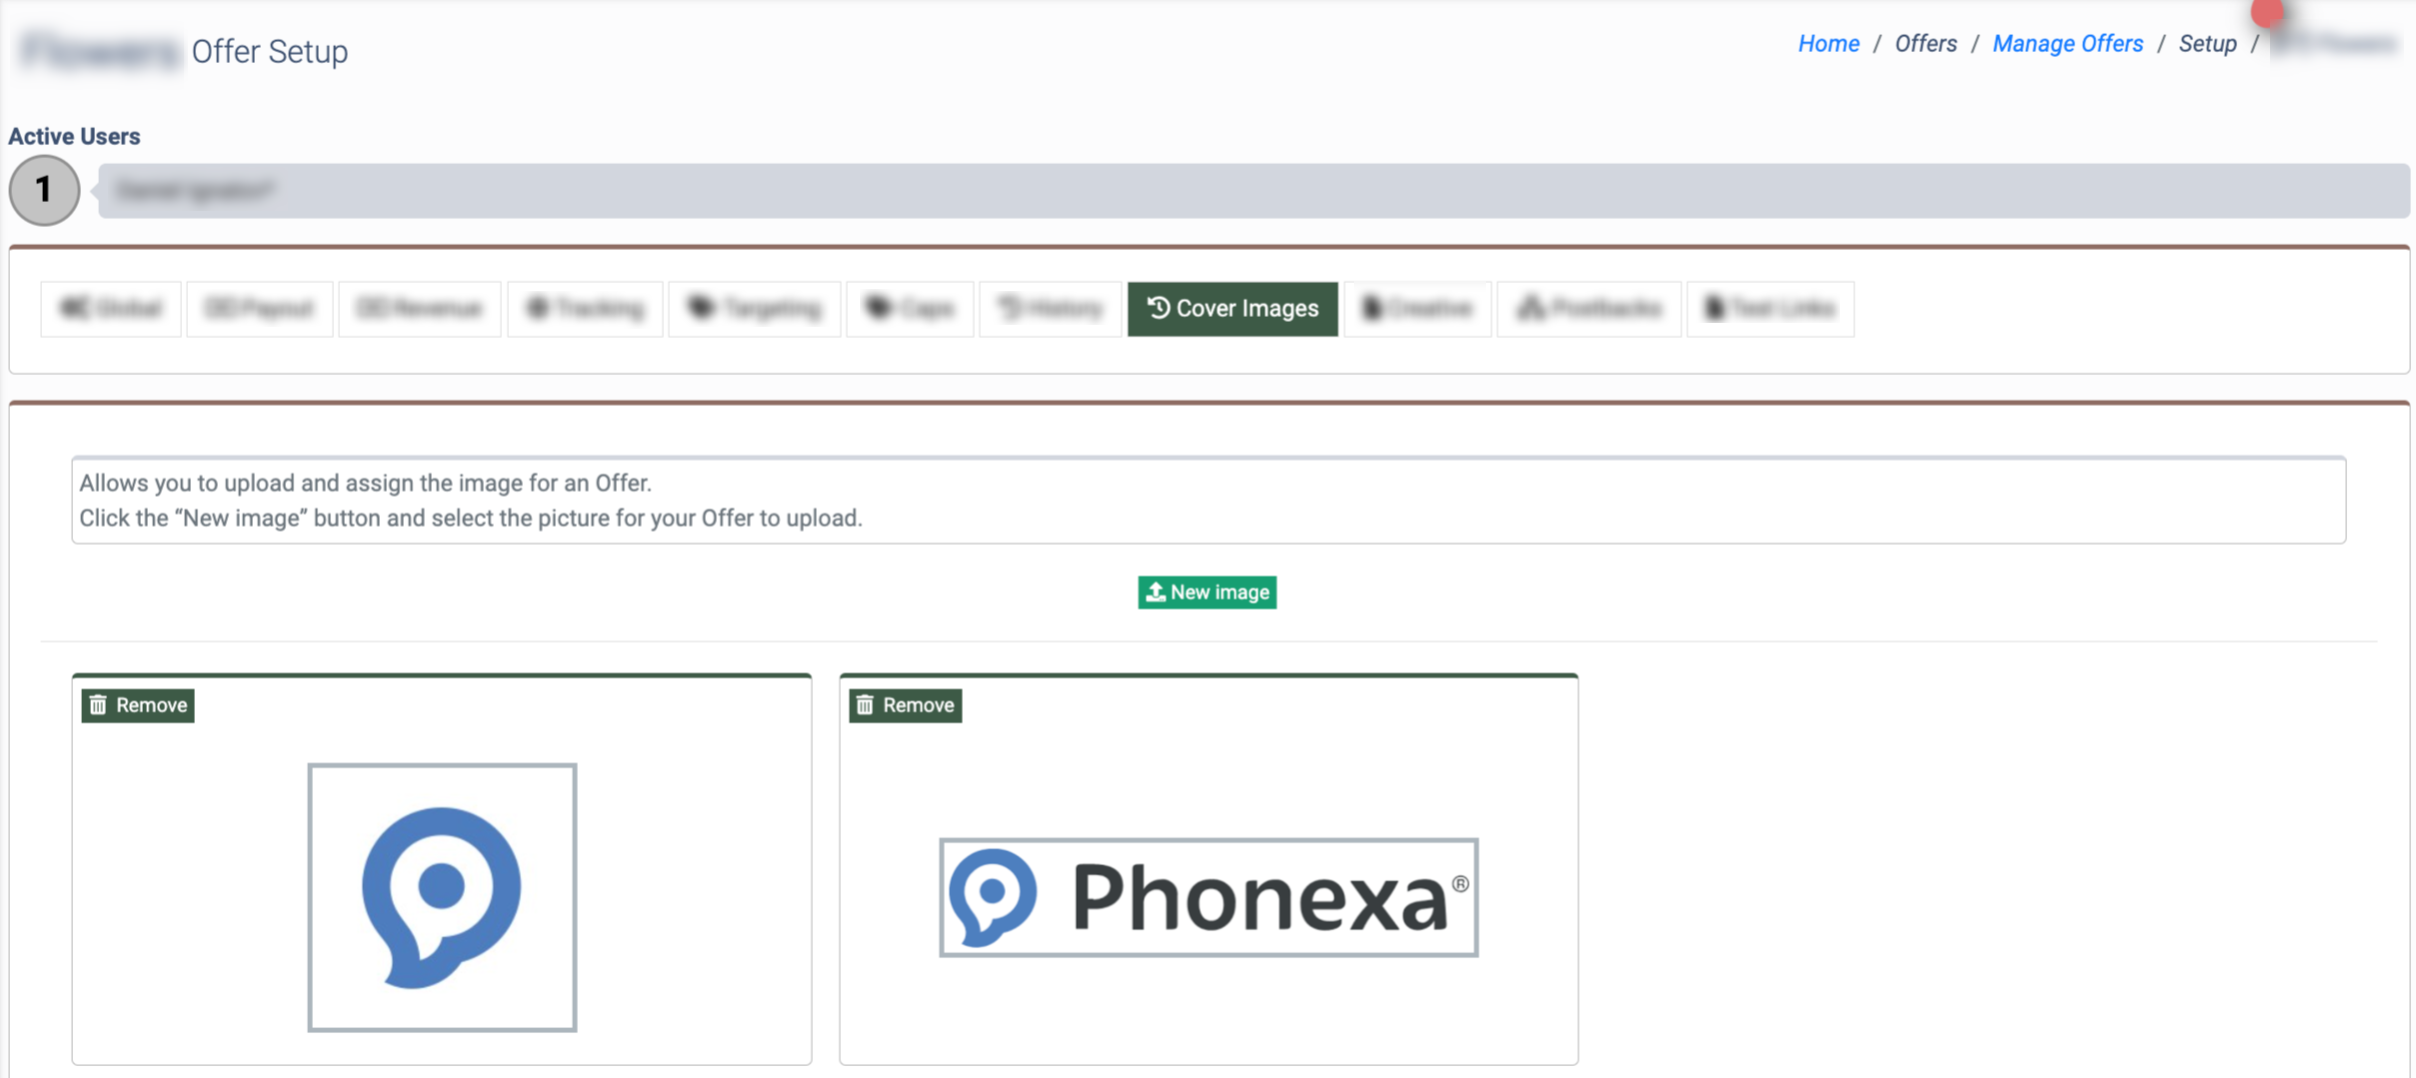
To add an image to the Offer, click the “New image” button and select the picture to upload.
To delete an image from the Offer, click the “Remove” button and confirm the action in the “Remove” pop-up window, or click the “Cancel” button to close the window.
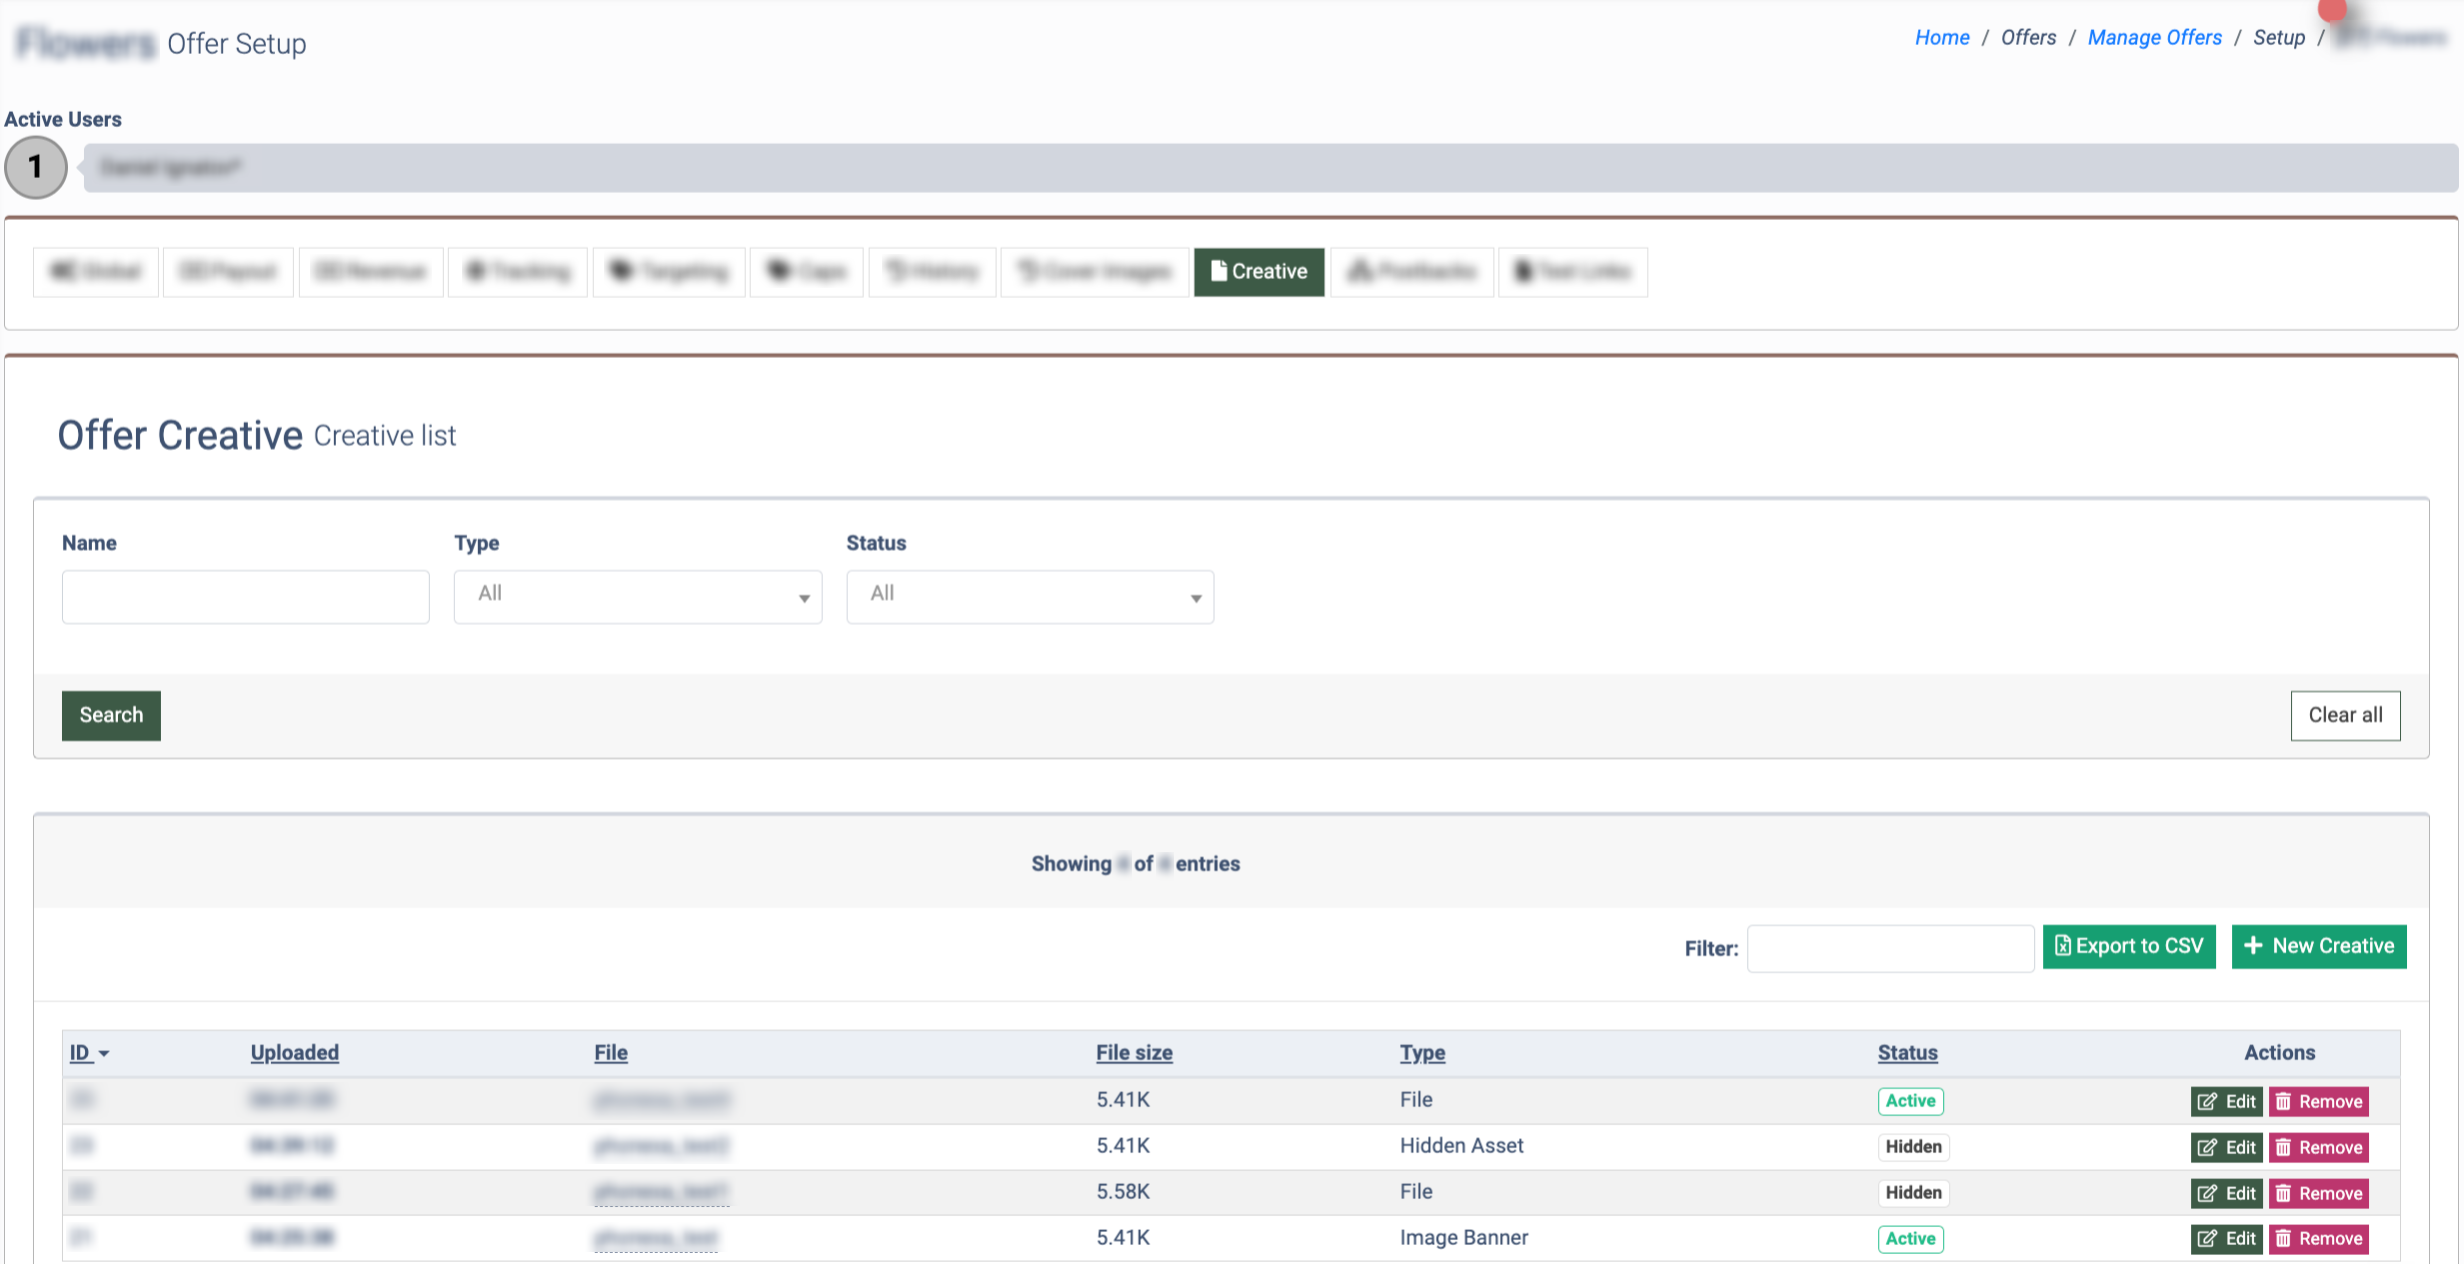
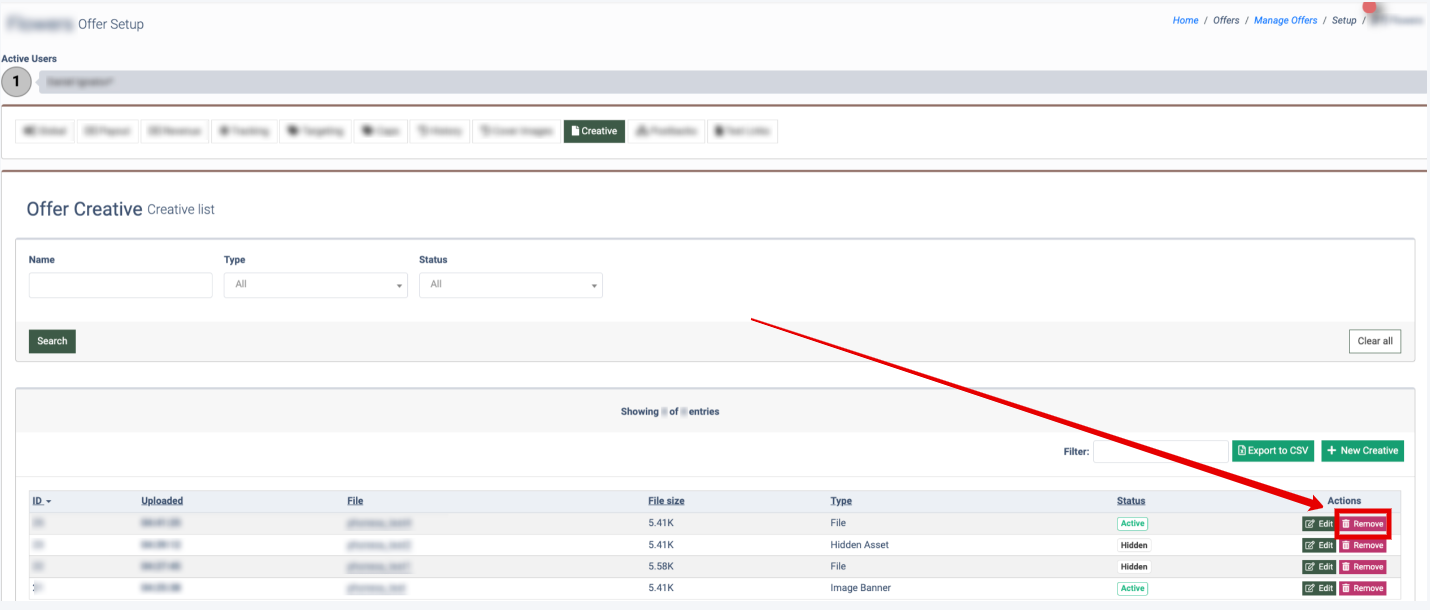
Creative
The Creative tab allows you to create different types of Offer Creatives (File, Image Banner, Flash Banner, Hidden Asset, and Cover Banner) and immediately assign them to the specific Offer.
You can narrow down the search results by using the following filters:
- Name: Enter the name of the Offer Creative.
- Type: Select the type of the Offer Creative(File, Image Banner, Flash Banner, Hidden Asset, and Cover Banner).
- Status: Select the status of the Offer Creative (Active, Hidden).
The Offer Creative list contains the following information:
- ID: The unique identification number of the Offer Creative.
- Uploaded: The date and time when the Offer Creative was uploaded.
- File: The name of the file.
- File size: The size of the file.
- Type: The type of the Offer Creative (File, Image Banner, Flash Banner, Hidden Asset, and Cover Banner).
- Status: The status of the Offer Creative (Active, Hidden).
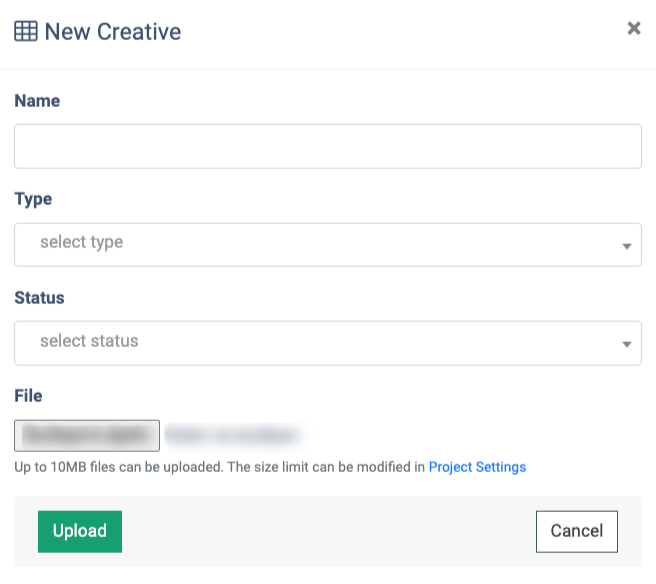
How to Create a New Offer Creative
To create a new Offer Creative, click the “+ New Creative” button.
In the “New Creative” pop-up window fill in the following fields:
- Name: Enter the name of the Offer Creative.
- Type: Select the type of the Offer Creative (File, Image Banner, Flash Banner, Hidden Asset, Cover Banner).
- Status: Select the status (Active, Hidden).
- File: Select the file locally from your drive.
Click the “Upload” button to complete the action, or click the “Cancel” button to close the “New Creative” pop-up window.
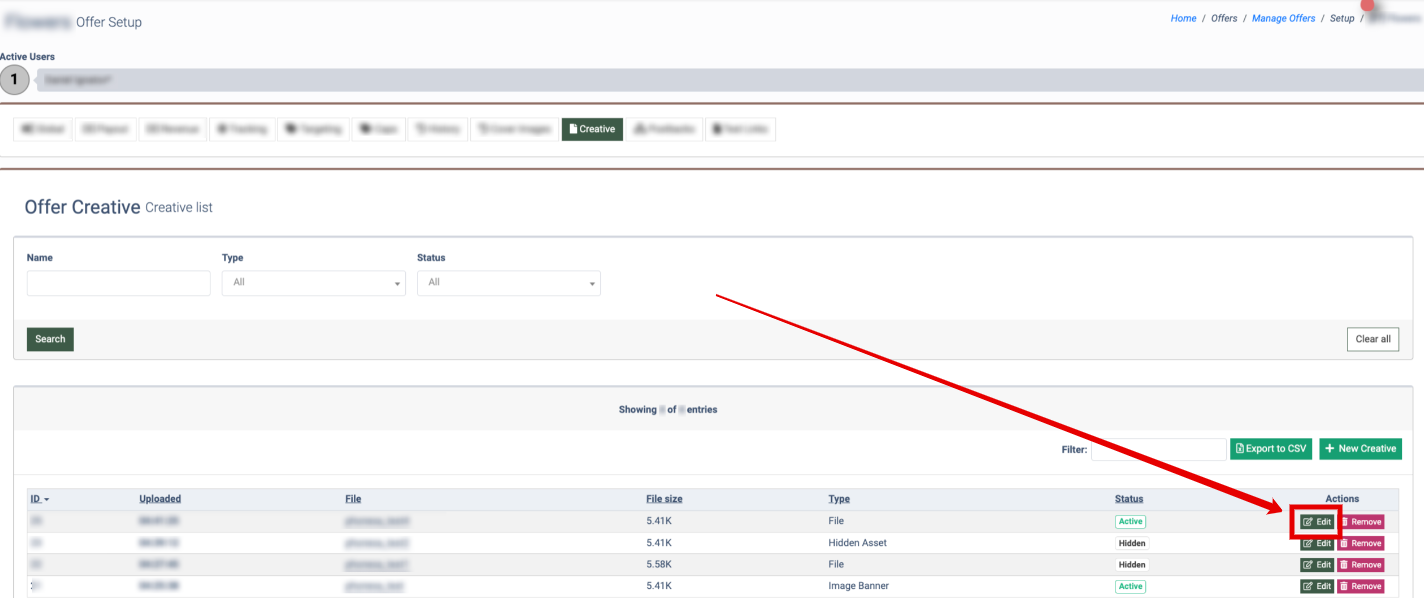
How to Configure the Offer Creative
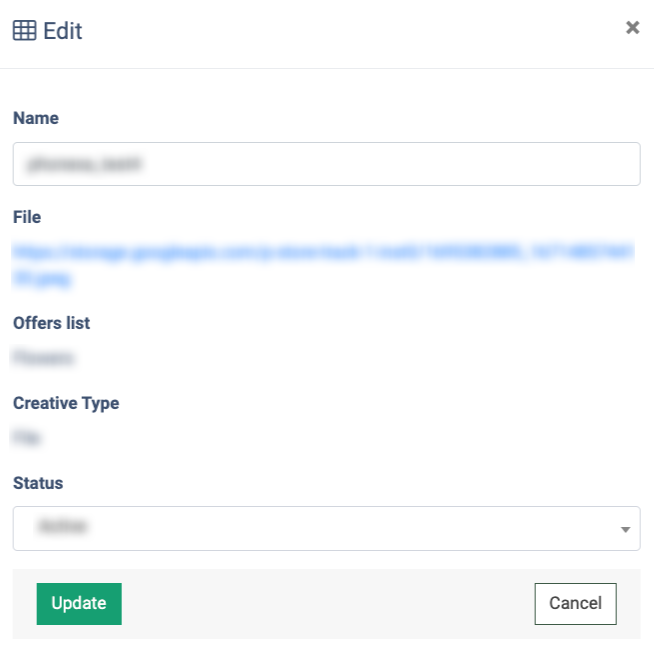
To configure the Offer Creative, click the “Edit” button in the “Actions” column. The “Edit” pop-up window allows you to edit the name and status of the Offer Creative.
In the “Edit” pop-up window fill in the following field:
- Name: Enter the name of the Offer Creative.
- File: The link to the image uploaded to the cloud storage.
- Offers list: The name of the Offer the Offer Creative is attached to.
- Creative Type: The type of the Offer Creative (File, Image Banner, Flash Banner, Hidden Asset, Cover Banner)
- Status: Select the status (Active, Hidden)
Click the “Update” button to complete the action, or click the “Cancel” button to close the “Edit” pop-up window.
How to Delete the Offer Creative
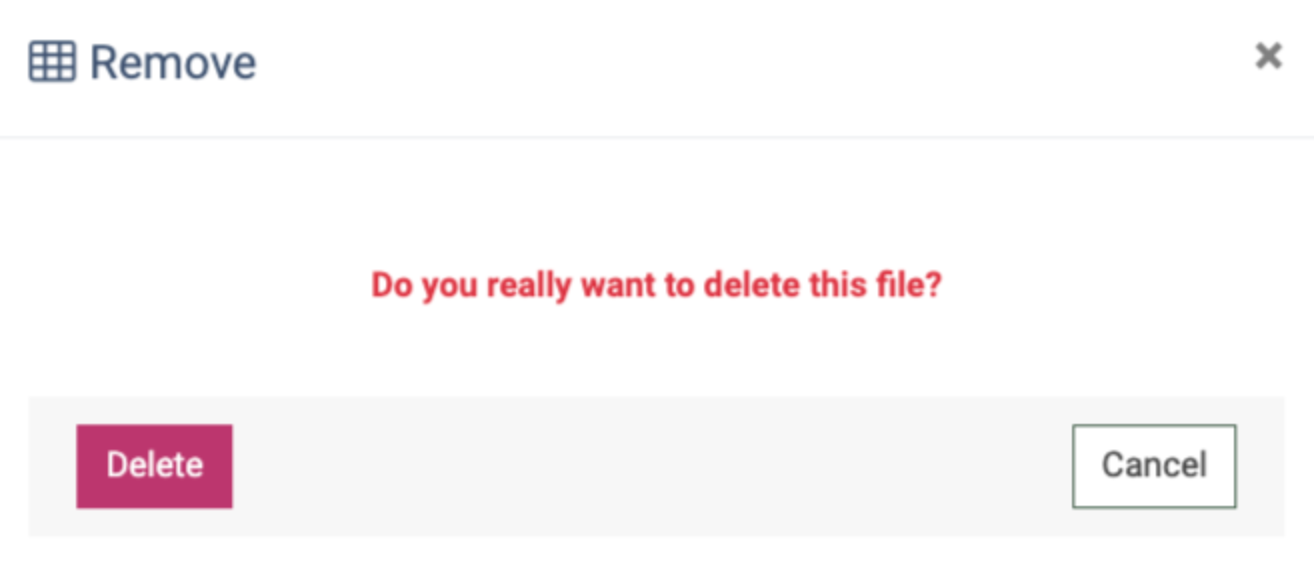
To delete the Offer Creative, click the “Remove” button in the “Actions” column.
In the “Remove” pop-up window, click the “Delete” button to confirm the action, or click the “Cancel” button to close the window.
Click the "Export to CSV" button to export data to the CSV file.
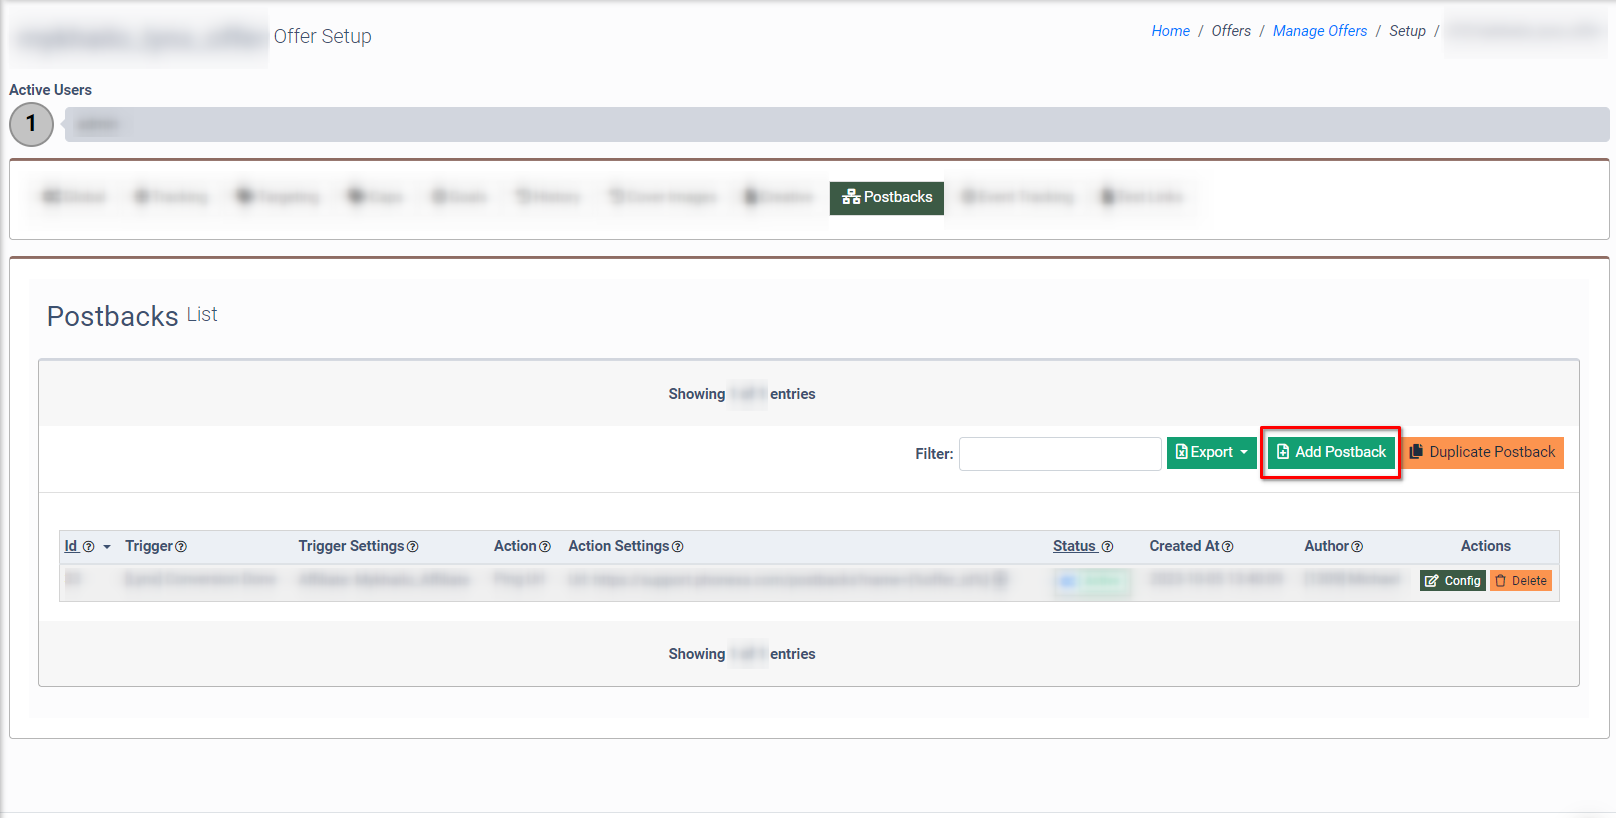
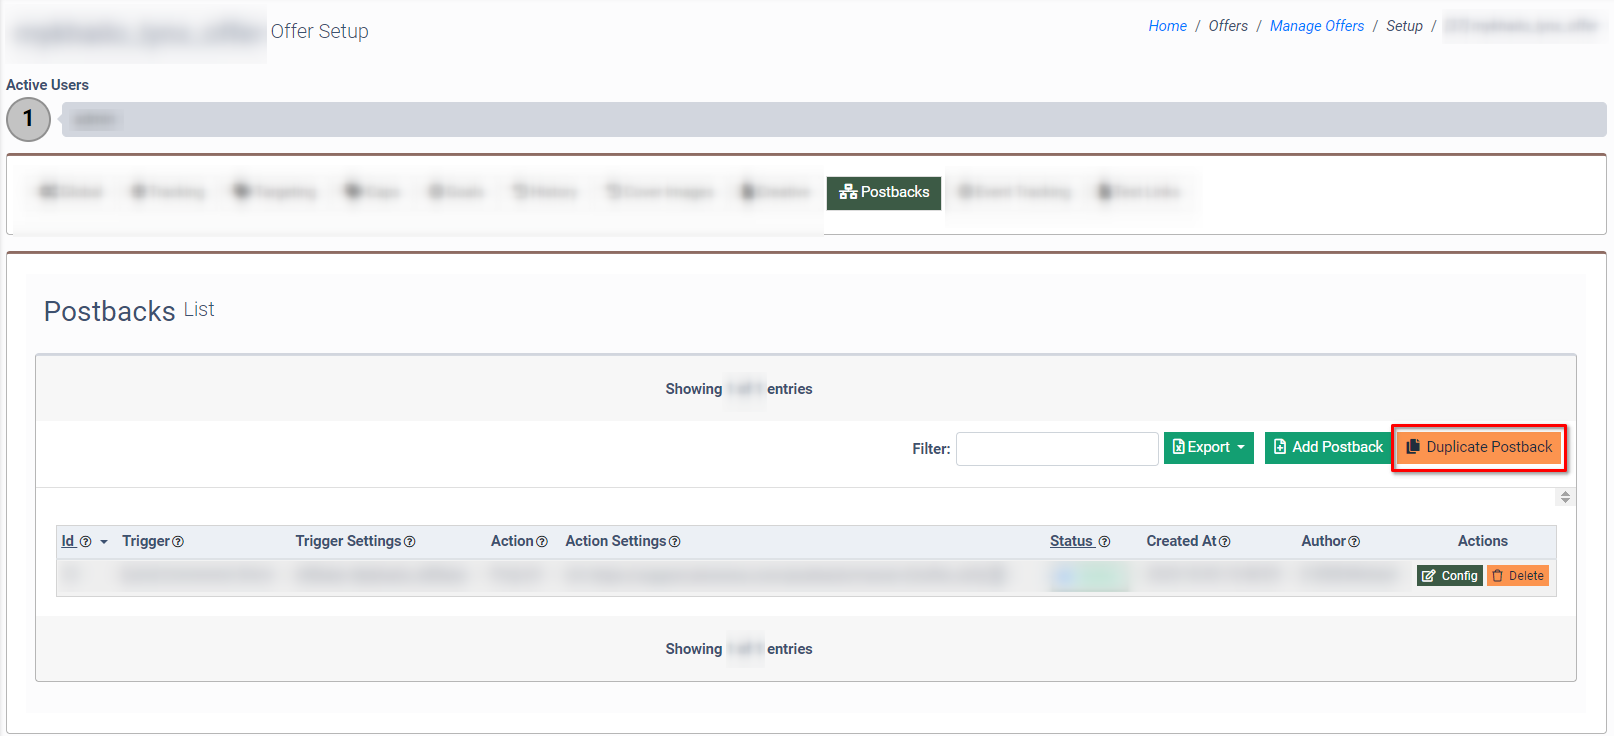
Postbacks
The Postbacks tab allows you to configure the postback feature. The postback feature allows to postback of specific conversion parameters to third-party services.
Read more about the postbacks in this Knowledge Base article.
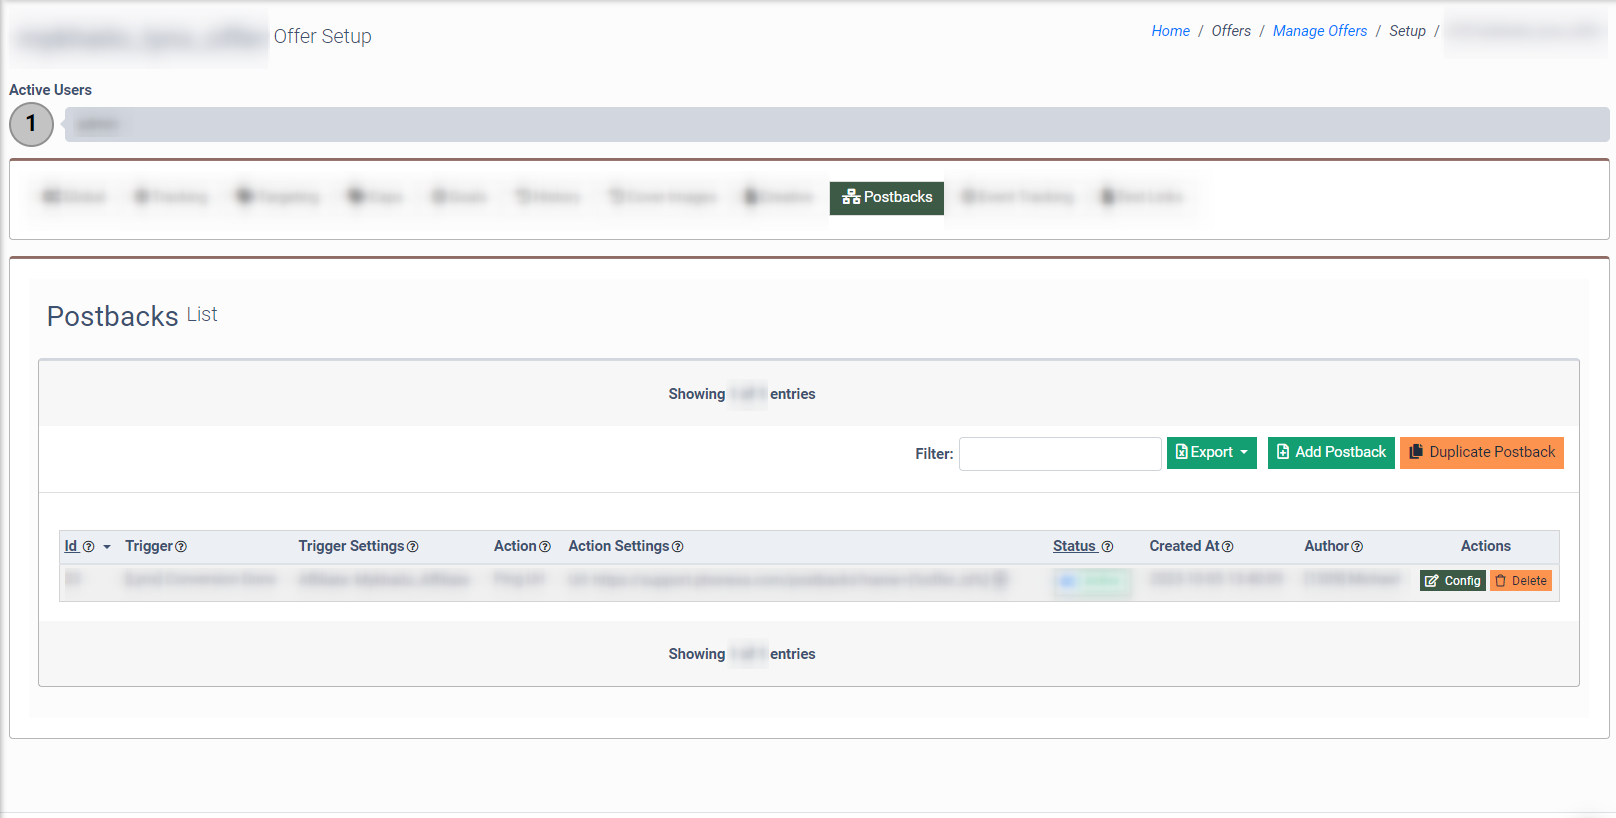
The Postbacks section contains the following information:
- ID: The unique identification number of the postback.
- Trigger: The name of the trigger.
- Trigger Settings: The combination of the general postback trigger settings for which the conversions are tracked.
- Action: The name of the action.
- Action Settings: The list of the action postback settings, such as method and URL.
- Status (Active / Disabled): The status of the postback. Note: To change the postback status, click the corresponding button and select the status in the pop-up window.
- Created At: The date and time of the postback creation.
- Author: The ID and name of the user created a postback.
How to Create a New Postback
To create a new Postback, click the “Add New Postback” button in the “Actions” column.
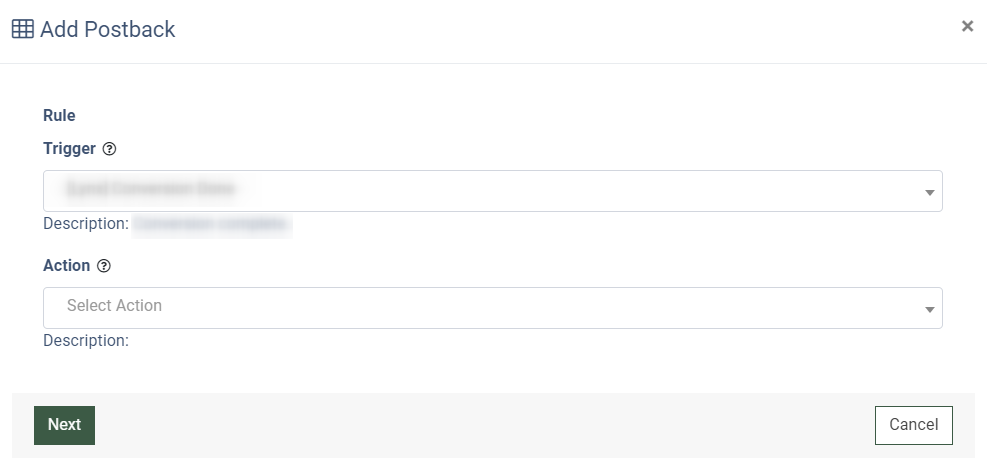
Fill in the following fields in the “New Postback” pop-up window:
- Trigger: Select the postback trigger.
- [Lynx] Conversion Done: The Lynx conversion is completed.
- [Lynx] Conversion Reject: The Lynx conversion is rejected.
- [Lynx] Conversion Pending: The Lynx conversion is pending.
- Action: Select the action which determines the way to transfer the conversion data
Read more about available actions for the Postback tracking in the following Knowledge Base article.
Click the “Next” button to proceed.
Follow the instructions from the Knowledge Base article to complete the Postback creation.
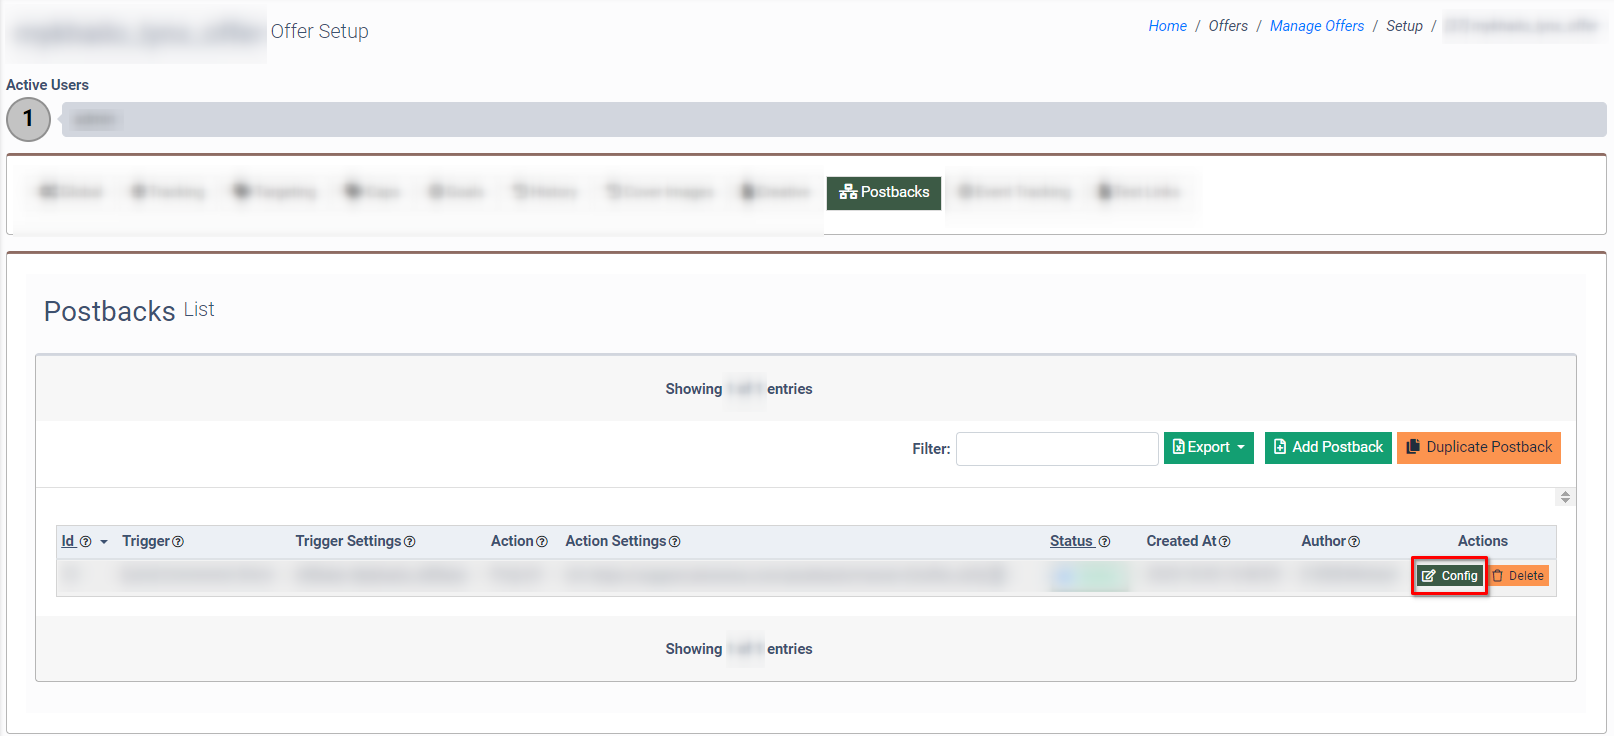
How to Configure the Postback
To configure the Postback, click the “Configure” button in the “Actions” column.
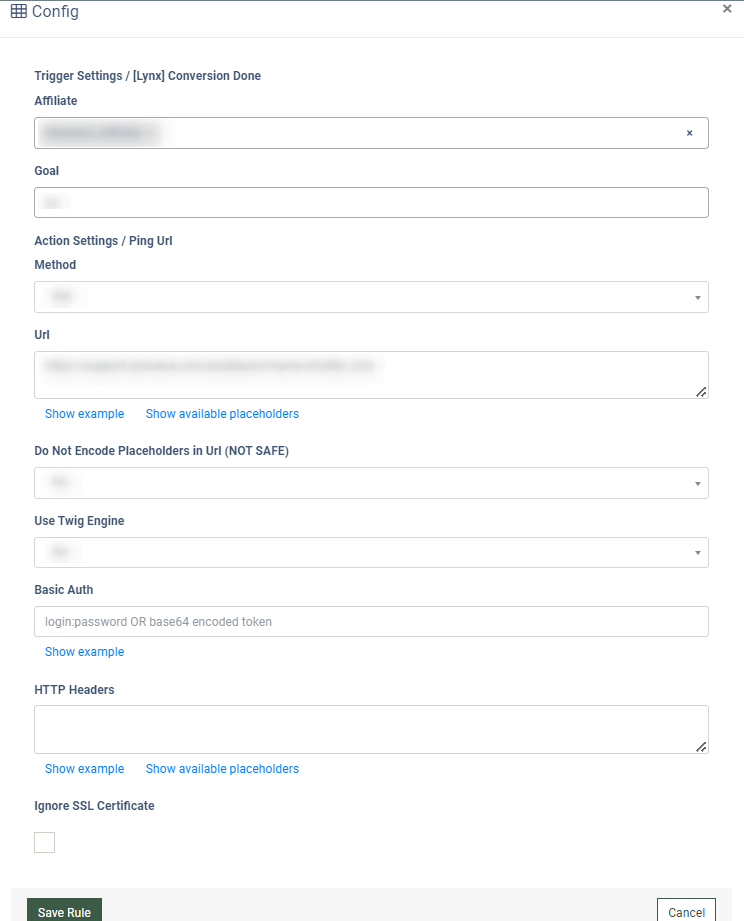
In the “Config” pop-up window fill in the following fields:
- Affiliate: Select the Affiliate for which the conversions are tracked, and that will be one of the conditions to trigger a postback.
- Goal: Select the goal that will be one of the conditions to trigger the postback. This field is available only when the “Enabled Goals” option is enabled via the “Global” tab.
Perform the corresponding changes to the fields that are available depending on the previous rule selection, and the “Save Rule” button to complete the action, or click the “Cancel” button to close the window.
Read more about the Postback rule configuration in the following Knowledge Base article.
How to Duplicate the Postback
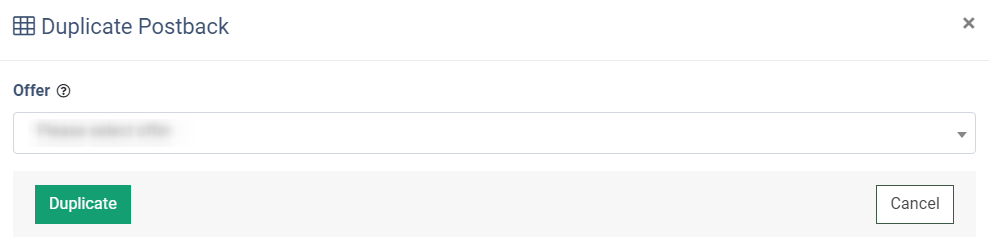
To create a duplicate of the Postback, click the “Duplicate Postback” button.
Select the offer for which the dupe of the ongoing Postback would be created in the “Offer” field of the “Duplicate Postback” pop-up window and click the “Duplicate” button to perform the action.
How to Delete the Postback
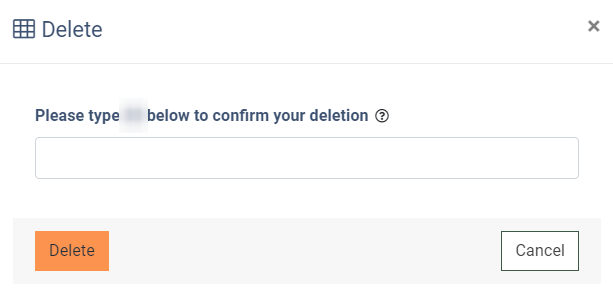
To delete the Postback, click the “Delete” button in the “Actions” column.
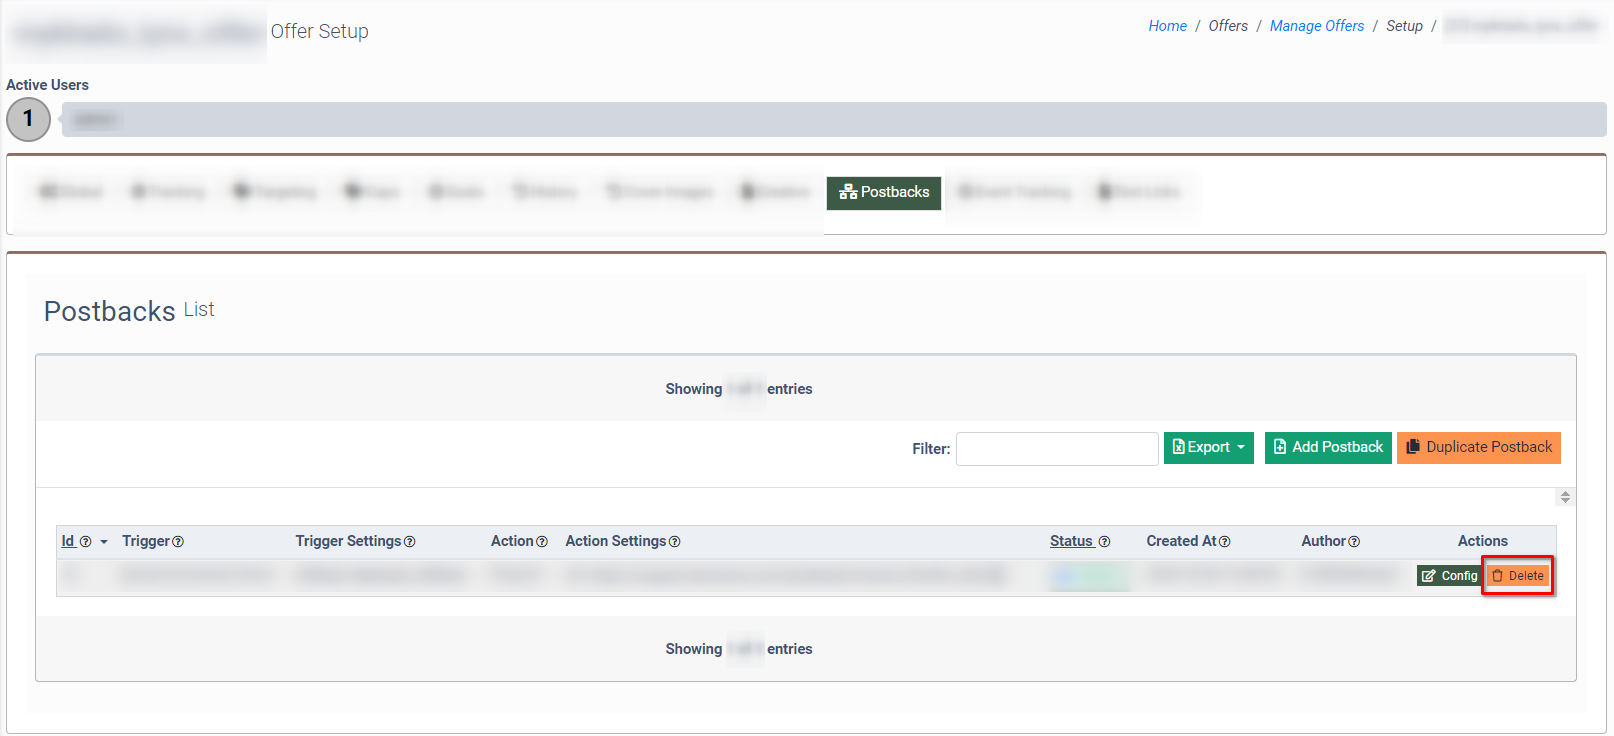
To confirm the action, click the “Delete” button in the “Delete record” pop-up window, or click the “Cancel” button to close the window.
Click the "Export to CSV" button to export data to the CSV file.
The Email tab enables shared email suppression through the Opt-Intel-Lynx integration. This feature simplifies the management of suppression lists and opt-out links directly from Lynx accounts. Now, when running email marketing campaigns, affiliates can automatically sync up-to-date suppression files and opt-out links, ensuring compliance with email regulations.
For example, a company has an offer, and its affiliates are running an email marketing campaign using Lynx to track performance and Opt-Intel for managing suppression lists to comply with email regulations. Once the suppression lists are activated for a specific offer, affiliates will have access to the most current suppression lists directly within their Lynx platform, removing the need to log into their Opt-Intel account each time.
This integration streamlines the sharing of suppression lists, saving time and enhancing workflow efficiency by seamlessly managing compliance and tracking performance within a single platform.
-Oct-17-2024-11-25-00-1872-AM.png?hsLang=en)
The “Email Suppression List” block contains the following fields:
- Opt-Intel Suppression List: Switch the toggle to the “ON” position to provide the affiliates with up-to-date suppression files and opt-out links from Opt-Intel.
- Campaign: Select the Opt-Intel Campaign from which the Suppression list will be provided to the affiliates.
Click the “Save” button to apply changes.
Go to the Offers > Live Offers section under the Affiliate user system role, and click the “Offer Details” button to view the Offer. With the enabled “Opt-Intel Suppression List” setting, the system will show the “Email Suppression List” block. It contains the following fields:
- Unsubscribe Url: The link to the Unsubscribe form.
- Download Url: The link to download the list of the recipients who did not unsubscribe.
-2.png?hsLang=en)
Event Tracking
The Event Tracking tab allows you to create and set up events for your offers, and generate their tracking link. When you create an event, you create a custom counter that keeps track of the number of times requests were sent to a certain API. The reporting created for the events will allow you to review the statistics for these events and get a better understanding of how they are performing.
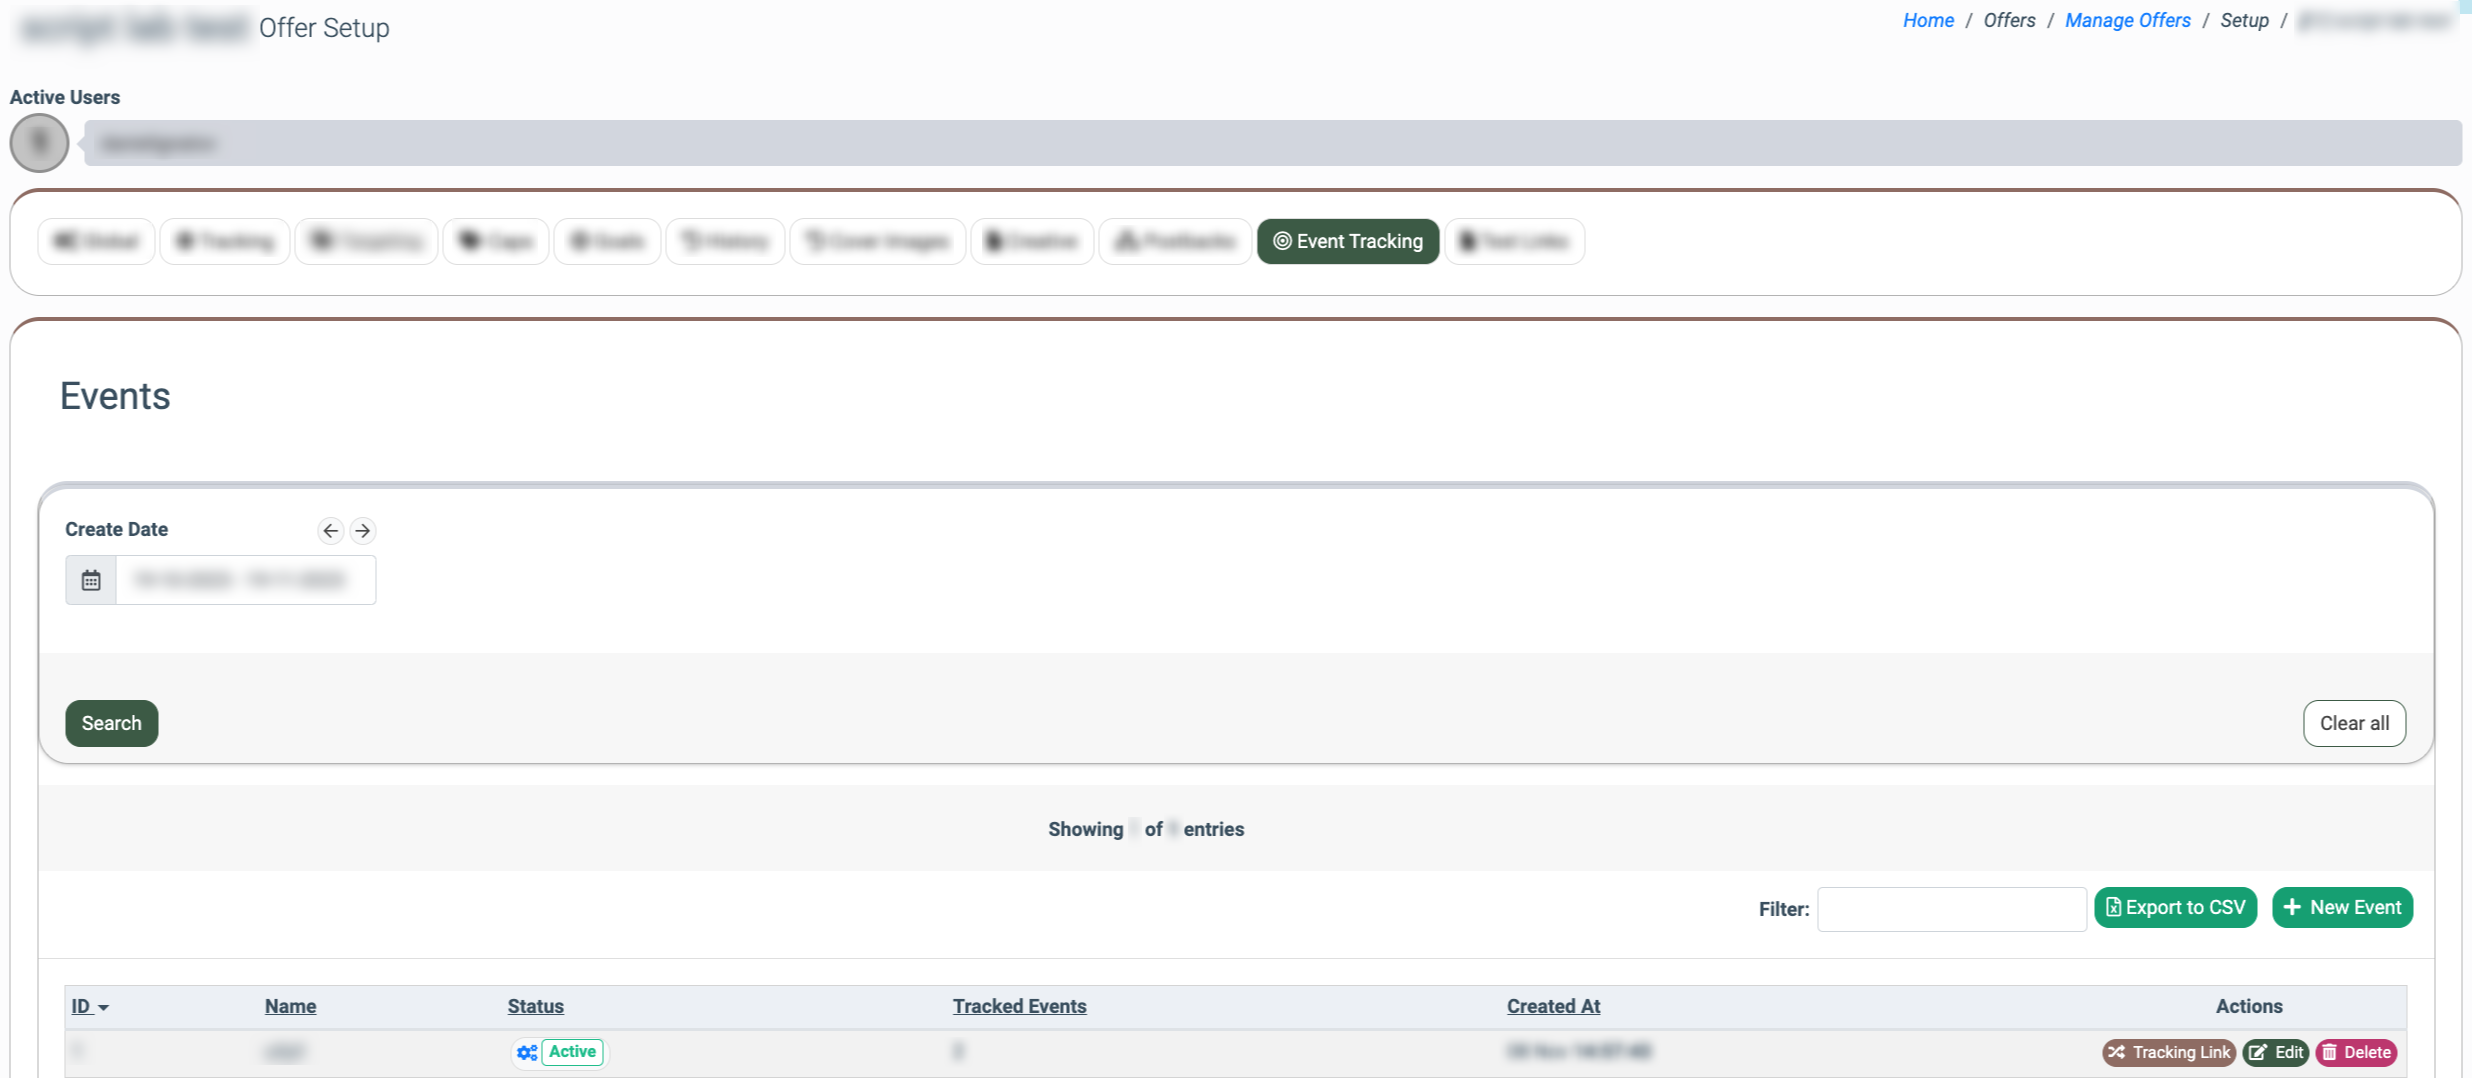
In the “Create Date” field, select a date range for which the quantity of triggered events will be displayed in the “Tracking Events” column of the “Events” list. Note: The “Create Date” filter does not affect the quantity of the shown entries in the list.
The “Events” list contains the following information:
- ID: The unique identification number of the Event.
- Name: The name of the Event.
- Status: The status of the Event (Active/Inactive).
- Tracked Events: The number of tracked events per date range selected in the “Create Date” field in the “Filters” block.
- Created At: The time and date when the Event was created.
Click the "Export to CSV" button to export data to the CSV file.
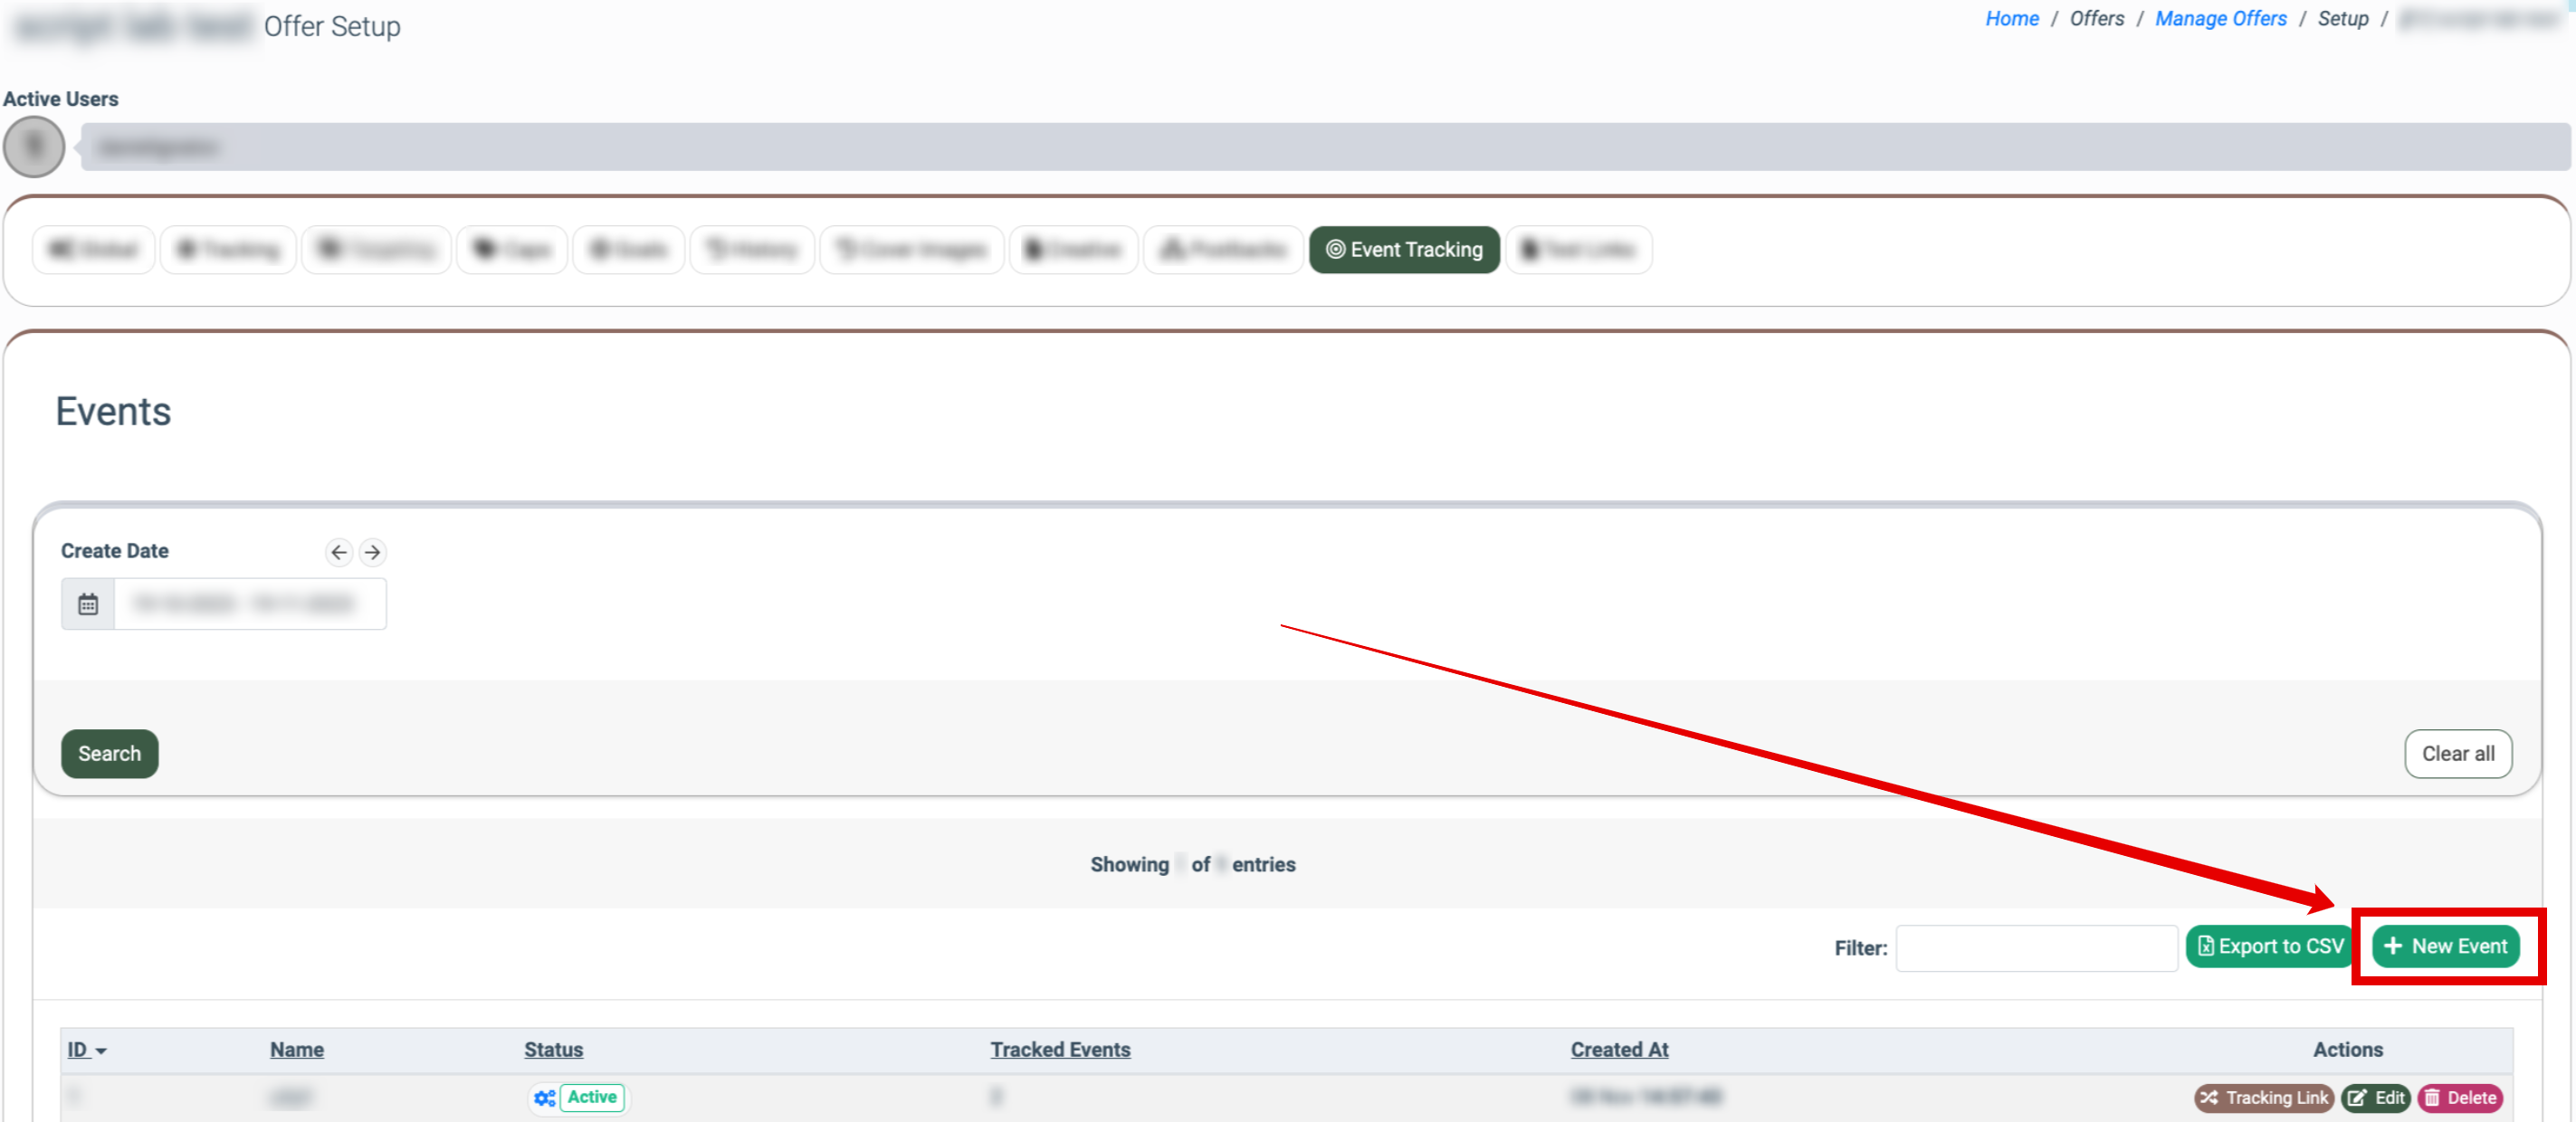
How to Add a New Event
To add a new Event, click the “New Event” button.
In the “New Event” pop-up window fill in the name of the event in the “Name” field and select the status of the event in the “Status” field (Active/Inactive).
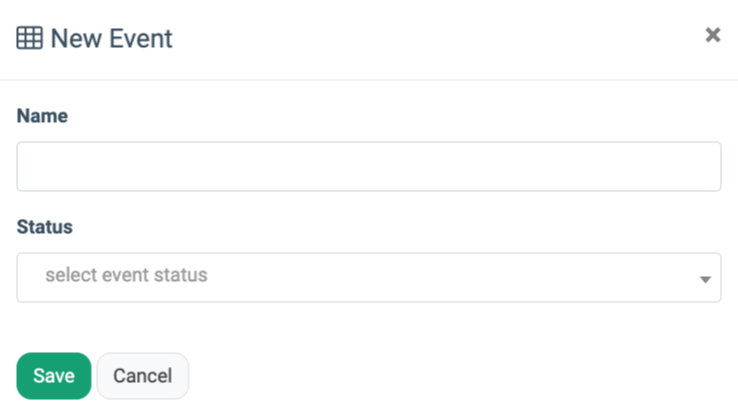
Click the “Save” button to complete the action and click the “Refresh” button to refresh the page, or click the “Cancel” button to close the window.
How to Generate a Tracking Link
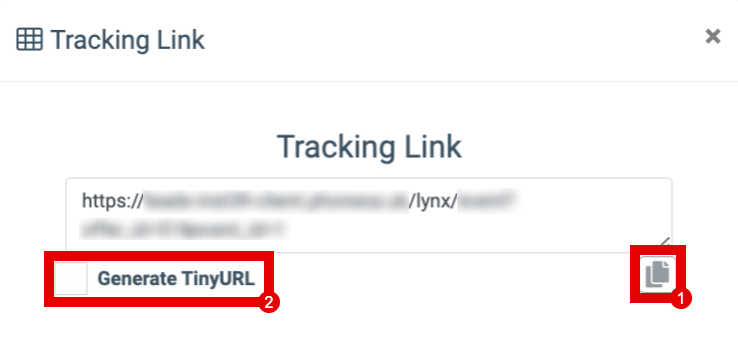
To generate a tracking link, click the “Tracking Link” button in the “Actions” column.
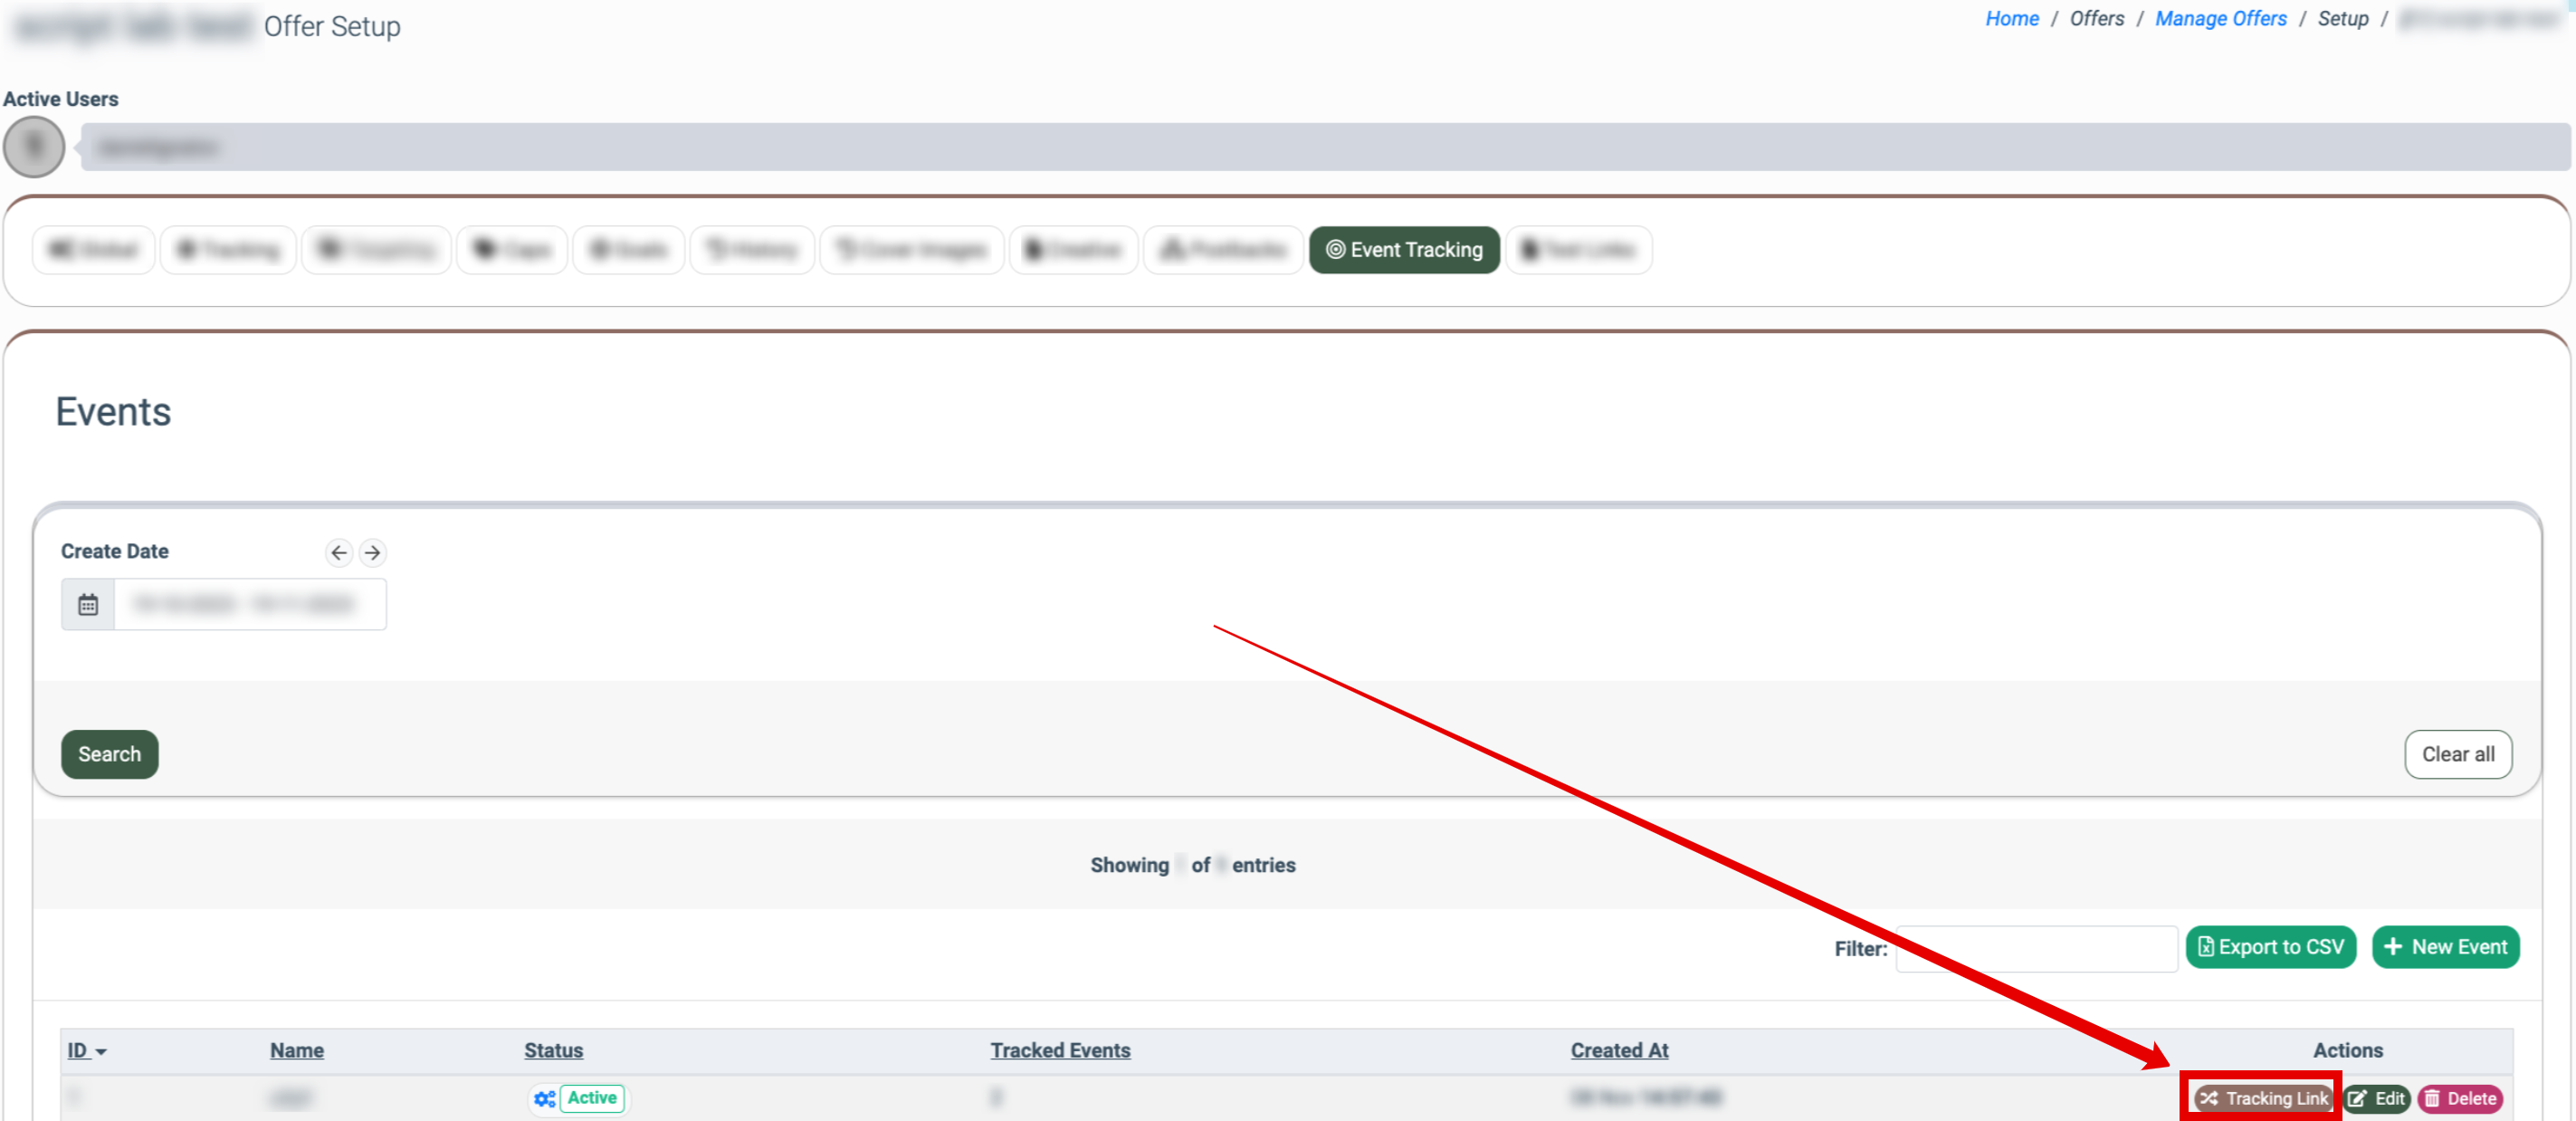
In the “Tracking Link” pop-up window, click the “Copy Tracking Link” button (1) to copy the Tracking Link to the clipboard. Select the “Generate TinyURL” checkbox (2) to generate the shortened link.
How to Configure the Event
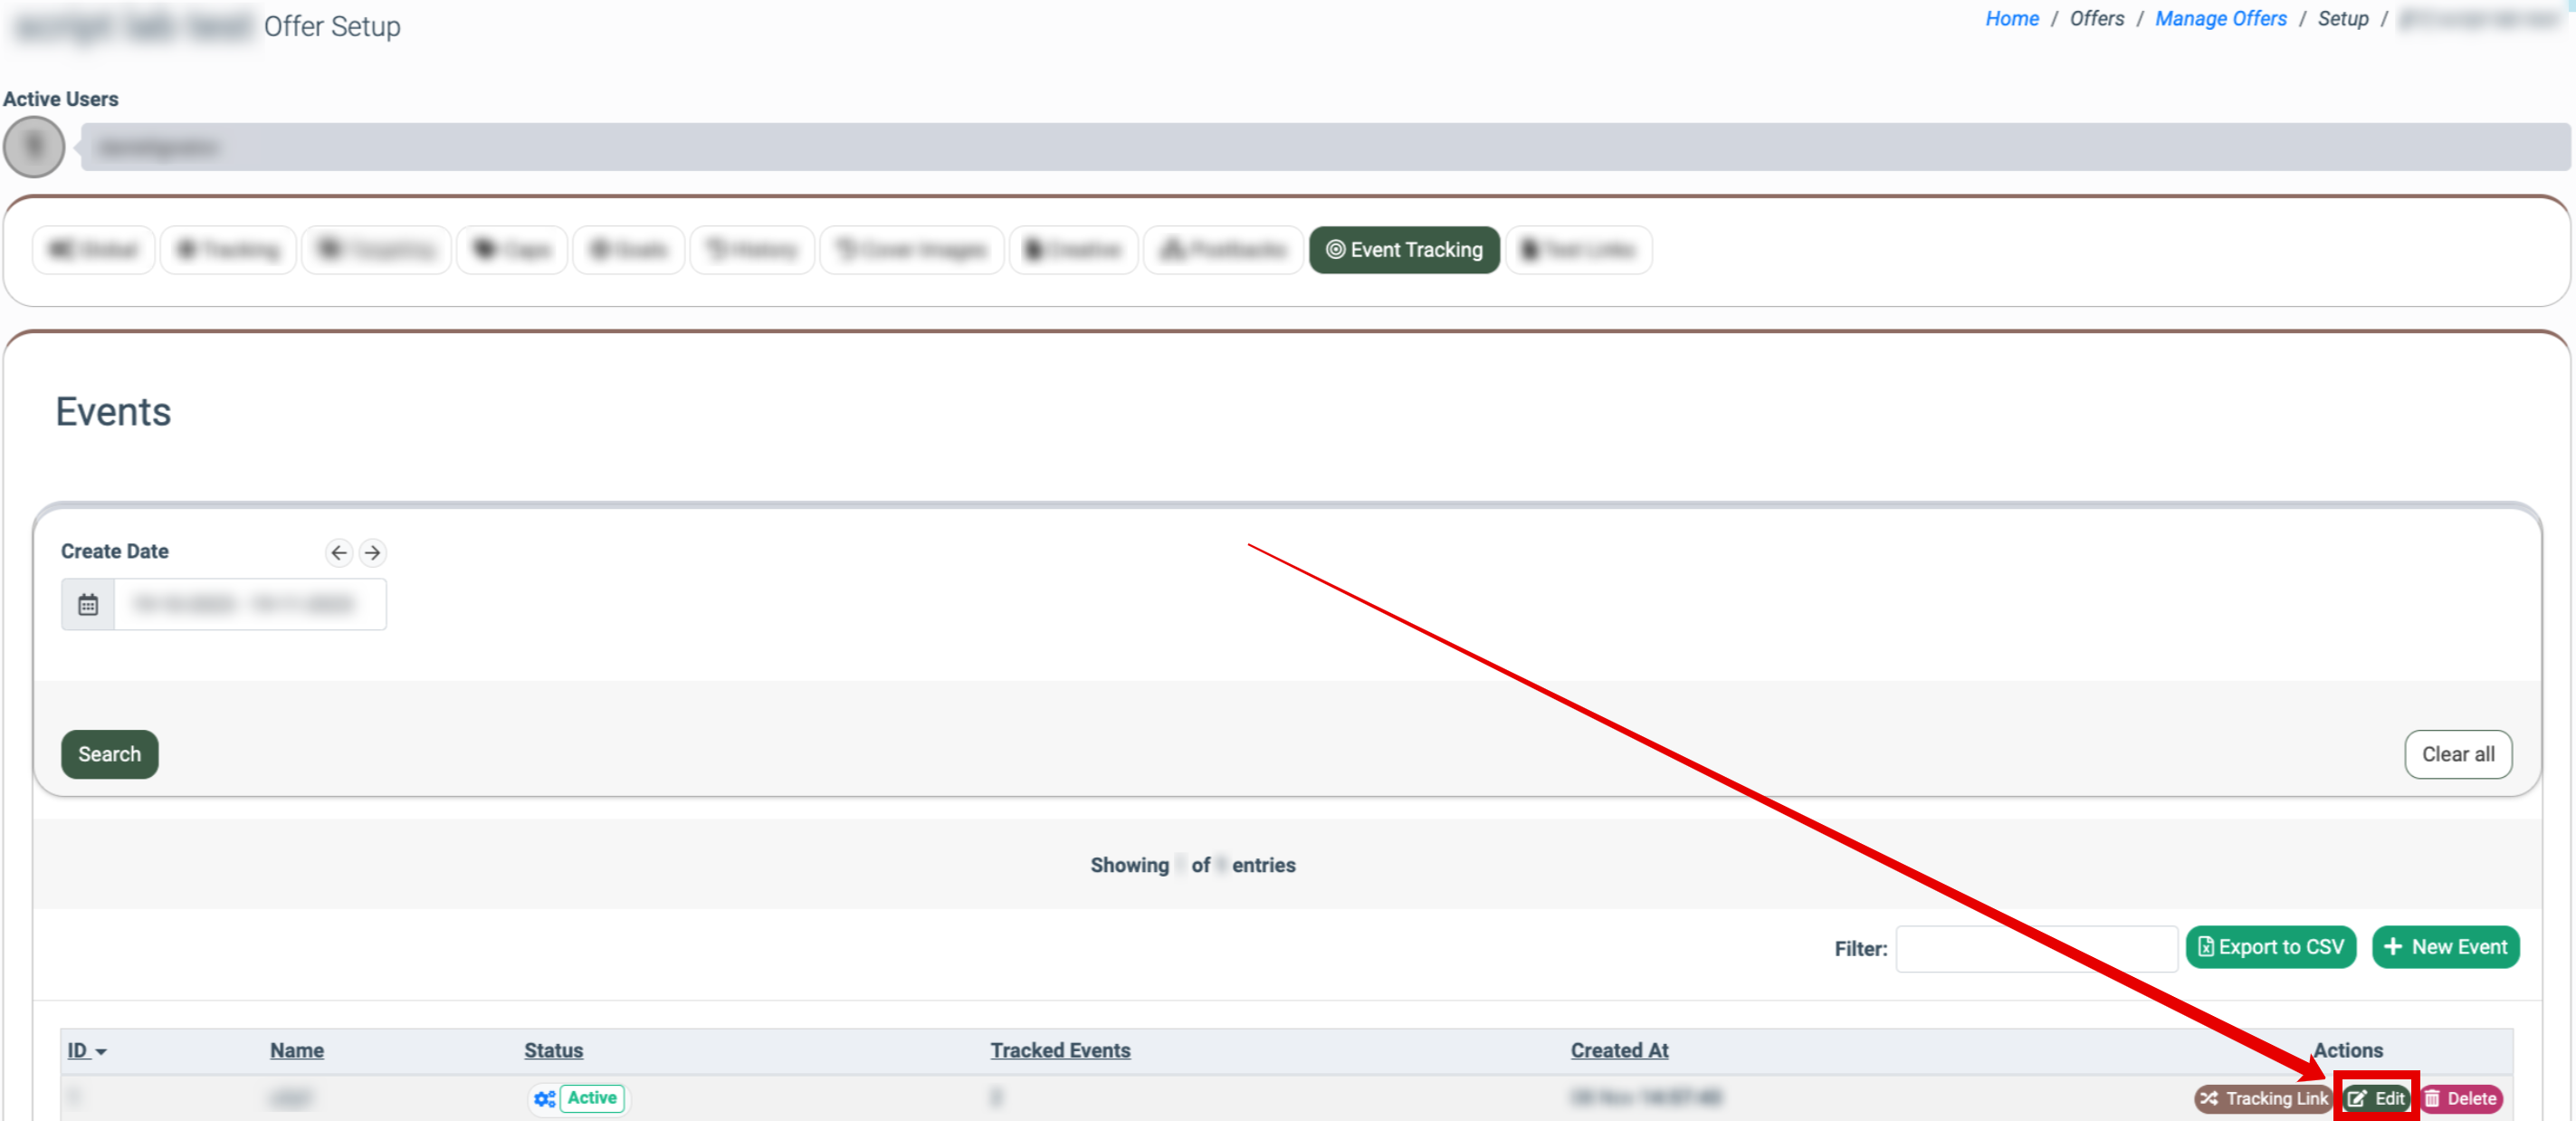
To configure the Event, click the “Edit” button in the “Actions” column.
In the “Edit” pop-up window fill in the name of the event in the “Name” field and select the status of the Event in the “Status” field (Active/Inactive).
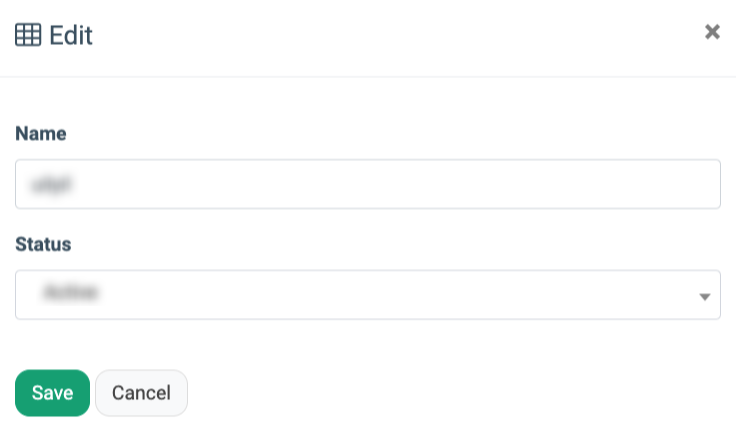
Click the “Save” button to complete the action and click the “Refresh” button to refresh the page, or click the “Cancel” button to close the window.
How to Delete the Event
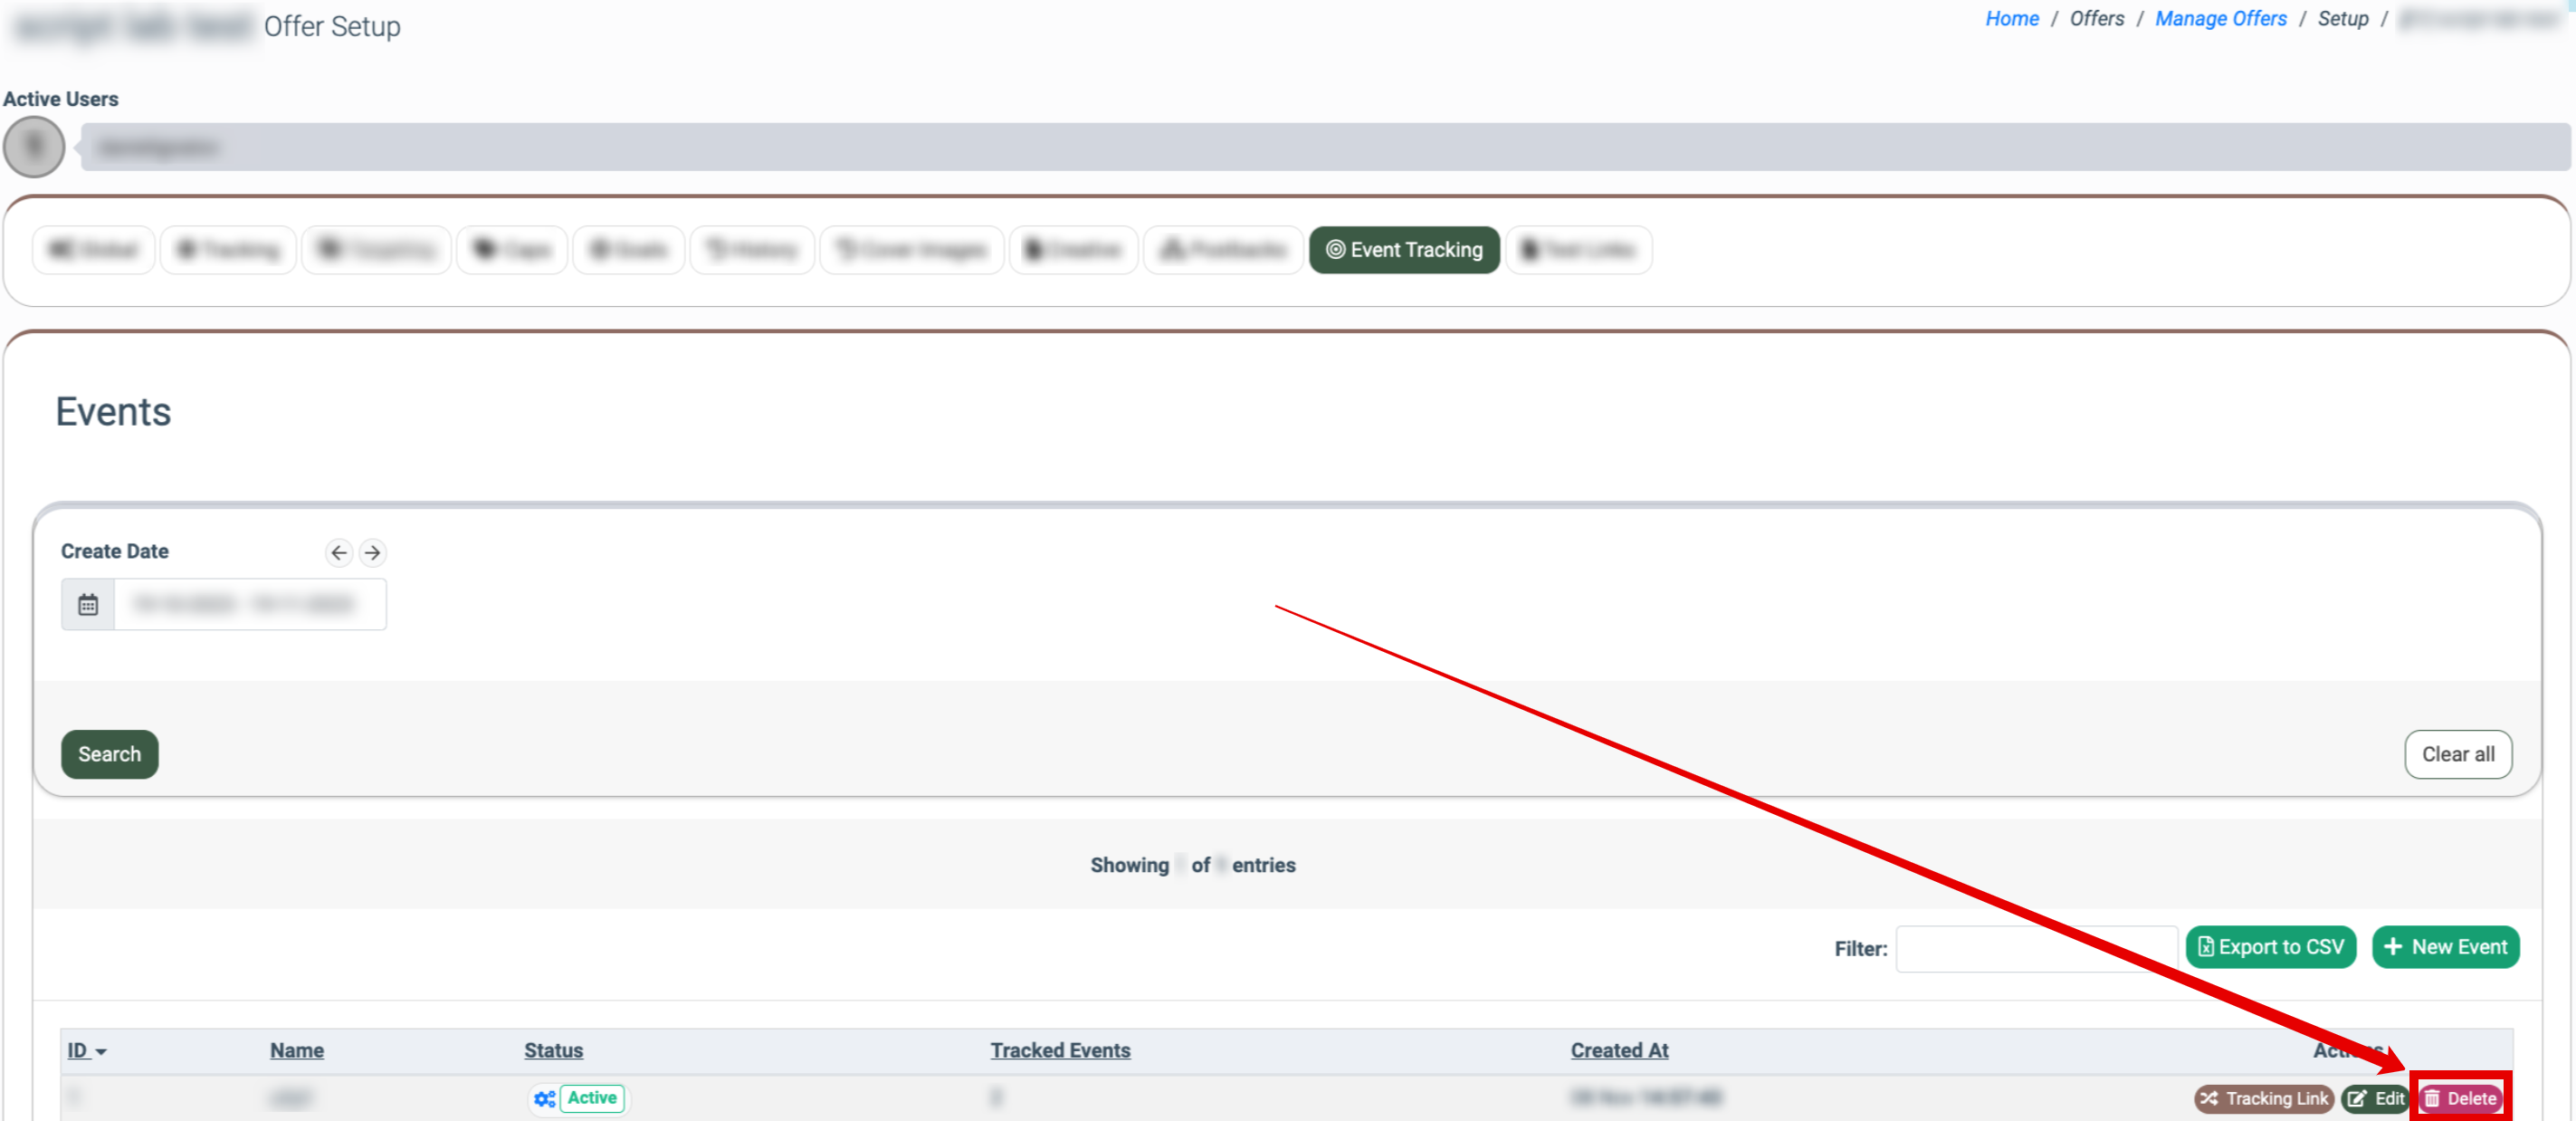
To delete the event, click the “Delete” button in the “Actions” column.
In the “Delete record” pop-up window click the “Delete” button to complete the action and click the “Refresh” button to refresh the page, or click the “Cancel” button to close the window.
Test Links
The Test Links tab allows you to generate the test traffic and send it to the system. Fill in the necessary fields and click the “Send” button.
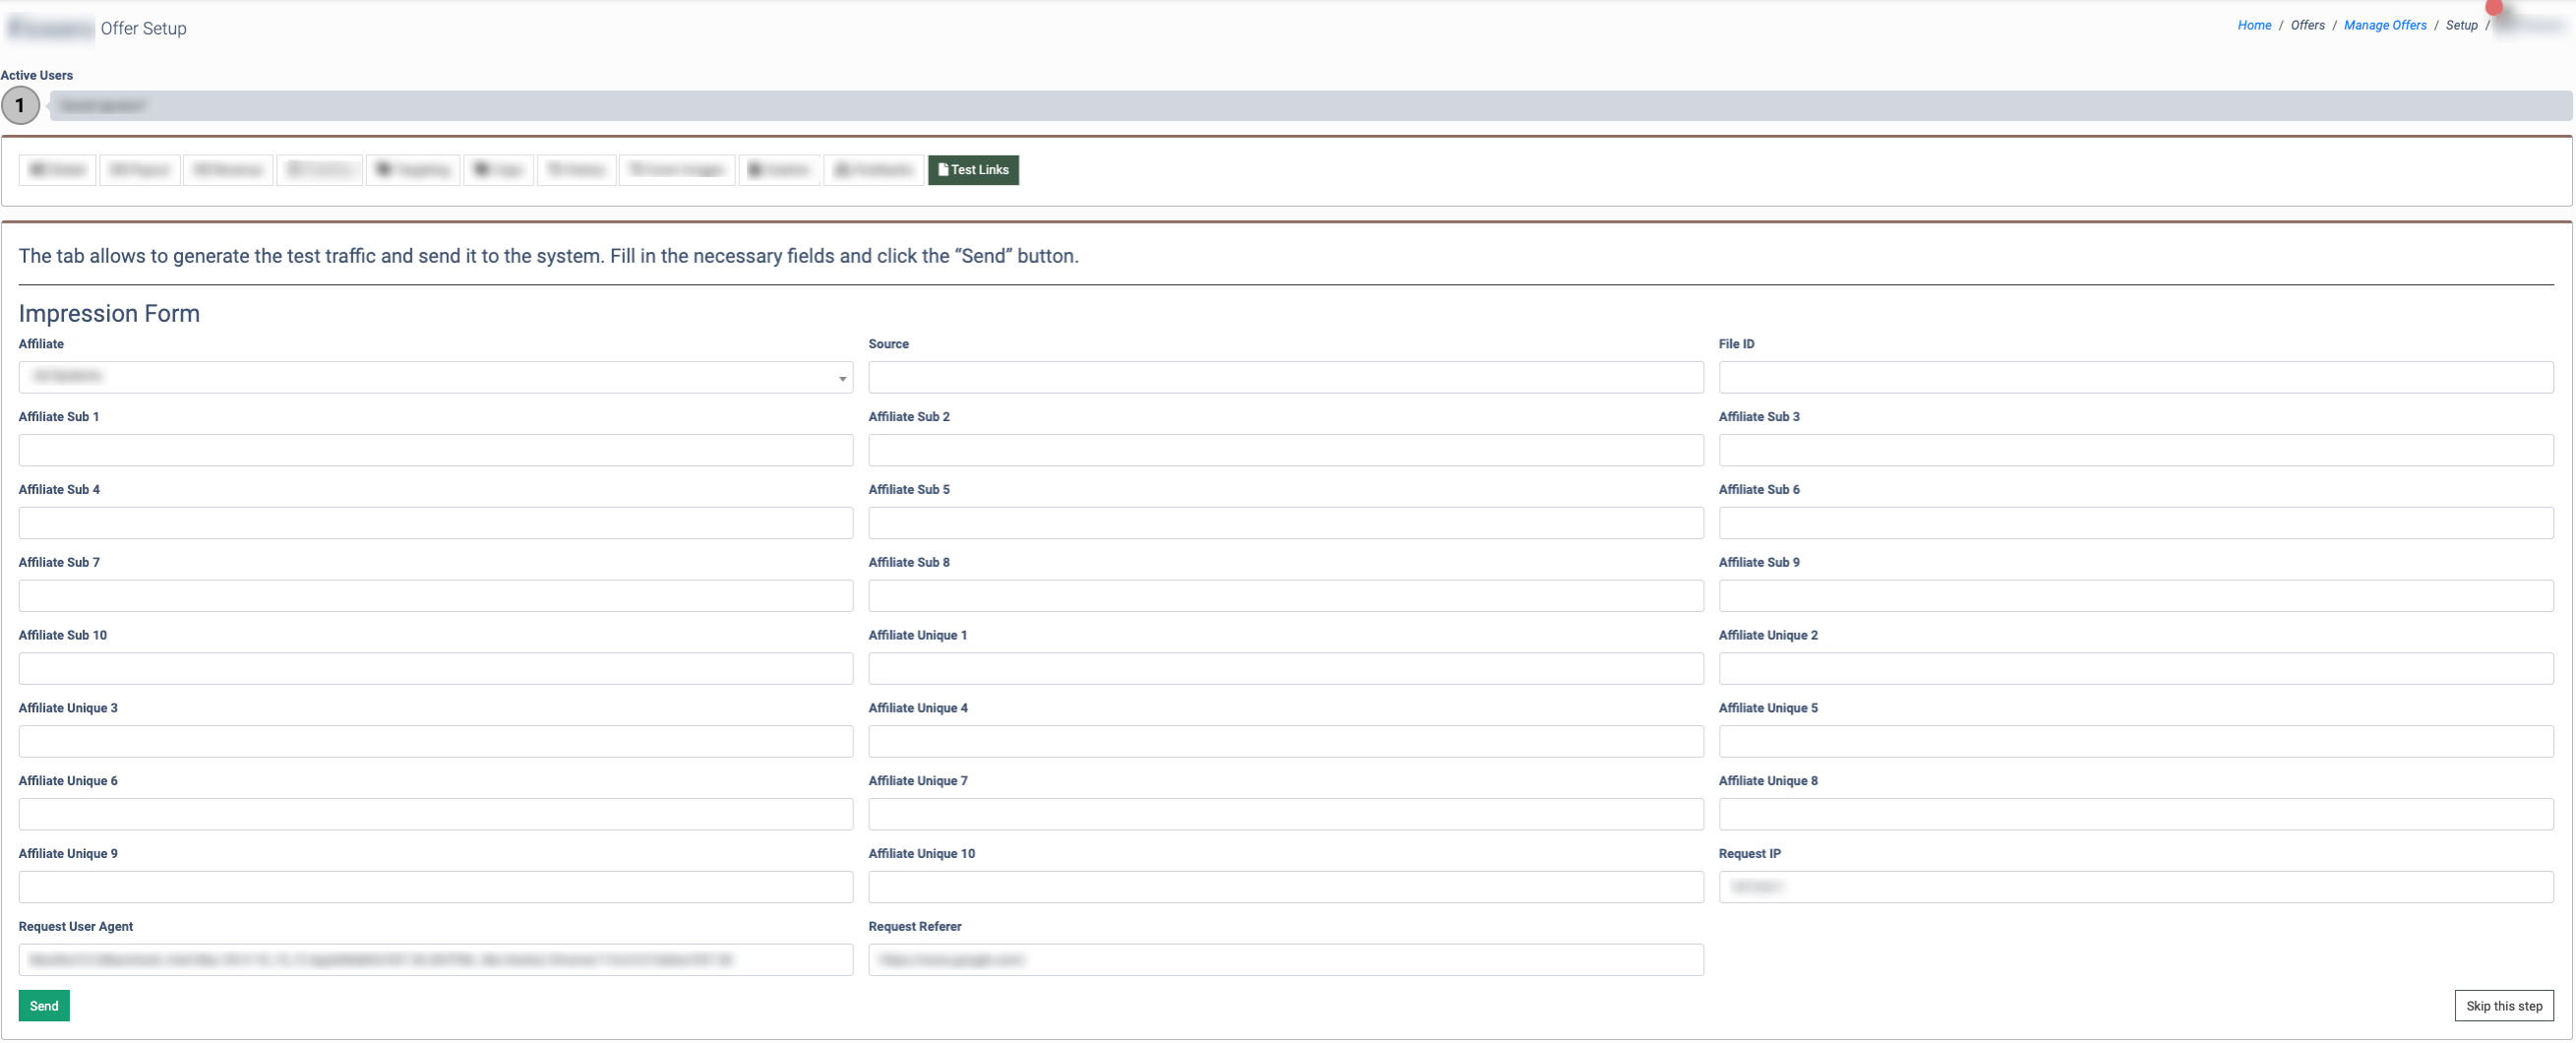
Click the “Send” button to complete the action.