The Offers section includes public feeds and forms, as well as descriptions of the Offers. You may use the Offers section to create an offer for your Publishers to bring the traffic to your own form. To view, go to the Publisher Management > Promo Materials > Offers section.
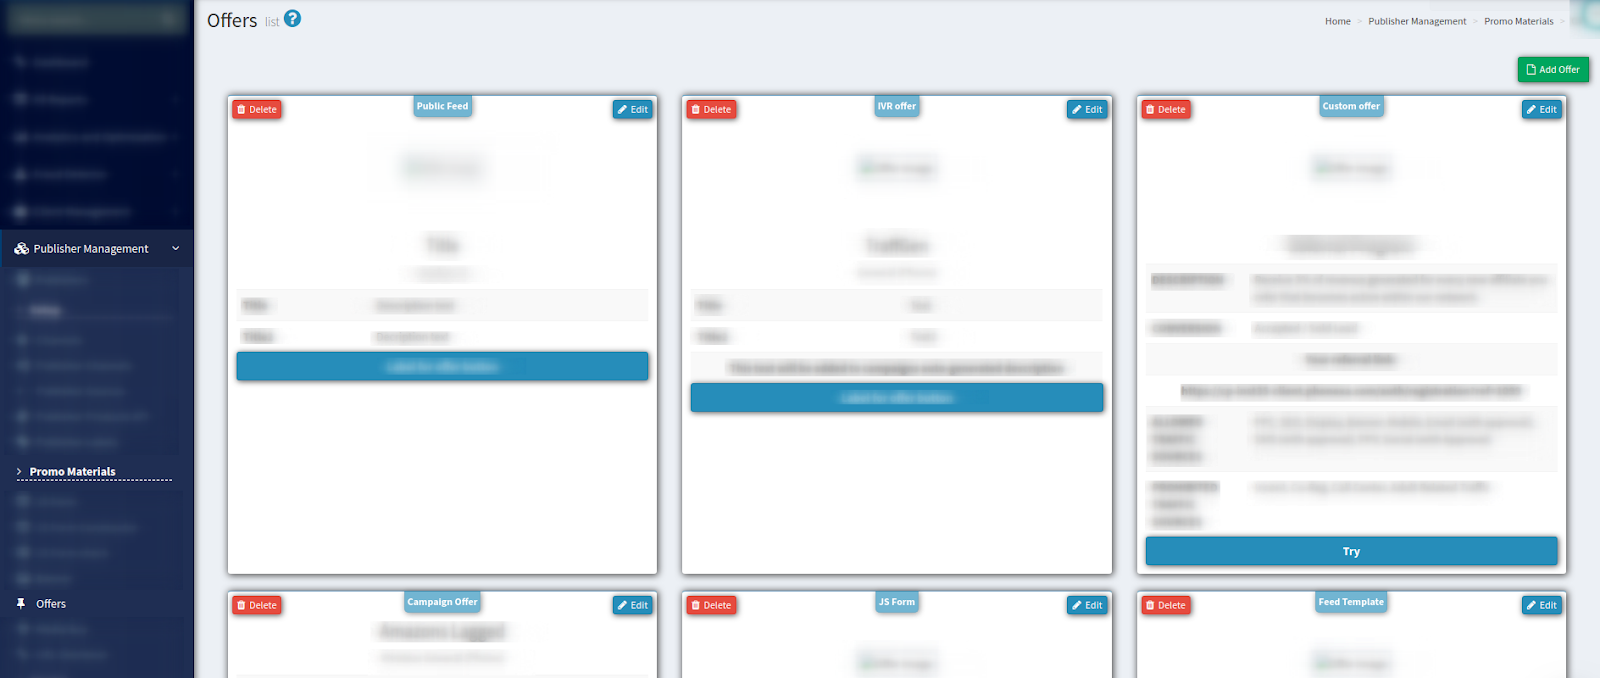
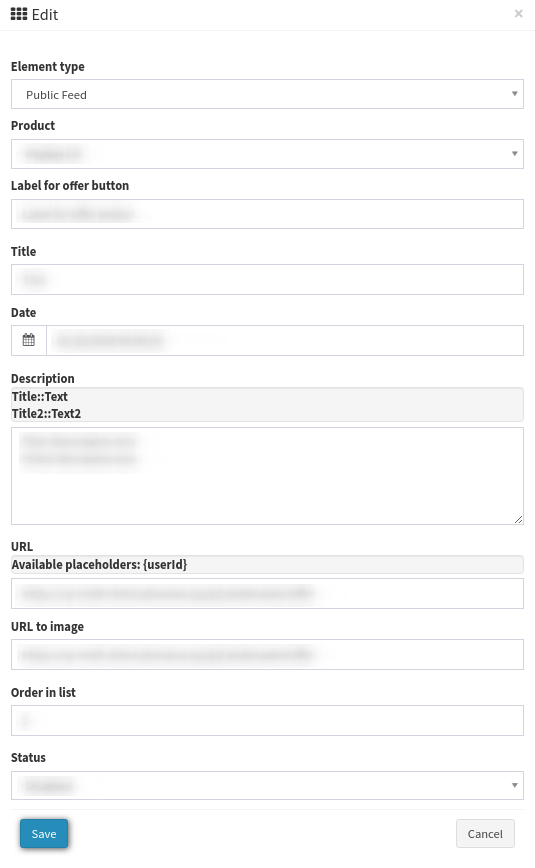
The Offers list contains all of the available offers in the system. To configure specific offers, select the offer from the list and click the “Edit” button. In the pop-up window fill in the data into the available fields and click the “Save” button. The set of settings depends on the chosen type of Offer. More detailed information about each of the Offers is provided below.
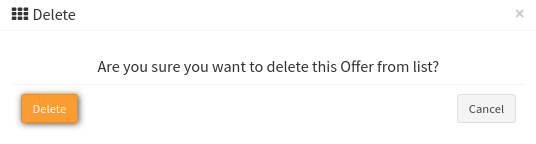
To delete an Offer, select the Offer from the list and click the “Delete” button. In the pop-up window, click the “Delete” button to complete.
There are six types of Offers available:
Custom Offer - a fully manual offer that allows you to customize each field in the offer.
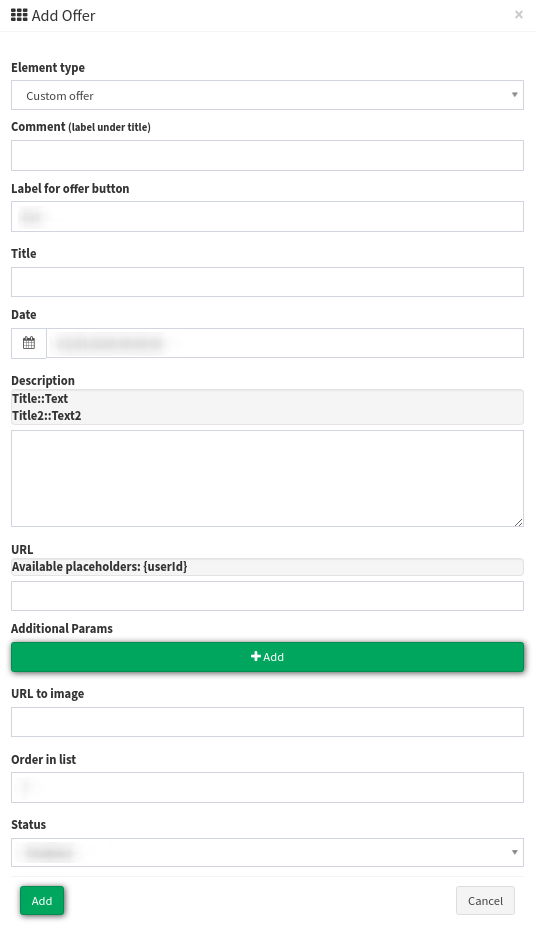
To create a Custom Offer, click the “Add Offer” button. In the pop-up window fill in the data in the fields:
-
Element type (Custom Offer / Public Feed / JS Form / Feed Template / Campaign Offer / IVR Offer): The type of the Offer. Select “Custom Offer” from the drop-down list.
-
Comment (label under title): The text that will be displayed below the offer title.
-
Label for offer button: The text that will be displayed on the offer button redirects you to the URL inserted in the offer.
-
Title: The offer title.
-
Date: The date for the offer to become available.
-
Description: The offer description allows you to provide the details for your Publisher to understand the offer. It can be set in key::value format and will display as a key-value table. The description field also supports BB codes.
-
URL: You may insert your own website URL, your own internal tracking parameter (ex. UUID), and the {userId} placeholder, for example:
www.yourwebsite.com/?uuid={userId}{userId} placeholder pulls the Publisher’s UUID in our system and puts it into the Publisher’s URL when redirected from your Offer.
Please note that the URL should be no longer than 1024 symbols.
-
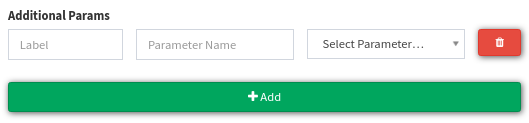
Additional Params: This allows you to include additional parameters for the offer link. To add the parameter, click the “Add” button, fill in the “Label” and the “Parameter Name” data fields, and select the parameter (Custom Input / Phone Number / Form) from the drop-down list. To remove the parameter, click the “Delete (trashcan icon)” button.
-
URL to image: The URL to the image that will be displayed in the offer. Custom Offer will display as a full link, for example:
https://mystorage.com/image.png
Please note that the URL should be no longer than 1024 symbols.
-
Order in list: This allows you to arrange the order of the offers in the list by inputting the number.
-
Status (Disabled / Public / Exclusive): Disabled Offer is not active and not visible for the Publishers. Public Offer is visible for all of the Publishers in the instance. Exclusive Offer allows you to select the Publishers the offer will be available.

To complete, click the “Add” button. After refreshing the page the offer will be available in the Offers list.
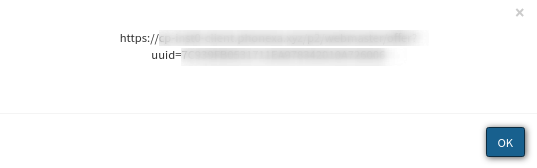
Public Feed - the offer that can be set for the Publishers of the chosen Product. The system attempts to find all of the Publisher’s forms created for the Product and generates the links containing the UUID of the forms. These exact links are provided in the pop-up window when clicking the offer button.
It is required to have a Public Feed for the offer to work properly. Read how to create a Public Feed in the Knowledge Base.
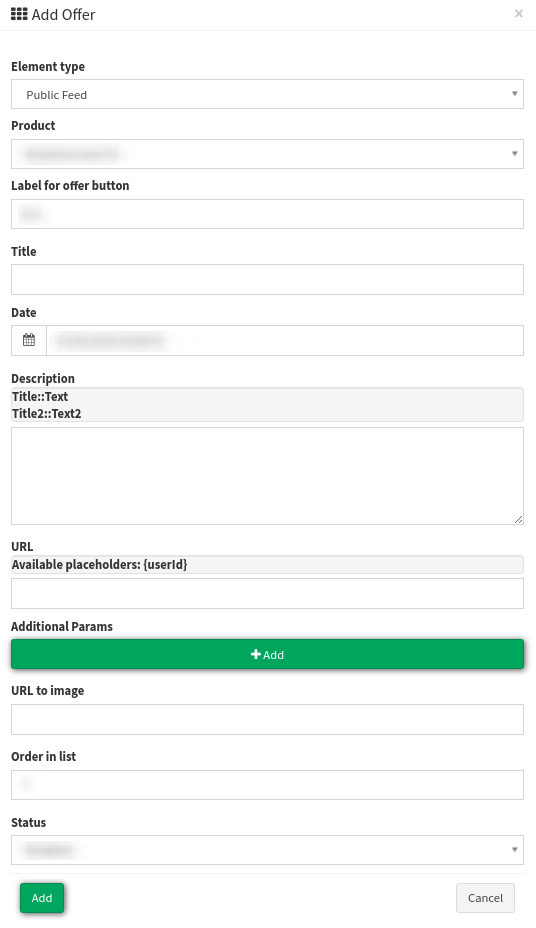
To create a Public Feed Offer, click the “Add Offer” button. In the pop-up window fill in the data fields:
-
Element type (Custom Offer / Public Feed / JS Form / Feed Template / Campaign Offer / IVR Offer): Select “Public Offer” from the drop-down list.
-
Product: Select the Product from the drop-down list.
-
Label for offer button: Enter the text that will be displayed on the offer button.
-
Title: Enter the name of the offer.
-
Date: Select the date for the offer to go public.
-
Description: Enter the public feed description. It can be set in key::value format and will display as a key-value table. The description field also supports BB codes.
-
URL: Enter your own website URL, your own internal tracking parameter (ex. UUID), and the {userId} placeholder, for example:
www.yourwebsite.com/?uuid={userId}{userId} placeholder pulls the Publisher’s UUID in our system and puts it into the Publisher’s URL when redirected from your offer.
Please note that the URL should be no longer than 1024 symbols.
-
Additional Params: Include additional parameters for the offer link. To add the parameter, click the “Add” button, fill in the “Label” and “Parameter Name” data fields, and select the parameter (Custom Input / Phone Number / Form) from the drop-down list. To remove the parameter, click the “Delete (trashcan icon)” button.

-
URL to image: The URL to the image that will be displayed in the offer. Public Feed will display as a full link, for example:
https://mystorage.com/image.png
Please note that the URL should be no longer than 1024 symbols.
-
Order in list: Arrange the order of the offers in the Offers list by inputting the number.
-
Status (Disabled / Public / Exclusive): Disabled Offer is not active and not visible for the Publishers. Public Offer is visible for all of the Publishers in the instance. Exclusive Offer allows you to select the Publishers the offer will be available for.
To complete, click the “Add” button. After refreshing the page the offer will be available in the Offers list.
JS Form - the offer that works in semi-automatic mode. Allows your Publishers to be redirected to your JS forms and use their code. You may customize what forms will be available for the Publishers. To make all of the forms in your system appear in the Offers list, you only need to specify the Product. You do not have to describe each form in your system.
For the offer to work properly, it is required to have pre-setup JS forms for your Products. Read how to create a JS Form in Knowledge Base.
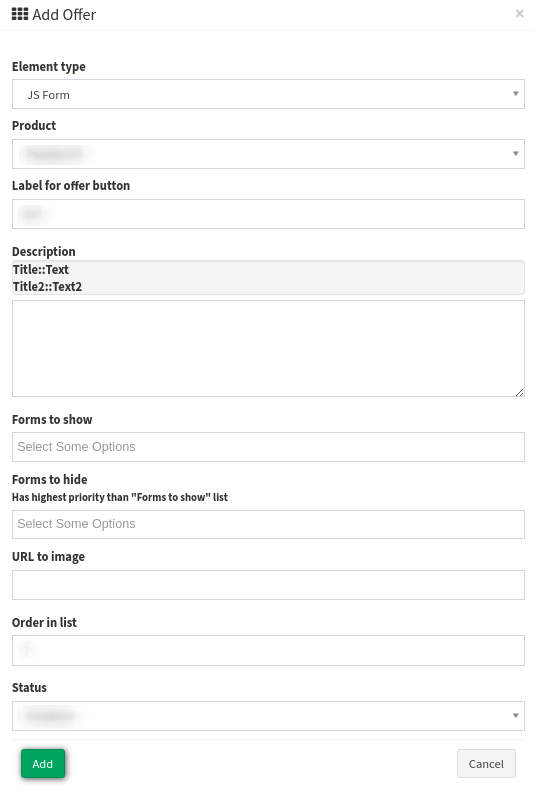
To create a JS Form Offer, click the “Add Offer” button. In the pop-up window fill in the data in the fields:
-
Element type (Custom Offer / Public Feed / JS Form / Feed Template / Campaign Offer / IVR Offer) - the type of the Offer. Select the “JS Form” from the drop-down list.
-
Product: Select the Product your forms are attached to.
-
Label for offer button: Enter the text that will be displayed on the offer button.
-
Description: The offer description allows you to provide the details for your Publisher to understand the offer. It can be set in key::value format and will display as a key-value table. The description field also supports BB codes.
-
Forms to show: Allows you to display specific JS forms in the Offers list.
-
Forms to hide: Allows you to hide specific JS forms from the Offers list. Has a higher priority than the “Forms to show” list.
-
URL to image: The URL to the image that will be displayed in the Offer. JS Form must be associated with a directory of your images. For example:
https://mystorage.com/formImages/
The system will add a form keyName to each form in the offer, and the offer list image link will change. For example:
https://mystorage.com/formImages/us_business_form.png
Please note that the URL should be no longer than 1024 symbols.
-
Order in list: This allows you to arrange the order of the offers in the Offers list by inputting the number.
-
Status (Disabled / Public / Exclusive) - Disabled Offer is not active and not visible for the Publishers. Public Offer is visible for all of the Publishers in the instance. Exclusive Offer allows you to select the Publishers the offer will be available.
To complete, click the “Add” button. After refreshing the page the offer will be available in the Offers list.
Feed Template - allows you to provide an offer for your Publishers to use your feed templates for their websites. It also can work in semi-automatic mode. To make all of the templates in your system appear in the Offers list, you only need to specify the Product.
For the offer to work properly, it is required to have pre-setup Templates (the Template has to be Public) and Feeds. Read how to set up the Templates and Feeds in the Knowledge Base.
To create a Feed Template Offer, click the “Add Offer” button. In the pop-up window, fill in the data in the fields:
-
Element type (Custom Offer / Public Feed / JS Form / Feed Template / Campaign Offer / IVR Offer) - the type of the Offer. Select the “Feed Template” from the drop-down list.
-
Product: Select the Product your feeds are attached to.
-
Label for offer button: Enter the text that will be displayed on the offer button.
-
Description: Enter the offer description that allows you to provide the details for your Publisher to understand the offer. It can be set in key::value format and will display as a key-value table. The description field also supports BB codes.
-
Feeds to show: This allows you to display specific feeds in the Offers list.
-
Feeds to hide: This allows you to hide specific feeds from the Offers list. Has a higher priority than the “Feeds to show” list.
-
URL to image: Enter the URL to the image that will be displayed in the offer. Feed Templates must be associated with a directory of your images. For example:
https://mystorage.com/formImages/
The system will add a form keyName to each template in the offer, and the offer list image link will change. For example:
https://mystorage.com/formImages/us_business_form.png
Please note that the URL should be no longer than 1024 symbols.
-
Order in list: This allows you to arrange the order of the offers in the Offers list by inputting the number.
-
Status (Disabled / Public / Exclusive): Disabled Offer is not active and not visible for the Publishers. Public Offer is visible for all of the Publishers in the instance. Exclusive Offer allows you to select the Publishers the offer will be available to.
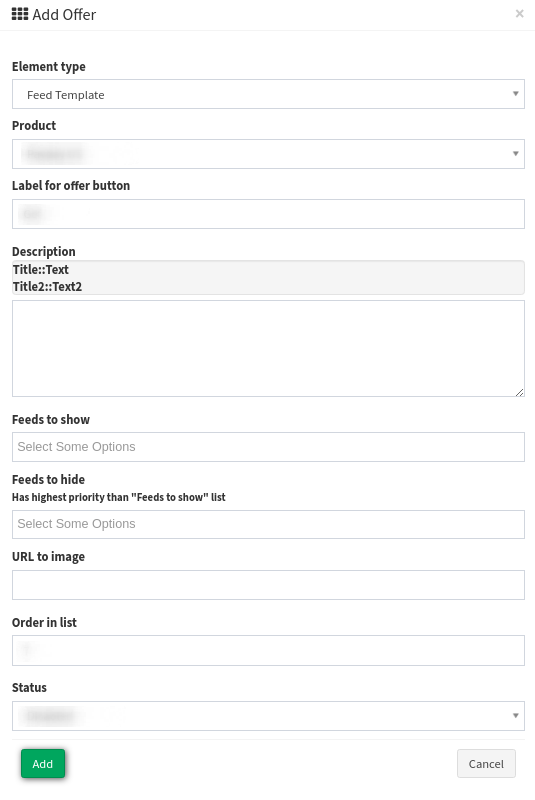
To complete, click the “Add” button. After refreshing the page the offer will be available in the Offers list.
Campaign Offer (Call Logic only) - the offer that allows the Publisher to be redirected to a specific Campaign for reserved phone numbers.
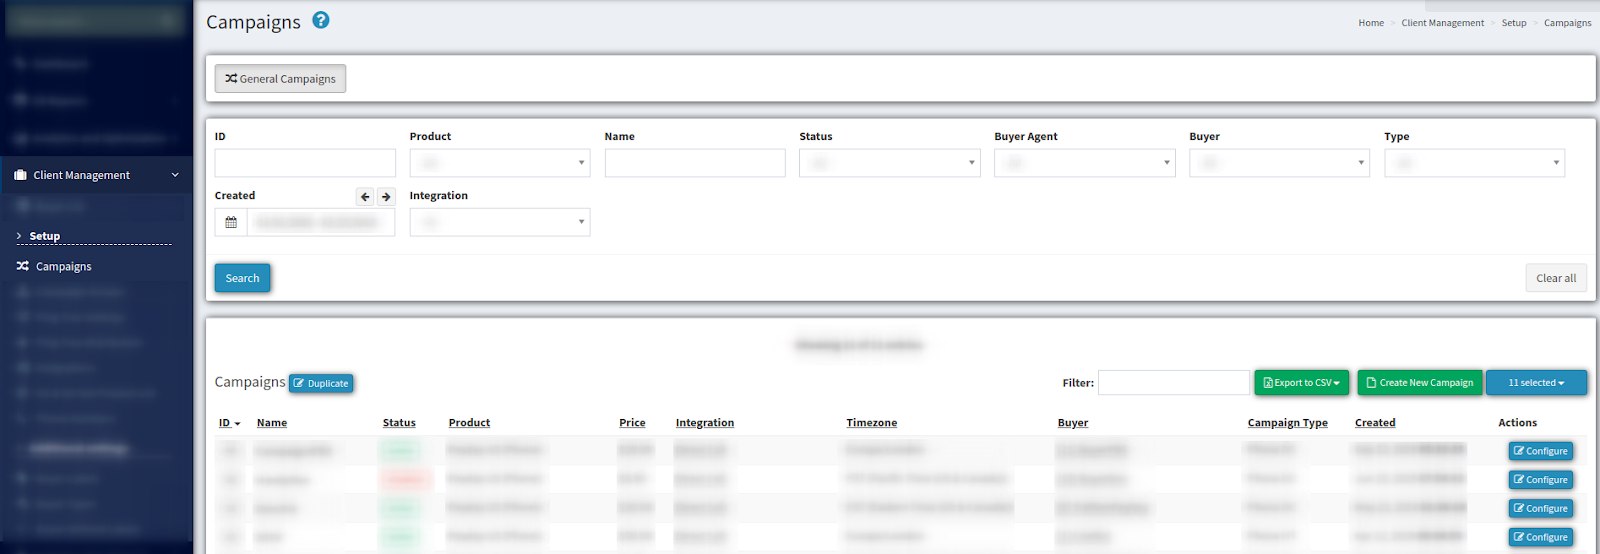
For the offer to work properly the user with the Admin role has to set up the offer on the Campaign level. To access these settings go to the Client Management > Setup > Campaigns section. Select the Campaign from the list and click the “Configure” button in the “Actions” column.
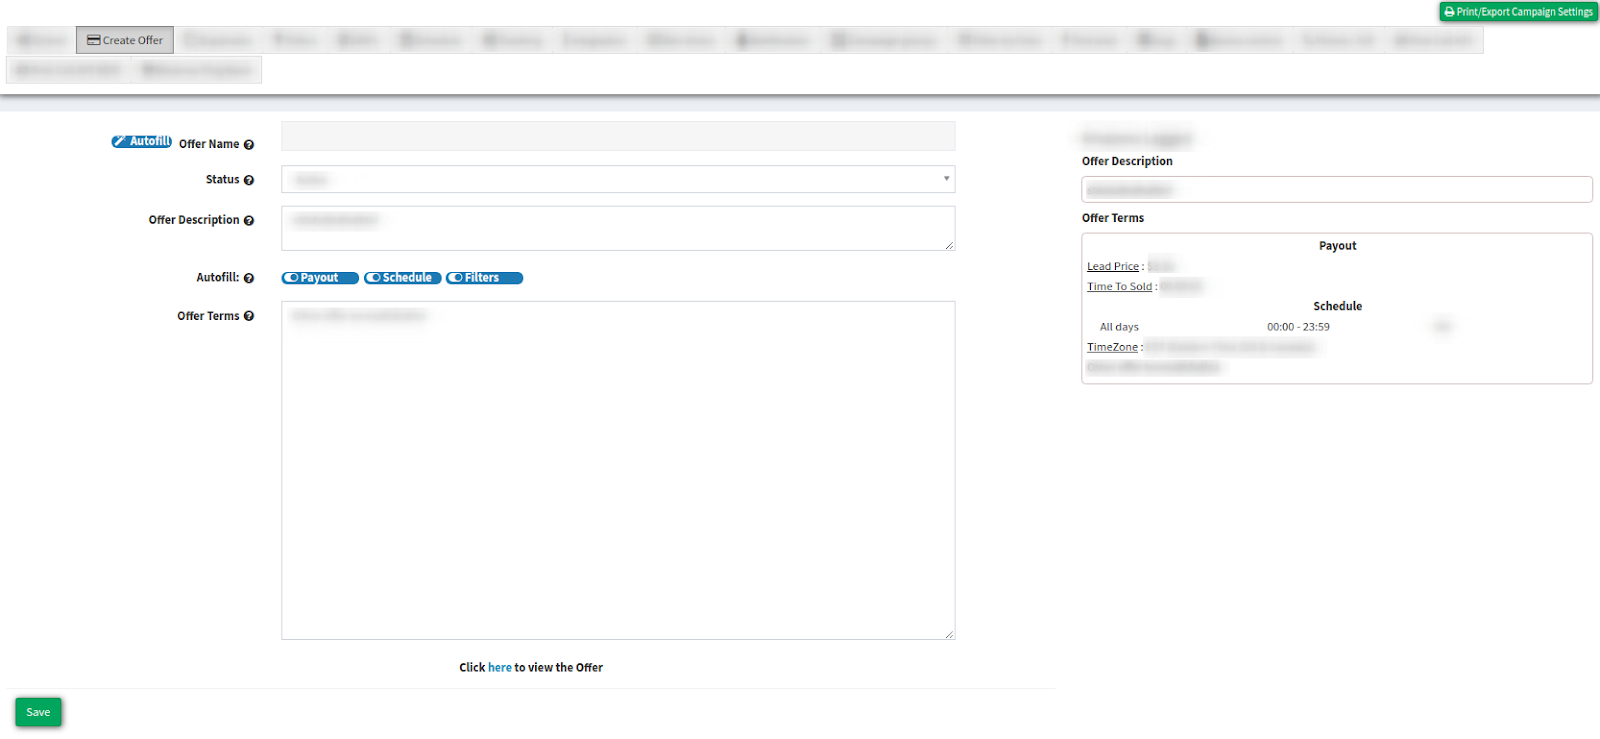
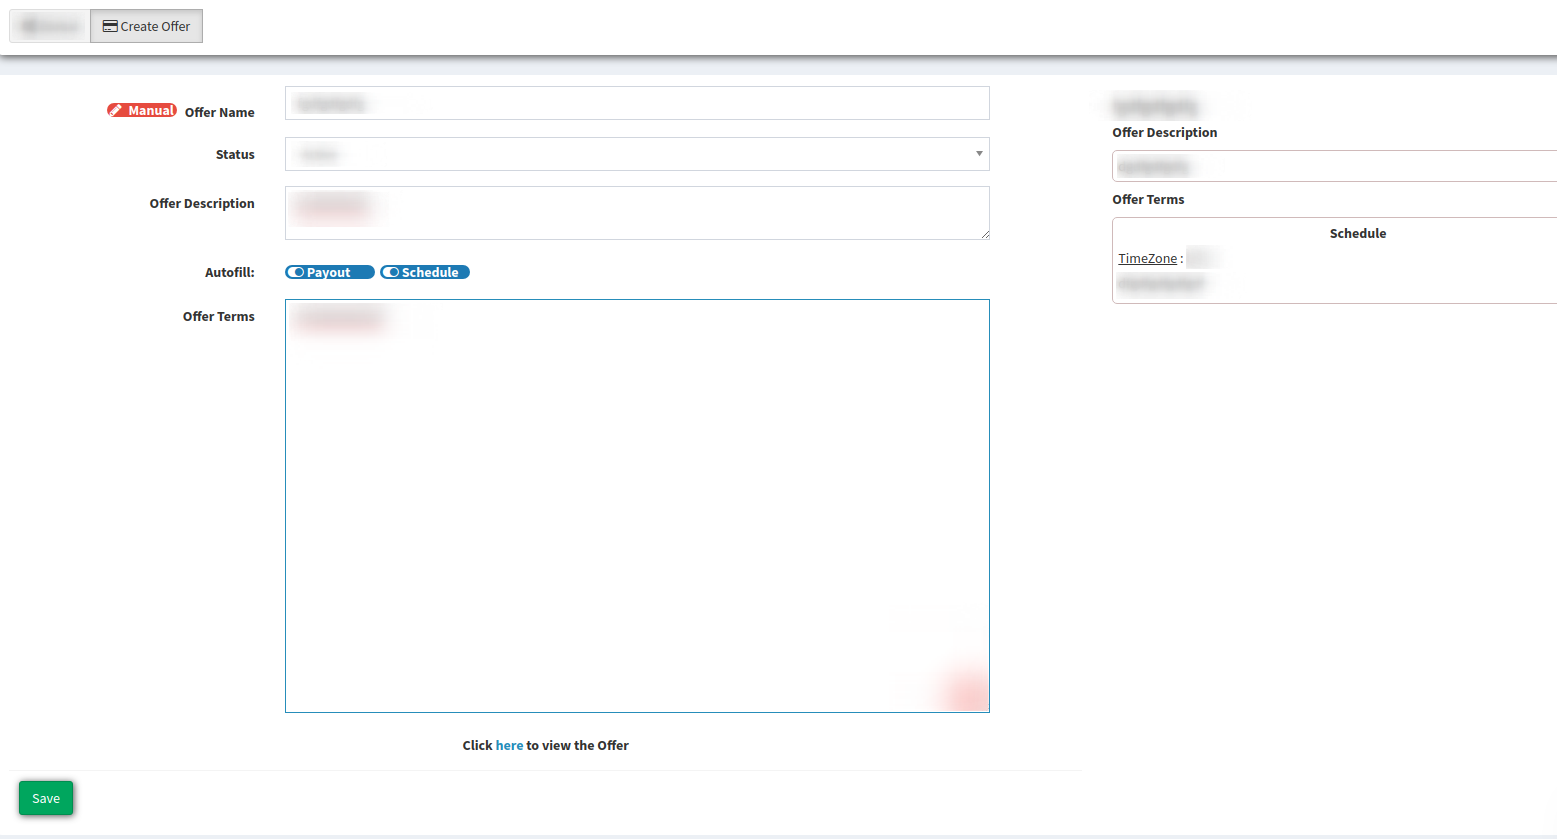
In the “Create Offer” tab, fill in the following fields:
-
Offer Name: Enter the name that will be displayed in the Offers list. To enter the name manually click the switch to “Manual”. Switching to “Autofill” mode allows you to display the Campaign’s Name as the Offer Name.
-
Status (Active / Disabled)
-
Offer Description: Enter the short description of the offer displayed below the Offer Name.
-
Autofill (Payout / Schedule / Filters): This option automatically pre-populates Payout, Schedule, and Filters from the Campaign settings. The values remain the same even if the parameters of the Campaign are changed.
-
Offer Terms: Enter the conditions and more detailed information about the offer for the Publishers.
To complete, click the “Save” button.
Then to create a Campaign Offer in the Offers list, go to the Publisher Management > Promo Materials > Offers section and click the “Add Offer” button. In the pop-up window fill in the data in the fields:
-
Element type (Custom Offer / Public Feed / JS Form / Feed Template / Campaign Offer / IVR Offer): Select the “Campaign Offer” from the drop-down list.
-
Product: Select the Product your Campaign is attached to.
-
Label for offer button: Enter the text that will be displayed on the offer button.
-
Description: Enter the offer description allows you to provide the details for your Publisher to understand the offer. This text will be added to the Campaign’s auto-generated description.
-
Campaigns to show: This allows you to display specific Campaigns (only the Campaigns with the pre-setup offers in Campaign settings) in the Offers list.
-
Campaigns to hide: This allows you to hide specific Campaigns from the Offers list. Has a higher priority than the “Campaigns to show” list.
-
URL to image: Enter the URL to the image that will be displayed in the offer. Campaign Offer will display as a full link, for example:
https://mystorage.com/image.png
Please note that the URL should be no longer than 1024 symbols.
-
Order in list: This allows you to arrange the order of the offers in the Offers list by inputting the number.
-
Status (Disabled / Public / Exclusive): Disabled Offer is not active and not visible for the Publishers. Public Offer is visible for all of the Publishers in the instance. Exclusive Offer allows you to select the Publishers the offer will be available.
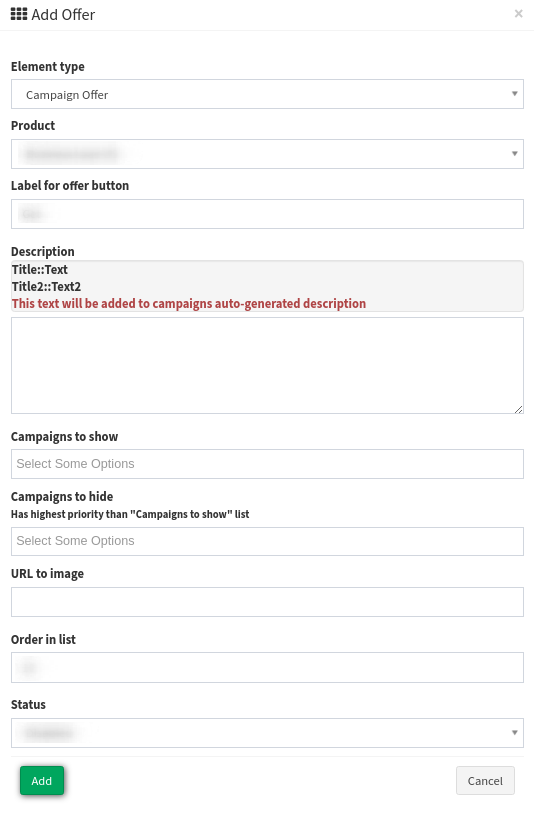
To complete, click the “Add” button. After refreshing the page the offer will be available in the Offers list.
By clicking the offer button of the Campaign Offer the Publisher will be redirected to the My Phone Numbers list which you can also view in the Publisher Management > Promo Materials > My Phone Numbers section.

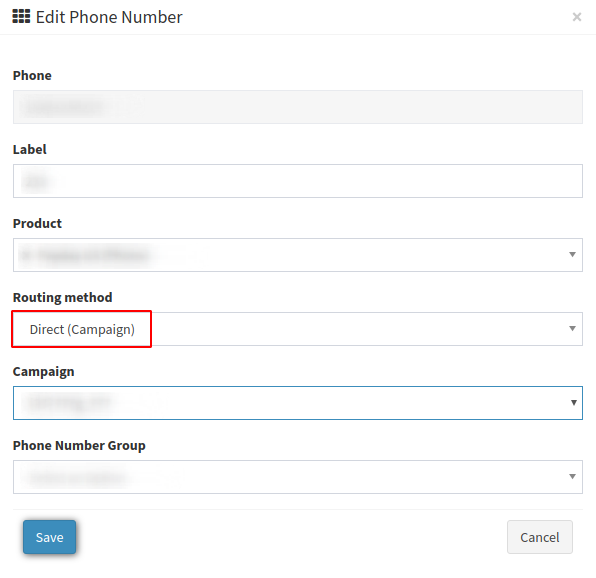
To join the offer, Publisher has to choose the Phone Number from the My Phone Numbers list and click the “Edit Phone Number” button in the “Action” column. In the pop-up window select the “Direct (Campaign)” option from the drop-down list of the “Routing method” field. Then select the Campaign Offer (the offer that was created in Campaign settings) from the “Campaign” field. To complete click the “Save” button. This way the Publisher’s reserved number will be redirected to the Campaign provided in the offer.
IVR Offer (Call Logic only) - the offer that allows the Publisher to be redirected to a specific IVR schema for a reserved phone number.
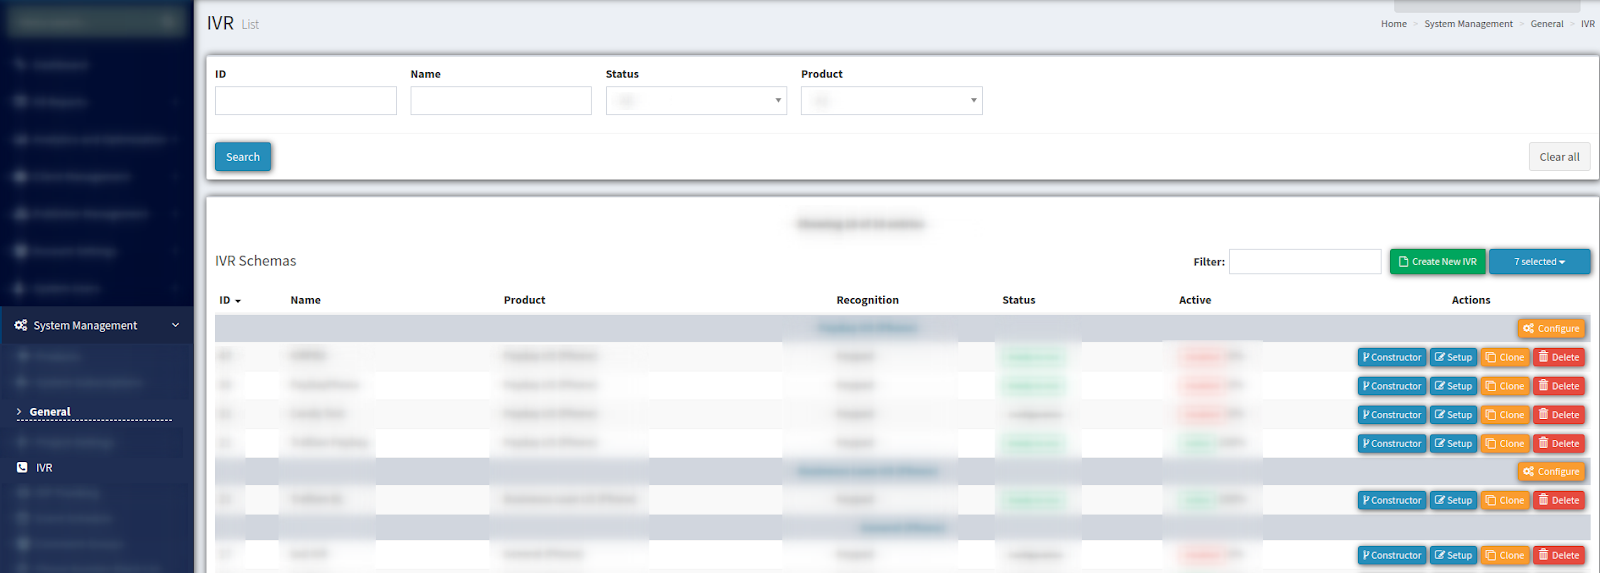
For the offer to work properly a user with an Admin role has to set up the offer on the IVR level. To access these settings, go to the System Management > General > IVR section. Select the IVR schema from the list and click the “Setup” button in the “Actions” column.
In the “Create Offer” tab fill in the following fields:
-
Offer Name: Enter the name that will be displayed in the Offers list. To enter the name manually click the switch to “Manual”. Switching to “Autofill” mode allows you to display the Campaign’s Name as the Offer Name.
-
Status (Active / Disabled)
-
Offer Description: Enter the short description of the offer displayed below the Offer Name.
-
Autofill (Payout / Schedule): This option automatically pre-populates Payout and Schedule from the IVR configuration. The values remain the same even if the parameters of the IVR are changed.
-
Offer Terms: Enter the conditions and more detailed information about the offer for the Publishers.
To complete, click the “Save” button.
Then to create an IVR Offer in the Offers list go to the Publisher Management > Promo Materials > Offers section and click the “Add Offer” button. In the pop-up window fill in the data in the fields:
-
Element type (Custom Offer / Public Feed / JS Form / Feed Template / Campaign Offer / IVR Offer): Select the “IVR Offer” from the drop-down list.
-
Product: Select the Product your IVR schema is attached to.
-
Label for offer button: Enter the text that will be displayed on the offer button.
-
Description: Enter the offer description that allows you to provide the details for your Publisher to understand the offer. This text will be added to the Campaign’s auto-generated description.
-
IVR to show: This allows you to display specific IVR schemas (only the IVR schemas with the pre-setup Offers in the IVR settings) in the Offers list.
-
IVR to hide: This allows you to hide specific IVR schemas from the Offers list. Has a higher priority than the “IVR to show” list.
-
URL to image: Enter the URL to the image that will be displayed in the offer. IVR Offer will display as a full link, for example:
https://mystorage.com/image.png
Please note that the URL should be no longer than 1024 symbols.
-
Order in list: This allows you to arrange the order of the offers in the Offers list by inputting the number.
-
Status (Disabled / Public / Exclusive): Disabled Offer is not active and not visible for the Publishers. Public Offer is visible for all of the Publishers in the instance. Exclusive Offer allows you to select the Publishers the offer will be available to.
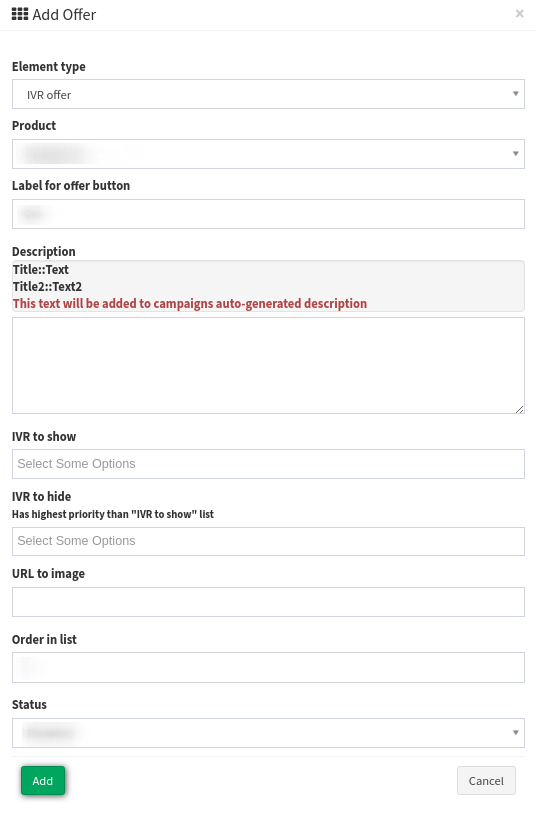
To complete, click the “Add” button. After refreshing the page the offer will be available in the Offers list.
By clicking the offer button of the IVR Offer the Publisher will be redirected to the My Phone Numbers list which you can also view in the Publisher Management > Promo Materials > My Phone Numbers section.
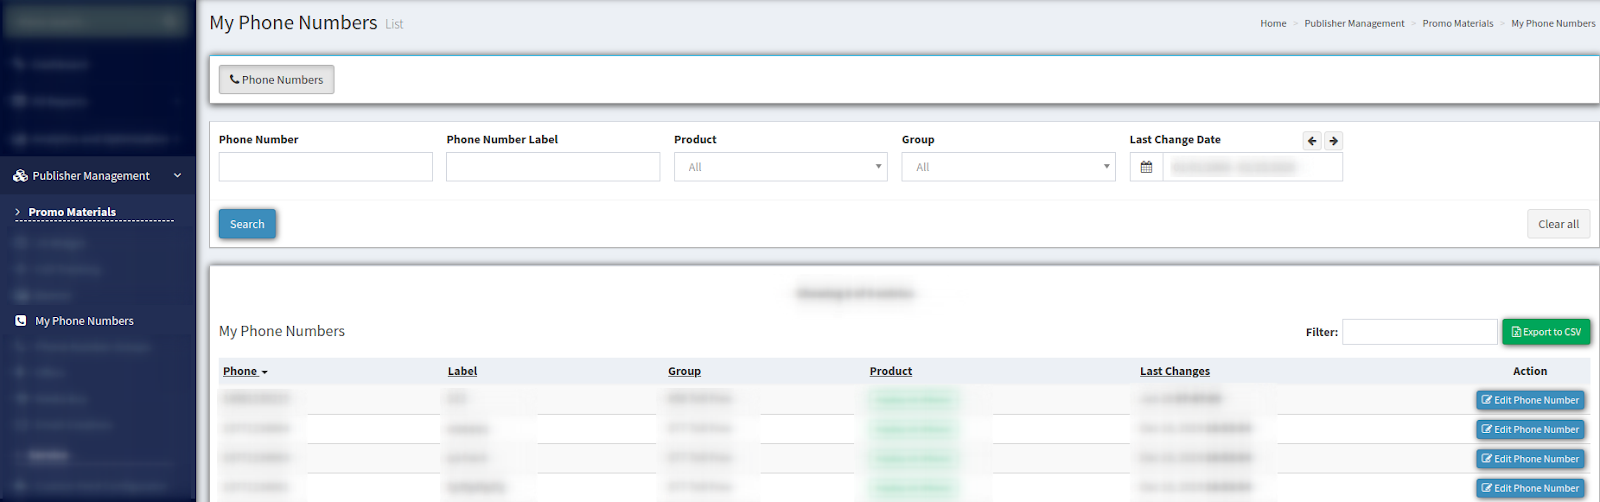
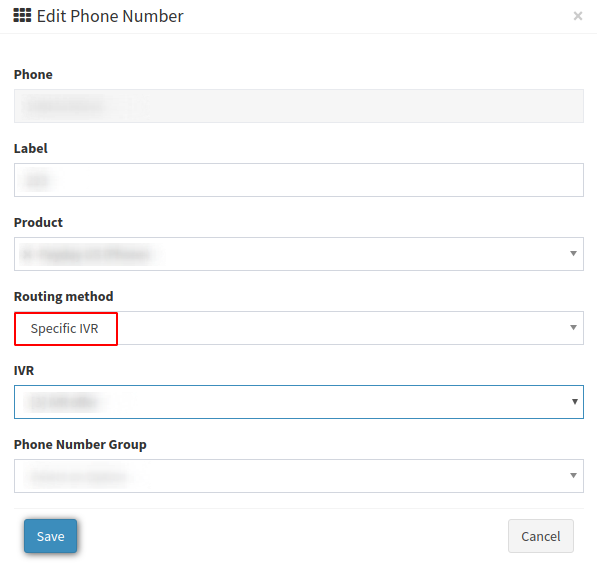
To join the offer, Publisher has to choose the Phone Number from the My Phone Numbers list and click the “Edit Phone Number” button in the “Action” column. In the pop-up window, select the “Specific IVR” option from the drop-down list of the “Routing method” field. Then select the IVR Offer (the offer that was created in IVR settings) from the “IVR” field. To complete, click the “Save” button. This way the Publisher’s reserved number will be redirected to the specific IVR Schema provided in the offer.
Extend Publisher Permissions (Required for the Campaign and IVR Offer)
For the Publisher to be able to reserve a Phone Number for the Offer, first you (Admin role) must configure the permissions for the Publisher. To access these settings go to the System Management > General > Project Settings section and click the “Publisher settings” tab.
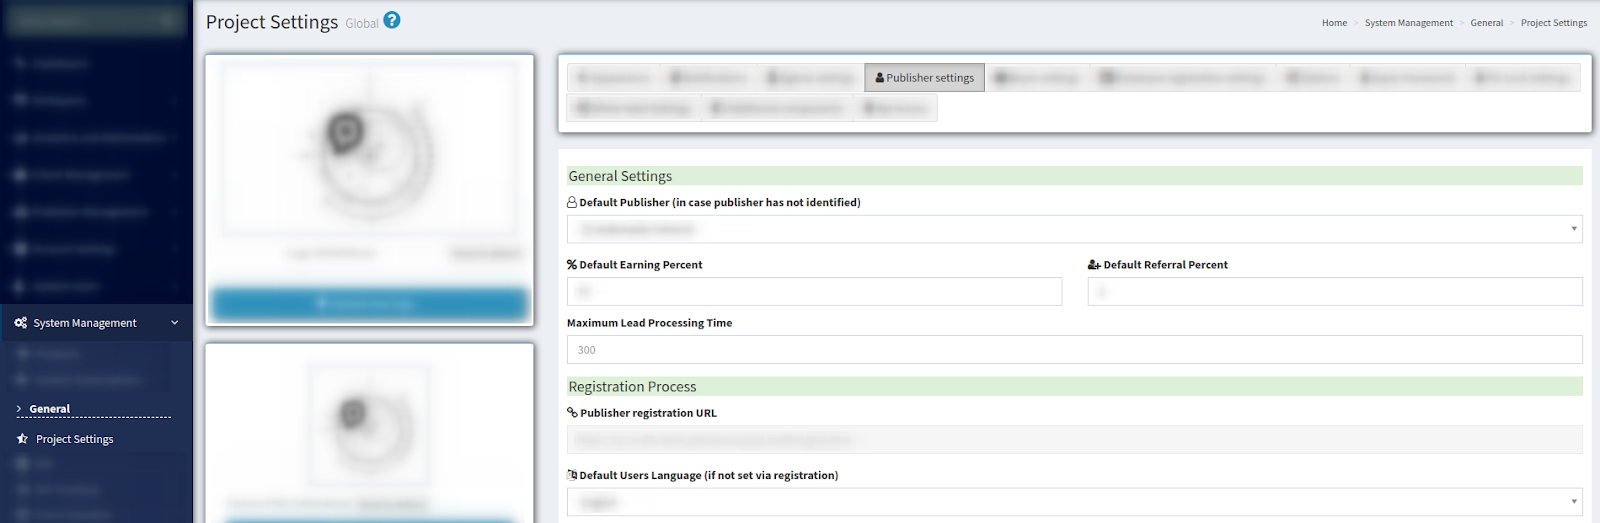
In the “Extended Publisher Permissions (Manipulation)” block there are three options available:
-
Allow Publishers To Manipulate Their Numbers: Assign phone numbers autonomously to other Products and/or Campaigns if these Campaigns are configured in the system as an Offer.
-
Allow Publishers to Reserve Phone Numbers: Reserve phone numbers. Please note that if you have enabled this option, the Publishers will be able to add additional phone numbers without the assistance of the Manager. The phone numbers will be taken from the list of available numbers in your system that is not assigned to any Publisher. If you do not have any available phone numbers in your system, the Publisher will receive a message that there is no availability.
-
Maximum Count Of Phone Numbers For Publisher Reservation: A global setting that limits the maximum number of phone numbers that the Publisher can reserve.
