The “Buyer Real Time Disposition Statuses” subtab allows you to manage the available disposition statuses for the Buyer.
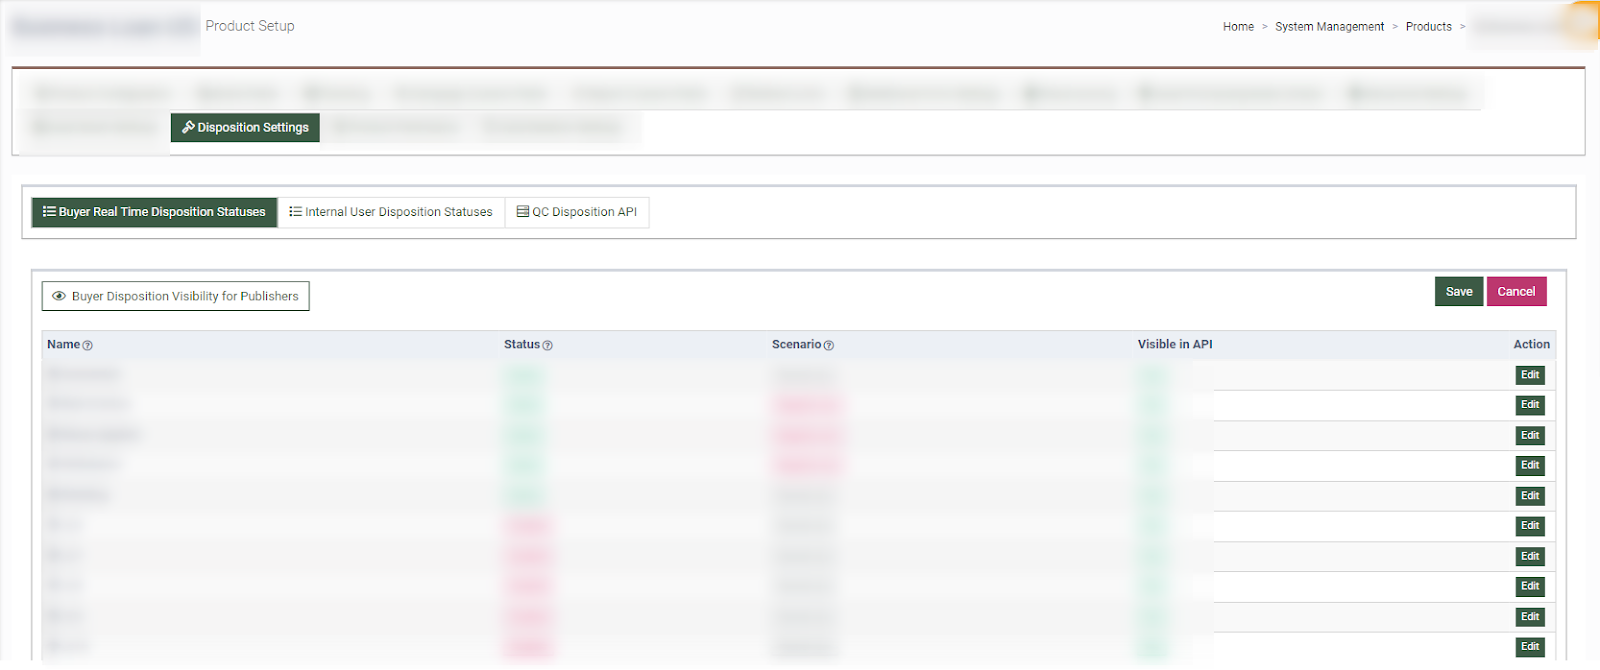
The list of Buyer Disposition statuses contains the following information:
-
Name: The name of the Buyer Disposition status.
-
Status: The current status of the Buyer Disposition.
-
Scenario: The type of the Buyer Disposition case (the disposition was qualified as positive, negative, or neutral).
-
Visible in API: The visibility of the field in the API Doc.
To change the current status of the Buyer Disposition, click the “Edit” button in the “Action” column. Change the information in the following fields from the “Edit” pop-up window:
-
Name: Enter the name of the Buyer Disposition.
-
Status: Select the current status of the Buyer Disposition.
-
Case: Select the corresponding scenario for the Buyer Disposition.
-
Visible in API: Select the visibility of the field in the API Doc.
Click the “Save” button to complete the changes.
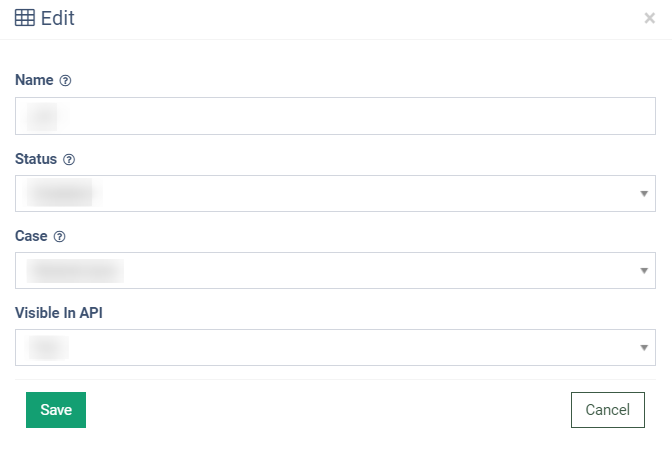
Note: The edit option is allowed only for the custom disposition statuses. Pre-set system disposition statuses can not be edited.
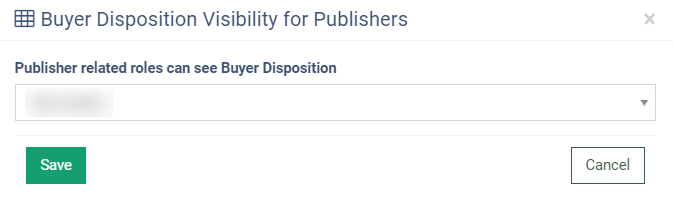
To set the visibility of the disposition statuses in the Publisher’s Lead Details report for users with the Publisher, Publisher Agent, or Publisher Senior Agent system roles, click the “Buyer Disposition Visibility for Publisher” button and select the option in the “Publisher related roles can see Buyer Disposition” field of the “Buyer Disposition Visibility for Publishers” pop-up window:
-
Not visible: The status of the Buyer Disposition will be hidden.
-
Sold leads only: The status of the Buyer Disposition will be displayed only for leads with the “Sold” status. For leads with the set Buyer Disposition but another status of the lead, the “Not Set” status will be displayed.
-
All leads: The status of the Buyer Disposition will be displayed for all leads.
Click the “Save” button to complete the action.
Read more about the Buyer Disposition Statuses management and usage in the Knowledge Base Article.
The “Internal User Disposition Statuses” subtab allows you to create and manage Internal User Disposition statuses.
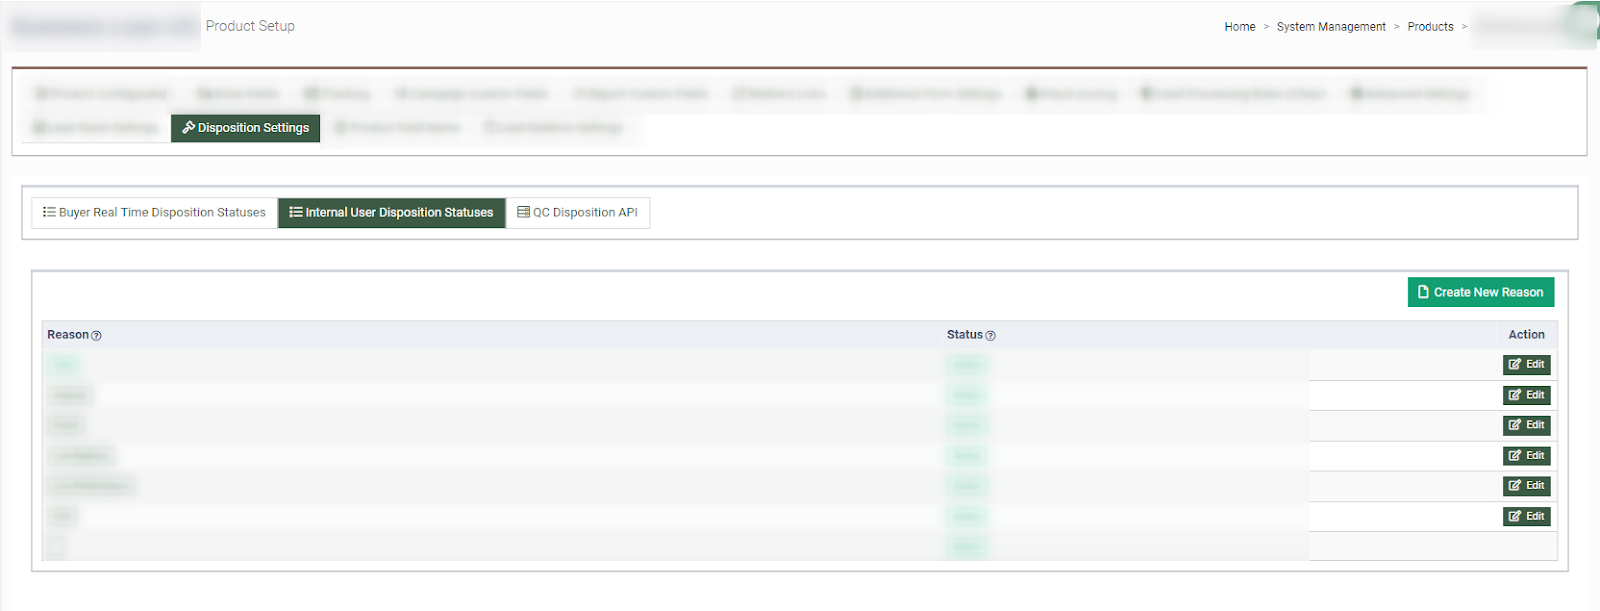
The list of the Internal Disposition Statuses contains the following information:
-
Reason: The name of the Internal Disposition Status.
-
Status: The current status of the Internal Disposition.
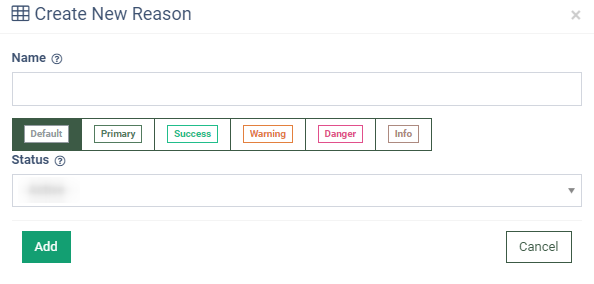
To add a new Internal Disposition Status, click the “Create New Reason” button and fill in the following fields in the “Create New Reason” pop-up window:
-
Name: Enter the name of the Internal Disposition Status.
-
Tag: Select the corresponding tag.
-
Status: Select the current status of the Internal Disposition.
Click the “Add” button to complete the action.
To manage the existing Internal Disposition Status, click the “Edit” button in the “Actions” column. Change the following information in the “Edit” pop-up window:
-
Name: Enter the name of the Internal Disposition Status.
-
Tag: Select the corresponding tag.
-
Status: Select the current status of the Internal Disposition.
Click the “Add” button to complete the changes.
Read more about the usage of the Internal Disposition Statuses in the Knowledge Base Article.
The “QC Disposition API” subtab allows you to create and manage the API key records for the QC Disposition sending from the user’s side.
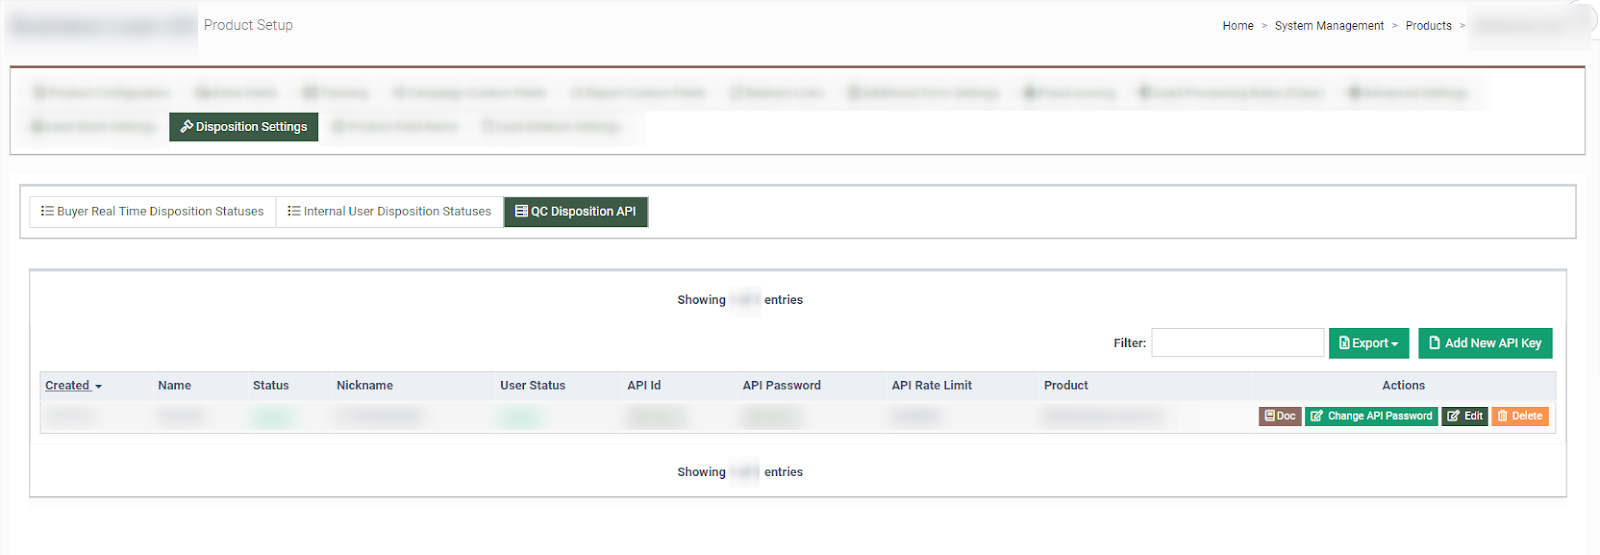
The list of API key records contains the following information:
-
Created: The date and time of the record creation.
-
Name: The name of the record.
-
Status: The current status of the record.
-
Nickname: The name of the related user.
-
User Status: The current status of the related user.
-
API Id: The unique identification number of the API record.
-
API Password: The password of the API record.
-
API Rate Limit: The rate limitation for the API record.
-
Product: The name of the related Product.
To add a new API record for the Product, click the “Add New API key” button and fill in the following fields in the “Add New API key” pop-up window.
-
Name: Enter the name of the API record.
-
Nickname: Select the related user.
-
Product: Select the related Product.
-
Rate Limit: Select the rate limiter for the API key record.
Click the “Add” button to complete the action.
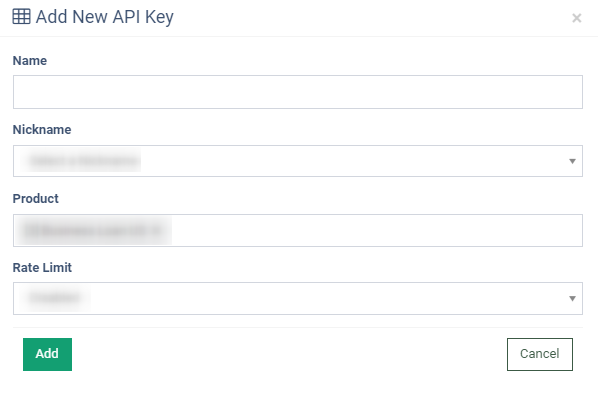
Note: Only users with the following system roles are eligible for API record adding: Pub Agent, Pub Senior Agent, LMS Admin, Call Logic, and Global Admin.
To view the unique identification number of the record, click the “Show” button in the “API Id” column.
To view the password of the API record, click the “Show” button in the “API Password” column.
To view the API Documentation for the created record, click the “Doc” button in the “Actions” column.
To change the password for the API record, click the “Change API Password” button.
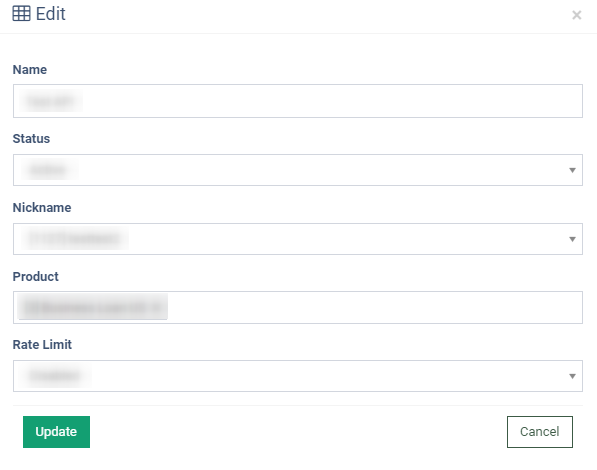
To edit the existing API record, click the “Edit” button in the “Actions” column and change the information in the following fields of the “Edit” pop-up window:
-
Name: Enter the name of the API record.
-
Status: Select the current status of the API record (Active, Disabled).
-
Product: Select the related Product.
-
Rate Limit: Select the corresponding rate limitation.
Click the “Update” button to complete the changes.
To remove the record from the list, click the “Delete” button in the “Actions” column.