Note: Lead Search does not return certain types of leads, even if a Lead ID has been generated. Specifically:
- Leads that failed deduplication rules configured at the Product level (for example, leads rejected as duplicates).
- Leads from Ping Post Products where only a ping was received and no post request occurred.
To view the report, go to the All Reports > Publisher Reports > Lead Search section.
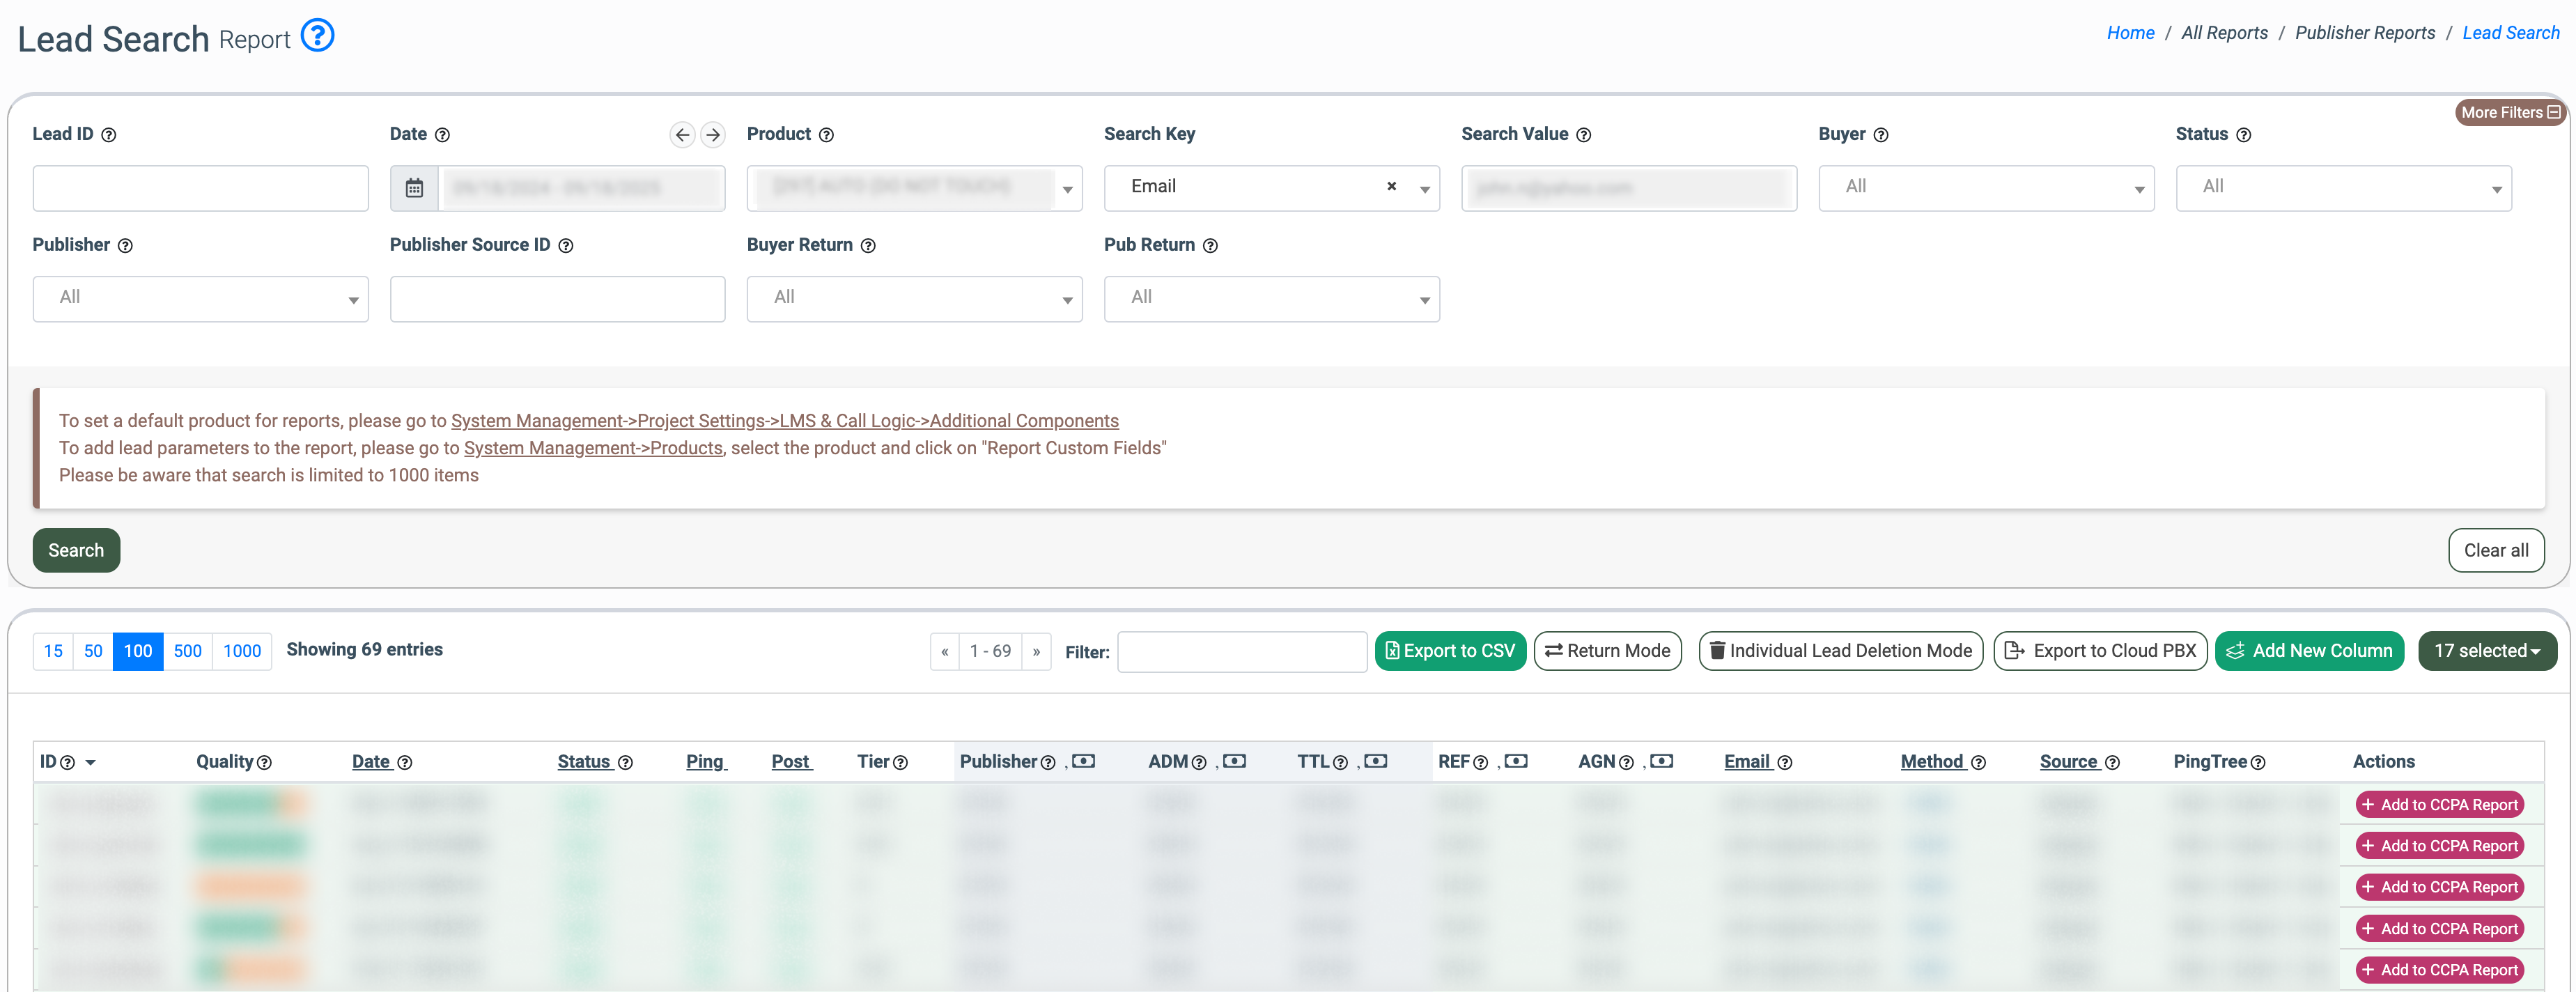
You can narrow down the search results by using the following filters:
- Lead ID: Enter the unique identification number of the lead.
- Date: Select the date range for the report.
- Product: Select the Product.
- Search Key: Select the entity you want to use for your lead search (Email / PhoneNumber).
- Search Value: Enter the value according to the selected entity.
- Buyer: Select the Buyer.
- Status: Select the Status of the lead (Reject, New).
- Publisher: Select the Publisher.
- Publisher Source ID: Enter the unique identification number of the internal publisher source.
- Buyer Return: Select the (Yes / No) option to display the leads with the returned Buyer’s amount.
- Pub Return: Select the (Yes / No) option to display the leads with the returned Publisher’s amount.
Note: To complete the search, it’s necessary to select the Product and fill in at least one of the data fields (Email or Phone Number/ Publisher Source ID / Lead ID).
Note: Click the “More Filters” button to display all available filters.
The Lead Search list contains the following information:
- ID: The unique identification number of the lead.
- Quality: The quality bubbles display the number of times the lead has been seen in the system (today, yesterday, in 30 days, or 45 days).
- Date: The date the lead entered the system.
- Status: The lead status (Sold / Reject / New).
- Tier: Tier price of the lead.
- Publisher: The name of the Publisher in the system.
- Redirect: The redirect link to the Campaign the lead is assigned to.
- Bucket Before: The amount on the Publisher’s bucket balance before the lead was posted to the system.
- Bucket After: The amount on the Publisher’s bucket balance after the lead was processed.
- Smart Bucket Before: The Smart Tree bucket bank balance amount before the lead was posted to the system.
- Smart Bucket After: The Smart Tree bucket balance bank amount after the lead was posted to the system.
- Pub: Publisher earnings.
- AGN: Agent payment.
- Buyer Return: Shows if there’s a Buyer’s amount return:
- Yes: In case of successful amount return.
- No: In case when the amount return is denied.
- -: In case of no lead return.
- Pub Return: Shows if there’s a Publisher’s amount return
- Yes: In case of successful amount return.
- -: In case of no lead return.
- REF: Referral payment.
- ADM: Admin payment.
- TTL: Total payment.
- Product: The Product the lead is assigned to.
- Channel: The name of the Channel in the system.
- Email: The email address provided by the lead.
- Method: Method of the Lead processing (POST / FORM).
- Source: The name of the source in the system.
- PingTree: The PingTree the lead is assigned to.
To add a custom column to the report, click the “Add New Column” button and fill in the required fields in the pop-up window:
- Title: Enter the name of the column.
- Status: Select the column status.
- After Column: Select the column placement in the report.
- Template: Enter the variables you would like the column to contain.
Note: All variables should be placed in the double curly braces and must be from the “Available variables” list below this field. It is possible to do simple math operations (+, -, /, %, //, *, **) in the template with the numerical variables if the operands are placed inside the braces.
Click the “Add” button to finish. Read more about how to create custom columns and how to manage them in this Knowledge Base article.
-1.png?hsLang=en)
To add a lead to the CCPA Report, click the “Add to CCPA Report” button in the “Actions” column and fill in the form in the pop-up window:
- Select State: This field is inactive as it’s predefined by the lead.
- Select the reason for the unsubscribe request. The list may vary depending on the selected state.
- Request to Know
- Request to Delete
- Request to Correct
- Request to Opt-Out
- Do not Sell
- Unsubscribe Note: if “Unsubscribe“ is selected, lead info will be added to the Global Unsubscribe report.
- Enable the radio buttons to specify on whose behalf the request is created:
- For Myself
- On Behalf of another person
- First name: This field is inactive as it’s predefined by the lead.
- Last name: This field is inactive as it’s predefined by the lead.
- Email Address: This field is inactive as it’s predefined by the lead.
- Telephone number: This field is inactive as it’s predefined by the lead.
-Aug-29-2024-09-58-00-9322-AM.png?hsLang=en)
Click the “Add” button to confirm the request.
Read more about the CCPA & Suppression Management report in this Knowledge Base article.
To download the report as an Excel file, click the “Export” button and select the pages to include in the report.
-Aug-29-2024-09-58-40-1343-AM.png?hsLang=en)
Return Lead
To be able to return the leads, click the “Return Mode” button to switch the mode.
-Aug-29-2024-09-59-24-8202-AM.png?hsLang=en)
Fill in all of the required fields to find a specific lead in the system and click the “Search” button. In the list, check the box with the lead and click the “Create Return” button to complete.
-Aug-29-2024-09-59-53-5217-AM.png?hsLang=en)
Delete Mode
To delete the leads, click the “Delete Mode” button to switch the mode.
-Aug-29-2024-10-00-26-6124-AM.png?hsLang=en)
Fill in all of the required fields to find a specific lead in the system and click the “Search” button. To complete the removal, click the “Delete” or “Partial Delete” button.-2.png?hsLang=en)
The “Individual Lead Deletion Mode” feature allows you to perform the lead deletion by removing a specific lead(s) upon request while ensuring the system retains the ability to process the same lead in the future.
For example, you can find a particular number of leads by filtration with the email address, and you need to select some of them for the lead removal operation in one transaction. This option allows you to perform such an action.
Use Case: A request for Lead Deletion is received from a Publisher and passed on to the instance owner who should delete the specific lead received from this Publisher on the specific date. The instance where the lead was deleted can still process the lead if they’ve applied at some point in the future. The lead is deleted from the system completely. The deleted lead will no longer be able to enter the system with the same email and cell phone number even if it came from other publishers.
Note: By default the standard Lead Deletion option is available in the system. To use the individual lead deletion mode, apply to your account manager to enable the feature.
To enable the individual deletion mode, click the “Individual Lead Deletion Mode” button.
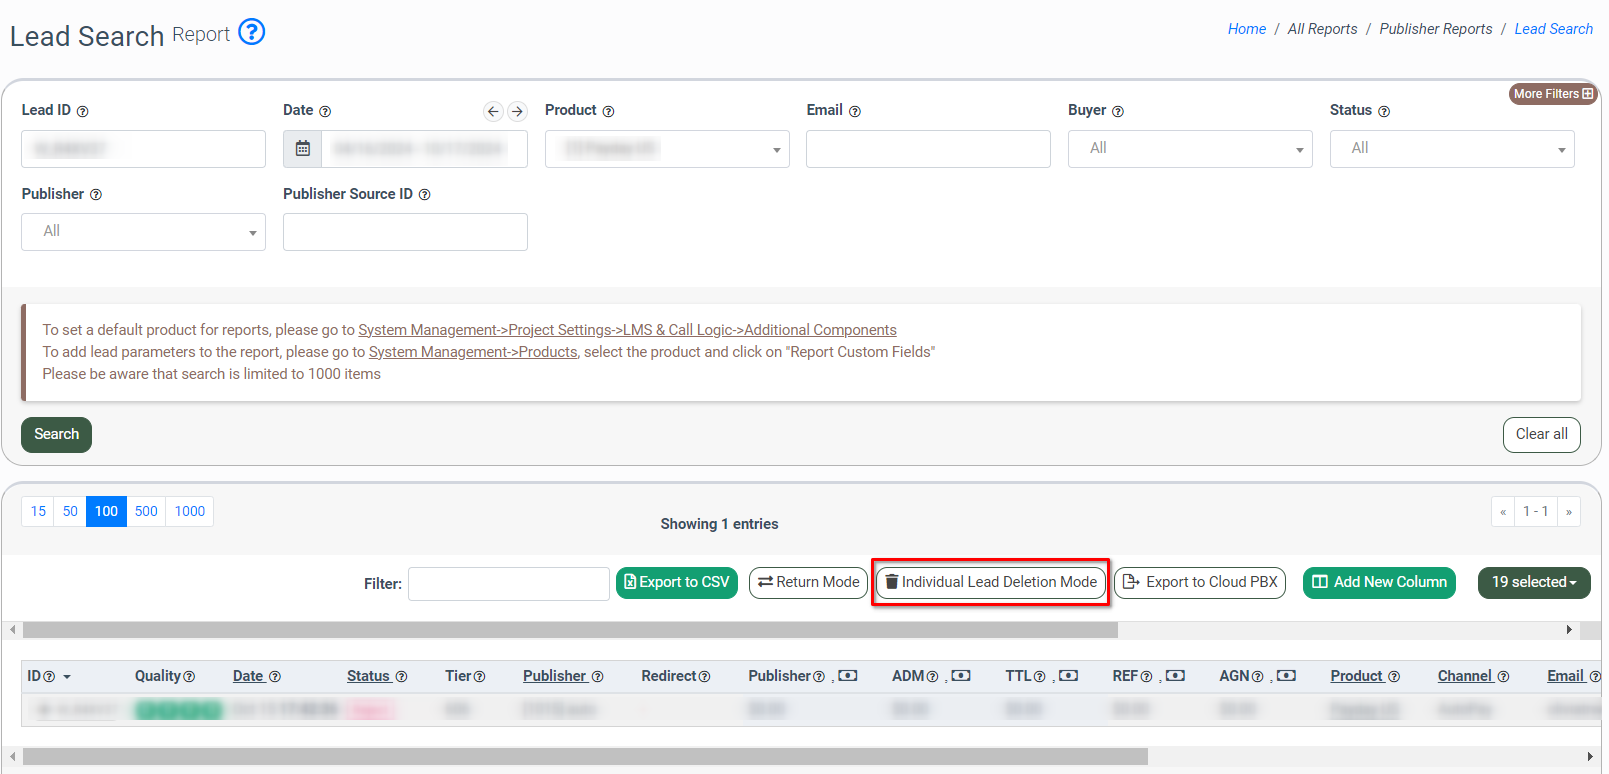
You will be redirected to the “Lead Delete” section.
Fill in all of the required filter fields to find a specific lead(s) in the system and click the “Search” button.
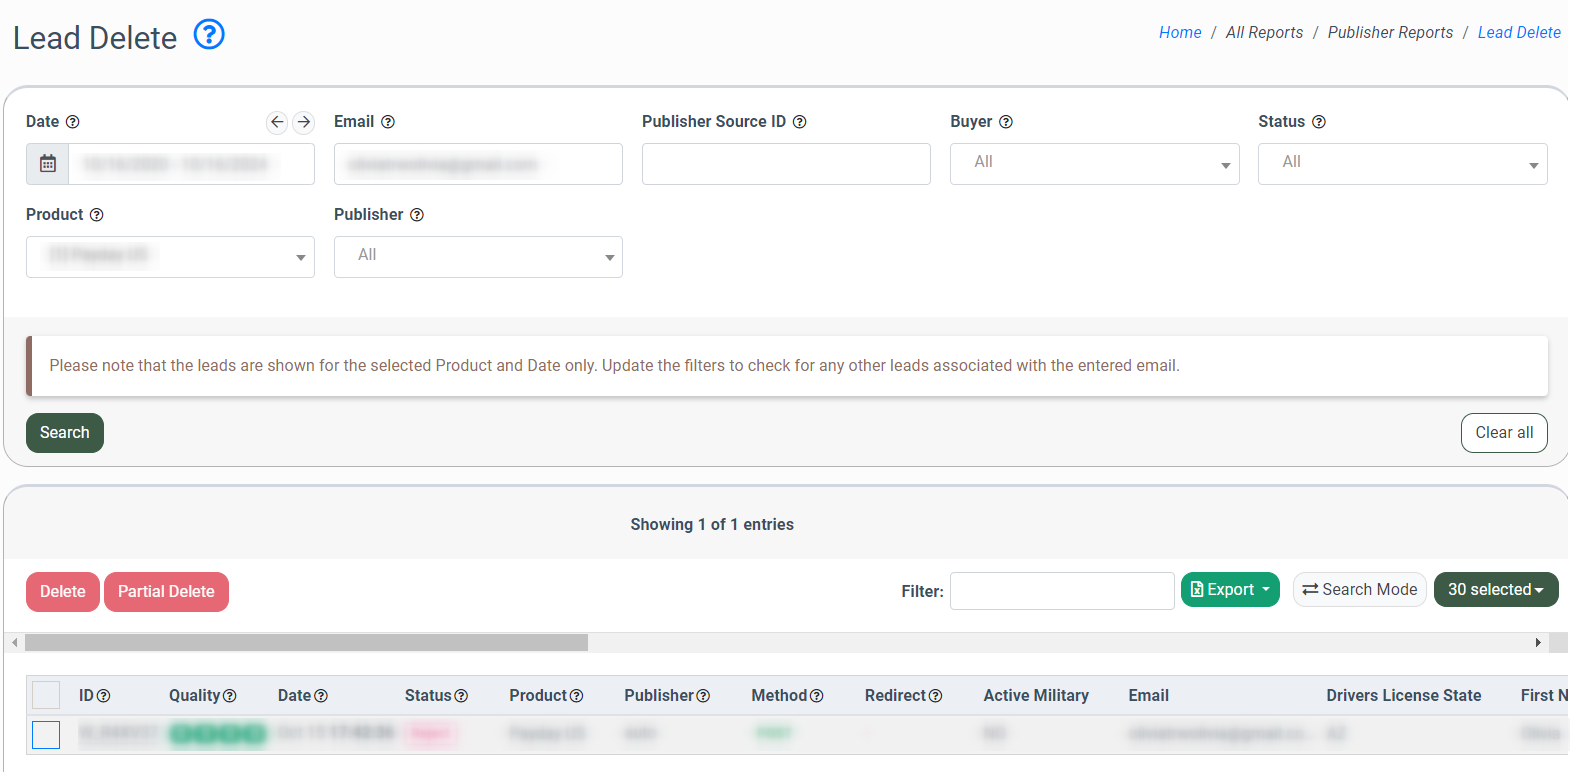
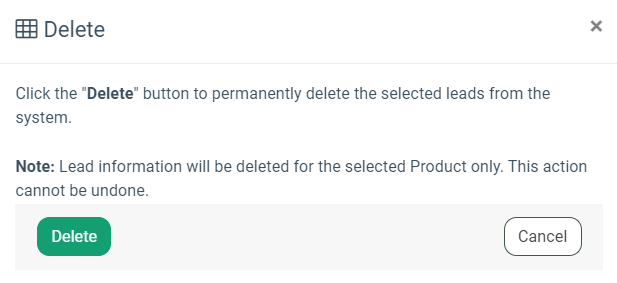
To perform the deletion operation for the particular lead(s), check the box(es) for the corresponding lead(s), and click the “Delete” button to complete the action. Confirm the deletion operation by clicking the “Delete” button in the “Delete” pop-up window.
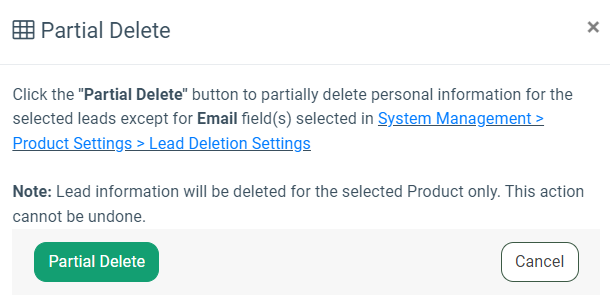
To perform the partial deletion operation for the particular lead(s), check the box(es) for the corresponding lead(s), and click the “Partial Delete” button to complete the action. Confirm the partial deletion operation by clicking the “Partial Delete” button in the “Partial Delete” pop-up window.
Read more information about the Lead Deletion feature in the following Knowledge Base article.