Registration page for Buyers
The Buyer Registration page feature allows you to create a Registration Form for Buyers and place the form code on your side to make the signup process for the Buyers more efficient and simplified.
This feature has a preset option where the corresponding form code along with the necessary functions such as CSRF and Captcha protections will be automatically added to the page and then used for placement to the registration page itself.
Note, that for this form display and access settings configured on the Project Settings level (System Management > General > Project Settings section > LMS & Call Logic tab > Buyer settings subtab) will not be applied for the form created by this guide.
Read more about the Buyer Settings on the Project Setup level in the following Knowledge Base article.
Follow the following steps to create a Buyer Registration form:
1. Create a Page for the form storing.
To create the Page, go to the System Management > General > Pages section, and click the “Add Page” button. Fill in the following fields in the "Add Page" pop-up window:
- Name: Enter the name of the new page.
- Short Name: Enter the short name of the page.
- Content: Fill in the initial script of the page.
- Rate Limiter: Select the option for the rate limitation. This limitation is for the number of page openings and loading per particular time range.
- Low Volume (10 / minute, 50 / 10 minutes)
- Medium Volume (50 / minute, 250 / 10 minutes)
- High Volume (120 / minute, 600 / 10 minutes)
- Very High Volume (360 / minute, 1800 / 10 minutes)
- Visibility: Select the publicity level of the page. Mark the checkbox to give all users access to the page using the direct link. If the checkbox is not marked, the page is accessible by the direct link and a key. The access key is generated automatically for this option. You can view the key in the URL of the page.
- Click the “Add” button to complete the page creation process.
2. Prefill the page by using the embedded template creation.
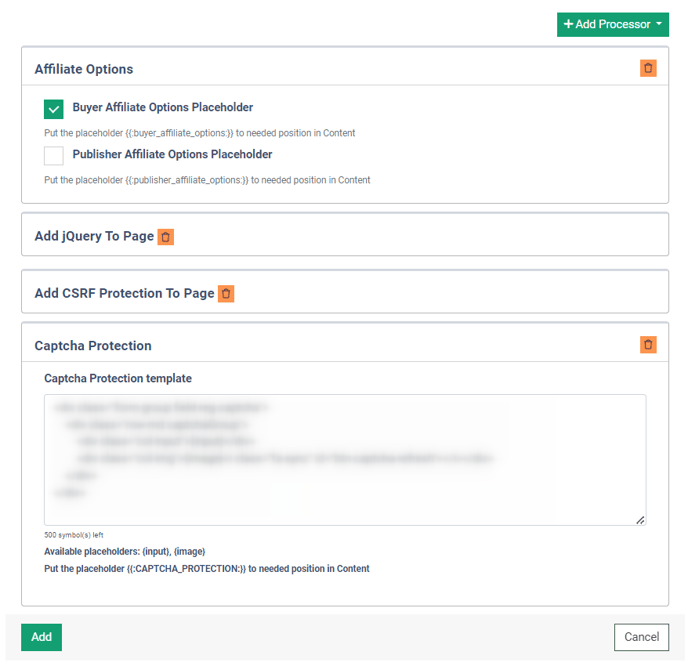
To prefill the page with the recommended script and page processors, click the “Template for registration buyer” button. The following field will be prefilled:
- Content: The buyer registration form script will be added to the page.
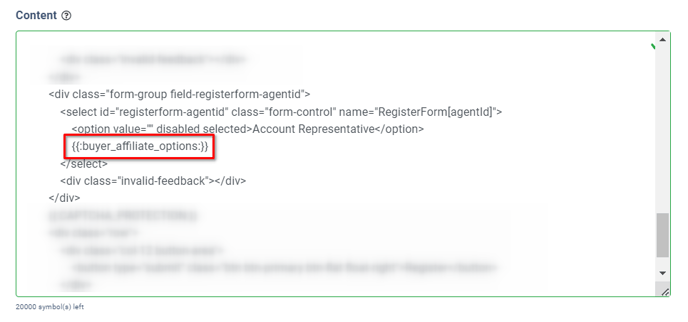
- Affiliate Options: Select the options for the Account Representative selection during the registration process. These are the and placeholder handlers. They are added automatically during the form template generation. Note that if the following options are not checked in the corresponding checkboxes, the Account Representative selection options will be empty. If the corresponding box is checked, the Account Representative selection options will be available.

-
- Buyer Affiliate Options Placeholder: Check the box to enable the options for the Account Representative selection for the Buyer registration. Note, that you should put the placeholder to the needed position in the “Content” field.
- Publisher Affiliate Options Placeholder: Check the box to enable the options for the Account Representative selection for the Publisher registration. Note, that you should put the placeholder to the needed position in the “Content” field.
- The “Add jQuery To Page” processor will be added to the page.
- The “Add CSRF Protection To page” processor will be added to the page.
- The “Captcha Protection” processor along with the captcha script template will be added to the page.

3. Place the form created via the page on the website.
To place the registration form on the customer’s website, click the “PHP Example” or “JQuery Example” button at the top of the “Pages” section. You can view the sample code that should be placed on your website to implement the registration form.

Read more about the Pages system section in the following Knowledge Base article.


