The Buyer settings section allows administrators to configure system-level settings for how buyers (lenders) interact with the LMS and Call Logic components, including buyer registration setup, payment and balance settings, lead access permissions, and more.
Best Practices
- Enable manual approval for new buyers to maintain quality
- Configure buyer default roles and permissions based on operational responsibilities
- Limit access to sensitive lead and accounting information where appropriate
- Configure default industries and products to streamline buyer onboarding
- Review registration form fields periodically to ensure only required information is collected
To configure the Buyer settings, go to the System Management > General > Project Settings section. In the Project Settings section, select the LMS & Call Logic product, then select the Buyer settings tab.

The Buyer settings tab contains six blocks:
Registration Process
The Registration Process block controls how buyers register and onboard into the platform. It includes settings that allow you to customize the publisher registration process.
Read more about the Global Registration process and Buyer Registration settings in the following Knowledge Base article.
Prepaid Auto Charge Settings
The Prepaid Auto Charge Settings block allows you to set up different prepaid options. Also, you can arrange the balance replenishment notifications. The Prepaid Auto Charge Settings block contains the following fields:
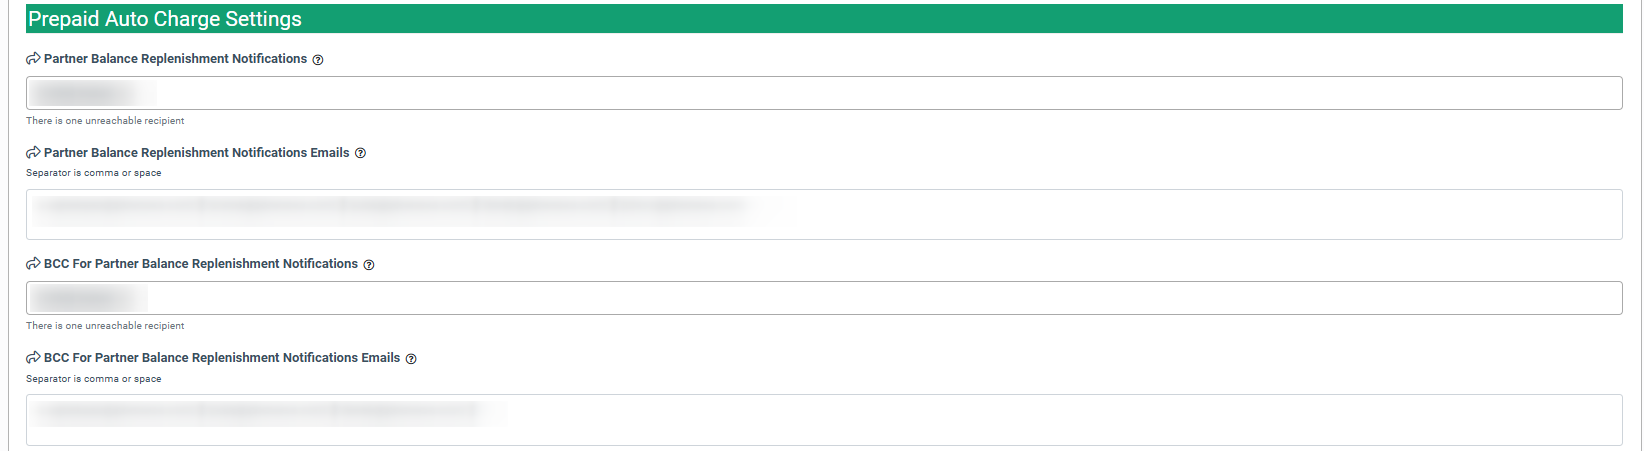
- Partner Balance Replenishment Notifications: Select the users from the list to receive the partner balance replenishment notifications.
- Partner Balance Replenishment Notifications Emails: Enter the emails for the partner balance replenishment notifications to be sent.
- BCC For Partner Balance Replenishment Notifications: Select the users from the list to receive the BCC for partner balance replenishment notifications.
- BCC For Partner Balance Replenishment Notifications Emails: Enter the emails for the BCC on partner balance replenishment notifications to be sent.
Payment Settings
The Payment Settings block allows you to set up additional payment settings for prepaid Buyers and select the IP addresses from which the system will accept connections.
-Jan-08-2025-10-39-48-0029-AM.png?hsLang=en)
The Payment Settings block contains the following fields:
- Minimum replenishment amount for prepaid buyers: Enter the minimum amount for deposit per time for prepaid Buyers.
- Amount to Charge Values: Enter the replenishment amount for prepaid Buyers to be able to select in the “Amount to Charge” field on the Billing Settings page. Read more about the Billing Settings in the Knowledge Base article.
- Allowlisted IPs: Enter the IP addresses from which the system will accept the connections.
- List of blocked IP addresses: The list of IP addresses blocked by the system.
Transaction Management
The "Transaction Management" block allows you to set a certain percentage of transactions from Prepaid Buyer for each payment system. It provides a mechanism for configuring this commission both throughout the system and in the context of individual Buyers.
If a commission is applied, the Buyer or Buyer Representative, when replenishing the balance, should see the commission percentage and how much funds will be credited as a result.
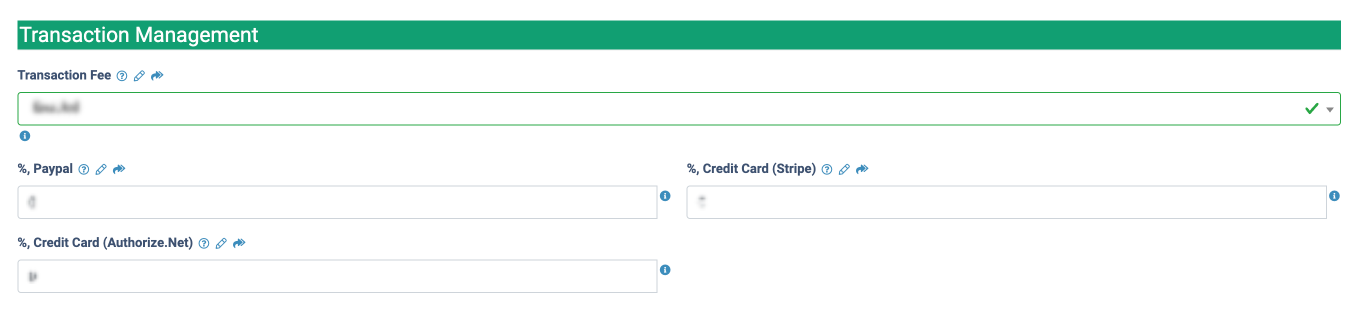
The "Transaction Management" block contains the following fields:
- Transaction Fee: Select the corresponding option to enable/disable the transaction fee.
- %, Paypal: Enter the numeric transaction fee percentage for PayPal.
- %, Credit Card (Stripe): Enter the numeric transaction fee percentage for Stripe.
- %, Credit Card (Authorize.Net): Enter the numeric transaction fee percentage for Authorize.Net.
Lead Deals Settings
The Lead Deals Settings block allows you to set the default and available Products and Industries for the Lead Deals report.
Note: The Lead Deals Settings block is available only if the Lead Deals feature is active. Read more about how to set up the Lead Deals feature in this Knowledge Base article.
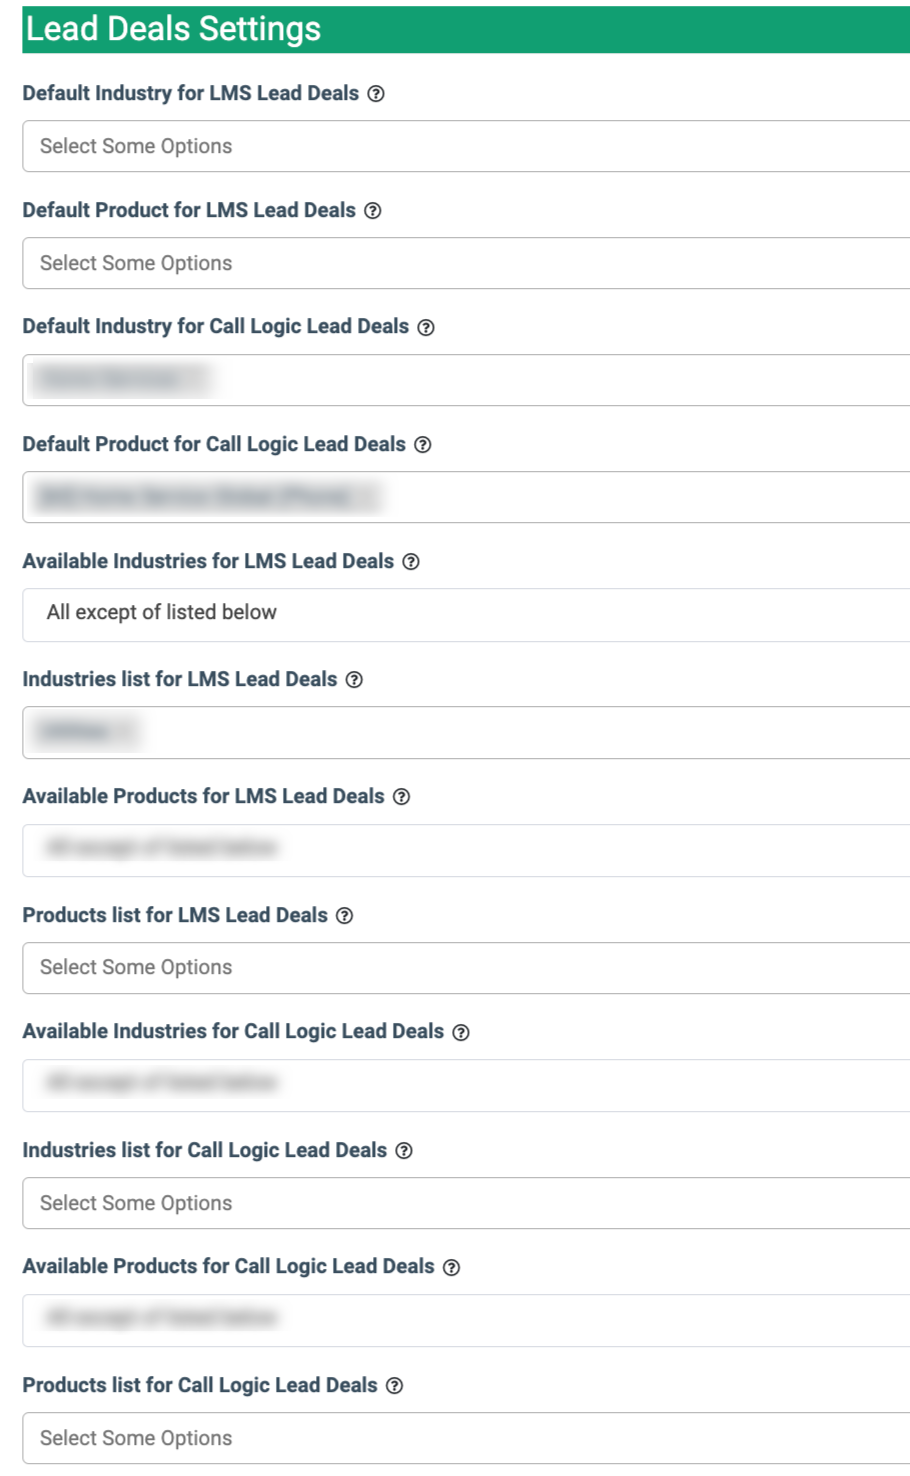
The Lead Deals Settings block contains the following fields:
- Default Industry for LMS Lead Deals: Select the default Industry for the LMS Lead Deals (EDU, Finance, Health, Home Service, Insurance, Legal, Other, Real Estate).
- Default Product for LMS Lead Deals: Select the default Product for the LMS Lead Deals from the drop-down list.
- Default Industry for Call Logic Lead Deals: Select the default Industry for the Call Logic Lead Deals (EDU, Finance, Health, Home Service, Insurance, Legal, Other, Real Estate).
- Default Product for Call Logic Lead Deals: Select the default Product for the Call Logic Lead Deals from the drop-down list.
- Available Industries for LMS Lead Deals: Select the logical operator for the Industries list for the LMS Lead Deals (All except the listed below, Only listed below).
- Industries list for LMS Lead Deals: Select the Industries for the LMS Lead Details from the drop-down list.
- Available Products for LMS Lead Deals: Select the logical operator for the Products list for the LMS Lead Deals (All except the listed below, Only listed below).
- Products list for LMS Lead Deals: Select the Products for the LMS Lead Deals from the drop-down list.
- Available Industries for Call Logic Lead Deals: Select the logical operator for the Industries list for the Call Logic Lead Deals (All except the listed below, Only listed below).
- Industries list for Call Logic Lead Deals: Select the Industries for the Call Logic Lead Details from the drop-down list.
- Available Products for Call Logic Lead Deals: Select the logical operator for the Products list for the Call Logic Lead Deals (All except the listed below, Only listed below).
- Products list for Call Logic Lead Deals: Select the Products for the Call Logic Lead Deals from the drop-down list.
Click the “Save” button to confirm the changes.
Lead Details Settings
The “Lead Details Settings” block allows you to manage the display of data in the Buyer Lead Details report.
Note that this setting is applied only for users with the Buyer Representative and Buyer Editor system roles.

-
Hide TTL column at Lead Details: Switch the toggle to the “ON” position to hide the TTL column display in Buyer Lead Details Report.