Voice AI Agents for IVR systems are intelligent, speech-enabled software designed to automate and enhance voice-based customer interactions. Powered by advanced technologies like natural language processing (NLP), speech recognition, and machine learning, these agents can understand, interpret, and respond to spoken language in a natural, conversational way.
Unlike traditional IVR systems with rigid menu options, Voice AI Agents allow callers to speak freely, making the interaction more intuitive and efficient. They can handle a wide range of tasks, such as answering common queries, authenticating users, and intelligently routing calls. This leads to reduced wait times and improved customer satisfaction.
In our IVR system, Voice AI Agents are integrated as a configurable block within the IVR constructor, allowing easy setup and management directly from the IVR interface. It allows you to embed call processing, including the creation of the questions list that the client can ask the system, a voice input feature for the specific field using predefined questions, the transmission of the client’s data to the Lead Stash, and the logging of the AI call processing results in the Lead Info.
Note: This option is available on-demand only. Please, contact your account manager for further details.
How to Enable the AI Agents
Manage the Workflow of the AI Agent
Add and Set the AI Agents IVR Block
AI Agents and Lead Stash Workflow
Check the Results of the AI Agents Workflow
Check the statistical data of the AI Agents workflow
Check the video tutorials
How to Enable the AI Agents
Before further setup and usage, the service should be enabled on the system level as a subscription. To activate the service subscription, go to the System Management > System Subscriptions section, expand the “Call Logic” collapsible section, and select the “Additional Features” tab.
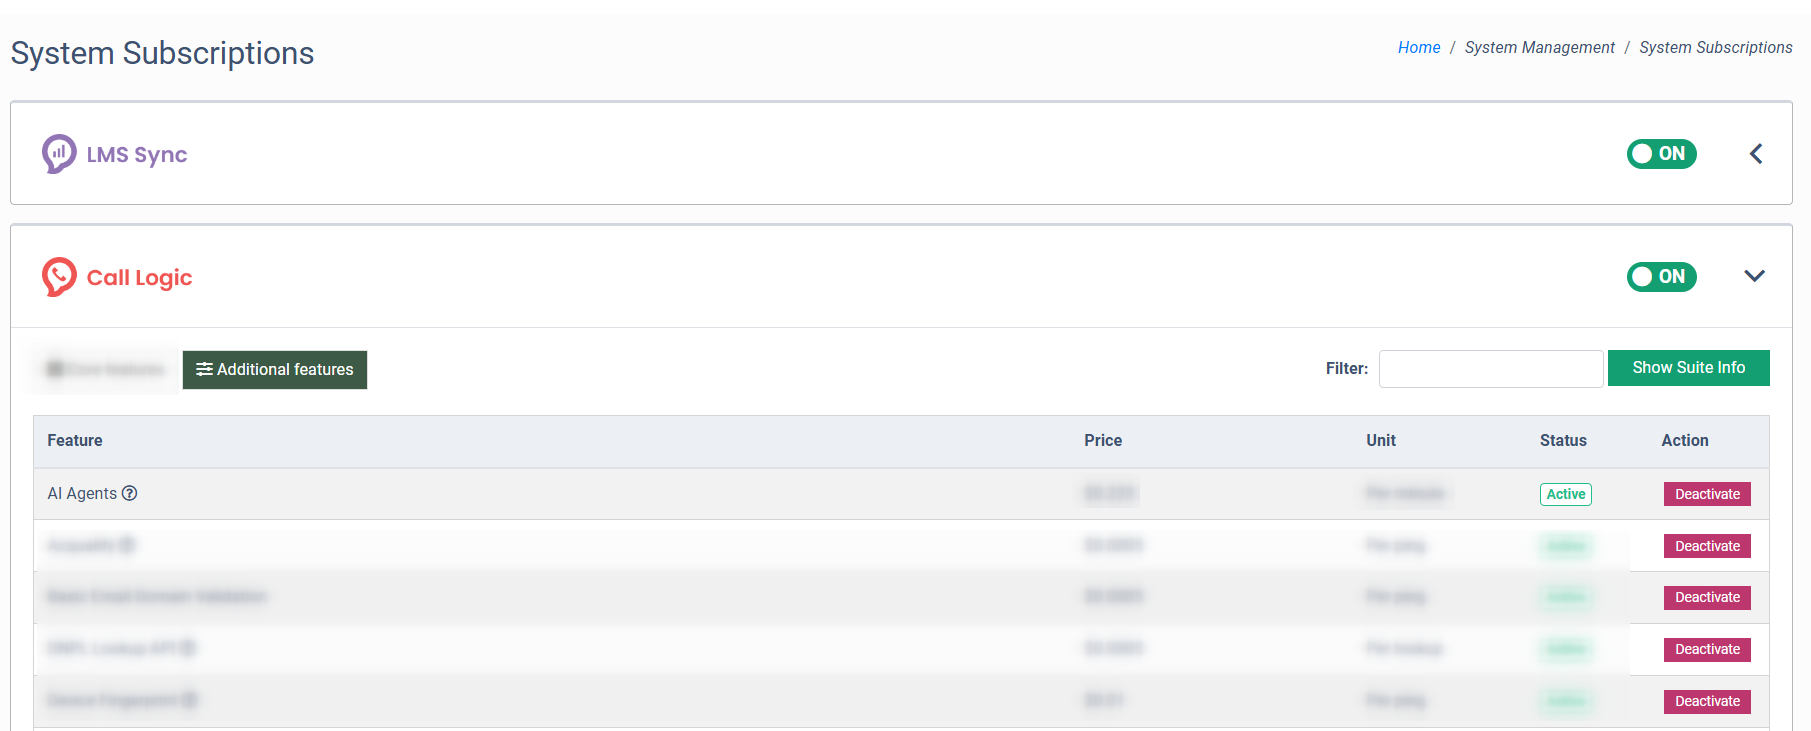
Select the “AI Agents” option and click the “Activate” button in the “Action” column.
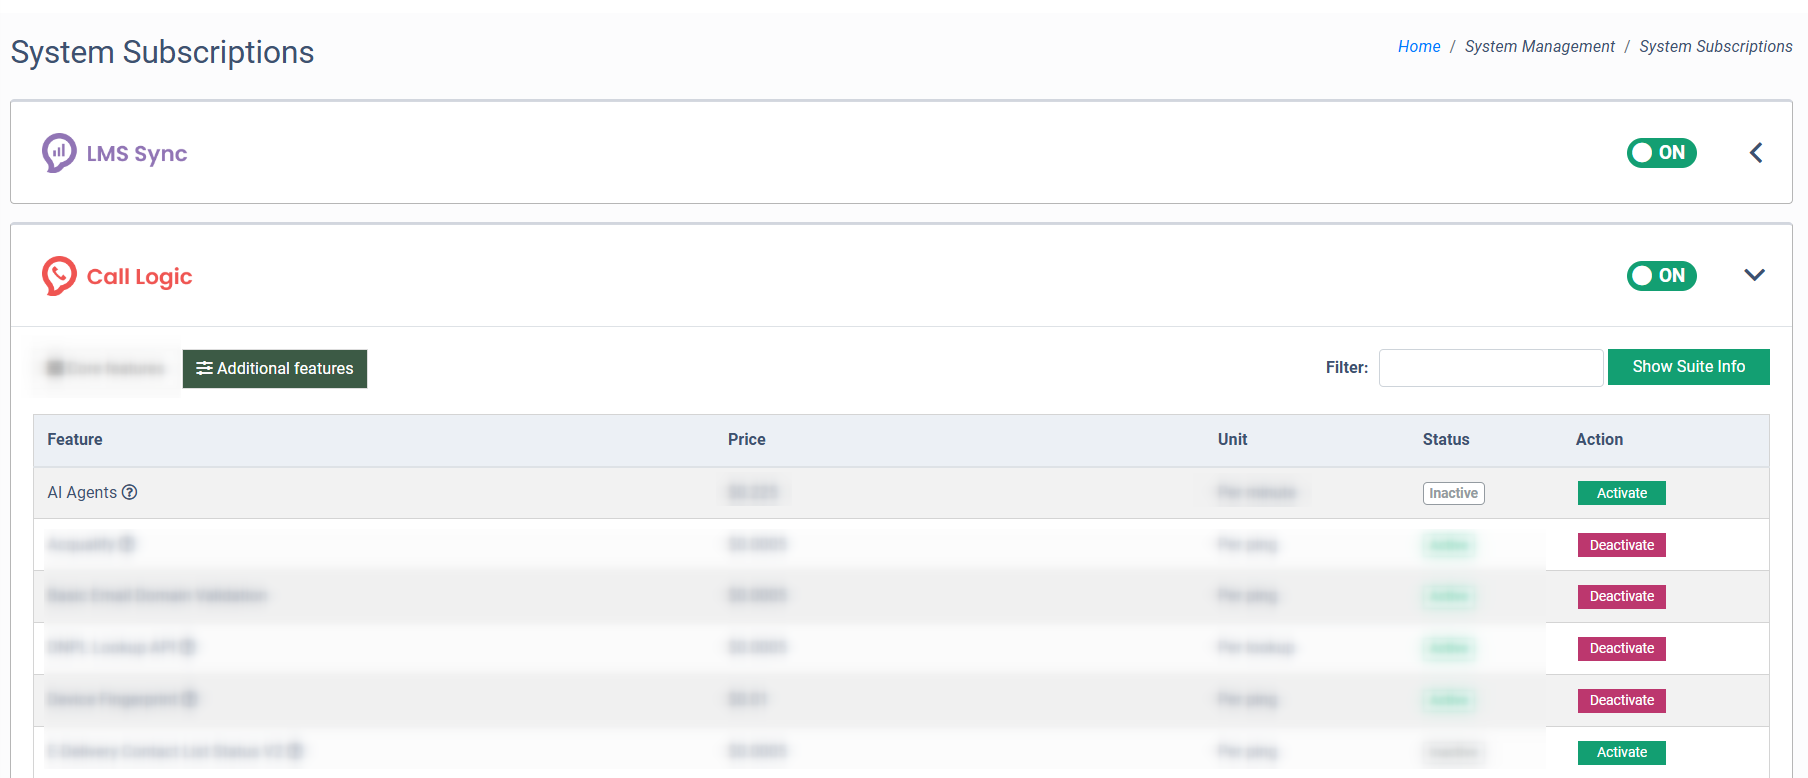
To complete the activation, click the “Activate” button in the “AI Agents” pop-up window.
-1.png?hsLang=en)
Before moving forward with setup, make sure that the current status of the AI Agent option is changed to “Active”, and that the “AI Agent” system section is available in the Publisher Management > Setup section.
Manage the Workflow of the AI Agent
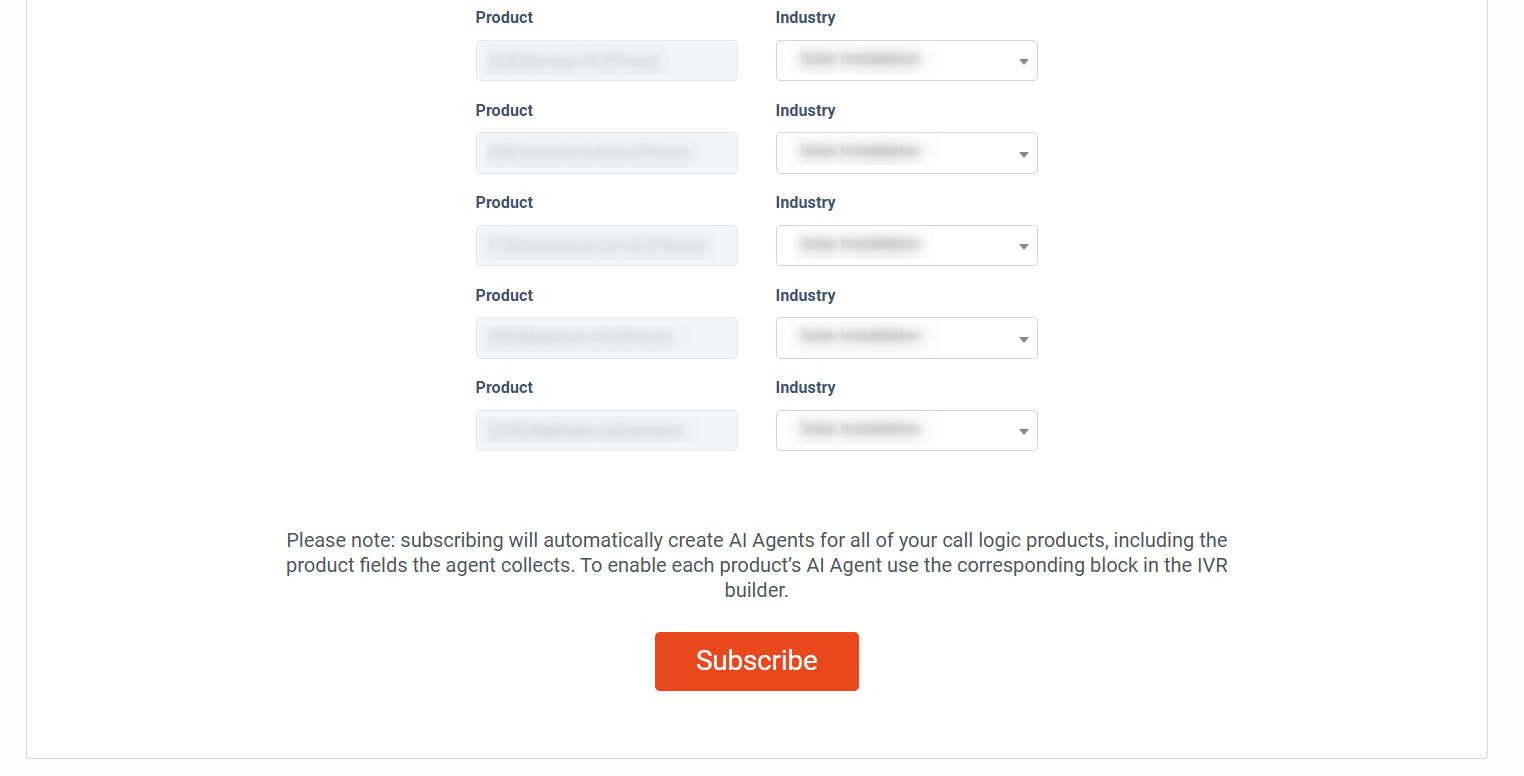
To manage the flow of the AI Agent, go to the Publisher Management > Setup > AI Agents section. Here, you can see all products where AI Agents are enabled. The first step in creating AI Agents for products is selecting an industry for each product. To do this, select the Product and choose the corresponding industry option in the “Industry” field.
The industry represents a set of built-in FAQ templates and instructions that the AI Agent uses to guide the conversation within the scope of the product. You can manage, modify, or create a unique set of FAQs for your specific business needs. We offer built-in FAQ templates for certain industries, which can be customized to fit your needs. If your product doesn’t match any of the available industry templates, you need to select "Custom Industry" from the Industry field dropdown and click the “Subscribe” button to complete the AI Agents settings. After subscribing, you will be redirected to the AI Agents section, where you can then enter your own FAQs for your industry. In this case, the AI Agent will attempt to capture the conversation's scope based on the FAQs you provide and the product fields configured.
The list of available built-in Industries is the following:
- Solar Installation
- Home Services
- Auto and Home Insurance
- Moving
- Cable TV & Internet
- Custom Industry
To create a FAQ for the custom Industry, go to the Publisher Management > Setup > AI Agents section, select the "Custom Industry" option for the particular Product, and click the “See All My Agents” button.
Select the “Knowledge Base” tab and enter the corresponding custom FAQ questions in the “FAQ” field.
More information about the FAQ creation is available below.
-1.png?hsLang=en)
To manage the existing AI Agents that have been already configured, click the “See My AI Agents” button.
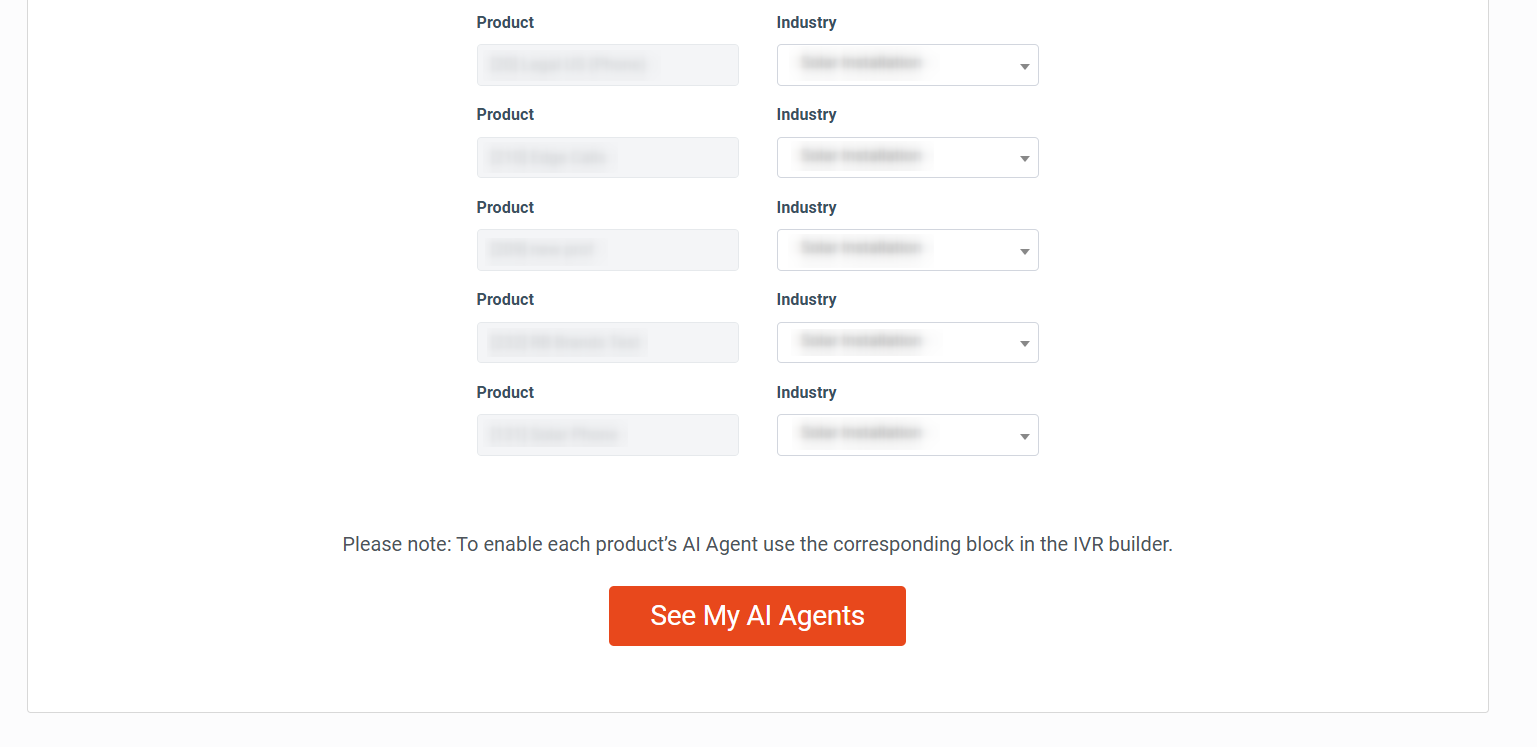
You will be redirected to the AI Agents section.
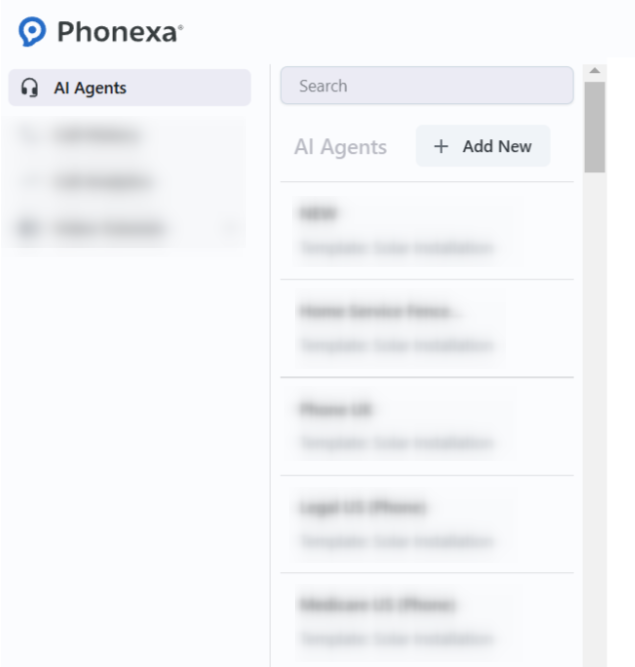
Select the corresponding AI Agent for the particular Product from the list and click on that. Use the “Search” field to filter out the list results.
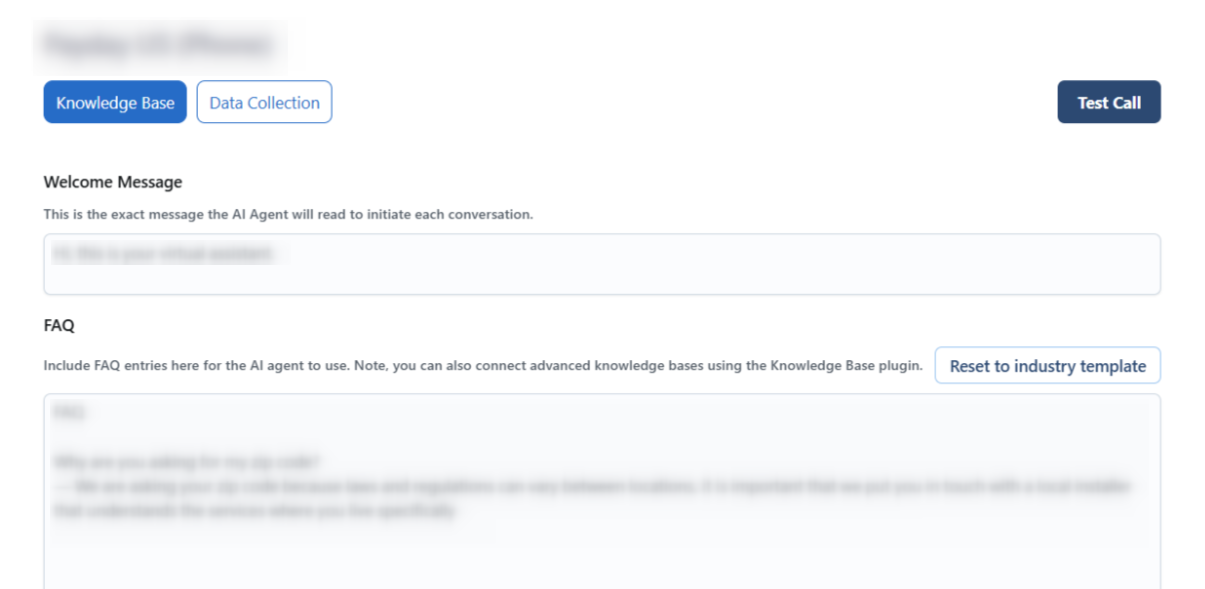
The “Knowledge Base” tab allows you to manage the text of the message that will be played by the AI Agent for the customer.
The following settings are available:
- Welcome Message: Here is the intro message that will be read by the AI Agents to the client when they reach the “AI Agents” IVR block and the conversation begins. Currently, it is read-only to ensure a clear disclosure to consumers that they are speaking with AI. However, if you need it customized for each agent due to specific disclosure requirements, please reach out to your account manager.
- FAQ: Enter the list of Q&A that may be asked by the client to the AI Agent. Note: If you leave the question blank the AI will try to ask the question itself using the label of that field. For example, “duiInLast3Years” label will automatically generate the question “Did you receive any DUI violations in the last 3 years”. However, we recommend putting questions manually to tailor the conversation to your needs, especially for labels that are not self-explanatory.
Click the “Save” button to complete the settings.
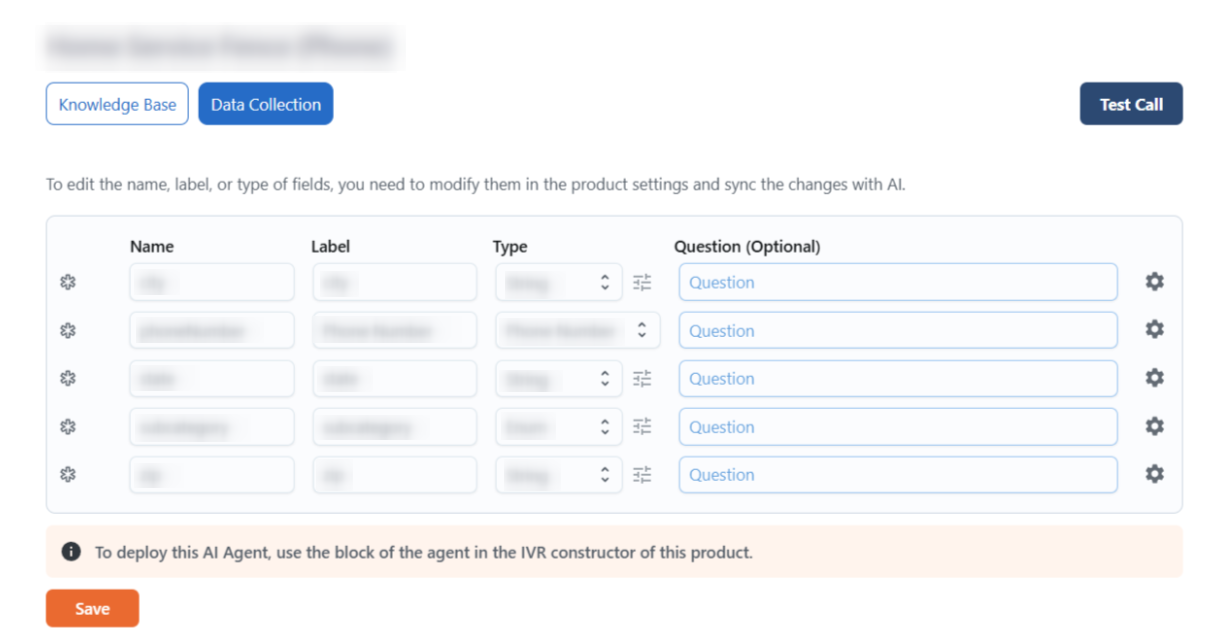
The "Data Collection" tab allows you to manage the list of product fields from which data should be obtained during the client's call processing on the AI Agents IVR block. Please note that the product fields are already automatically synchronized, giving you the option to customize the interactions even further.
The following settings are available for fields:
- Name: The name of the field.
- Label: The label of the field.
- Type: The type of data input for the field.
- Question (Optional): Enter the question that the AI Agent will ask the client regarding this field. If you leave the question blank the AI will try to ask the question itself using the label of that field.
Click the “Save” button to complete the settings.
Note: The fields present in the AI Agents are connected to the corresponding Product fields. If changes are required to the list of fields in the AI agent, the respective changes should be done at the Product level.
Read more information about the Product Fields Configuration in the following Knowledge Base article.
You can configure each part of the interaction further by going inside the additional settings for the field, by clicking the button with the “Gear” icon. The following settings are available:
- Enabled: If enabled, the AI agent will ask the question. If disabled, the AI agent will skip asking the question within the flow.
- Required: If enabled, an answer to this question will be required before the consumer can move forward with the conversation.
- Dictation Mode: If enabled, it allows consumers more time to respond to the questions and automatically applies corrections for enhanced accuracy.
- Check Spelling: If enabled, the AI Agent will perform the spelling check on the information that was said by the client using phonetic cues (e.g., A as in Alpha) before storing the answer.
Click the “OK” button to apply the field settings.
Additionally, you can make test calls to try it out before the AI Agent goes live.
Please note that each of the F&Q templates includes guardrails to keep the conversation focused on topics within the scope of the product. There are also settings available to follow up with the consumer in case of extended silence and to limit the total length of each call.

Add and Set the AI Agents IVR Block
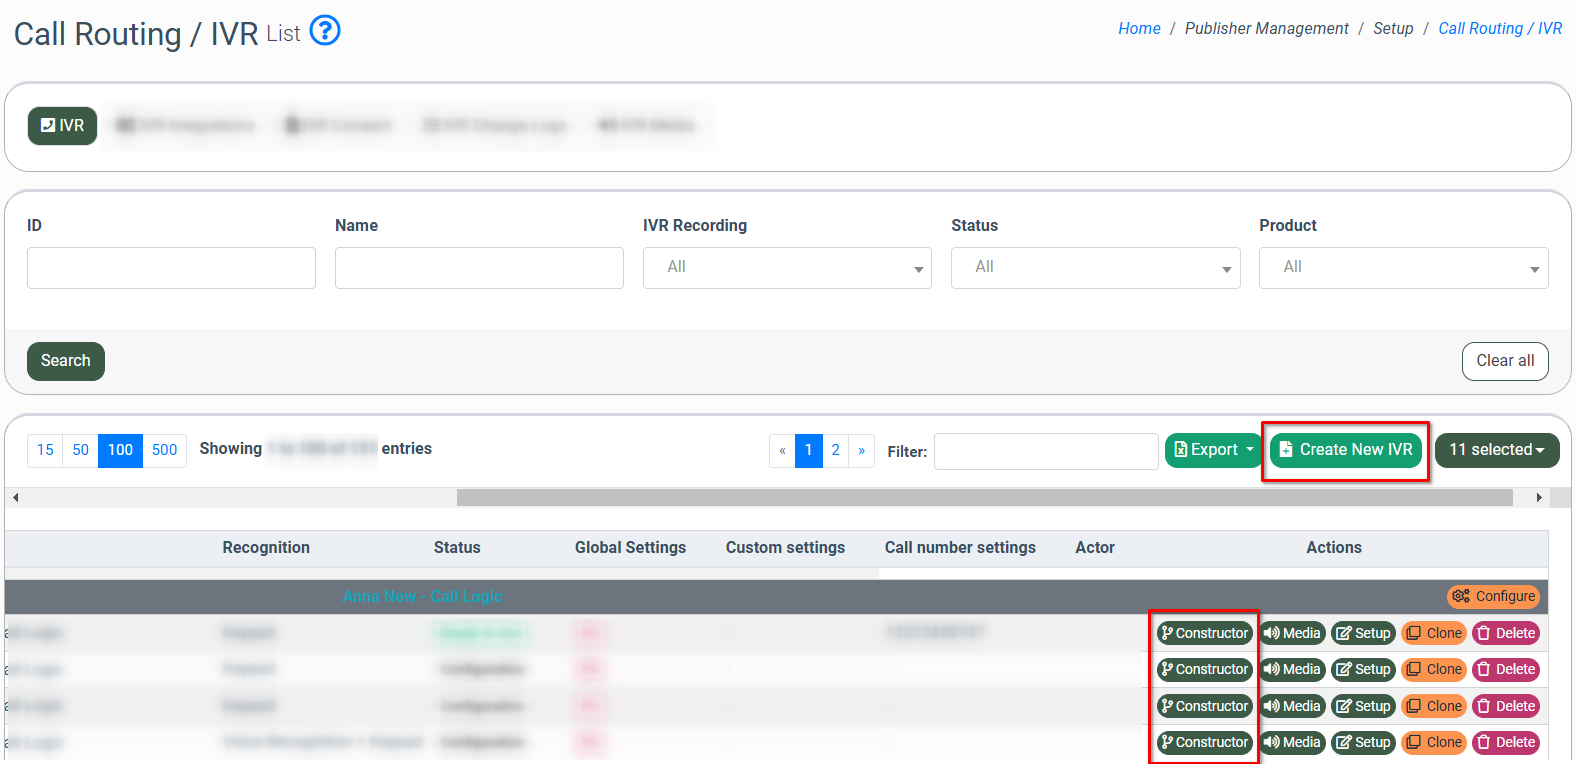
To add the AI Agents block to the IVR, go to the Publisher Management > Setup > Call Routing / IVR section, select the existing IVR from the list, and click the “Constructor” button in the “Actions” column, or create a new IVR by clicking the “Create New IVR” button.
Read more information about the Call Routing / IVR system section in the following Knowledge Base article.
To add the AI IVR block, click the “AI Agents” block in the “Call Handling” collapsible section and add it to the flow section of the constructor.
Read more about the IVR blocks in the following Knowledge Base article.

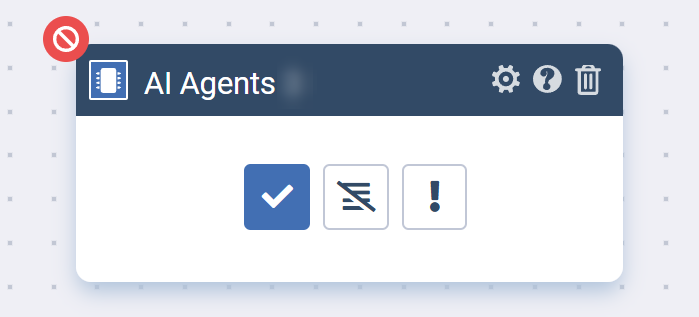
The “AI Agents” IVR block collects from the client's speech and includes settings for branching based on three scenarios:
- Success branch: The client provided the required information verbally, and it meets the corresponding block requirements.
- No Data or Live Agent branch: The client asked to be connected to the operator or company representative by saying the corresponding sentence or word combination to the AI Agent. Note: If the caller stays silent 3 times after asking the corresponding question from the AI Agent, the system will lead the call according to the route that is set in the “Error branch” branch.
- Error branch: The error during the call processing occurred, such as connection interruption, the client said insufficient information, etc.
Read more about block flow management in the “Manage the Workflow of the AI Agents” section of the ongoing article.
To manage the block settings, click the “Block Settings” button (the button with the “Gear” icon).
The following settings are available for the “AI Agents” block:
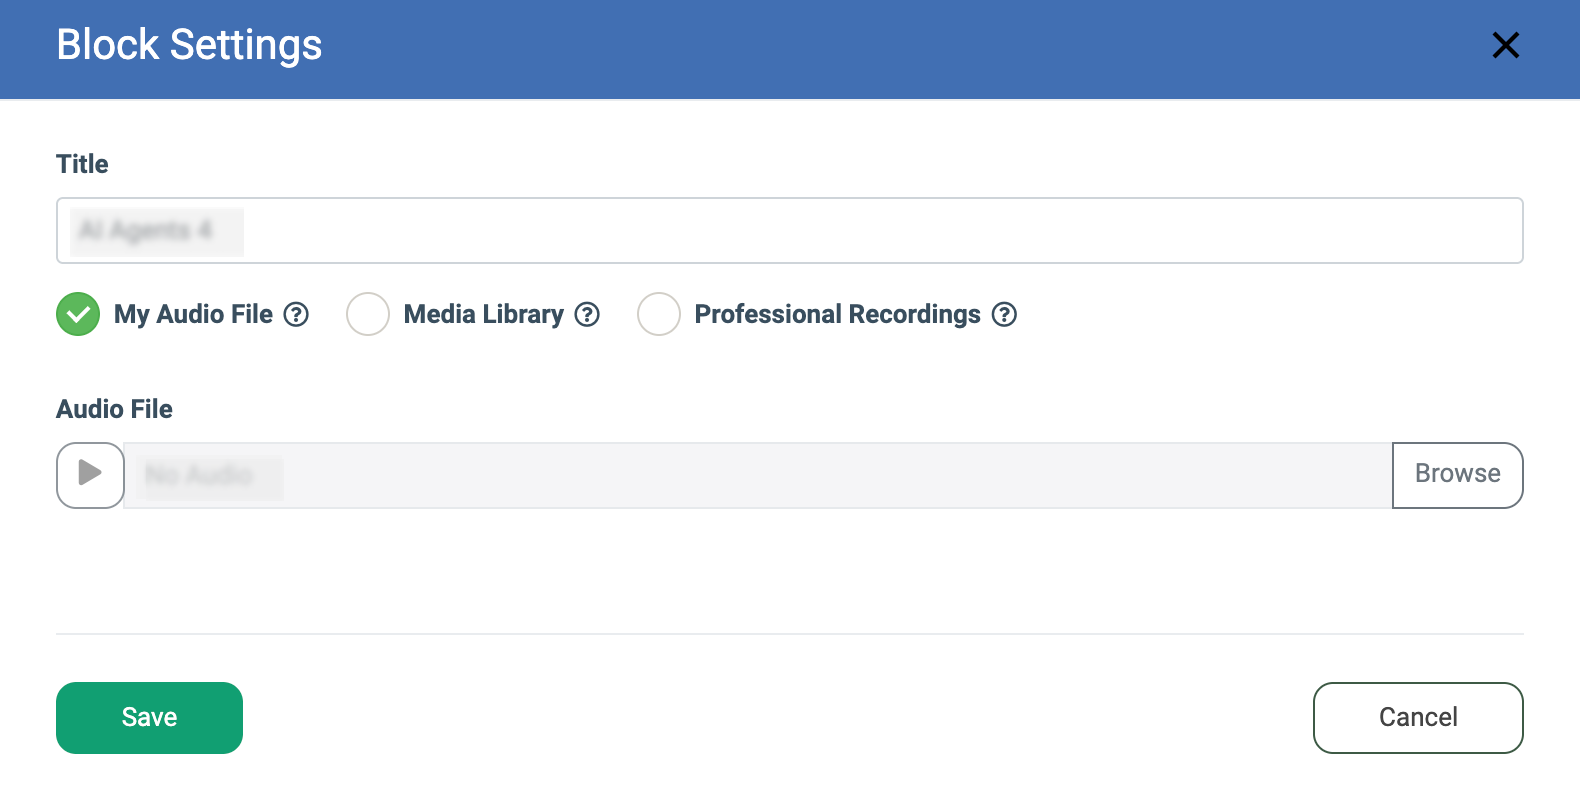
- Title: Enter the name of the block.
- My Audio File: Check the box to upload the audio file that will be played in case of some system delays after the client comes back from the AI Agent input stage.
- Audio File: Select the audio file for uploading.
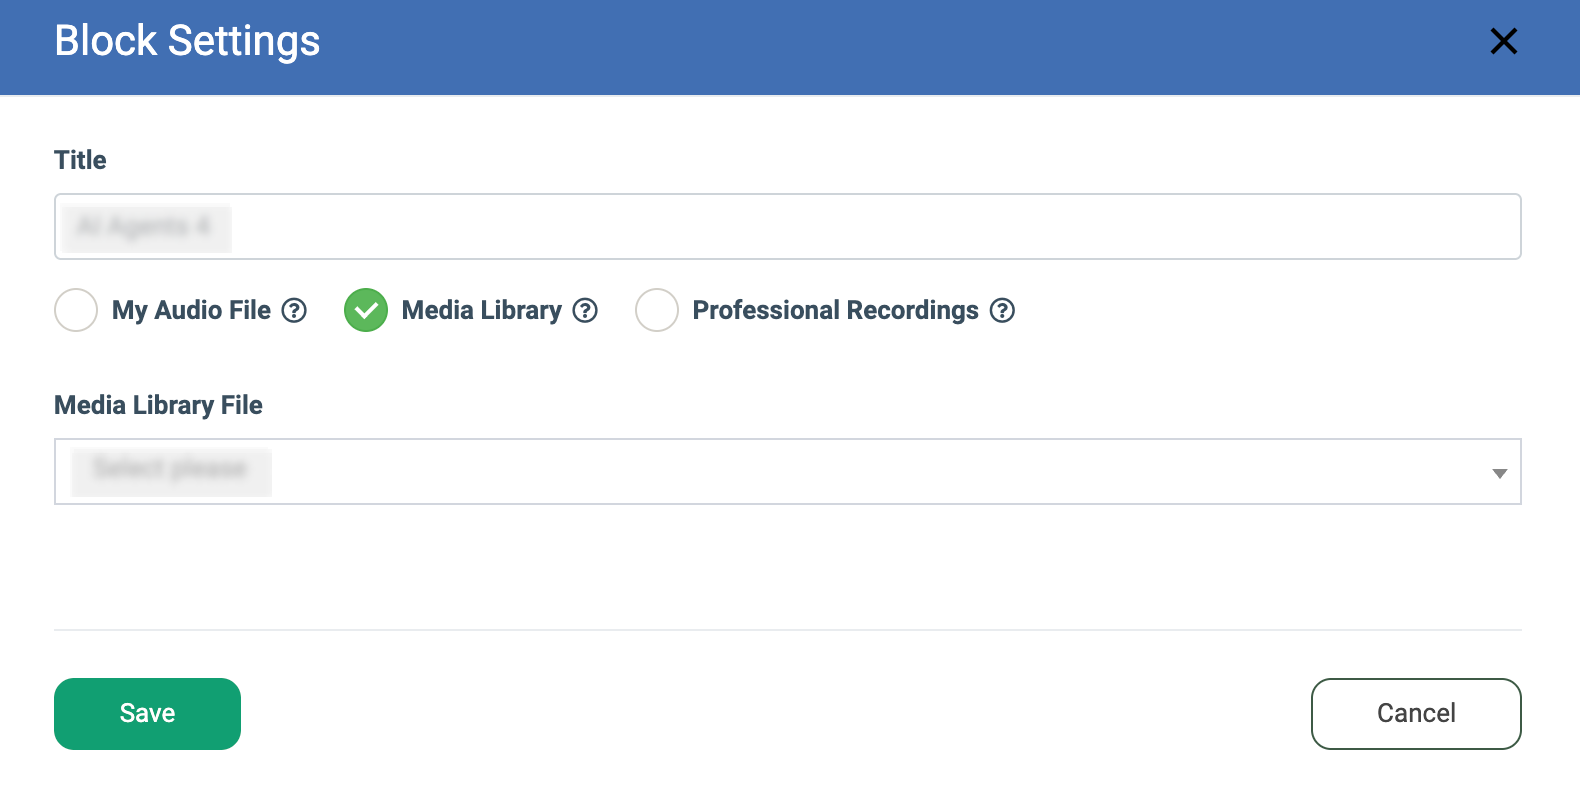
- Media Library: Check the box to select the audio file that will be played in case of some system delays after the client comes back from the AI Agent input stage from the available in the Media Library section. Read more about the Global Media Library section in the following Knowledge Base article.
- Media Library File: Select the audio file from the Media Library.
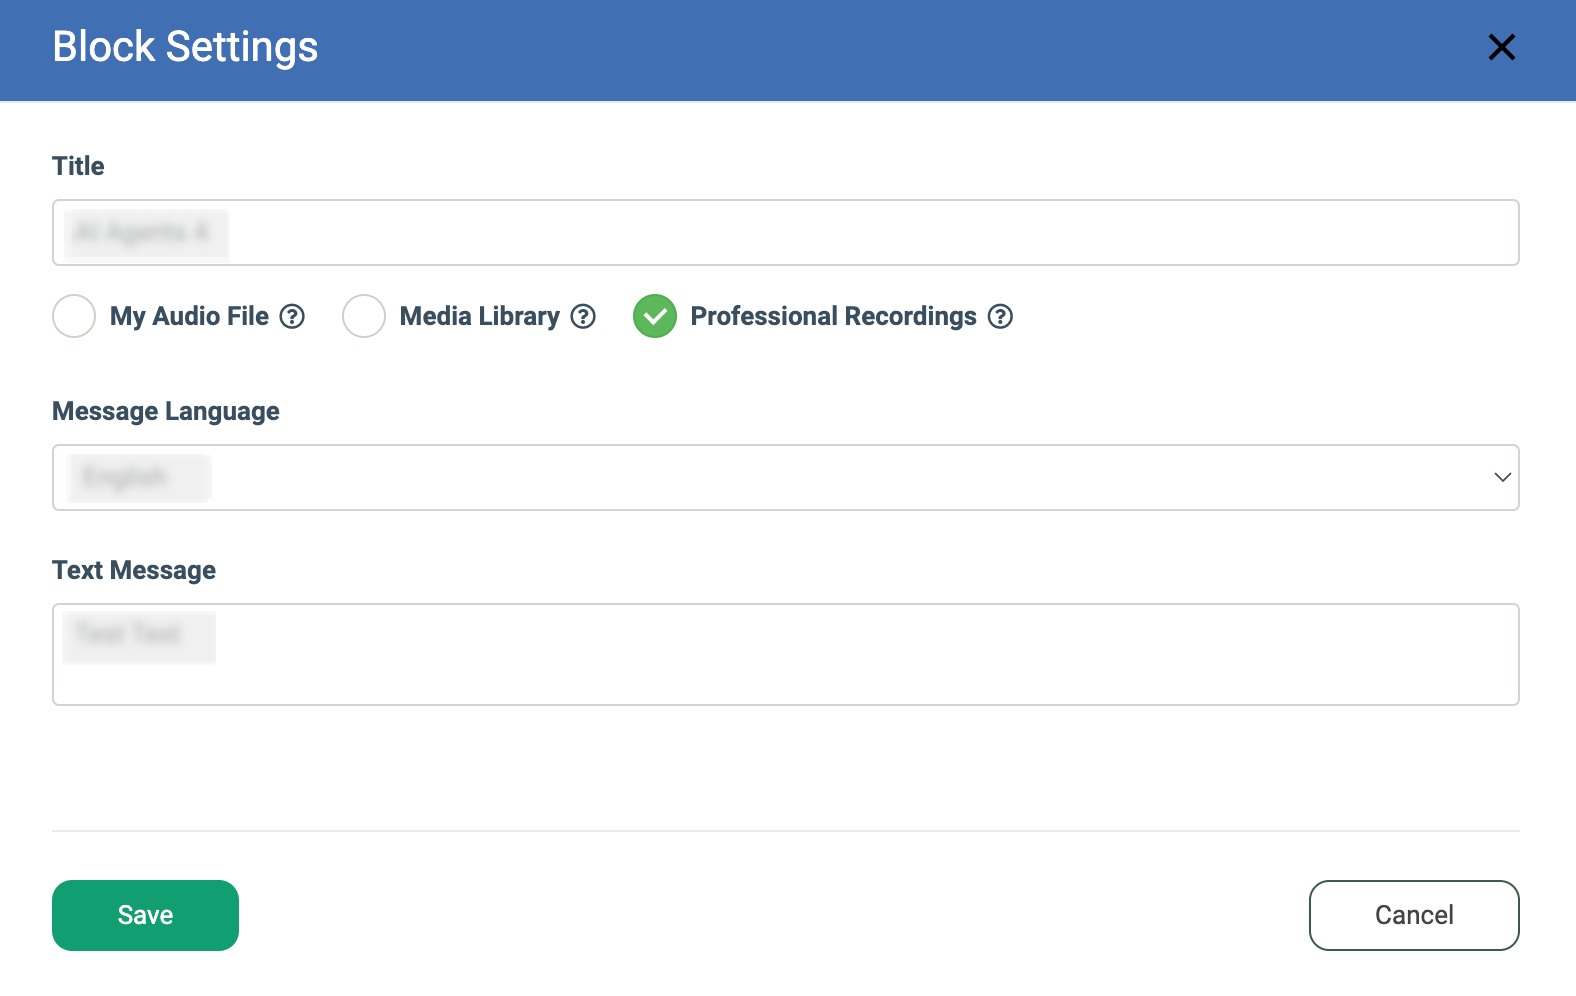
- Professional Recordings: Check the box to request the professional recording for the audio file that will be played in case of some system delays after the client comes back from the AI Agent input.
- Message Language: Select the language for the message that should be recorded.
- Text Message: Enter the text of the message that will be recorded.
Click the “Save” button to complete the block settings.
AI Agent and Lead Stash Workflow
To enable the Lead Stash option for the processing (storing and lookup) of the data obtained from the AI Agent workflow, perform the following steps:
- Go to the System Management > Products section, select the Product, and click the “Settings” button in the “Action” column. Select the “Lead Stash Settings” tab on the Product Setup page.
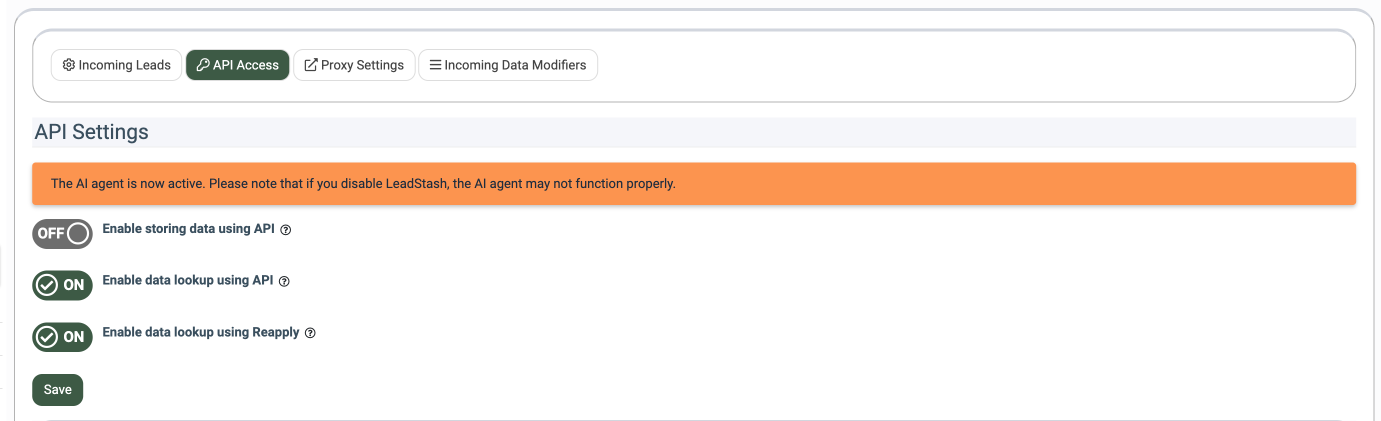
- Select the “APi Access” tab and enable the “Enable storing data using API” and the “Enable data lookup using API” settings.
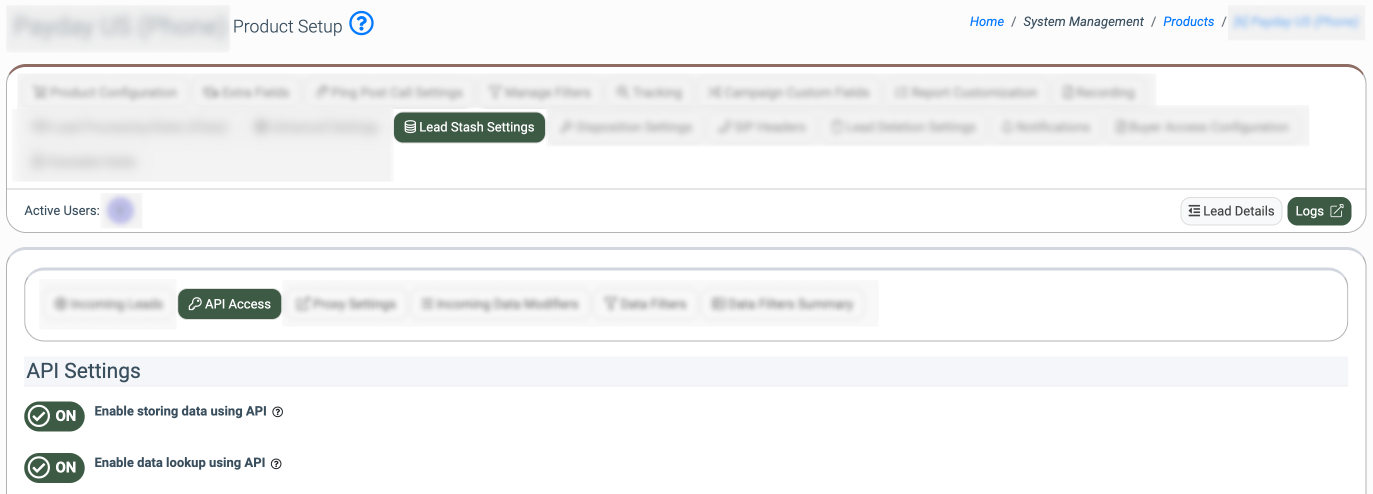
Note: If you disable the mentioned settings, please consider that if the AI Agent is already set and active, some data may be processed incorrectly through the AI Agent and Lead Stash workflow.
The corresponding information message will also appear.
Read more about the Lead Stash settings in the following Knowledge Base article.
Check the Results of the AI Agents Workflow
The results of the call processing via the “AI Agents” IVR block will be displayed in the Lead Info section of the particular call.
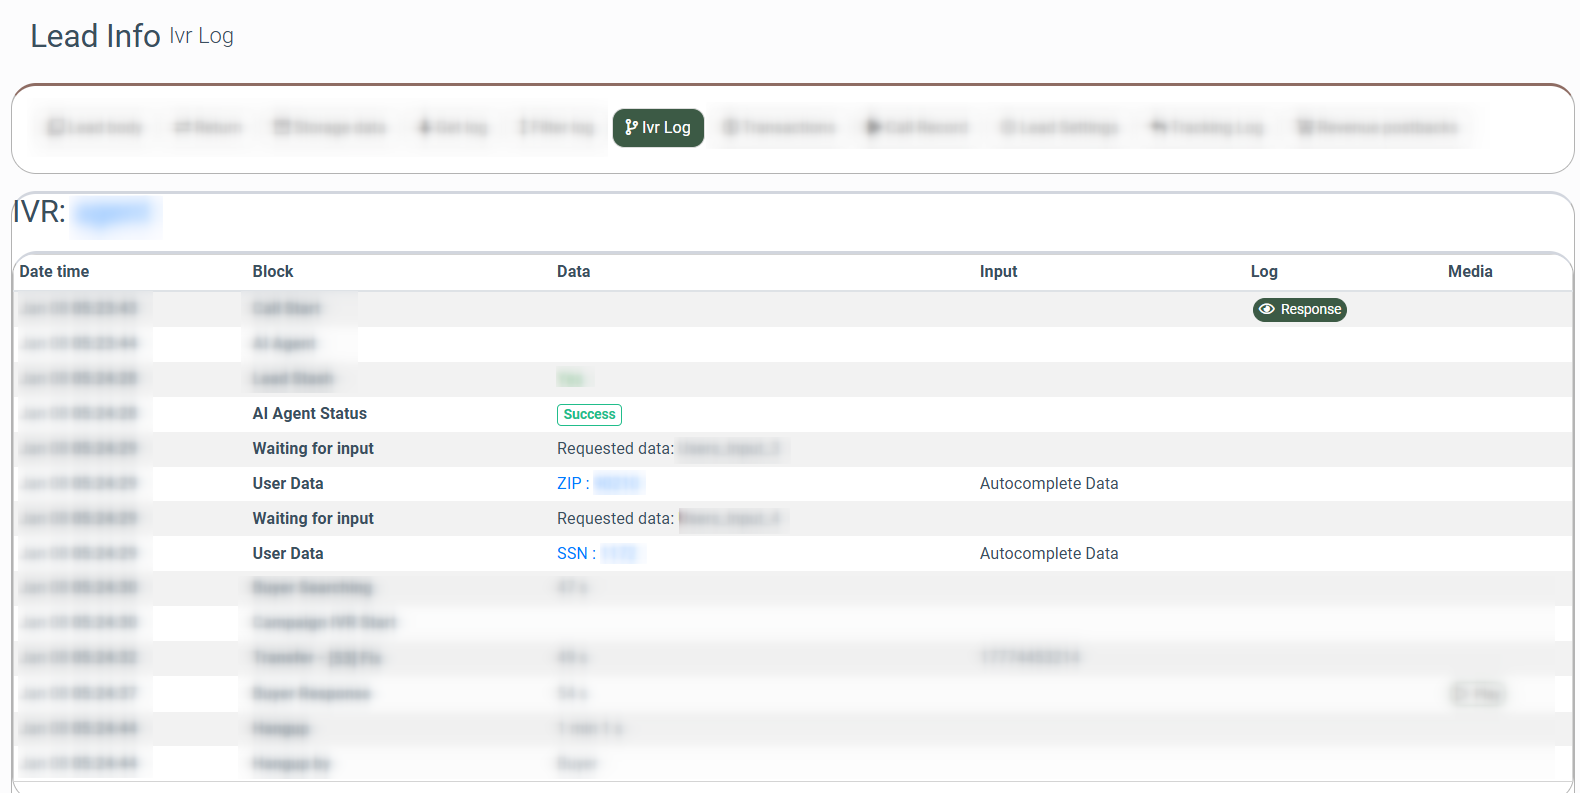
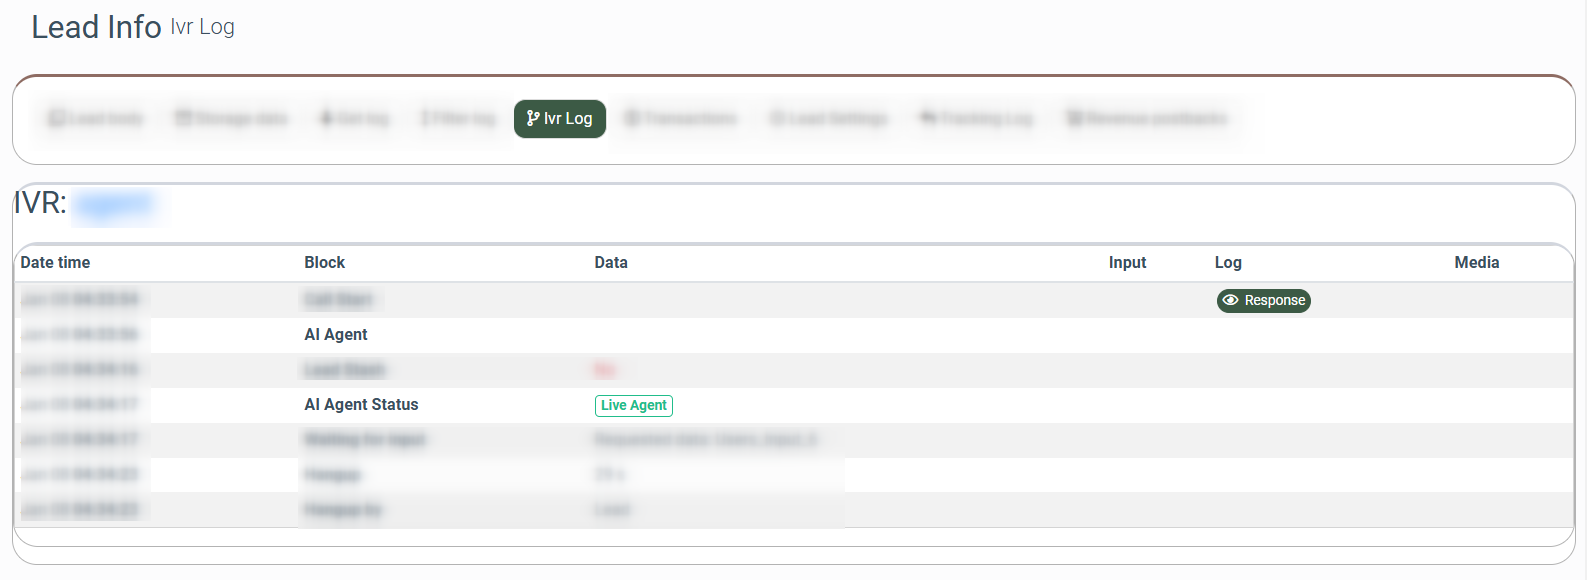
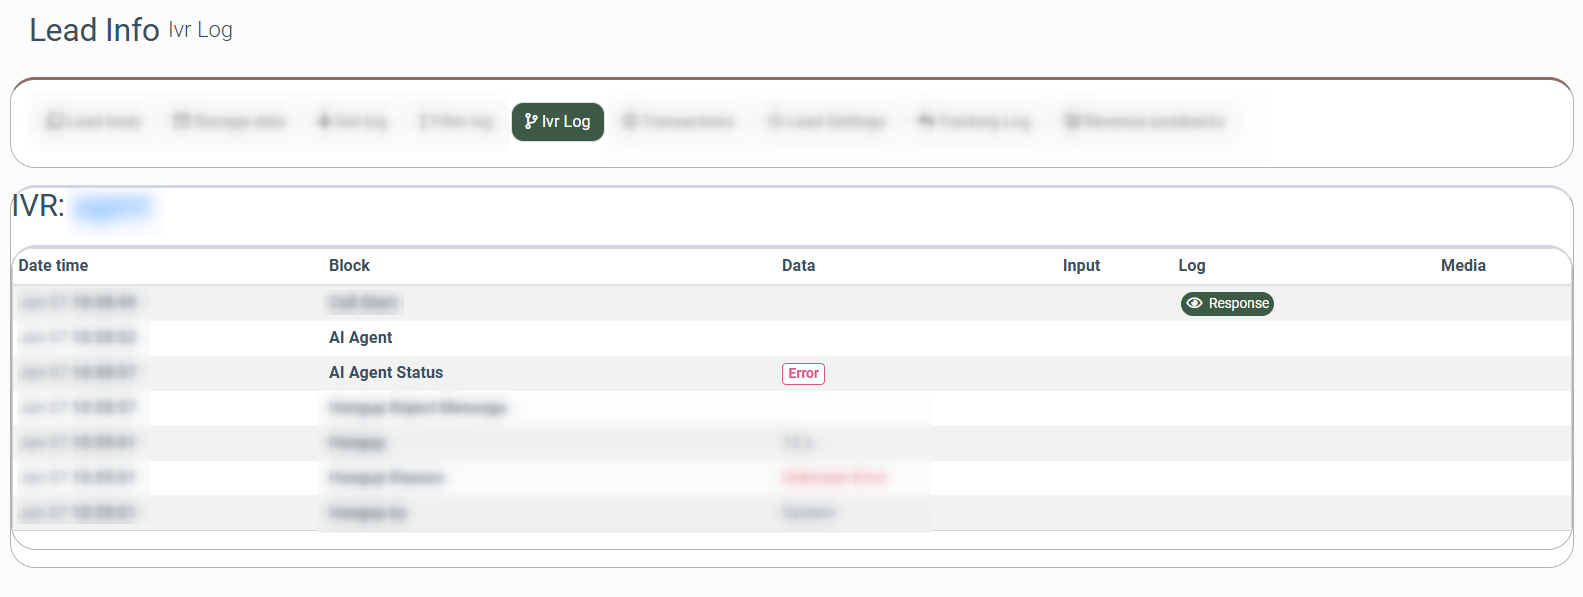
To view these results, go to the Lead Details system section, select the corresponding lead from the list, and click the “Lead ID” button in the “Lead ID” column. Select the “IVR Log” tab in the “Lead Info” section.
The results of the call processing through the AI Agent IVR block will be displayed in the “AI Agent Status” field.
If the call was properly processed with the AI Agent, the status will be set as “Success”.
If the call was transferred to the operator or the company representative, the status will be set as “Live Agent”.
If during the call processing, some error has occurred or the client was silent during the processing on the AI Agent block, the status will be set as “Error”.
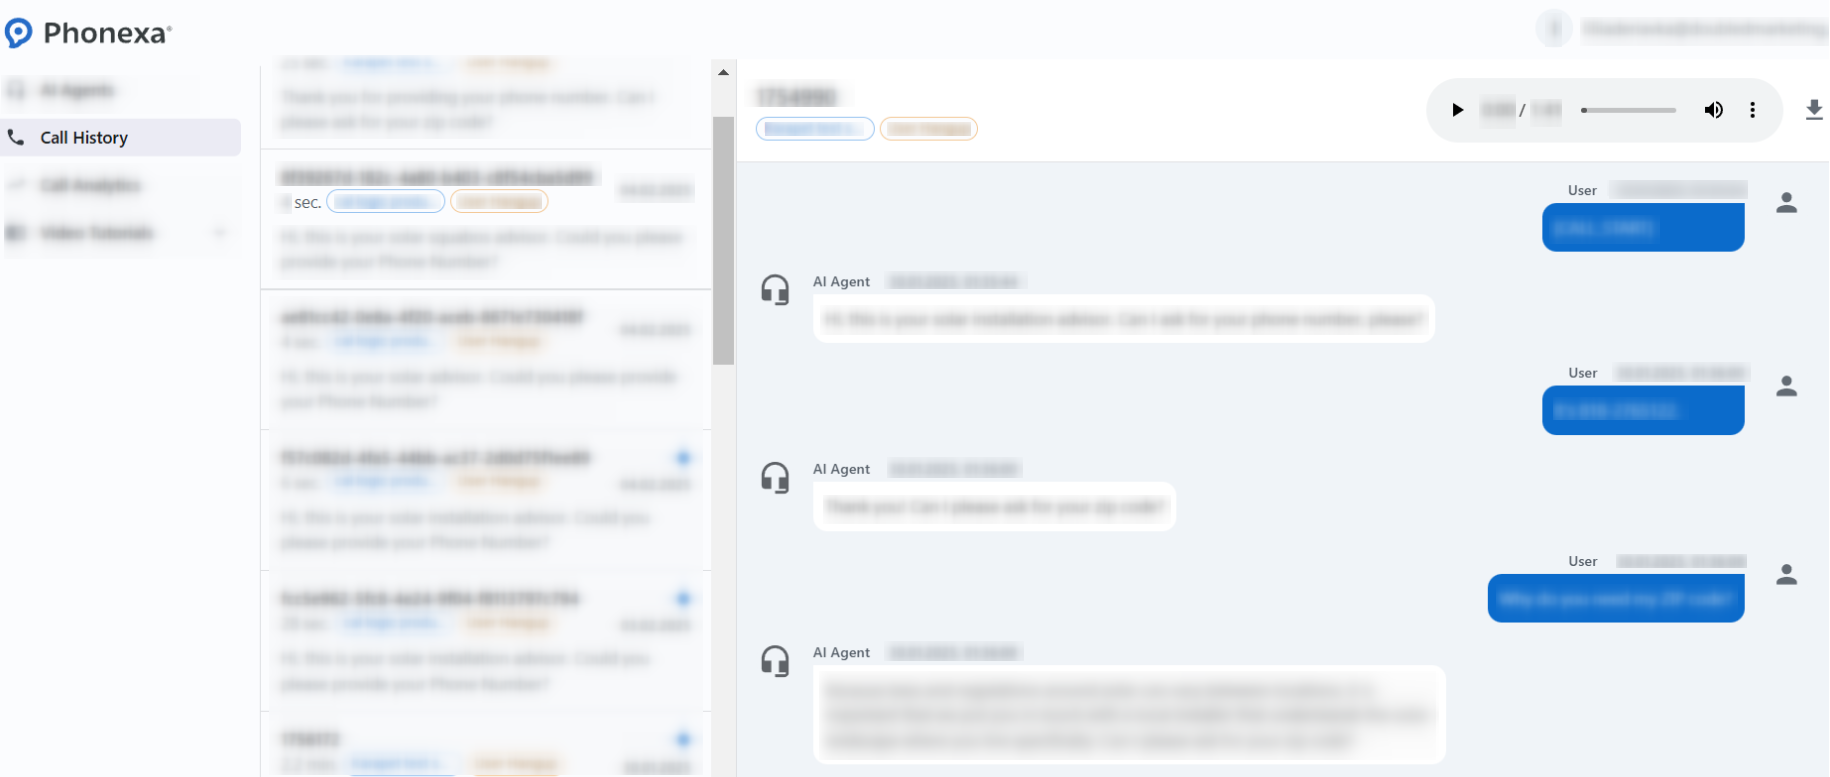
The information about the processed calls, along with the transcript of the call recording, is available in the system as well. This information allows you to check the results of the AI Agent recognition and questions composing along with the processing of the data obtained from the client.
To view the transcriptions of the processed calls, go to the Publisher Management > Setup > AI Agent section, click the “See My AI Agents” button and select the “Call History” section.
Select the required option in the “Session” column, review the transcript information, and listen to the call recording in the main block of the section.
Note: You can also view the transcription of the processed call through the Lead Info > IVR Log tab by clicking the “Call Log (AI Agent) button..png?hsLang=en) To view the call log, click the “Response” button in the “Log” column.
To view the call log, click the “Response” button in the “Log” column.
-1.png?hsLang=en) The system will open a pop-up window with the detailed log information:
The system will open a pop-up window with the detailed log information:
-1.png?hsLang=en) To view all data collected by the AI Agent, click the “Details” button in the “Log” column.
To view all data collected by the AI Agent, click the “Details” button in the “Log” column.
-1.png?hsLang=en)
The system will open a pop-up window with the information collected by the AI Agent during the phone call:
- Field Name: The internal name of the Product field.
- Value: The data collected by the AI Agent. Note that the data will be provided in the view mode according to the settings applied to the corresponding fields on the Product level (the “Encryption” and “Protection” fields). The data can be displayed without any modifications, in the encrypted or protected mode. These settings allow you to ensure that the sensitive data is protected from direct view. Read more about the Product Configuration section in the following Knowledge Base article.
-1.png?hsLang=en) Note: This button is displayed only if the AI Agent collected any lead information during the phone call.
Note: This button is displayed only if the AI Agent collected any lead information during the phone call.
Check the statistical data of the AI Agents workflow
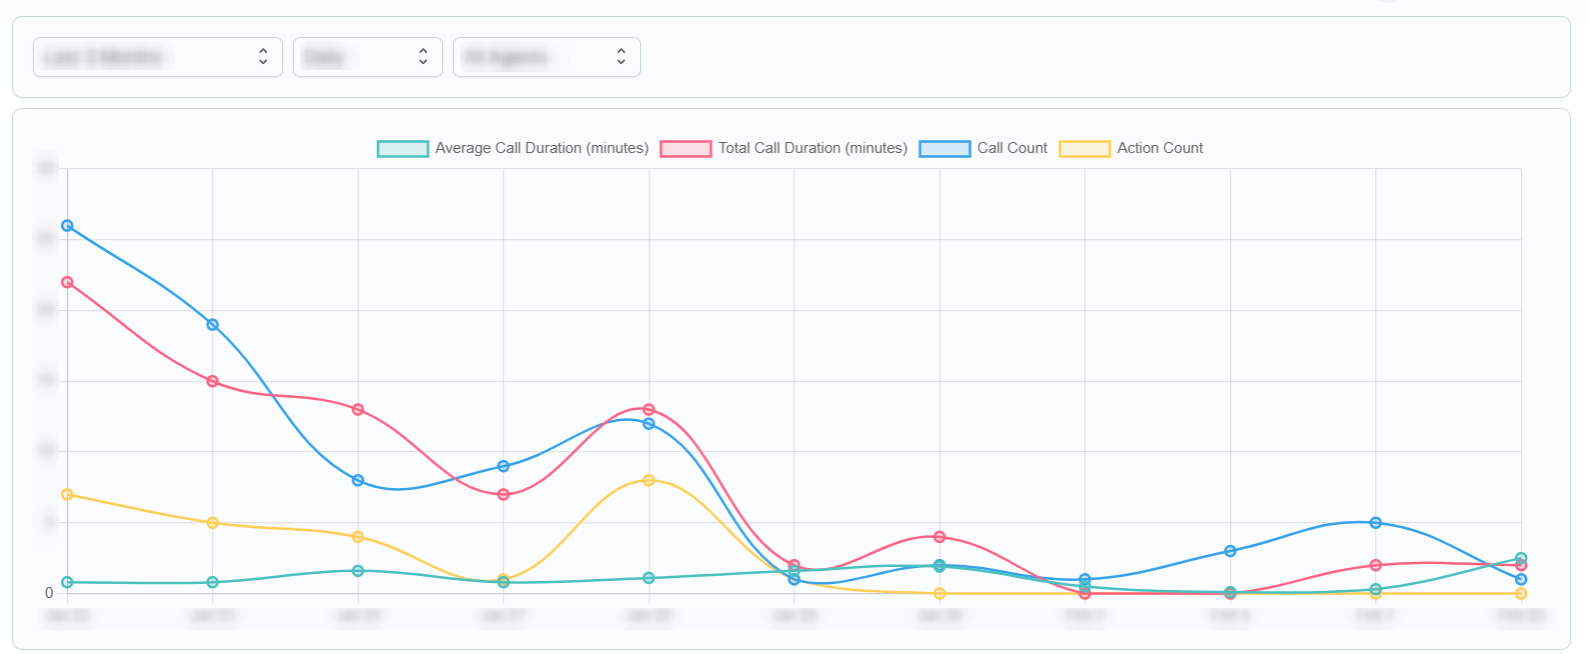
To check the information about the statistical data of the AI Agent workflow, such as average and total call durations, numbers of processed calls, and performed actions, select the “Call Analytics” section in the “AI Agent” system.
You can customize the graph and narrow down the statistical data by using the following filters:
- Timerange: Select the time range for the graph.
- Display mode: Select the approach for the data grouping according to the time ranges (Hourly, Daily, Monthly).
- AI Agent: Select the particular AI Agent. To view the summary data for all AI Agents, select the “All Agents” option.
The graph displays the following information:
- Average Call Duration (minutes): The average duration of the call for the selected time range.
- Total Call Duration (minutes): The total duration of all calls processed during the selected time range.
- Call Count: The total number of all calls processed during the selected time range.
- Action Count: The total number of actions performed during the call processing during the selected time range.
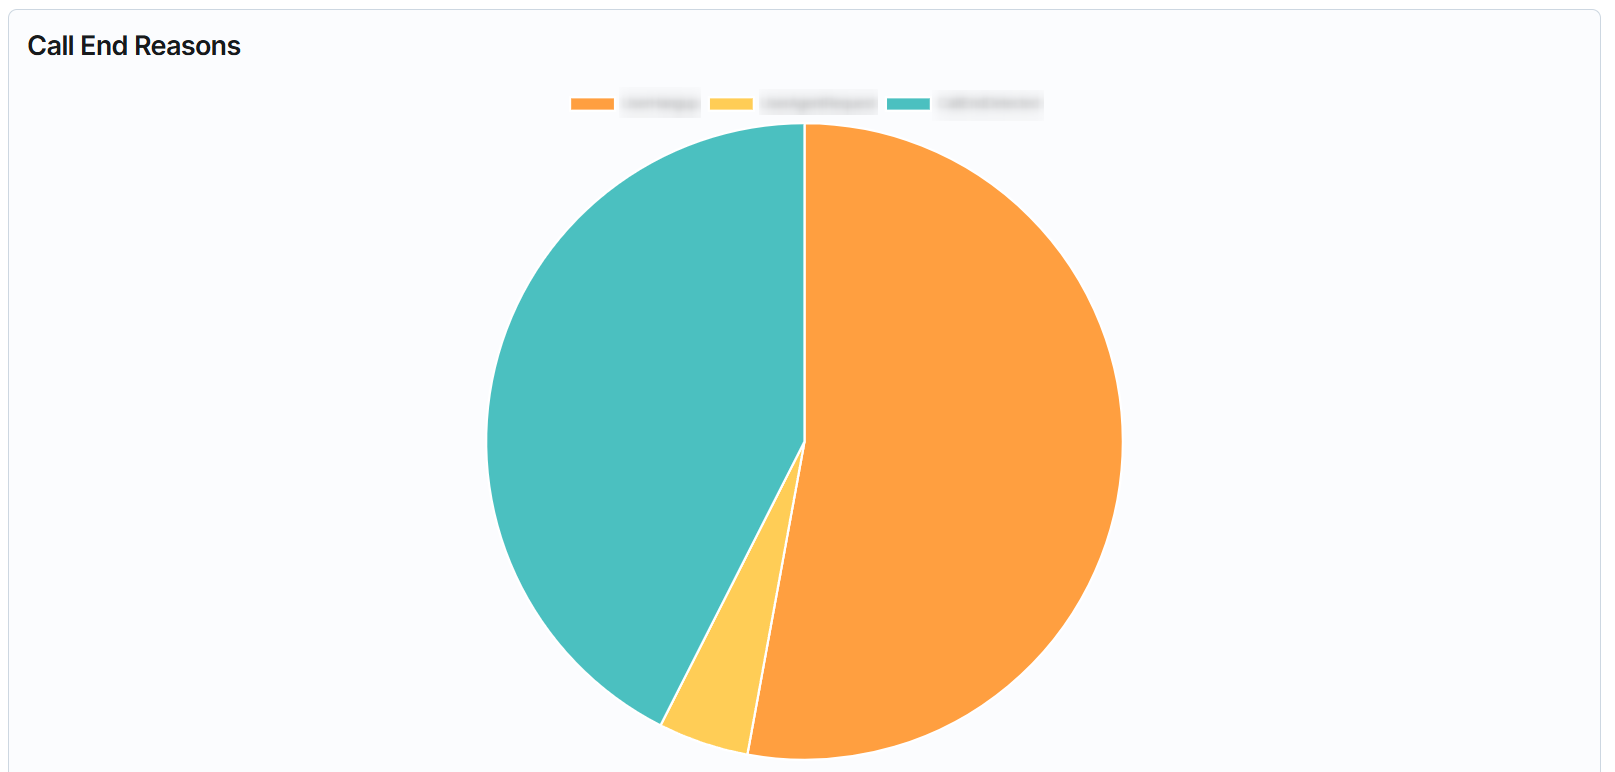
The “Call End Reasons” pie chart displayed the data about the number of calls that were ended according to the particular system reason.
The list of the possible reasons is the following:
- UserHangup: The user finished the call (hang up) on the "AI Agents" IVR block.
- UserAgentRequest: The user had a conversation with the "AI Agents" IVR block and the caller requested to be transferred to the human agent, and the call was transferred to the blocks that are set on the "No Data or Live Agent branch".
- CallEndDetected: The user had a conversation with the "AI Agents" IVR block and depending on the results of the call processing, he was transferred to the blocks that are set on the "Success branch" branch.
To view the information about the particular number of calls, put the pointer on the corresponding part of the pie chart.
Check the video tutorials
To view the video tutorials on how to perform initial setup, manage, and test the AI Agent workflow, select the corresponding option in the “Video Tutorials” section in the “AI Agent” system.