To configure the integration settings for a Campaign, go to the Client Management > Setup > Campaigns section, choose the Campaign and click the “Configure” button in the “Actions” column, and select the “Integration” tab.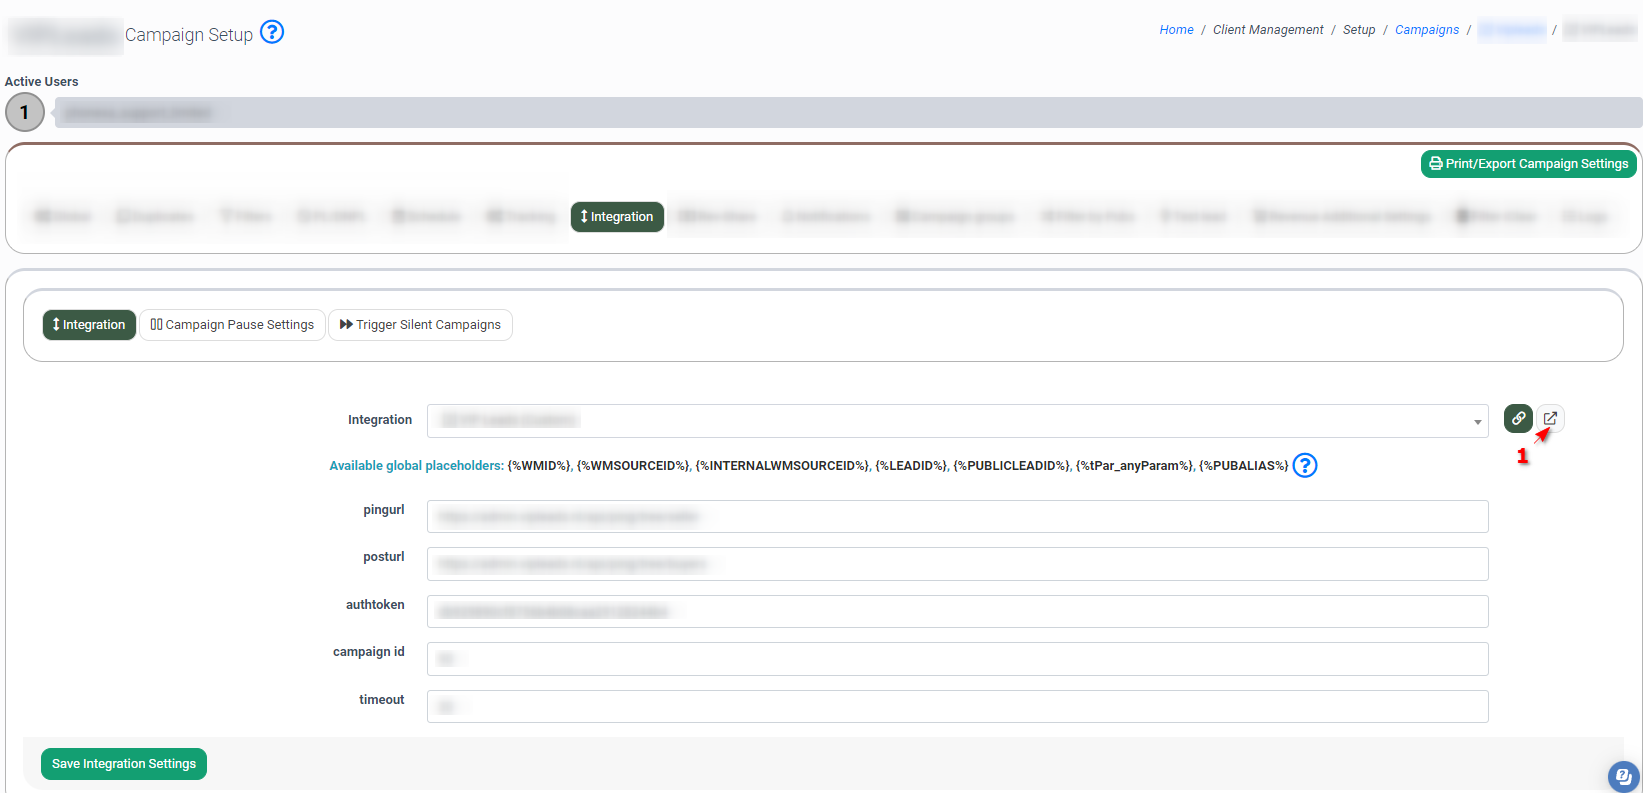
The “Integration” tab allows you to configure the integrations settings, add or remove Integrations and manage Campaign Pause settings.
Available four subtabs: “Integration”, “Campaign Pause Settings”, “Duration To Sell”, and "Trigger silent campaigns".
Note: For the Ping-Post Call Bundle Campaigns, these tabs are separated into LMS (Data) and Call Logic (Call) subtabs. Also, it allows you to set up the Post Call API integration in the corresponding tab. Making any changes in the Data or Call tabs applies these changes to the corresponding LMS or Call Logic Campaign.
To configure the Integration, go to the “Integration” subtab and select the type in the “Integration” field. Note: Depending on the chosen Integration, you will be provided a list of fields for extra settings.
Note: If you have a custom integration, you can be redirected to the Integration Builder Settings page by clicking the “Redirect” button (1) to the right of the “Integration” field.
Read more about the Integration Builder feature in this Knowledge Base article.
Then, in the “Redirect URL” field (if you have that), put the URL with placeholders to which the initial customer will be redirected.
Global Placeholders are available in any Integrations and can be used in almost all the Integration fields except Post Timeout and some specific Integration fields.
{ %WMID% } - internal publisher ID in the system. You can find the Publisher ID in the Publisher List in the ID field column.
{ %WMSOURCEID% } - source name/ID sent by the Publisher. You can find it in the "Name" column of the Publisher Sources section.
{ %INTERNALWMSOURCEID% } - internal Publisher Source ID in the system. You can find it in the "ID" column of the Publisher Sources section.
Example:
Use the { %WMID% } placeholder to pass the Publisher Source Name (Sub ID). The Source Name is sent in the &source=SourceName parameter by the Publisher.
To pass a masked Publisher Source to the Buyer, use the { %INTERNALWMSOURCEID% } placeholder to send the Internal Publisher Source ID.
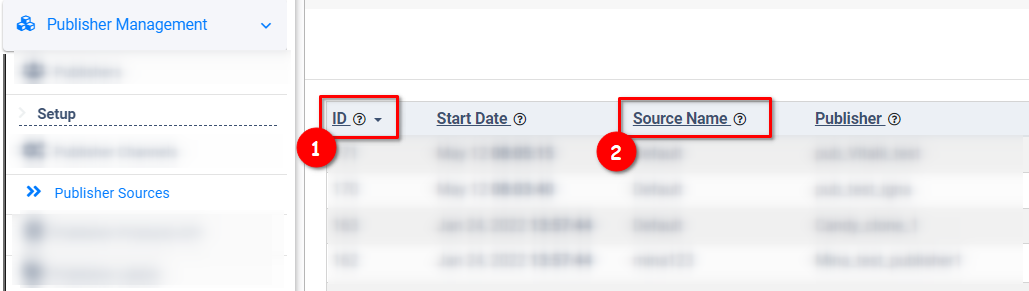
1 - the Internal Publisher Source ID, 2 - the Publisher Source Name (Sub ID)
{ %LEADID% } - internal Lead ID in your system. You can find it in the "ID" column of the Lead Details Report.
How to set up a Tracking Pool integration
To configure an integration for the LMS campaign with the possibility to pull the phone numbers from Call Logic’s Tracking Pool, select the type in the “Integration” field and fill in the following fields:
- Use Tracking Pool: Select the "Yes" option to use the tracking pool.
Read more about the Call Tracking feature and on how to create the Tracking Pool in this Knowledge Base article.
- Tracking Pool ID: Enter the tracking pool identification number.
Read more about the Call Tracking feature and on how to create the Tracking Pool in this Knowledge Base article.
- Duration to Sell (seconds): Enter the time to sell the lead (in seconds).
- Publisher duration to sell (seconds): Enter the time to sell the lead for the Publisher.
- Max buyer duration to sell (seconds): Enter the maximum time frame in seconds to sell the lead for the Buyer.
- Call Logic Campaign ID: Enter the Call Logic campaign identification number.
- Time To Sold: Enter the time to sell the lead (in seconds).
- Phone Number to Transfer: Enter the phone number. Note: This field will overwrite the Call Logic Buyer phone number.
Note: Assign the phone number to a Publisher, and create the Tracking Pool and the Campaign in the Call Logic platform in advance.
Read how to assign the Phone Number to a Publisher in this Knowledge Base article.
Read more about the Call Tracking feature and on how to create the Tracking Pool in this Knowledge Base article.
-1.png?hsLang=en)
This way, the lead goes through the usual processing on the LMS platform. Then, in the response, the lead gets the Publisher’s phone number and is expected to call. The call will go past the IVR, i.e., directly to the Buyer’s Direct Campaign. After getting to the Buyer, the Price, Time To Sold, and Buyer’s Phone Number are substituted in the Call Logic Campaign to the parameters from the LMS Campaign and are recorded in the system. The caller also has time to call back, in order to get to the same Buyer.
To view a detailed report on what phone numbers were displayed to the sold leads via LMS's campaign with a Tracking Pool integration, go to the Analytics and Optimization > Publisher Analytics > Phone Number Pool Routing section in your Call Logic platform. Read more about the Phone Number Pool Routing report in this article.
In the “Campaign Pause Settings” tab, you can temporarily suspend a Campaign based on a response from buyers' APIs.
-1.png?hsLang=en)
Specify the notification recipient list or enter the recipient emails in the “Recipient List” and the “Recipient Emails”.
In the “Search response for” field, you need to enter the text fragment, which will trigger the system to pause the Campaign.
In the “Pause for” field, put the number of minutes of Campaign pause.
Switch the toggle “Pause until the end of the day” to pause the Campaign until the end of the day.
Switch the toggle “Send Notification” to enable the email notifications for the recipients.
After entering the information, click the “Add Pause settings” button and as soon as the record will appear in the list, click the “Save Pause Settings” button to complete.
The “Duration to Sell (Advanced)” function allows you to adjust the Campaign price based on the call duration.
The “Duration to Sell” field allows you to set up call duration in seconds.
The “Campaign Price” field allows you to set up a price for the call duration (USD) previously indicated in the “Duration to Sell” field.
The “Trigger Silent Campaigns” tab allows you to set up triggers for silent Campaigns. You can set as a trigger action one of the following statuses of the Lead: "Sold", "Reject", or any status, except "Error".
-1.png?hsLang=en)
You can add a silent Campaign to three lists:
-
Trigger silent Campaigns on SOLD - The lead will be posted to silent Campaign(s) selected from the list only after it is accepted by the main processing Campaign and marked as SOLD.
-
Trigger silent Campaigns on REJECT - The lead will be posted to silent Campaign(s) selected from the list only after it is rejected by the main processing Campaign and marked as REJECT.
-
Trigger silent Campaigns on ANY STATUS - The lead will be posted to silent Campaign(s) selected from the list only after receiving any status, except “Error” on the primary main processing Campaign.
Note: You can add one or more silent Campaigns from the trigger list to one or more main processing Campaigns.
Note: If you add a silent Campaign on the SOLD trigger, you cannot add the same Campaign to REJECT or ANY STATUS trigger.
The “Post Call API” tab allows you to set up the Post Call integration. Select the integration in the “Integration” field and click the “Save” button to finish.
-1.png?hsLang=en)