The “Notifications” tab allows you to set and manage notification settings for the Campaign. You can configure Timeout, Cap, and Integration notifications and the list of specific notifications for Call Logic Campaigns.
To set up the Notifications for the Campaign, go to the Client Management > Campaigns section and select the Campaign you would like to set up notifications for. Click the “Configure” button in the “Action” column and select the “Notifications” tab on the Campaign Setup page.
The “Notifications” tab has the following structure:
- Call Events
- “No Answer” Automation
- “No Answer” Notification
- “Busy” Automation
- “Busy” Notification
- "Short call" Automation
- “Short call” Notification
- All Call Events Automation
- All Calls Events Notification
- "No Response" Notification
- Error Notification
- "Non-Converted" Notification
- "Short Call" Notification
- "Drop By Buyer" Notification
General
The "General" tab allows you to manage notifications within a system based on a wide range of strategies. The notifications can be customized according to your requirements and may include general alerts related to a specific campaign.
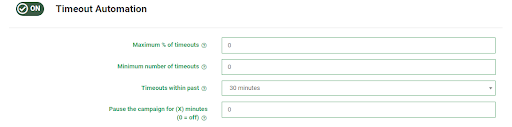
Timeout Automation
The “Timeout Automation” block allows you to set up the timeout settings of the lead according to the defined strategy (After the expiration of the Max Lead Processing Time, the lead will get the timeout status).
Note: Read more about the Lead Processing Time in our Knowledge Base article.
If you choose to configure the “Timeout Automation” block manually, fill in the following fields:
- Maximum % of timeouts: Enter the percentage value of maximum timeouts (ratio of leads with timeout status to the total leads) to trigger the notification and campaign pause.
- Minimum number of timeouts: Enter the minimum number of leads with timeouts to trigger the notification.
- Timeouts within past: Select the time range to track the number of leads with timeouts.
Example: You set the Maximum % of timeouts as "10%", the Minimum number of timeouts as "15", and the Timeouts within past as "5" minutes. If within the past 5 minutes, there have been 100 leads, out of which 10 timed out, the pause or the notification will not be triggered even though it is 10%. So unless the minimum number requirement is also met there will be no pause or notification sent.
- Pause the campaign for (X) minutes (0=off): Enter the number of minutes to pause the campaign when the maximum set percentage of timeouts is reached. Please note Phonexa strongly recommends pausing the campaign for a minimum of 5 minutes; otherwise, it may affect the performance of your Instance and the processing of your leads.
To configure the “Preset Mode” of the “Timeout Automation” notification settings for the Campaign, select the option from the drop-down list. To view the description of each option click the info (?) icon next to the field.
The following preset modes are available:
Preset groups:
Note: The “Timeout Automation” notification settings for the Campaign contains 3 options:
-
- Strict: The most prohibitive timeout settings level.
-
- Medium: Apply these settings when the error rate goes slightly above normal level.
- Soft: Baseline settings for a network or a lender without abnormal errors.
- Custom preset: Can be configured in accordance with the user's preference.
- High Volume (150 in 2 min): Strict: Select this option for the Campaign that usually gets at least 3,000 leads per hour with the Strict timeout settings level.
- High Volume: Medium: Select this option for the Campaign that usually processes at least 3,000 leads per hour with the Medium timeout settings level.
- High Volume: Soft: Select this option for the Campaign that usually processes at least 3,000 leads per hour with the Soft timeout settings level.
- Mid (125 in 5 min) Volume: Strict: Select this option for the Campaign that usually processes at least 1,000 leads per hour with the Strict timeout settings level.
- Mid Volume: Medium: Select this option for the Campaign that usually processes at least 1,000 leads per hour with the Medium timeout settings level.
- Mid Volume: Soft: Select this option for the Campaign that usually processes at least 1,000 leads per hour with the Soft timeout settings level.
- Low (20 in 15 min) Volume: Strict: Select this option for the Campaign that usually processes at least 400 leads per hour with the Strict timeout settings level.
- Low Volume: Medium: Select this option for the Campaign that usually processes at least 400 leads per hour with the Medium timeout settings level.
- Low Volume: Soft: Select this option for the Campaign that usually processes at least 400 leads per hour with the Soft timeout settings level.
- Parallel: Select this option for the Silent Campaign.
To restore Buyer's default settings, click the “Reset To Buyer's Defaults” button.
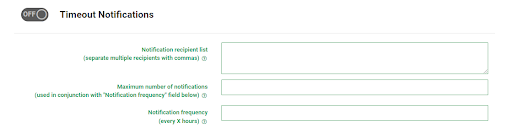
Timeout Notification
The “Timeout Notification” block allows you to set up the notification of the lead timeout according to the defined strategy.
Note: The Timeout Automation block should be configured first, otherwise, you can't set up the Timeout Notification block.
To configure the “Timeout Notification” block, fill in the following fields:
- Notification recipient list (separate multiple recipients with commas): Enter the list of emails to send the notifications.
- Maximum number of notifications (used in conjunction with "Notification frequency" field below): Enter the number of emails with notifications that can be sent within the time range set in the “Notification frequency (every X hours)” field.
- Notification frequency (every X hours): Enter the time range that indicates how often the notification emails will be sent (in hours).
Cap Notification
The “Cap Notification” block allows you to configure the list of emails to receive the cap-out notifications by entering it in the “Notification recipient list (separate multiple recipients with commas)” field.
Note: If the maximum value for the set cap is updated, the notification counter will be reset.

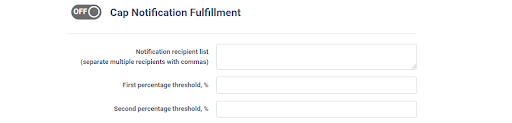
Cap Fulfillment Notification
The “Cap Fulfillment Notification” block allows you to configure a two-stage control notification on reaching cap limits and a list of emails to receive the cap notifications fulfillment. To configure the “Cap Fulfillment Notification” block fill in the following fields:
- Notification recipient list (separate multiple recipients with commas): Enter the list of emails to send the notifications.
- Daily First percentage threshold, %: Enter a percentage limit for the daily first threshold.
- Daily Second percentage threshold, %: Enter a percentage limit for the daily second threshold.
- Weekly First percentage threshold, %: Enter a percentage limit for the weekly first threshold.
- Weekly Second percentage threshold, %: Enter a percentage limit for the weekly second threshold.
- Monthly First percentage threshold, %: Enter a percentage limit for the monthly first threshold.
- Monthly Second percentage threshold, %: Enter a percentage limit for the monthly second threshold.
Note: The notification is sent to recipients if the percent of capping out leads is equal to or greater than the specified value.
Integration Error Notifications
The “Integration Error Notification” block allows you to configure the settings and list of emails to receive integration error notifications. To configure the “Integration Error Notification” block fill in the following fields:
- Notifications recipient list (separate multiple recipients with commas): Enter the list of emails to send the notifications.
- Maximum number of errors: Enter the maximum number of errors detected within the time range specified in the “Errors within past (X) minutes” that will trigger the notification.
- Errors within past (X) minutes: Enter the time range to track the number of errors (in minutes).
- Maximum number of notifications (used in conjunction with "Notification Frequency" field below): Enter the number of emails with notifications that can be sent within the time range set in the “Notification Frequency (every X hours)” field.
- Notification Frequency (every X hours): Enter the time range that indicates how often the notification emails will be sent (in hours).

Campaign Activation Notification
The “Campaign Activation Notification” block allows you to configure the list of emails to receive campaign status change to active notifications by entering it in the “Notification recipient list (separate multiple recipients with commas)” field.

Campaign Deactivation Notification
The “Campaign Deactivation Notification” block allows you to configure the list of emails to receive campaign status change to inactive notifications by entering it in the “Notification recipient list (separate multiple recipients with commas)” field.

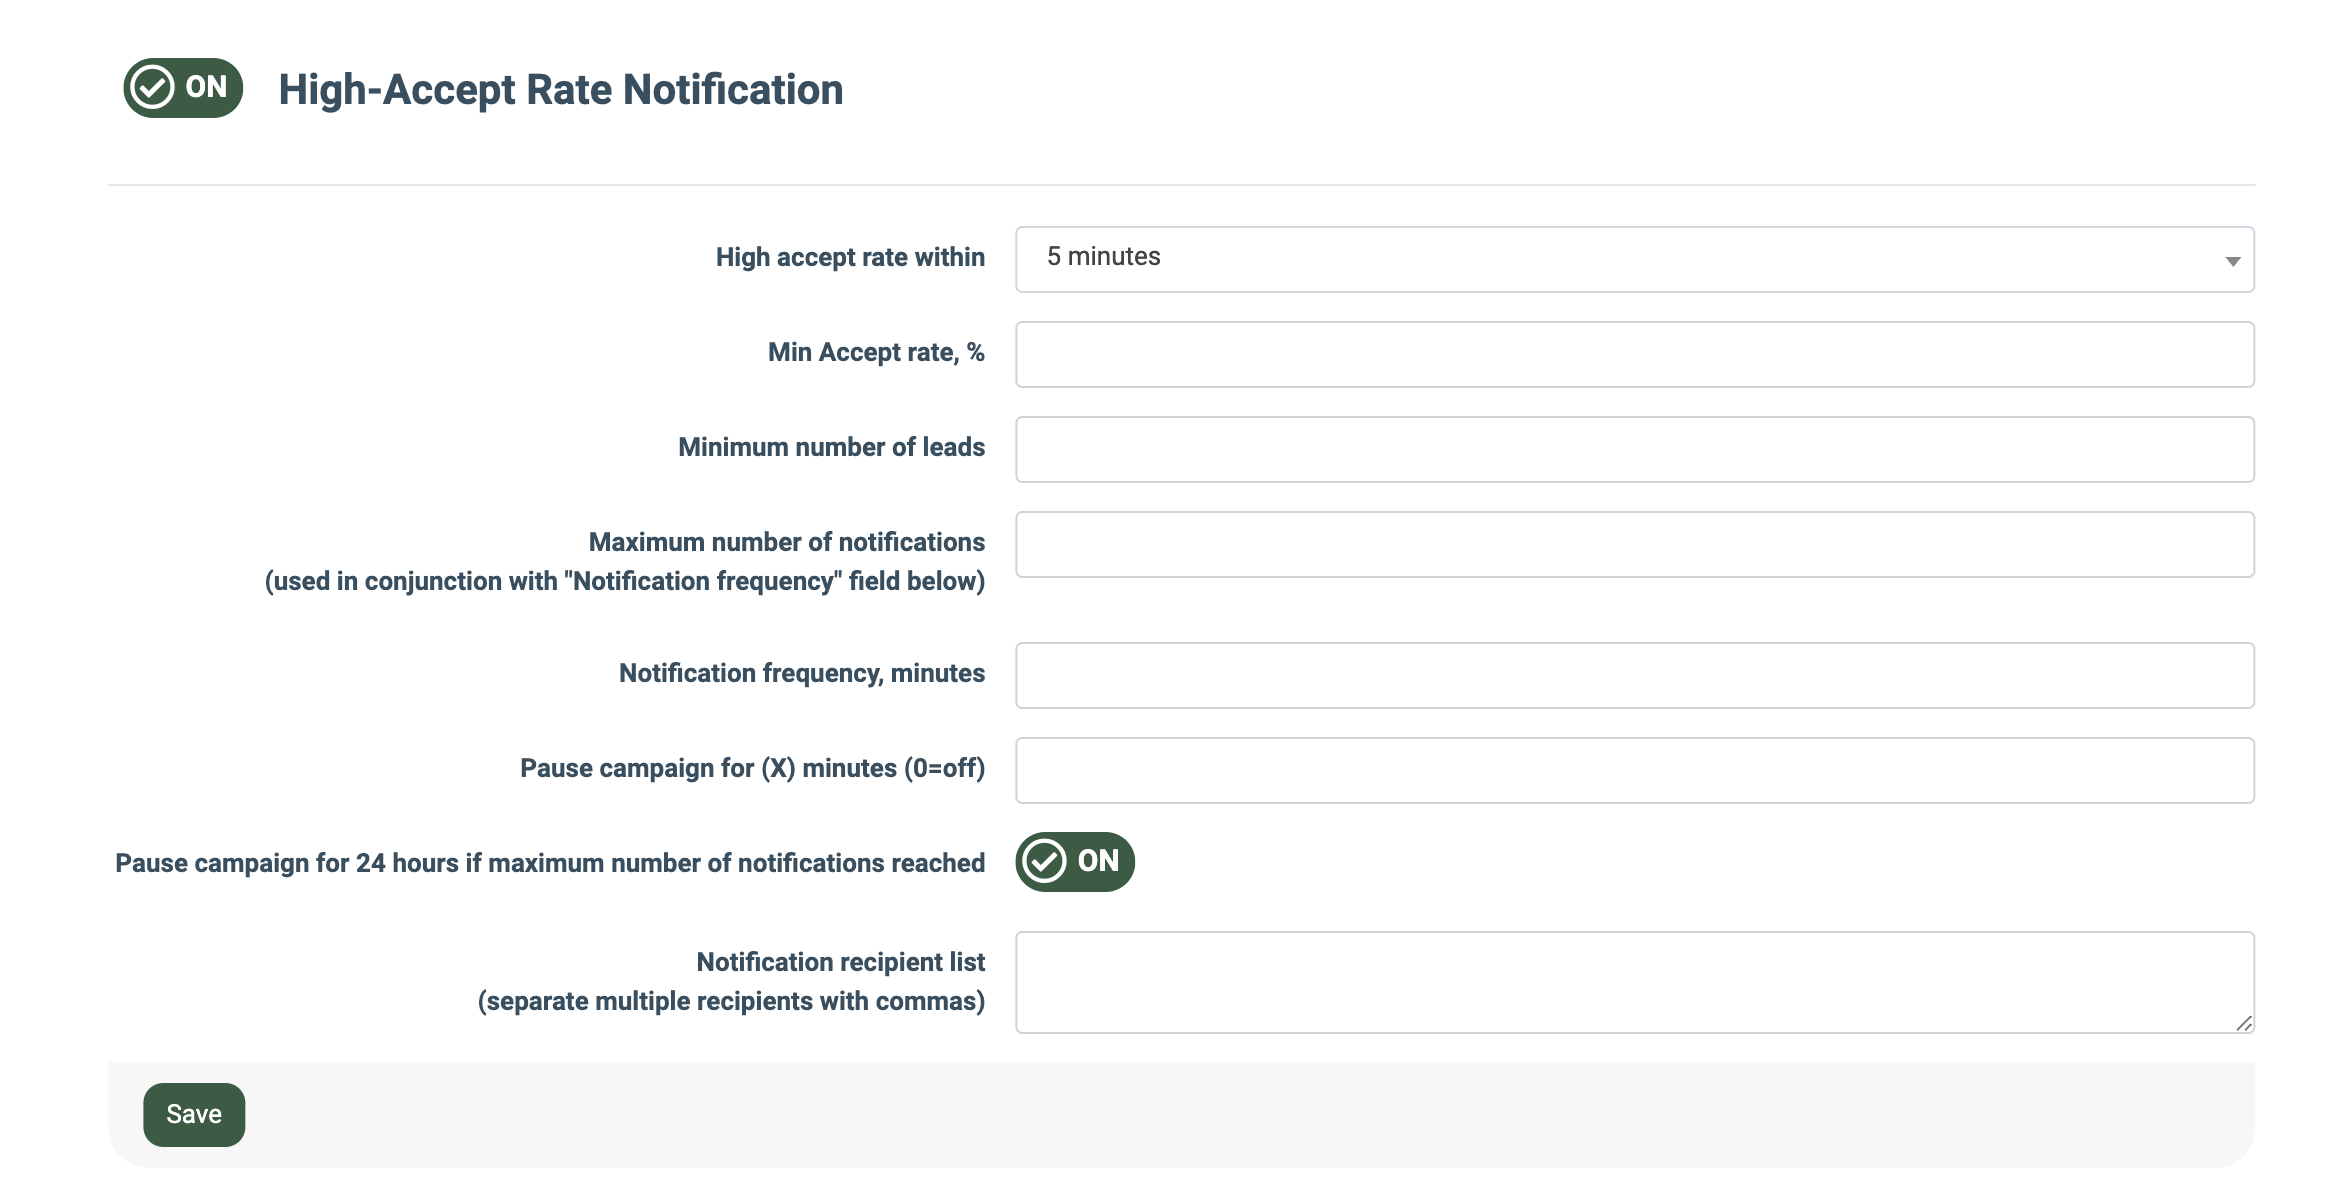
High-Accept Rate Notification
The "High-Accept Rate Notification" feature allows you to enable and configure notifications for Buyers who wish to receive alerts regarding Campaigns that exceed the specified Accept Rate within a designated period to prevent an unwanted increase in sales. To configure the High-Accept Rate notifications, fill in the following fields:
- High accept rate within: Select the period within which the Accept Rate data will be analyzed.
- Min Accept rate, %: Enter the minimum Accept Rate ratio that will trigger the notification.
- Minimum number of leads: Enter the minimum number of leads to be acquired within the selected period.
- Maximum number of notifications (used in conjunction with “Notification frequency” field below): Enter the maximum number of notifications to be sent once the event is triggered.
- Notification frequency, minutes: Specify the number of minutes between each notification.
- Pause campaign for (X) minutes (0=off): Specify the duration in minutes for which the Campaign will be paused once the event is triggered.
- Pause campaign for 24 hours if maximum number of notifications reached: Switch the toggle to the “ON” position to pause the Campaign for 24 hours once the number of notifications reaches the number set in the “Maximum number of notifications” field.
- Notification recipient list (separate multiple recipients with commas): Enter the notification recipient emails using a comma.
Low-Accept Rate Notification
The “Low-Accept Rate Notification” feature allows you to enable and configure notifications for Buyers who wish to receive alerts when the acceptance rate on a campaign drops below the set threshold within a specific time period, helping to quickly identify and address performance issues.
To configure the Low-Accept Rate notifications, fill in the following fields:
- Low accept rate within: Select the period within which the Accept Rate data will be analyzed.
- Low Accept Rate Threshold (%): Set the value for the threshold of the low accept rate.
- Minimum number of leads: Enter the minimum number of leads to be acquired within the selected period.
- Maximum number of notifications: Enter the maximum number of notifications to be sent once the event is triggered.
- Notification frequency, minutes: Specify the number of minutes between each notification.
- Pause campaign for (X) minutes (0=off): Specify the duration in minutes for which the Campaign will be paused once the event is triggered.
- Pause campaign for 24 hours if maximum number of notifications reached: Switch the toggle to the “ON” position to pause the Campaign for 24 hours once the number of notifications reaches the number set in the “Maximum number of notifications” field.
- Notification recipient list: Enter the notification recipient emails using a comma.
-1.png?hsLang=en)
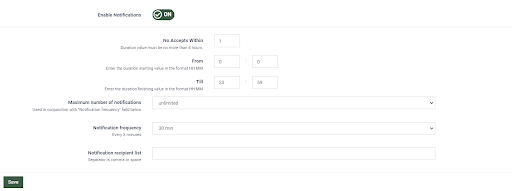
Non-Accepts
The Non-Accepts notifications tab allows you to enable and set notifications if the Buyer does not accept traffic within the specified time range. To configure the “Non-Accept Notifications” block, fill in the following fields:
- No Accepts Within: Enter the time range in hours. The duration must be no more than four hours. If the Buyer does not accept the leads within the selected time, a notification will be sent.
- From / Till: Specify the time range when the system checks for Non-Accepts. Enter the durations starting and finishing values in HH: MM format. Notifications will be sent within the selected time.
- Maximum number of notifications: Enter the maximum number of notifications sent in the selected time range (1 / 2 / unlimited).
- Notifications frequency: Select the notification frequency. Every X minute, the system will resend the notification.
- Notification recipient list: Enter the email address(es) of recipients who receive notifications about Non-accepts.
Click the “Save” button to apply the notification settings.
Note: The notifications are sent only if the campaign status is "Active". Campaign schedule and Caps configuration also affect sending notifications.
Call Events
The Call Events notifications tab allows you to manage the call notifications within the system that are applicable to a wide range of selected strategies. The setup of the notifications is customizable and may include general alerts related to a specific Campaign.
Note: Read more about the Call Status Description in our Knowledge Base article.
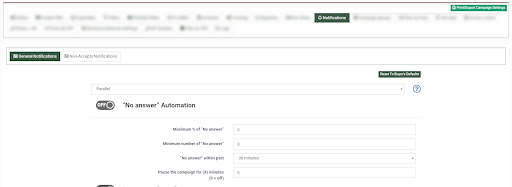
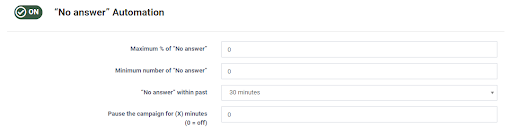
“No Answer” Automation
The “No Answer” Automation (Not answer for more than 30 seconds) block allows you to set up the no answer call automation settings according to the defined strategy. To configure the “No Answer Automation” block, fill in the following fields:
- Maximum % of “No answer”: Enter the percentage value of the maximum calls with no answer status (ratio of calls with no answer status to the total calls) to trigger the notification.
- Minimum number of “No answer”: Enter the minimum number of calls with no answer status to trigger the notification.
- “No answer” within past: Select the time range to track the number of calls with no answer status.
Example: You set the Maximum % of timeouts as "10%", the Minimum number of timeouts as "15", and the Timeouts within the past as "5" minutes. If, within the past 5 minutes, there have been 100 leads, out of which 10 timed out, the pause or the notification will not be triggered even though it is 10%. So, unless the minimum number requirement is also met, there will be no pause or notification sent.
- Pause the campaign for (X) minutes (0=off): Enter the number of minutes to pause the campaign when the maximum set percentage of calls with no answer status is reached.
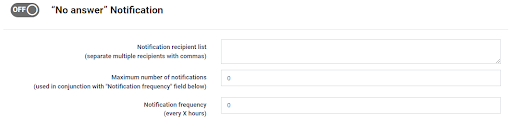
“No Answer” Notification
The “No Answer” Notifications block allows you to configure the settings and list of emails to receive no answer notifications.
Note: The “No Answer” Automation block should be configured first, otherwise, you can't set up the “No Answer” Notification block.
To configure the “No Answer” Notification block, fill in the following fields:
- Notification recipient list (separate multiple recipients with commas): Enter the list of emails to send the notifications.
- Maximum number of notifications (used in conjunction with "Notification frequency" field below): Enter the number of emails with notifications that can be sent within the time range set in the “Notification frequency (every X hours)” field.
- Notification frequency (every X hours): Enter the time range that indicates how often the notification emails will be sent (in hours).
“Busy” Automation
The “Busy” Automation block allows you to set up the busy call automation settings according to the defined strategy.
To configure the “Busy Automation” block, fill in the following fields:
- Maximum % of “Busy”: Enter the percentage value of the maximum calls with busy status (ratio of calls with busy status to the total calls) to trigger the notification.
- Minimum number of “Busy”: Enter the minimum number of calls with busy status to trigger the notification.
- “Busy” within past: Select the time range to track the number of calls with busy status.
- Pause the campaign for (X) minutes (0=off): Enter the number of minutes to pause the campaign when the maximum set percentage of calls with busy status is reached.

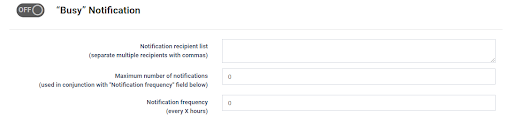
“Busy” Notification
The “Busy” Notification block allows you to configure the settings and list of emails to receive busy call notifications.
Note: The “Busy” Automation block should be configured first, otherwise, you can't set up the “Busy” Notification block.
To configure the “Busy” Notification block, fill in the following fields:
- Notification recipient list (separate multiple recipients with commas): Enter the list of emails to send the notifications.
- Maximum number of notifications (used in conjunction with "Notification frequency" field below): Enter the number of emails with notifications that can be sent within the time range set in the “Notification frequency (every X hours)” field.
- Notification frequency (every X hours): Enter the time range that indicates how often the notification emails will be sent (in hours).
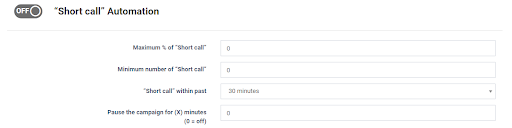
“Short Call” Automation
The “Short Call” Automation block allows you to set up the short call (Call duration up to three seconds) automation settings according to the defined strategy. To configure the “Short Call” Automation block, fill in the following fields:
- Maximum % of “Short call”: Enter the percentage value of the maximum calls with short call status (ratio of calls with short call status to the total calls) to trigger the notification.
- Minimum number of “Short call”: Enter the minimum number of calls with short call status to trigger the notification.
- “Short call” within past: Select the time range to track the number of calls with short call status.
- Pause the channel for (X) minutes (0=off): Enter the number of minutes to pause the channel when the maximum set percentage of calls with short call status is reached.
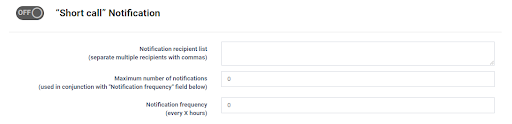
“Short Call” Notification
The “Short Call” Notification block allows you to configure the settings and list of emails to receive short call notifications.
Note: The “Short Call” Automation block should be configured first, otherwise, you can't set up the “Short Call” Notification block.
To configure the “Short Call Notification” block, fill in the following fields:
- Notification recipient list (separate multiple recipients with commas): Enter the list of emails to send the notifications.
- Maximum number of notifications (used in conjunction with "Notification frequency" field below): Enter the number of emails with notifications that can be sent within the time range set in the “Notification frequency (every X hours)” field.
- Notification frequency (every X hours): Enter the time range that indicates how often the notification emails will be sent (in hours).
All Call Events Automation
The All Call Events Automation block allows you to set up all call events (such as: no answer, busy, short call) automation settings according to the defined strategy. To configure the All Call Events Automation block, fill in the following fields:
- Maximum % of All Call Events: Enter the percentage value of the maximum of all calls events (ratio of all calls events to the total calls) to trigger the notification.
- Minimum number of All Call Events: Enter the minimum number of all calls events to trigger the notification.
- “No Answer” within past: Select the time range to track the number of all call events.
- Pause the channel for (X) minutes (0=off): Enter the number of minutes to pause the channel when the maximum set percentage of all call events is reached.

All Call Events Notification
The All Calls Events Notification block allows you to configure the settings and list of emails to receive all call events notifications.
Note: The All Call Events Automation block should be configured first, otherwise, you can't set up the All Call Events Notification block.
To configure the All Call Events Notification block, fill in the following fields:
- Notification recipient list (separate multiple recipients with commas): Enter the list of emails to send the notifications.
- Maximum number of notifications (used in conjunction with "Notification frequency" field below): Enter the number of emails with notifications that can be sent within the time range set in the “Notification frequency (every X hours)” field.
- Notification frequency (every X hours): Enter the time range that indicates how often the notification emails will be sent (in hours).

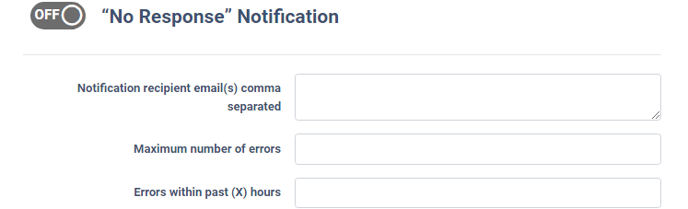
"No Response" Notification
The "No Response" Notification (No answer to the call for more than a minute) notification block allows you to configure the settings and list of emails to receive no response call notifications. To configure the "No Response" Notification block fill in the following fields:
- Notification recipient list (separate multiple recipients with commas): Enter the list of emails to send notifications.
- Maximum number of errors: Enter the maximum number of errors detected within the time range specified in the “Errors within past (X) hours” that will trigger the notification.
- Errors within past (X) hours: Enter the time range to track the number of errors (in hours).
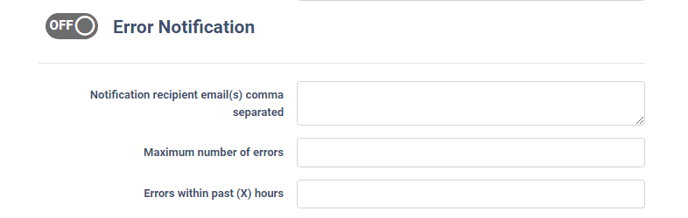
Error Notification
The Error Notification block allows you to configure the settings and list of emails to receive busy/error call notifications. To configure the Error Notification block fill in the following fields:
- Notification recipient list (separate multiple recipients with commas): Enter the list of emails to send notifications.
- Maximum number of errors: Enter the maximum number of errors detected within the time range specified in the “Errors within past (X) hours” that will trigger the notification.
- Errors within past (X) hours: Enter the time range to track the number of errors (in hours).
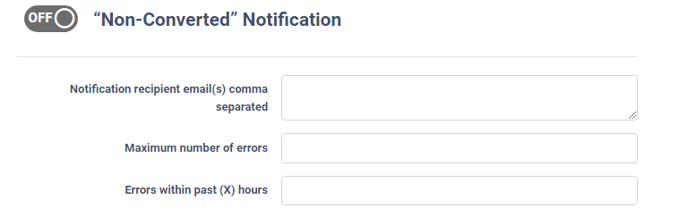
"Non-Converted” Notification
The "Non-Converted" Notification notification block allows you to configure the settings and list of emails to receive not converting call notifications. To configure the "Non-Converted" Notification block fill in the following fields:
- Notification recipient list (separate multiple recipients with commas): Enter the list of emails to send notifications.
- Maximum number of errors: Enter the maximum number of errors detected within the time range specified in the “Errors within past (X) hours” that will trigger the notification.
- Errors within past (X) hours: Enter the time range to track the number of errors (in hours).
"Short Call" Notification
The "Short Call" Notification block allows you to configure the settings and list of emails to receive short call notifications. To configure the "Short Call" Notification block fill in the following fields:
- Max number of short calls: Enter the maximum number of calls with short call status to trigger the notification.
- Within past hour(s): Select the time range to track the number of calls with short call status.
- Notification recipient list (separate multiple recipients with commas): Enter the list of emails to send the notifications.
- Maximum number of notifications (used in conjunction with "Notification Frequency" field below): Enter the number of emails with notifications that can be sent within the time range set in the “Notification Frequency (every X hours)” field.
- Notification Frequency (every X hours): Enter the time range that indicates how often the notification emails will be sent (in hours).

"Drop By Buyer" Notification
The "Drop By Buyer" Notification block allows you to configure the settings and list of emails to drop by buyer call notifications. To configure the "Drop By Buyer" Notification block fill in the following fields:
- Max number of short calls: Enter the maximum number of calls with Drop By Buyer status to trigger the notification.
- Within past hour(s): Select the time range to track the number of calls with Drop By Buyer status.
- Notification recipient list (separate multiple recipients with commas): Enter the list of emails to send the notifications.
- Maximum number of notifications (used in conjunction with "Notification frequency" field below): Enter the number of emails with notifications that can be sent within the time range set in the “Notification frequency (every X hours)” field.
- Notification frequency (every X hours): Enter the time range that indicates how often the notification emails will be sent (in hours).

Click the “Save” button to apply the notification settings.
Note: The previous settings (Settings that Campaign has before changes) of the Campaign Notifications will be overwritten on the Campaign level.
Read more about the notification settings on the Buyer level for the LMS platform in our Knowledge Base article and for the Call Logic platform in this Knowledge Base article.