Note: To set up the tracking rule in the Phonexa system, you need to use credentials from your Meta Account. Read more about how to set up your account in Meta in this article.
This rule can be configured at the Product, Campaign, and Publisher levels.
Read more about the Tracking Rule setup at the Product level in this Knowledge Base article.
Read more about the Tracking Rule setup at the Campaign level in this Knowledge Base article.
Read more about the Tracking Rule setup at the Publisher level in this Knowledge Base article.
Read more about the Tracking Rule setup for the LYNX Postback in this Knowledge Base article.
System Settings
To create this tracking rule, fill in the following fields in the “Add Rule” pop-up window:
- Trigger: Select the event that triggers the action (the list of available triggers may vary depending on the setup level):
- [LMS] Lead Sold: The lead was sold for the Publisher .
-
- [LMS] Lead Rejected: The lead was rejected for the Publisher.
- [LMS] Campaign Rejected: The Campaign has rejected the lead.
- [LMS] Publisher Earning Received: The Publisher has received earnings.
- [LMS] Campaign Sold: The lead was sold to the specific Сampaign.
- [LMS] Revenue Ping Back: The revenue pingback has been received.
- [LMS] Lead Offer Received: The lead status changed to "Offer Received" after a successful ping (for Ping Post Products only).
-
- [Call Logic] Lead Sold: The lead was sold for the Publisher.
- [Call Logic] Lead Rejected: The lead was rejected for the Publisher.
[Call Logic] Campaign Rejected: The Campaign has rejected the lead. - [Call Logic] Campaign Accepted: The Campaign has accepted the lead.
- [Call Logic] Campaign Sold: The lead was sold to the specific Campaign.
- [Call Logic] Call Recorded: Call recorded and ready to download.
- [Call Logic] Publisher Earning Received: Fires every time the Publisher gets earning (Direct Sold / Revenue Post-back).
- [Call Logic] Buyer response: The Buyer has answered the call.
- [Call Logic] Disposition Updated: Buyer Disposition has been updated.
- [Call Logic] Publisher Earning Adjusted: Lead Adjustment happens.
- [Call Logic] Lead Return: Lead Return happens.
- [Call Logic] Lead Partial Return: Lead Partial Return happens.
-
- [Call Logic] Duration to sell reached: The lead has reached the "Duration to sell" time.
- [Call Logic] AMD: The answering machine is detected on the Buyer's side.
- [Call Logic] Revenue Postback: Revenue Postback sent.
-
- [Lynx] Conversion Done: The Lynx conversion is completed.
- [Lynx] Conversion Reject: The Lynx conversion is rejected.
- [Lynx] Conversion Pending: The Lynx conversion is pending.
- Action: Select the “Facebook Conversion” option.
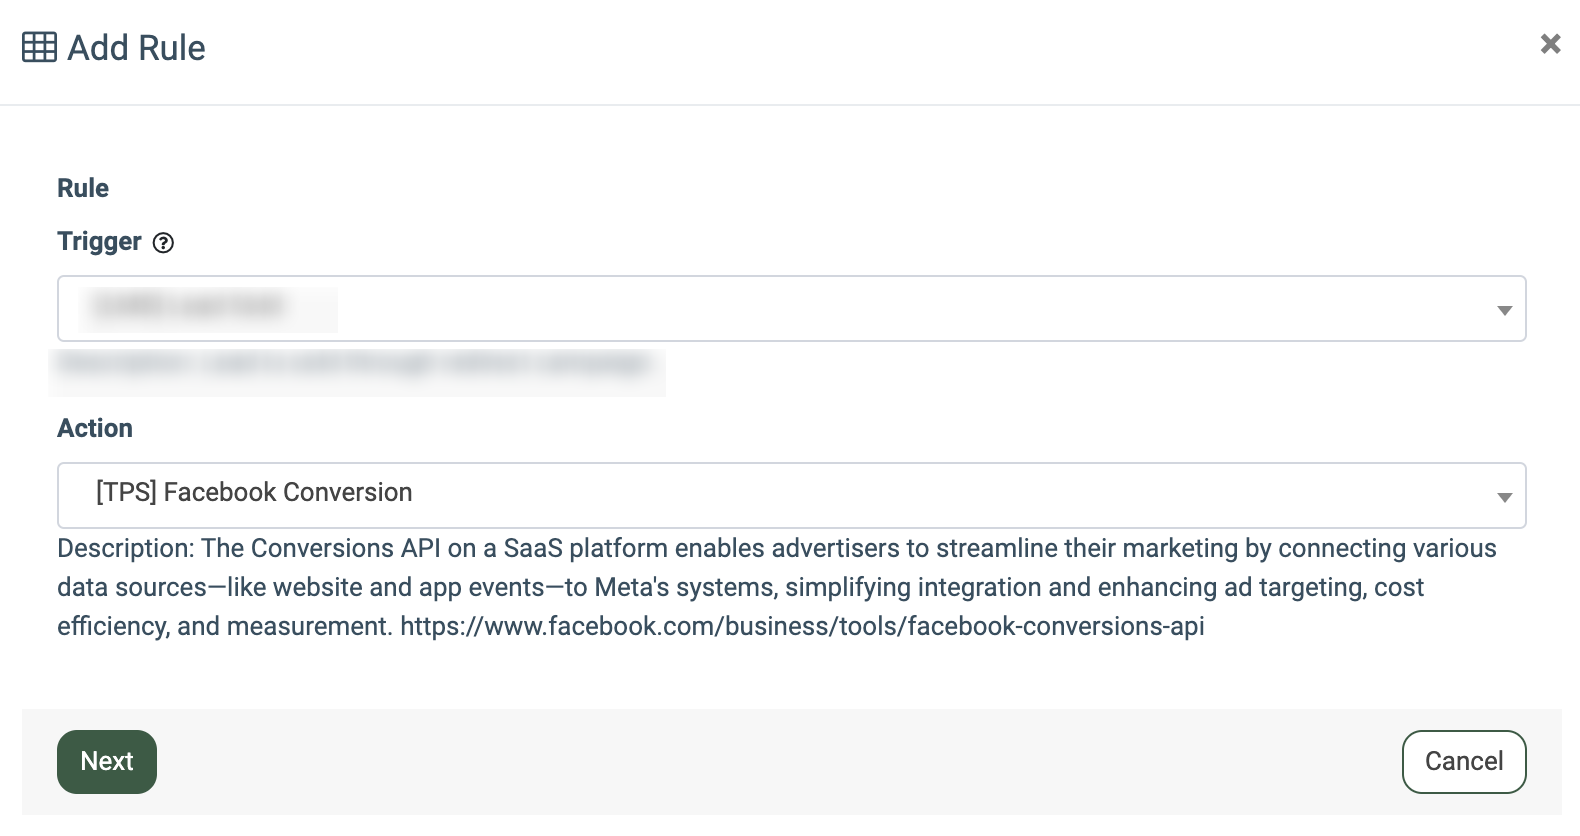
Once the trigger and the action have been selected, click the “Next” button to proceed with the setup.
The “Trigger Settings” block allows you to set up additional filters for the selected trigger. The filter fields are optional. If no filters are set up, the action will be triggered for all the leads that fit the trigger event.
Depending on the user role, platform, and configuration level, the following filters for trigger settings are available:
- Product: Select the Product.
- Method: Select the Method (POST/FORM).
- Publisher: Select the Publisher.
- Publisher Exclude: Select the Publisher to exclude from the rule.
- Channel: Select the Publisher Channel.
- Channel Exclude: Select the Publisher Channel to exclude from the rule.
- Call Tracking Pool: Select the call tracking pool (available only for Call Logic triggers).
- Source: Select the Publisher Source.
- Source Exclude: Select the Source to exclude from the rule.
- Buyer: Select the Buyer.
- Campaign: Select the Campaign.
- Pingtree: Select the Pingtree.
- Price Restrictions: Select the Price restrictions (Price is greater than 0, Price is greater than a certain value, Price is greater than or equal to a certain value, Price is lower than a certain value, Price is lower than or equal to a certain value, Price range inclusive). Note: The “Price range inclusive” value is available only for the “Lead Sold” and “Campaign Sold” triggers.
- Price Restriction Value: Enter the price value.
- Min Price: Enter the minimum price value to trigger the rule by the price range (available only for the “Price range inclusive” value in the “Price Restrictions” field).
- Max Price: Enter the maximum price value to trigger the rule by the price range (available only for the “Price range inclusive” value in the “Price Restrictions” field).
-1.png?hsLang=en)
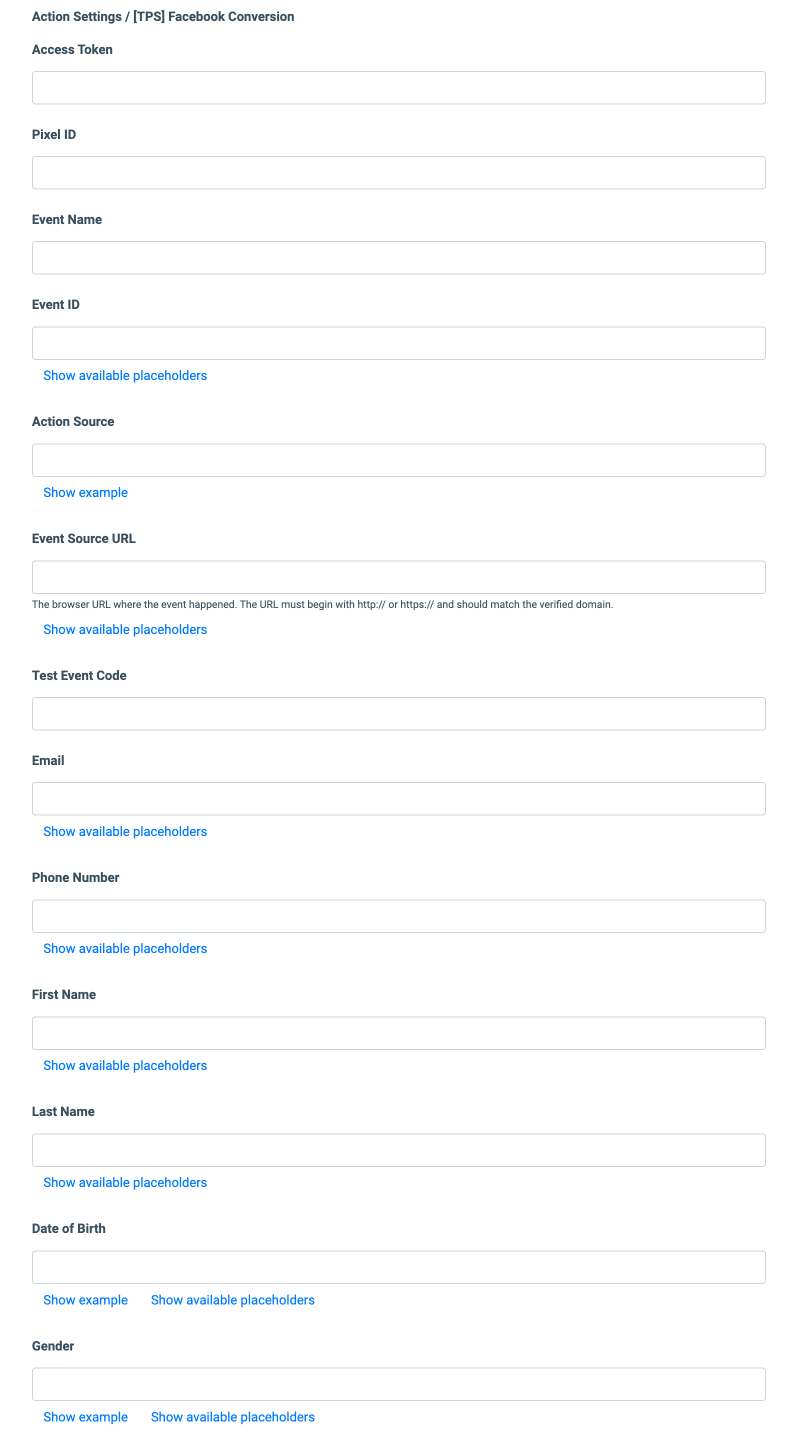
The “Action Settings / Facebook Conversion” block allows you to configure the action for the rule and the placeholders for the lead data to pass back to Facebook as conversion details:
- Access Token: Enter the token from your Meta account. Note: Read more about Access Token in this article.
- Pixel ID: Enter Pixel ID from your Meta account. Note: Read about Pixel ID and its settings in this article.
- Event Name: Enter the Event Name value. Note: Read more about the Event Name parameter in this article.
- Action Source: Enter the value of the Action Source. Note: Read more about the Action Source in this article.
- Event Source URL: Enter the browser URL where the event happened. The URL must begin with http:// or https:// and should match the verified domain. Note: Read more about the Event Source URL parameter in these articles: Custom Data Destination and Server Event Parameters.
- Test Event Code: Enter the Meta test code to track test events without impacting live data. The test event code can be found in your Meta Account under Event Manager > Data Sources > Test events.


- Email: Select the placeholder for the email lead data field.
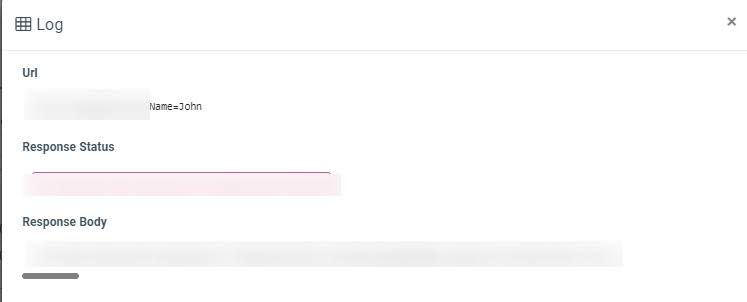
Note: The Lead Body field placeholders are unavailable on the Publisher level, however, the “{%leadGet_*%}” placeholder can be used to pass any field from the get log.
Example: You can set a tracking rule for the particular Publisher and add a “{%leadGet_firstName%}” placeholder to the rule configuration instead of the {%productField_firstName%} placeholder that is unavailable for this level.
Once the tracking rule is triggered, you can see the result in the “Tracking Log” tab in the Lead Details section. When you click the “Log” button next to the record in the “Tracking Log”, the First Name of the lead is displayed.
- Phone Number: Select the placeholder for the phone number lead data field.
- First Name: Select the placeholder for the lead`s First Name field.
- Last Name: Select the placeholder for the lead`s Last Name field.
- Date of Birth: Select the placeholder for the lead`s date of birth field.
- Gender: Select the placeholder for the lead`s gender field.
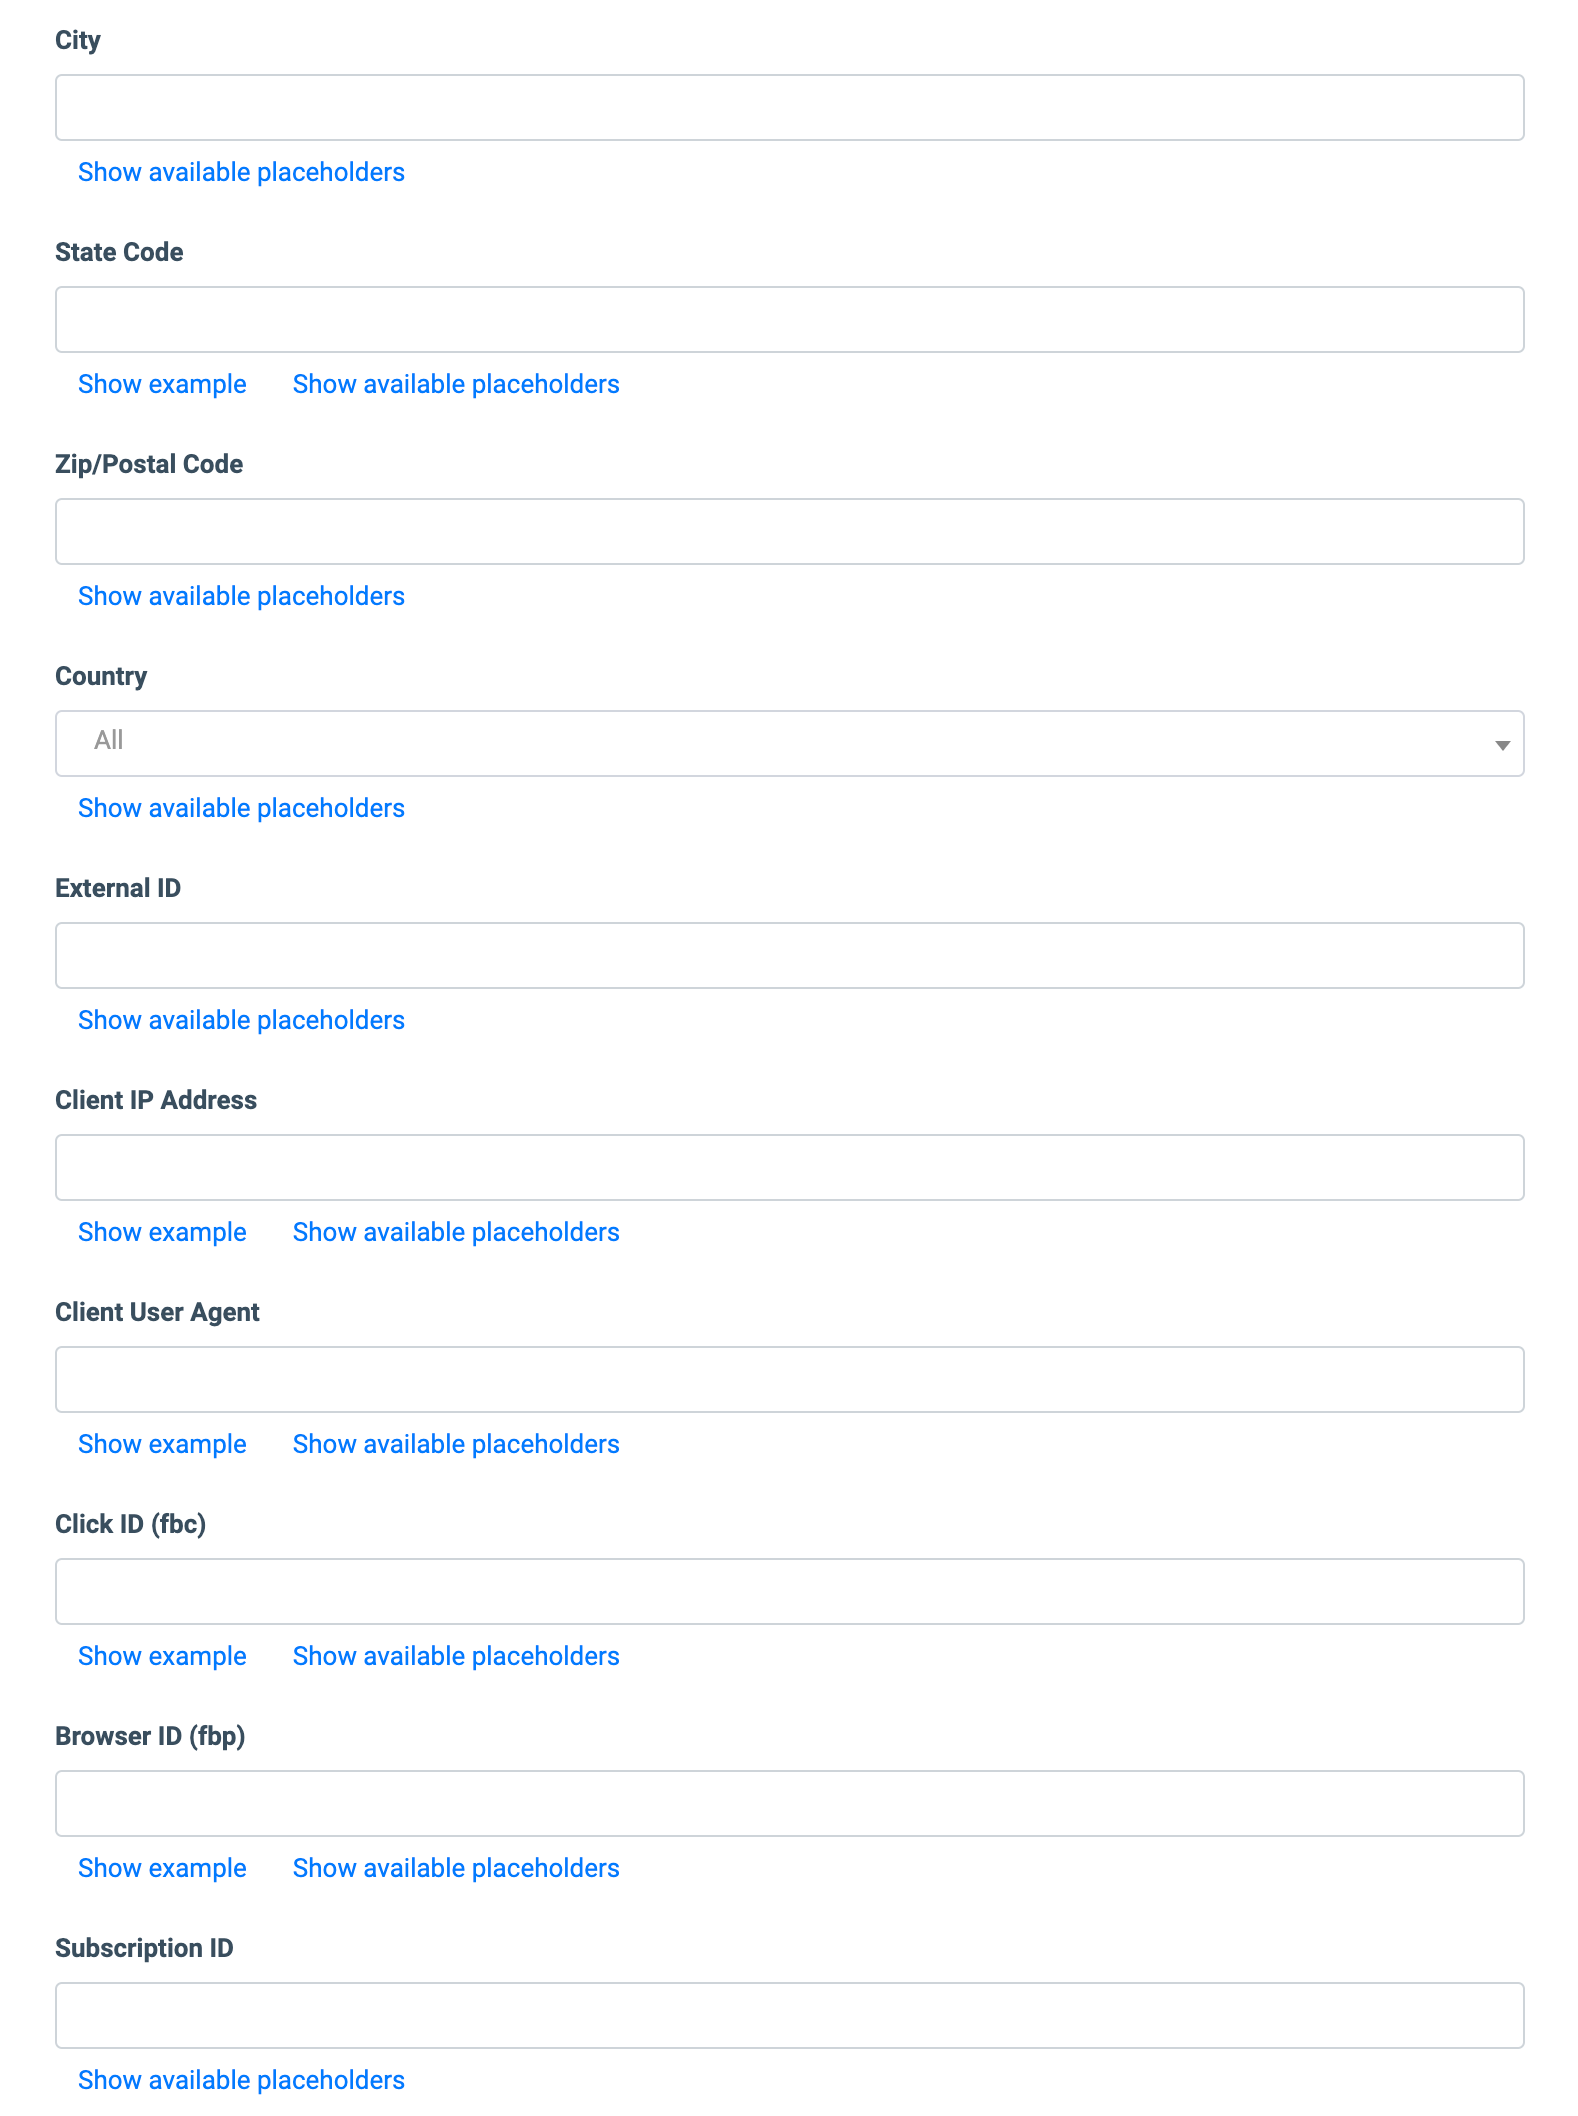
- City: Select the placeholder for the lead`s city field.
- State Code: Select the placeholder for the lead`s state code data field.
- Zip/Postal Code: Select the placeholder for the lead`s zip or postal code field.
- Country: Select the placeholder for the lead`s country data field.
- External ID: Select the placeholder for the External ID data field.
- Client IP Address: Select the placeholder for the client IP address data field.
- Client User Agent: Select the placeholder for the client User Agent data field.
- Click ID (fbc): Select the placeholder for the Click ID data field.
- Browser ID (fbp): Select the placeholder for the browser ID data field.
- Subscription ID: Select the placeholder for the Subscription ID data field.
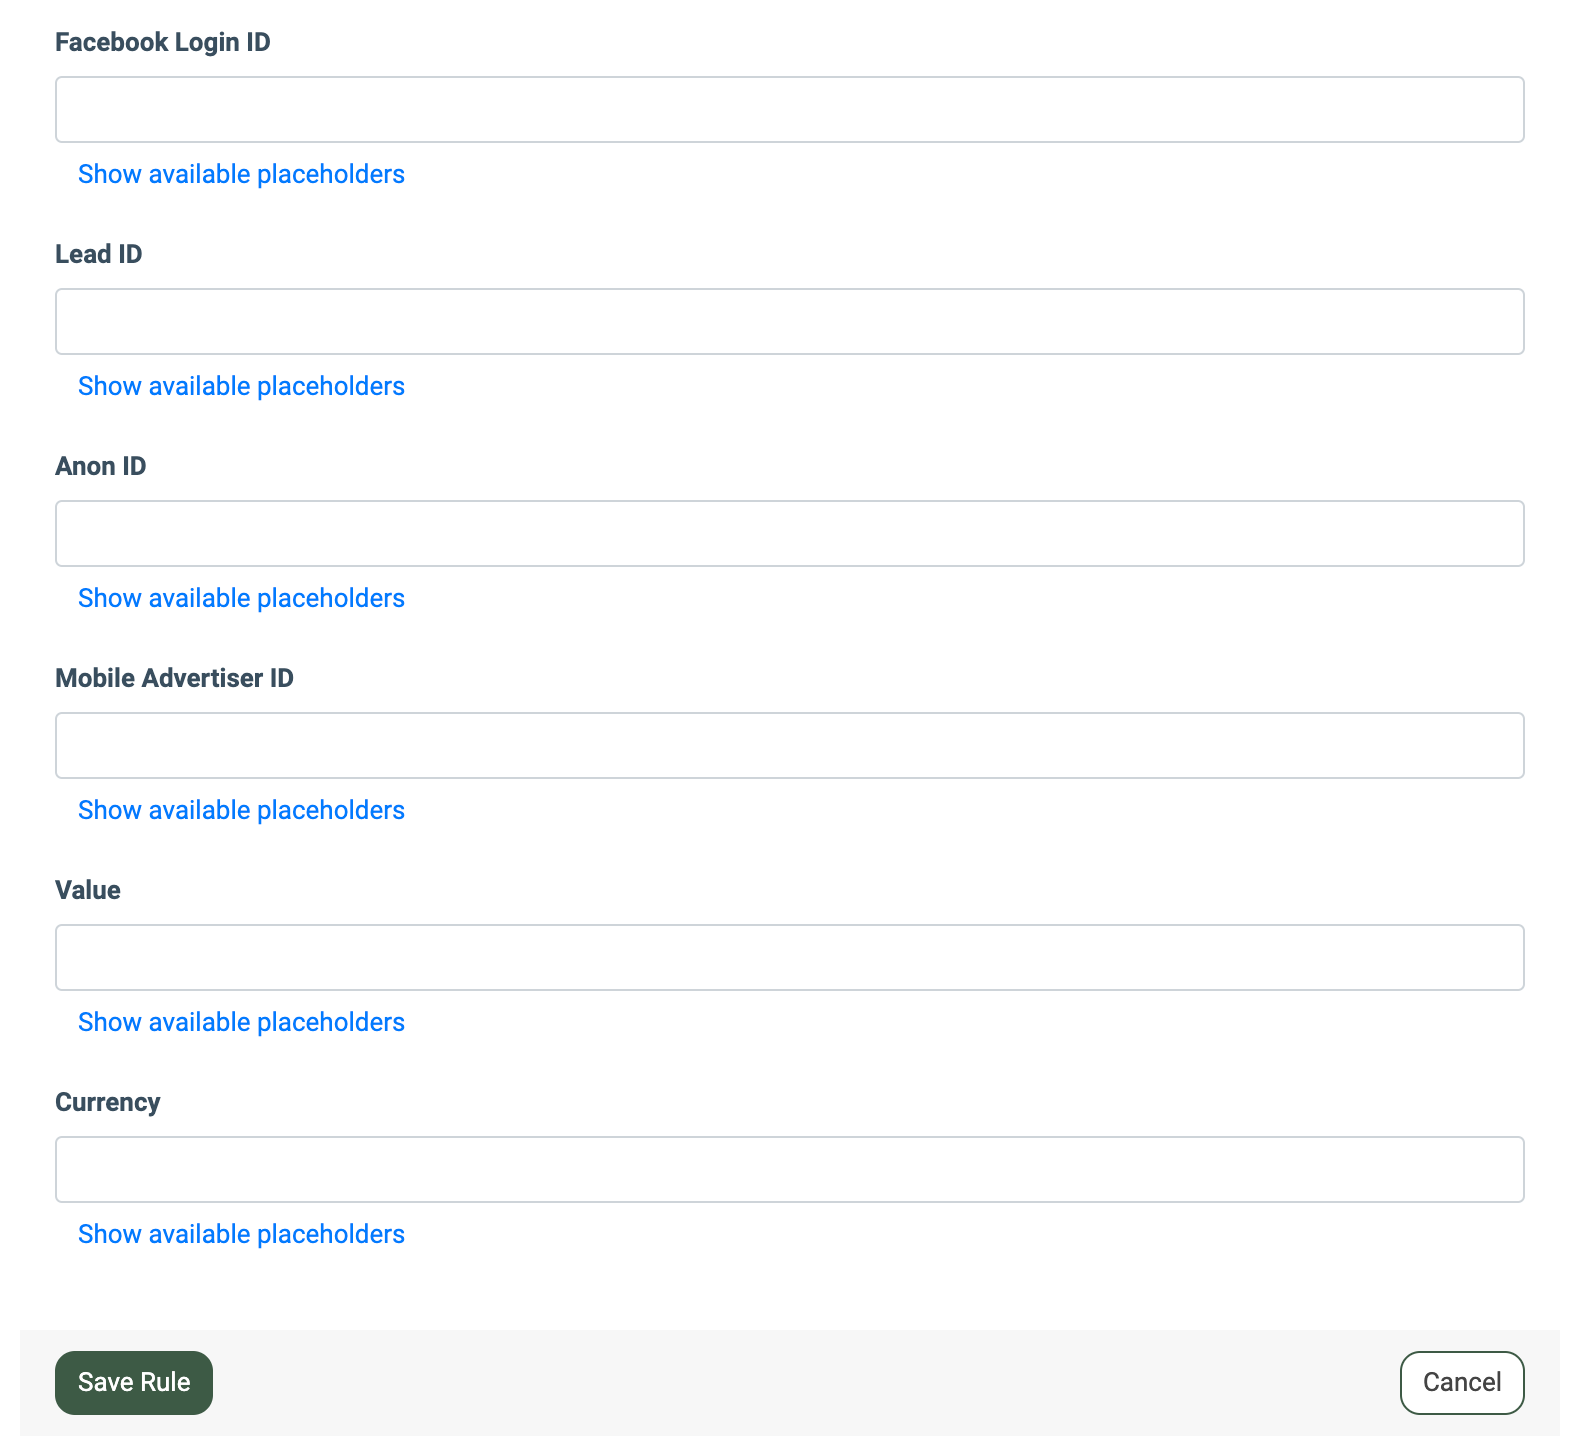
- Facebook Login ID: Select the placeholder for the Facebook Login ID data field.
- Lead ID: Select the placeholder for the Lead ID data field.
- Anon ID: Select the placeholder for the Anon ID data field.
- Mobile Advertiser ID: Select the placeholder for the Mobile Advertiser ID data field.
- Value: Select the placeholder for the value field.
- Currency: Select the placeholder for the currency field.
Click the “Save Rule” button to confirm.
Facebook Conversion + Call Tracking Use Case
One potential use case for combining Facebook's Conversion functionality with Phonexa’s Call Tracking feature is to run Facebook Ads that direct traffic to your landing page, where the Phonexa Phone Numbers Pool widget is installed. Follow this step-by-step instruction to apply this setup:
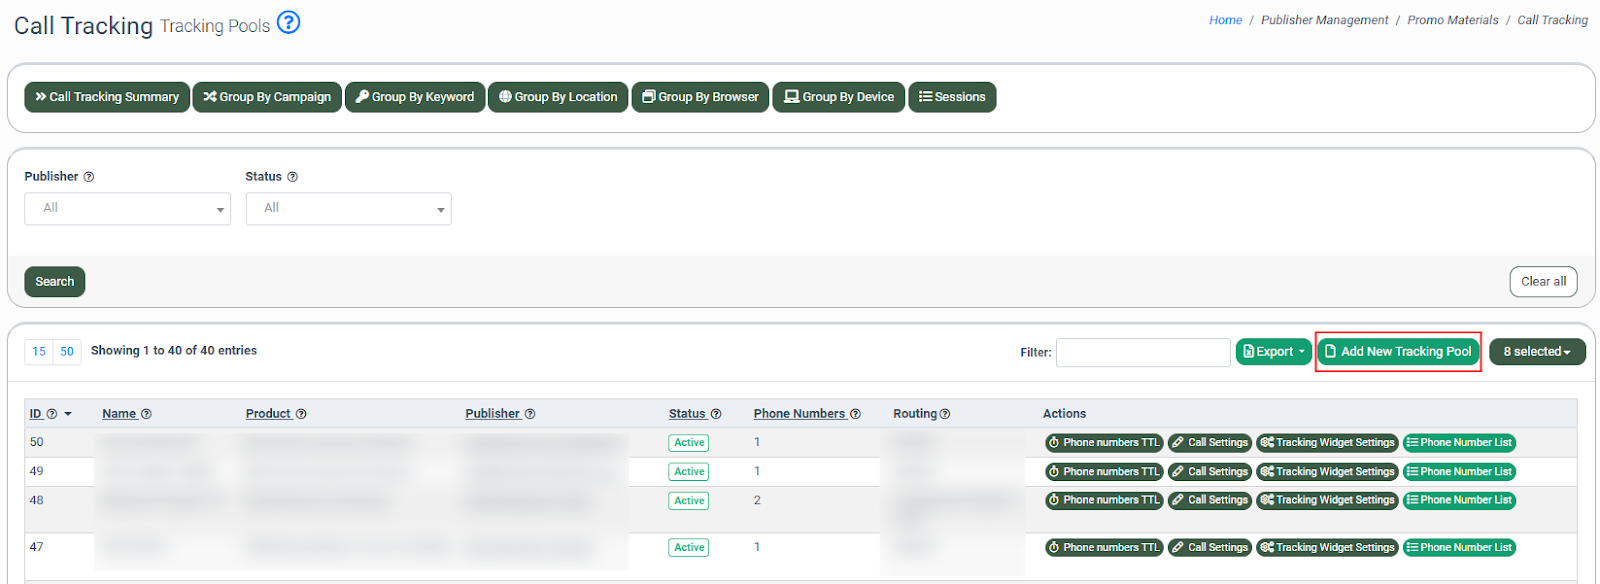
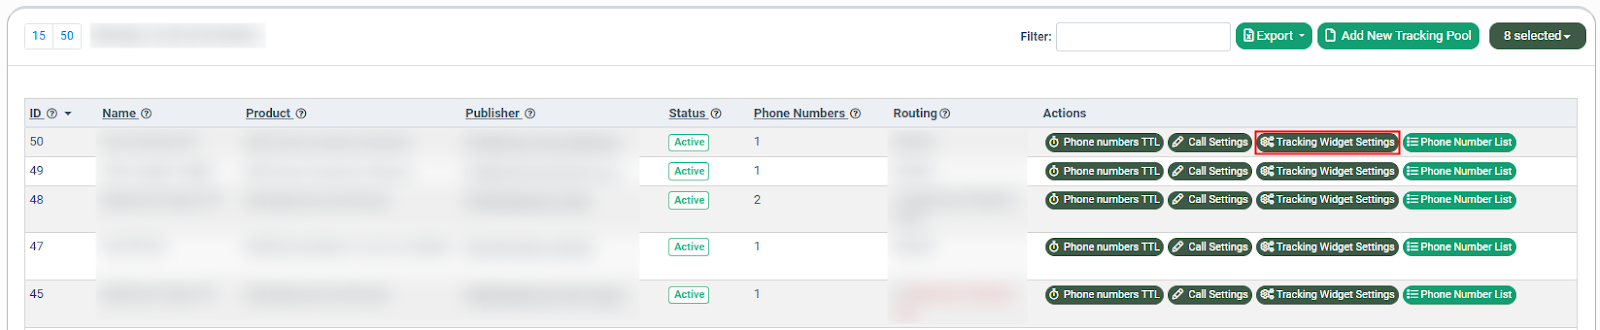
- First, you need to set up the Call Tracking Pool in Call Logic. To do so, go to the Publisher Management > Promo Materials > Call Tracking section and click the “Add New Tracking Pool” button.

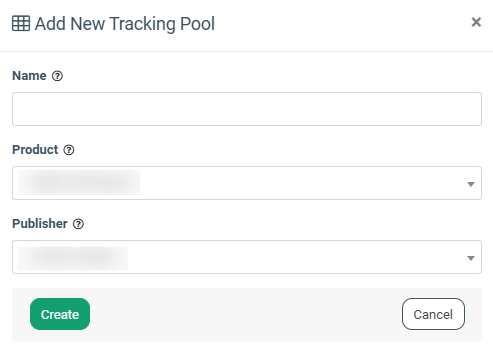
Fill in the following fields in the pop-up window:
- Name: Enter the name of the tracking pool.
- Product: Select the Product.
- Publisher: Select the Publisher.
Click the “Create” button to confirm.
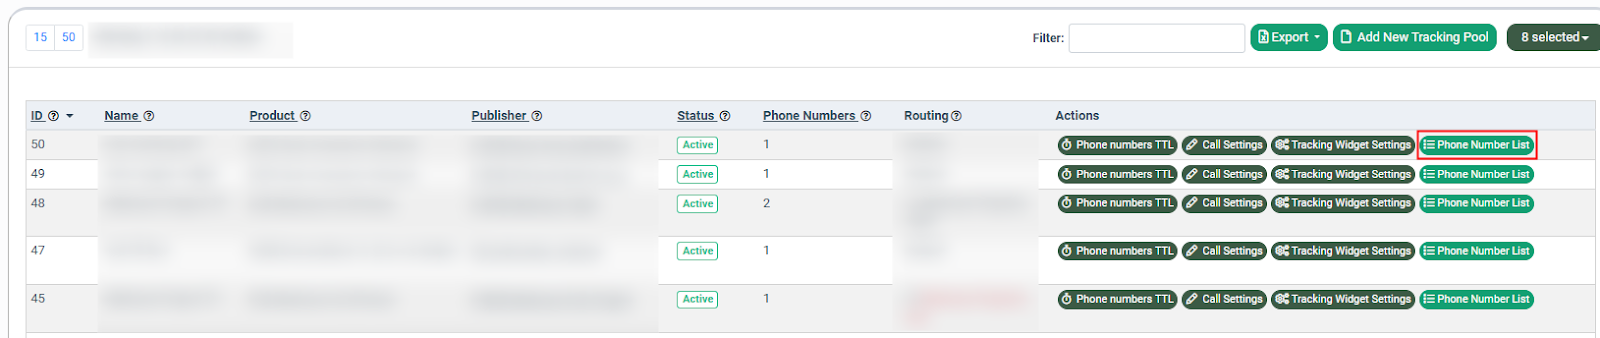
Then, open the pool of phone numbers for the tracking pool you have created by clicking the “Phone Numbers List”.
Click the “Add Phone Number” button.
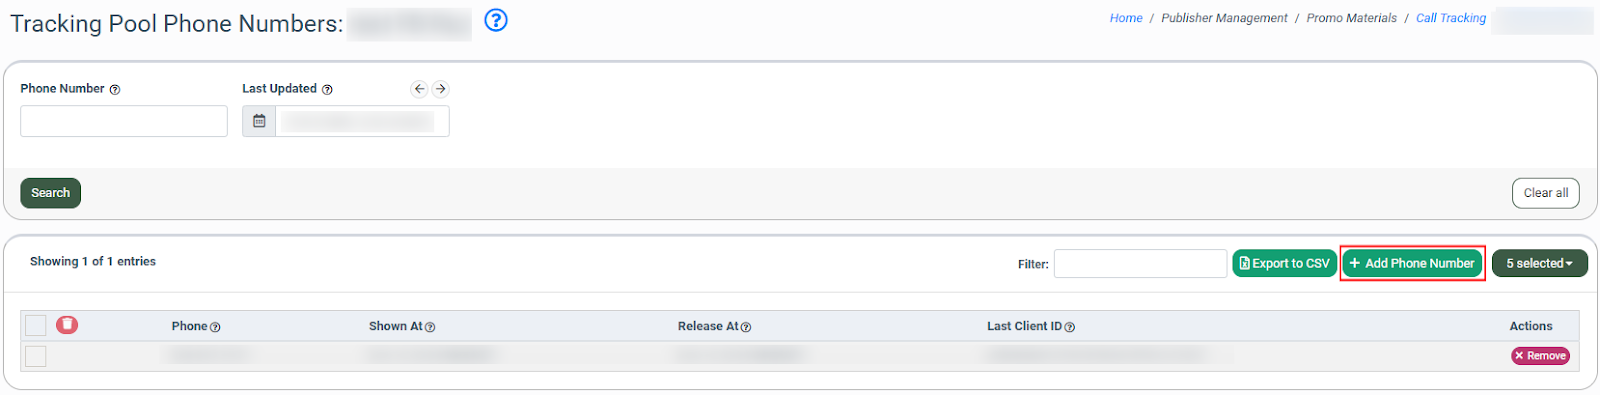
Check the boxes next to the phone numbers you wish to add to your tracking pool and click the “Add” button.
Note: Please make sure that you have reserved the needed quantity of phone numbers beforehand. Read more about how to reserve the phone numbers in this Knowledge Base article.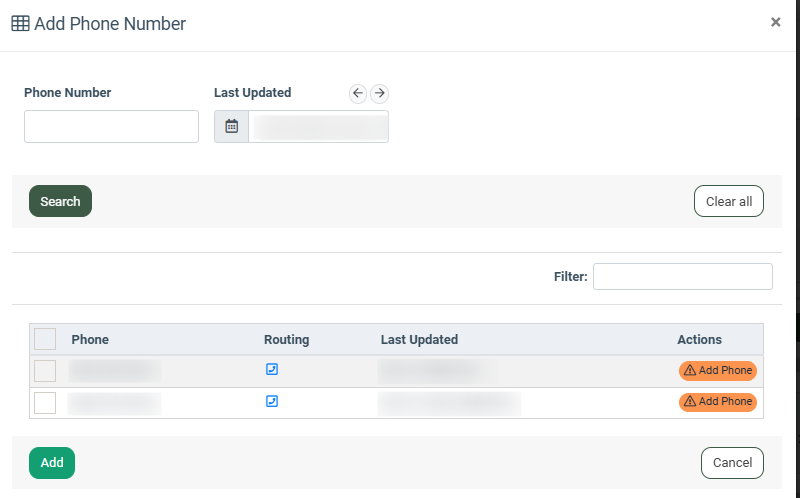
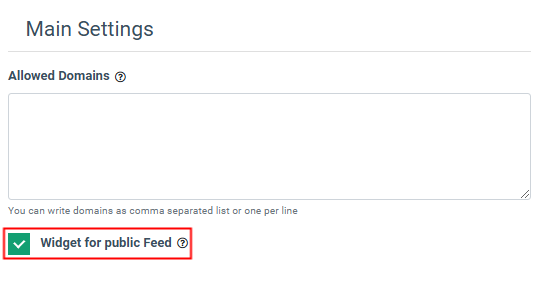
Check the box in the “Main Settings” block to make the widget public.
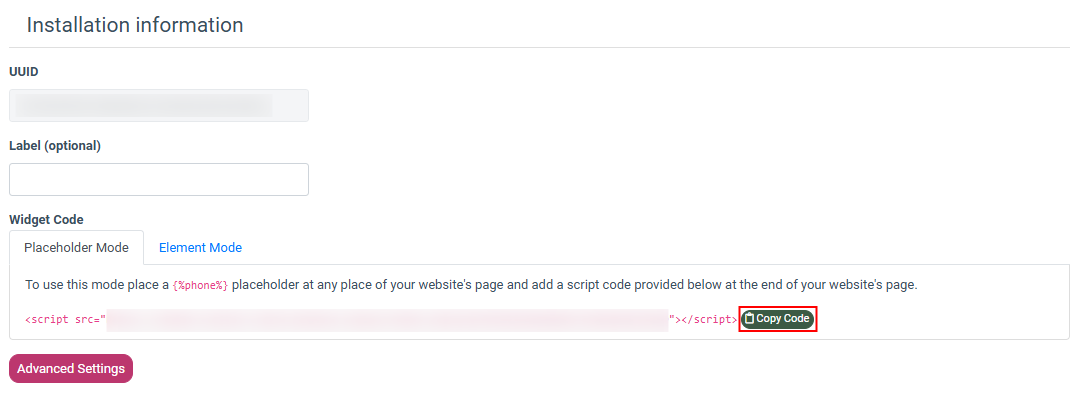
Then, copy the widget script by clicking the “Copy Code” button in the “Installation Information” block and inserting it at the end of your landing page.
Note: You may choose between the Placeholder Mode and Element Code according to your preference. Find out more about how to install the widget in this Knowledge Base article.
3. In the next step, you would need to add some extra fields to your Product for tracking purposes. Go to the System Management > Products section, select the Product from the list, and click the “Settings” button.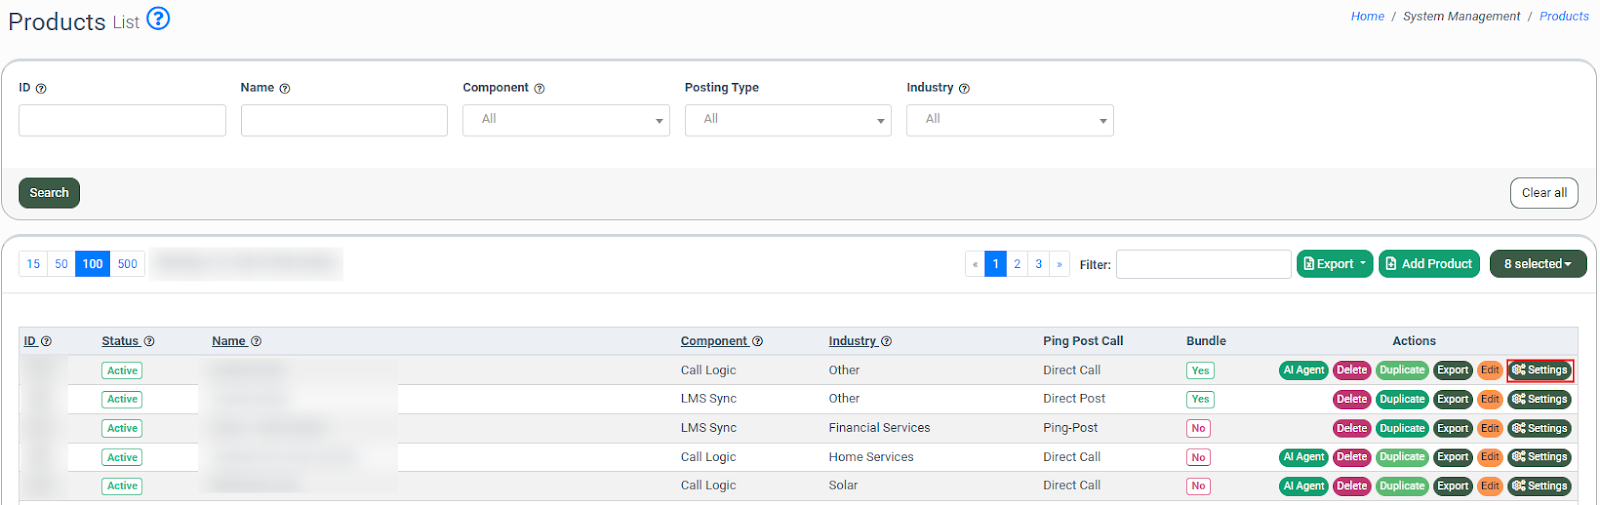
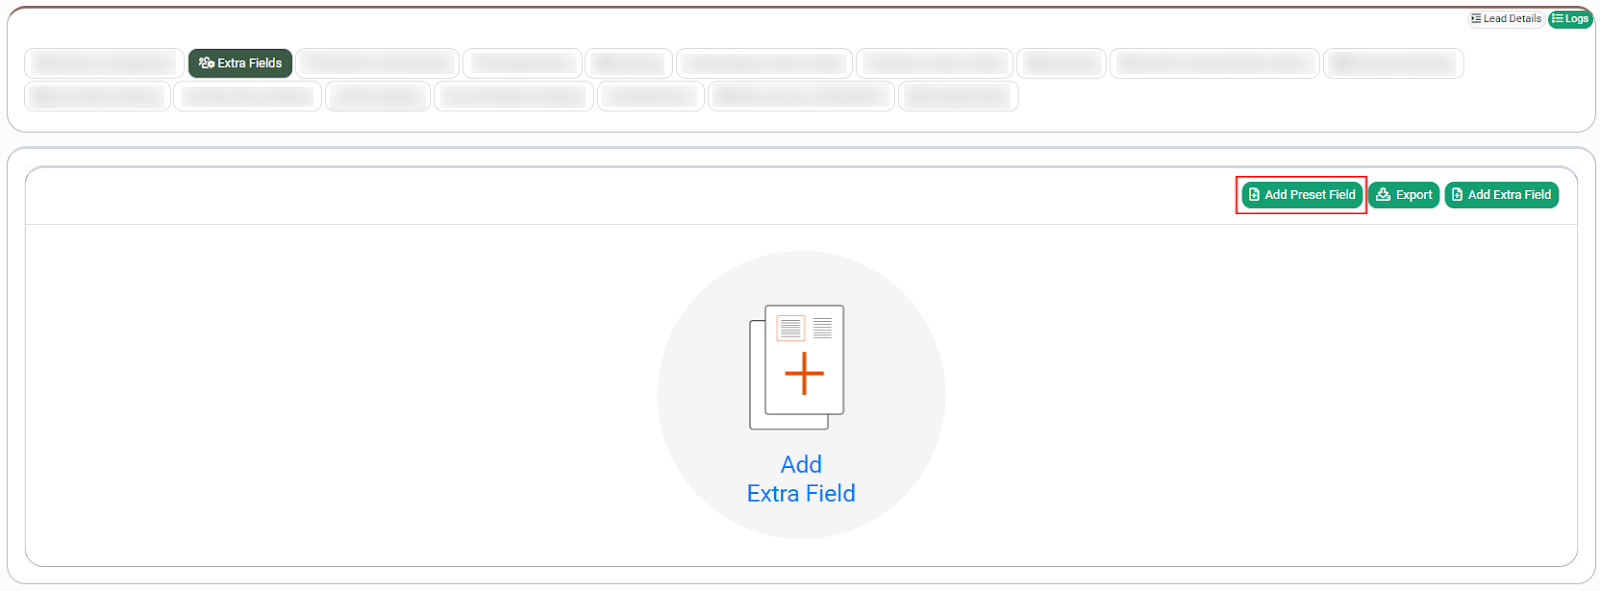
Then go to the “Extra Fields” tab and click the “Add Preset Field” button.
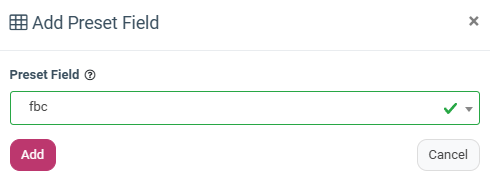
In the pop-up window, select the “fbc” option that represents the Facebook Click ID and click the “Add” button.
Note: Optionally, you can add “utm” parameters too (e.g. utm_source, utm_campaign, utm_keyword).
This will allow the Phonexa Tracking Pool Widget to capture data from the webpage URL for accurate conversion attribution.
4. For advanced additional parameters tracking, add Data Collection Script to your page, which you can get from the “Usage Example” block of the API documentation for the Phone Number Tracking Widget. See the example of the script that includes the Widget Code and additional data to ping below:
<script src="https://cdn101-inst152-client.phonexa.com/resource/global/js/params_store.js"></script>

<script>

    /*

    Setting lead body fields (which are part of product’s lead body)

    please refer to product documentation API to get the list of product fields

     */


    var ivrData = {

        email: omParamsStore.getUrlItem('email') || 'unknown@unknown.com', // get email from URL

        phoneNumber: omParamsStore.getCookieItem('phoneNumber') || 18885553322, // get phone number from cookie

        zip: omParamsStore.getCookieItem('zip') || 55555, // get zip from cookie

    };


    /*

    Setting custom tracking parameters (which are not the part of your lead body) if you need to pass them to the system. If you don’t need to pass any additional parameters just define tPar as an empty object : var tPar = {};

     */


    var tPar = {

        myTrackingParam: '12345'

    };


    /*

    Passing parameters to the system

    If you need to have a callback function which will be called after the parameter is passed, you can pass it as a third parameter.

    In example below we send data to the system as soon as the page is loaded, but you can call omPwSetCustomData function whenever you need, ex: after some user action.

     */


    document.onreadystatechange = function () {

        if (document.readyState == "complete") {

            setTimeout(() => {

                omPwSetCustomData(tPar, ivrData, function (data) { /* place your callback code here  */ });

            }, 500);

        }

    }

</script>


<script src="https://cdn101-inst152-client.phonexa.com/pw/render.php?p=06403728011B44C5903409EA763C96E0"></script>
Then you need to place the respective parameters into var ivrData.
Example:
var ivrData = {

fbc: omParamsStore.getUrlItem('fbc'),

utm_source: omParamsStore.getUrlItem('utm_source')

};
Add timeout parameters as well:
setTimeout(() => {

    var tPar = {

        utmCampaign: 'clickid'

    };
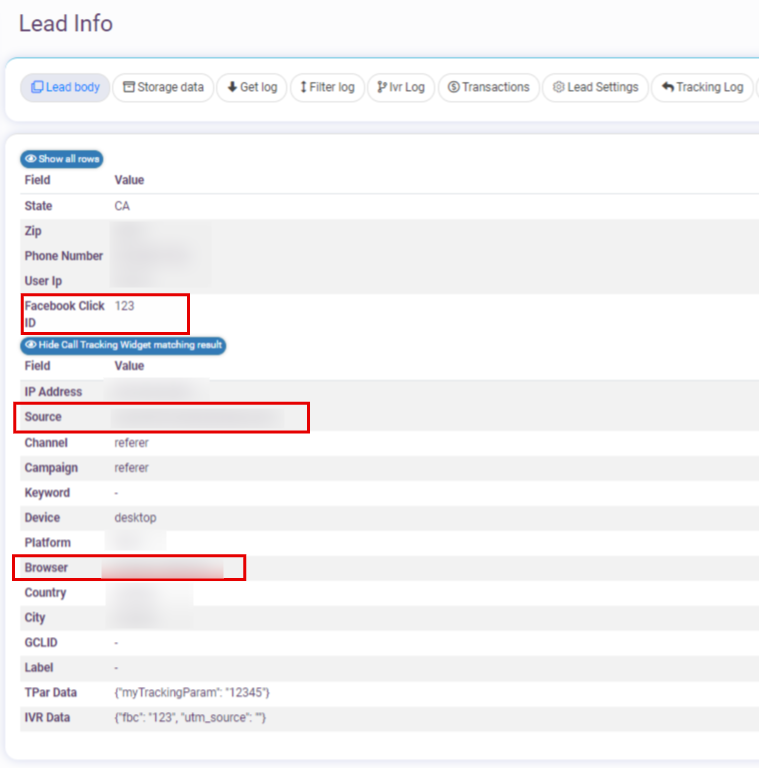
See the example of the lead sent with fbc and source parameters as described above:
5. Set up the Event Tracking to send events back to Facebook according to the instructions provided above via the “System Settings” section.