To view the section, go to the Publisher Management > Promo Materials > Form Builder section.
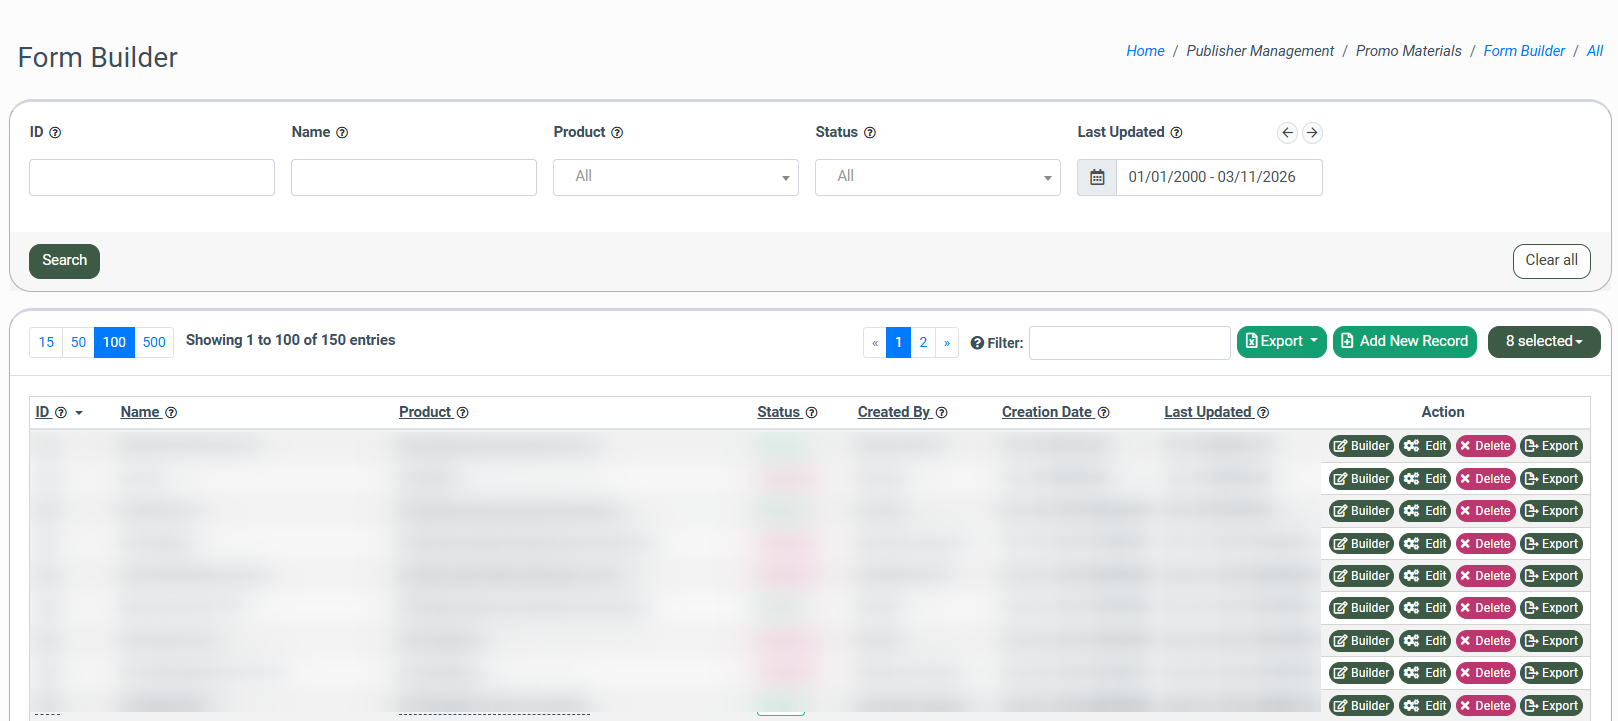
You can narrow down the search results by using the following filters:
- ID: Enter the identification number of the form.
- Name: Enter the name of the form.
- Product: Choose the relevant Product.
- Status: Select the form status (Active / Deleted / Disabled).
- Last Updated: Select the time range of the previous update.
The Form Builder list contains the following information:
- ID: The identification number of the form.
- Name: The name of the form.
- Product: The unique identification number (ID) and the name of the Product.
- Status: The status of the form (Active / Deleted / Disabled).
- Created by: The name of the creator.
- Creation Date: The date and time of the form creation.
- Last Updated: The date of the previous template changes.
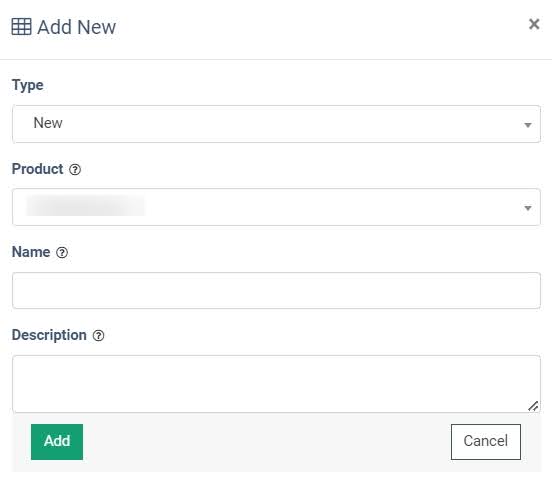
You can add a new form or import the form that was already created using the Form Builder feature. It allows you to import forms from another system.
To create a new form, click the “Add New Record” button. Fill in the following fields in the pop-up window:
- Type: Select the “New” option to create a new form.
- Product: Select the Product from the drop-down list.
- Name: Enter the form name.
- Description: Fill in the “Description” field to add additional information.
Click the “Add” button to save the record.
Note: The form will be created with the “Disabled” status by default.
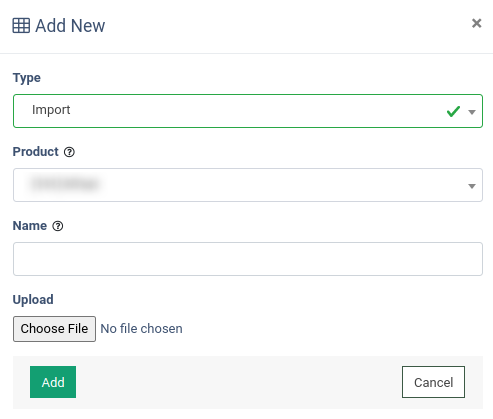
To import the form, click the “Add New Record” button. Fill in the following fields in the pop-up window:
- Type: Select the “Import” option to import the existing form.
- Product: Select the Product from the drop-down list.
- Name: Enter the form name.
- Upload: Click the “Choose File” button to upload the form into the system.
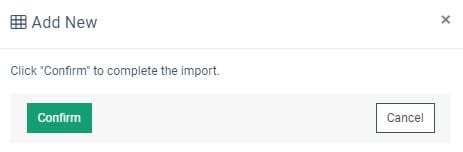
Click the “Add” button to proceed and click the “Confirm” button to complete the action. After uploading the form you will be redirected to the Form Builder section.
To configure the form, click the “Builder” button in the “Actions” column.
You will be redirected to the Form Builder section, containing three tabs. The “Form Builder” tab allows you to create a custom form using different tools and form elements.
Read more on how to construct the form using the JS Form Builder in this Knowledge Base article.
The "Form Customization and Preview" tab allows you to configure and customize the appearance of the different form elements such as form, input, label, and tooltip.
Read more on how to manage the customization of the form in this Knowledge Base article.
The “Response analyzer & redirect” tab allows you to select the flow for the lead after sending the form and preview the Thank You Page.
Read more about this section of the Form Builder in this Knowledge Base article.
To edit the name of the form and the description, click the ”Edit” button in the “Actions” column.
To delete the record from the system, click the “Delete” button in the “Actions” column.
To export the form from the system, click the “Export” button in the “Actions” column and select the directory to save the form.