The Publisher Performance Summary report allows you to track the Publisher revenue and monitor performance for every product.
To view the report, go to the All Reports > Publisher Reports > Performance Summary section.
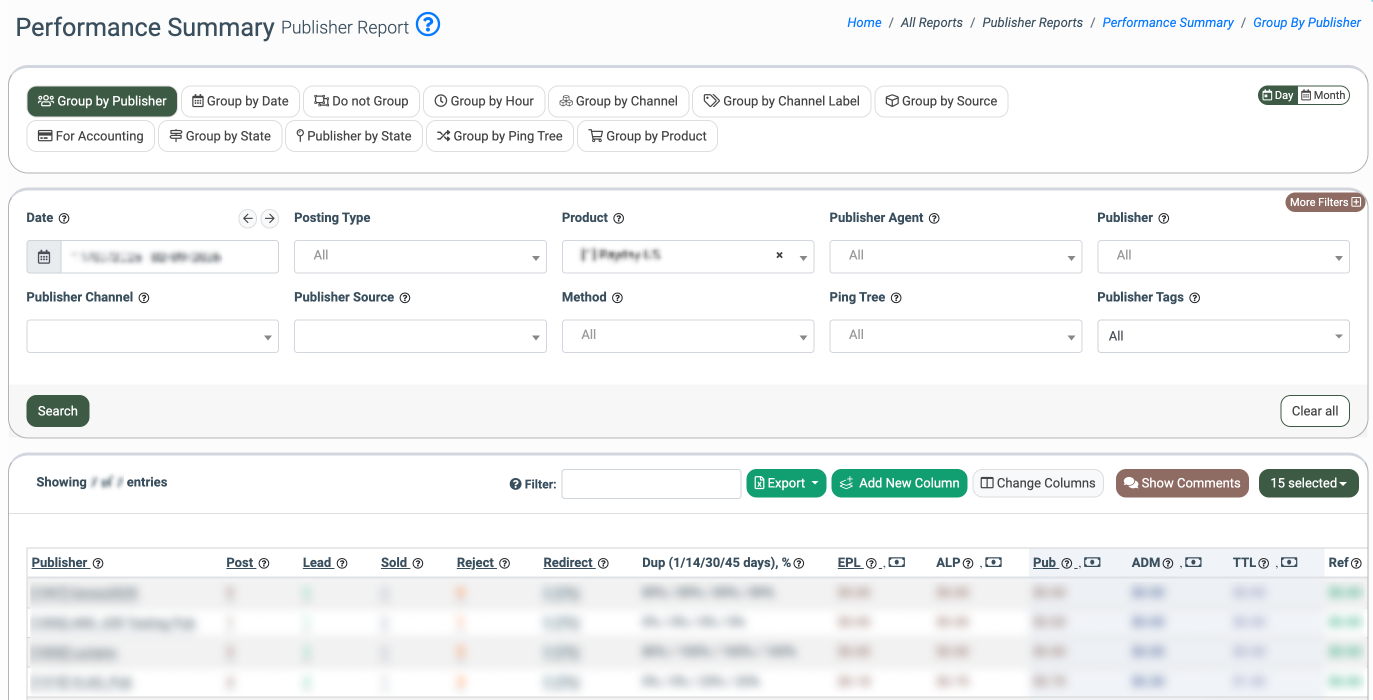
The Performance Summary report contains the following information:
-
Publisher: The name of the Publisher.
-
Publisher Tags: The tags of the Publisher.
-
Pings: The number of pings (LMS Ping Post products only).
-
Pings Accepted: The number of accepted pings (LMS Ping Post products only).
-
Pre-screening: The number of applications that have been triggered to receive an SMS code. At this step, users are asked to verify their phone number by receiving a code via SMS. Data in the column is displayed in the following format: XX(XXX):
-
XX: The current number of users who did not proceed to receive the SMS code.
-
(XXX): The total number of users who have been triggered to receive an SMS code.
-
-
Verifying: The number of users who requested and received a verification code via SMS. At this step, users are required to input the SMS verification code. Once they enter the code, the application will be processed and will turn into a Reject or Sold status. Data in this column is displayed in the following format: XX(XXX):
-
XX: The current number of users who received SMS but have not entered the code yet.
-
(XXX): The total number of users who received the SMS code.
-
-
Verified: The total number of users who have successfully completed the verification process.
-
Post (LMS only): The number of posts.
-
Lead: The number of leads.
-
Sold: The number of sold leads.
-
Adjusted/Returned: The number of adjusted leads. Note that the multiple adjustment transactions for the same lead are reported as one adjusted lead.
-
Reject: The number of rejected leads.
-
Redirect (LMS only): The number of redirects. In addition, the ratio of redirects to sold leads is shown in parentheses, for example, 1(100%).
-
Consent (Call Logic only): The number of collected voice consents.
-
Dup (1/7/30/45 days), %: The duplicate percentage in one, seven, 30, and 45 days.
-
Duration (Call Logic only): The total call duration.
-
Duration (Buyer) (Call Logic only): The call duration after it was connected to the Buyer.
-
Avg. Duration (Call Logic only): The average call duration for the selected date range.
-
Cons. Payout (Call Logic only): The total amount of payout for consent.
-
EPL: The Publisher earnings per lead (Publisher earnings divided by the total number of leads).
-
ALP: The average lead price (Publisher earnings divided by the total number of sold leads).
-
Pub: The Publisher's earnings.
-
ADM: Admin revenue (ADM = TTL - PUB - REF - AGN).
-
TTL: Total revenue.
-
Ref: The Referral payment.
-
AGN: The Agent payment.
-
Date (Group by Date tab): The dates within the selected range.
-
Product (Group by Product tab): The name of the Product.
-
Channel (LMS only): The Publisher Channel.
-
Channel Label (LMS only): The Publisher channel label.
-
Source (LMS only): The Publisher source.
-
Avg. Duration (Buyer) (Call Logic only): The average call duration after it was connected to the Buyer.
-
Publisher Phone Number (Call Logic only): Reserved phone number for the Publisher.
-
Hour (Group by Hour tab): The hour range 00-23.
-
Phone Number Label (Call Logic only): The phone number label.
-
# Of Hold Days: The publisher payout hold period.
-
State (LMS only): The US state code.
-
Ping Tree: The name of the Ping Tree.
-
Rev-Share, %: The Rev-Share percentage.
-
Phone Number Tag (Call Logic only): The list of phone number tags.
Read more about the Phone Number Tags in this Knowledge Base article. -
Phone Number Group (Call Logic only): The list of phone number groups.
Read more about the Phone Number Groups in this Knowledge Base article. -
Converted: The number of purchased leads with the “Converted” disposition status assigned by the Buyer. Check the “Show Quality/Disposition” box to see this column.
-
Bad Contact: The number of purchased leads with the “Bad Contact” disposition status assigned by the Buyer. Check the “Show Quality/Disposition” box to see this column.
-
Never Applied: The number of purchased leads with the “Never Applied” disposition status assigned by the Buyer. Check the “Show Quality/Disposition” box to see this column.
-
Withdrawn: The number of purchased leads with the “Withdrawn” disposition status assigned by the Buyer. Check the “Show Quality/Disposition” box to see this column.
-
Pending: The number of purchased leads with the “Pending” disposition status assigned by the Buyer. Check the “Show Quality/Disposition” box to see this column.
-
Publisher Adj.: The Publisher earnings adjustment amount. Check the “Adjusted/Returned” box to see this column.
-
ADM Adj.: Admin revenue adjustment amount. Check the “Adjusted/Returned” box to see this column.
-
TTL Adj.: Total revenue adjustment amount. Check the “Adjusted/Returned” box to see this column.
-
REF Adj: The referral payment adjustment amount. Check the “Adjusted/Returned” box to see this column.
-
AGN Adj: The agent payment adjustment amount. Check the “Adjusted/Returned” box to see this column.
-
iClear Reject Global: The number of rejected leads by the iClear configuration.
-
iClear Reject Rules: The number of rules that have been set up for the specific Publisher.
Note: To display the “Pub”, “TTL”, and “ADM” columns for the particular Publisher Agent, you should enable the “Show Total Revenue” option in the Employees section by clicking the “Edit” button next to the corresponding Publisher Agent. Read more about the Employees section in the Knowledge Base article.
-2.png?hsLang=en)
You can add custom columns to the report by clicking the “Add New Column” button. Read more about how to create custom columns and how to manage them in this Knowledge Base article.
You can narrow down the search results by using the following filters:
-
Date: Select the date range for the report.
-
Posting Type: Select the type of leads posting (Direct Post, Ping-Post, Ping-Post Call, Smart, Smart Legs).
-
Product: Select the Product.
-
Publisher Agent: Select the Publisher Agent.
-
Publisher: Select the Publisher.
-
Publisher Label: Select the Publisher Label.
-
Publisher Phone Number: Select the reserved phone number of the Publisher.
-
Publisher Source: Select the Publisher Source.
-
Channel Label: Select the Channel Label.
-
Phone Number Group: Select the Phone Number Group.
-
Phone Number Tag: Select the Phone Number Tag.
-
Publisher Tags: Select the Publisher Tag.
-
Show Media Buy (checkbox): Check the box to track the efficiency of your advertising budget.
-
Show only repost data (checkbox): Check the box to show only repost data for leads.
-
Show Quality/Disposition (checkbox): Check the box to show the lead quality/disposition.
-
Adjusted/Returned (checkbox): Check the box to show the price adjustment.
-
Ping Tree: Select the Ping Tree.
-
Method (LMS only): Select the post/form method.
-
Publisher Channel (LMS only): Select the Publisher Channel.
-
State (LMS only): Select the state.
You can view the report grouped by the following criteria:
For Call Logic:
-
Group by Publisher
-
Group by Date
-
Do Not Group
-
Group by Hour
-
Group by Phone Number
-
Group by Source
-
For Accounting
-
Group by Ping Tree
-
Group by Product
-
Group by Phone Number Tag
-
Group by Phone Number Group
For LMS Sync:
-
Group by Publisher
-
Group by Date
-
Do Not Group
-
Group by Hour
-
Group by Channel
-
Group by Channel Label
-
Group by Source
-
For Accounting
-
Group by State
-
Publisher by State
-
Group by Ping Tree
-
Group by Product
Click the "Export" button and select "Current Page to CSV" to export the current page to CSV or "All Pages to CSV" to export all pages to CSV.
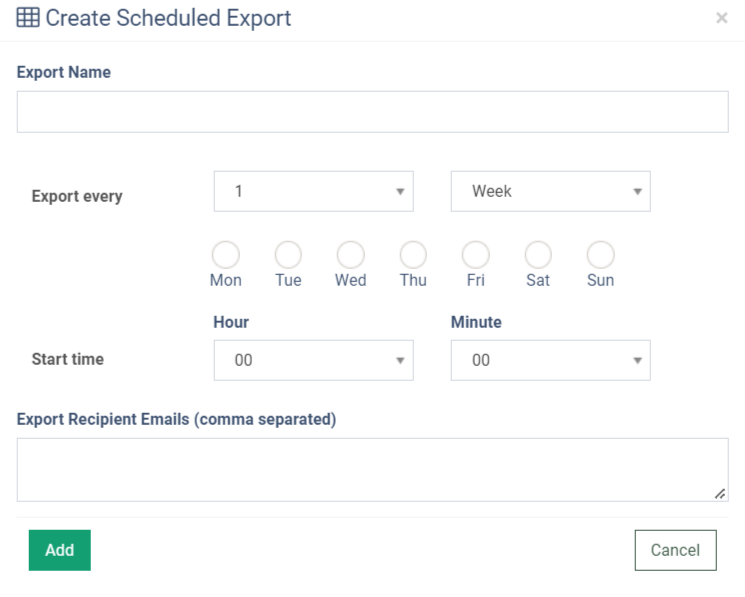
To create a scheduled reporting export request, select the “Scheduled Export” option. Enter the export name in the “Export Name” field in the pop-up window.
Select the number of weeks or months for the repeat period, select the day and time to start export, and enter recipient emails in the “Export Recipient Emails (comma separated)” field. Click the “Add” button to complete the action.
Read more about the Scheduled Report Export in this Knowledge Base article.