It is a set of instructions and prompts that guide your operators during phone conversations with clients. This tool allows you to design the call process by using different types of blocks. You can add conditional steps, insert text as needed, invite other operators to join the ongoing call, and even set up payment details for your operators.
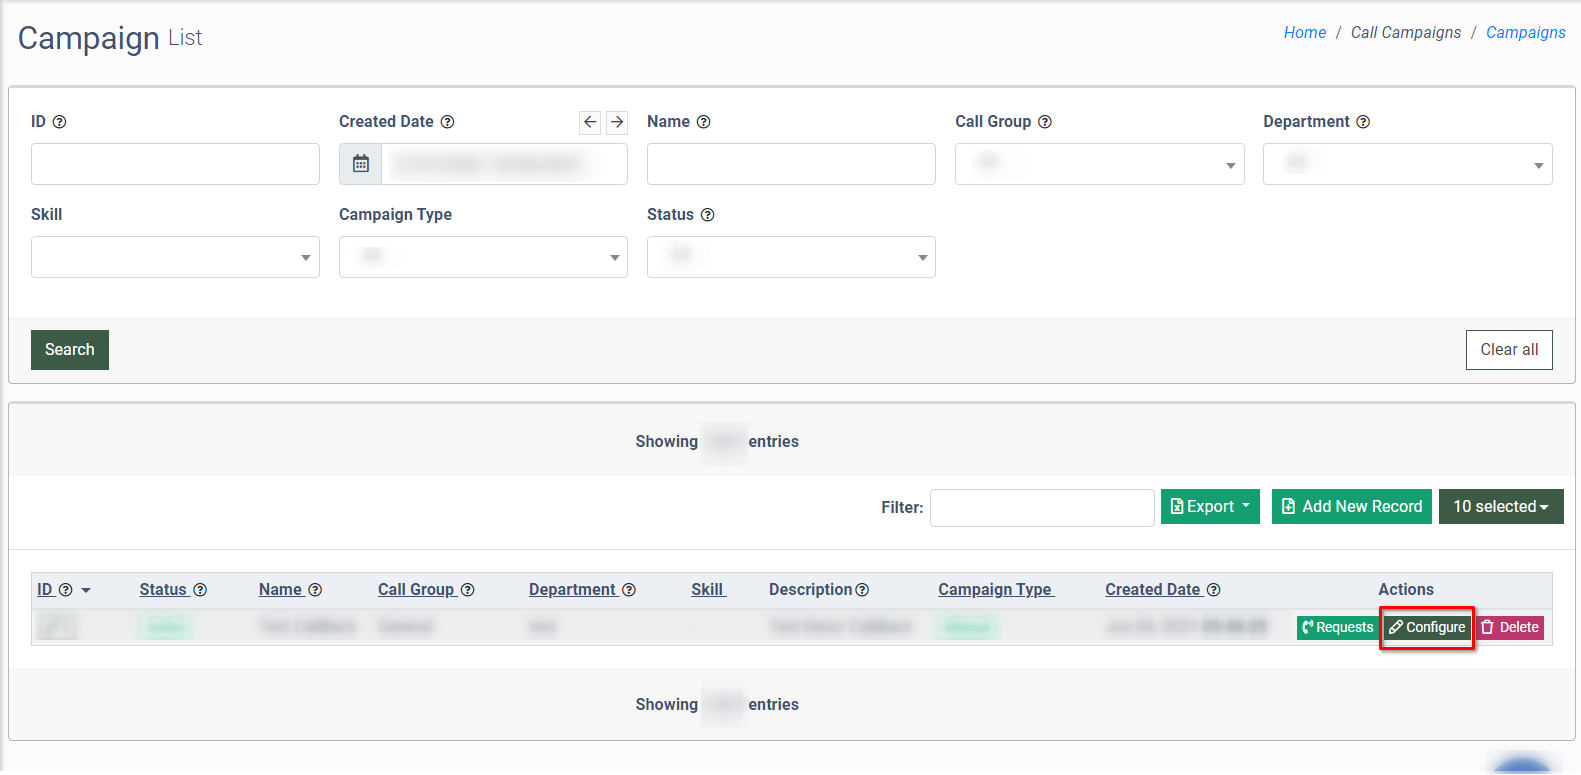
To view the Call Script builder, go to the Call Campaigns > Campaigns section, select the corresponding campaign, and click the “Configure” button in the “Actions” column.
Note, that the campaign with the “Auto” type only can be selected for the Call Script building.
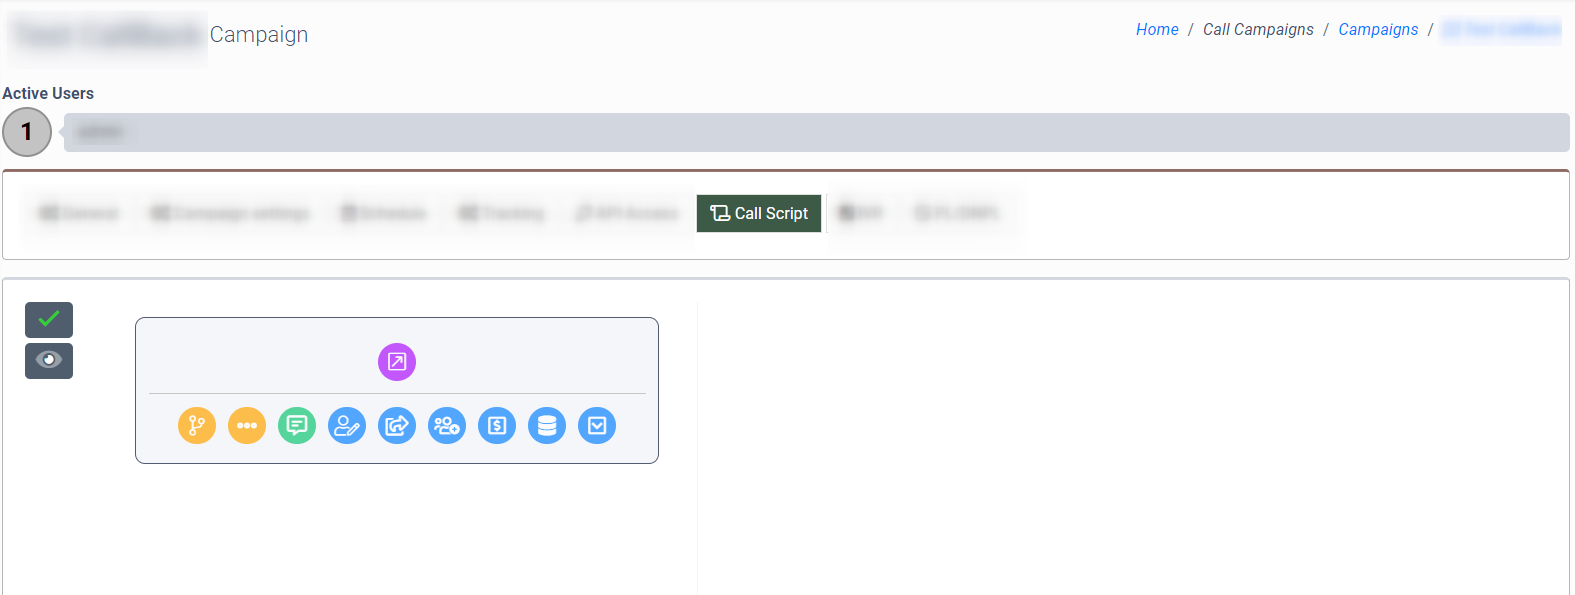
In the Campaign Setup section select the “Call Script” tab.
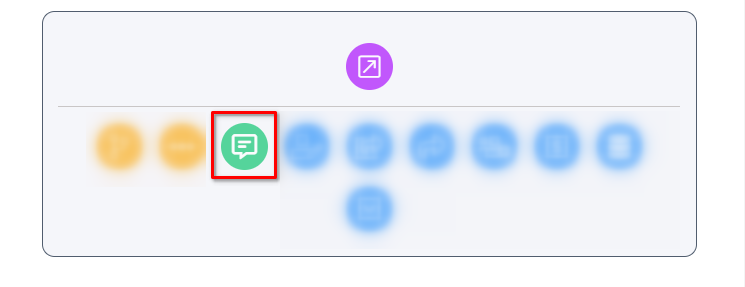
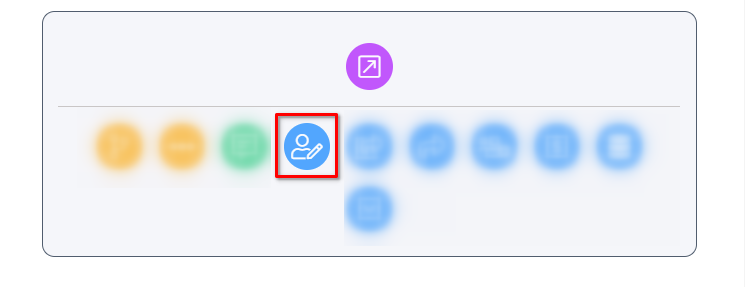
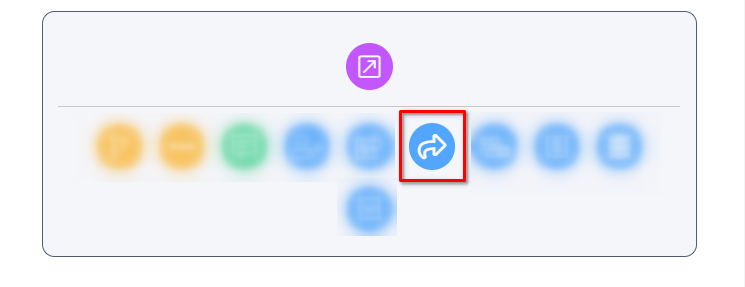
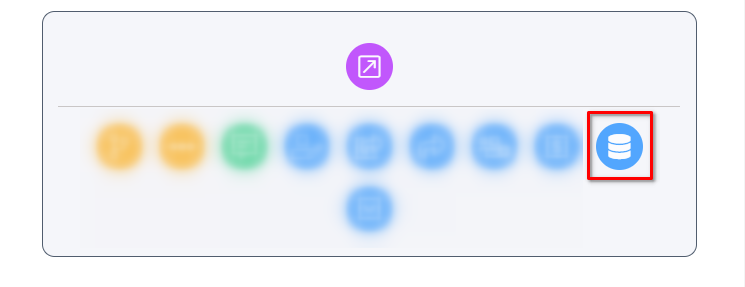
The list of available blocks contains the following items:
- Condition
- Operator buttons
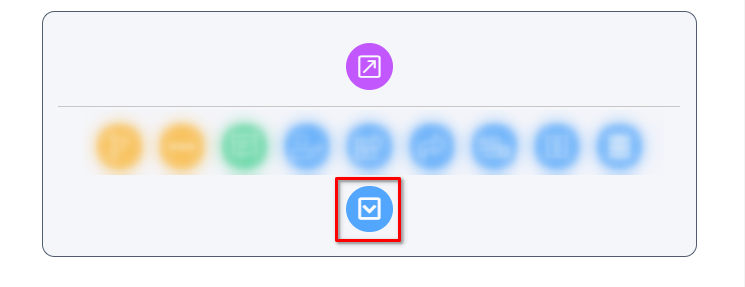
- Text out
- Operator input
- Auto Integration
- Manual Integration
- Invite
- Operator payout
- Save to Lead Stash
- Transfer to
- Converted

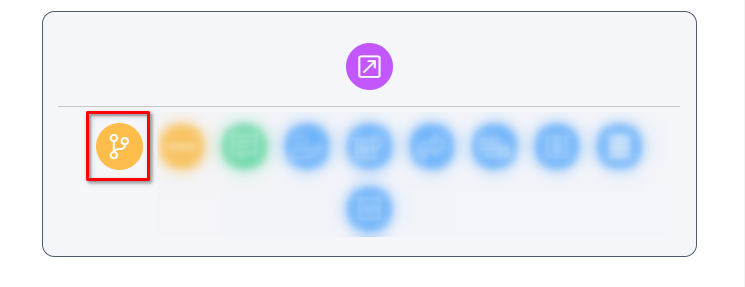
Condition
The “Condition” block allows you to move across the script branches depending on the result of the evaluation of the values in fields.
To add the block, click the “Condition” button.
To manage the block, click the “Gear” button at the top of the block, or select the type of field for the data recording in the “Category” field.
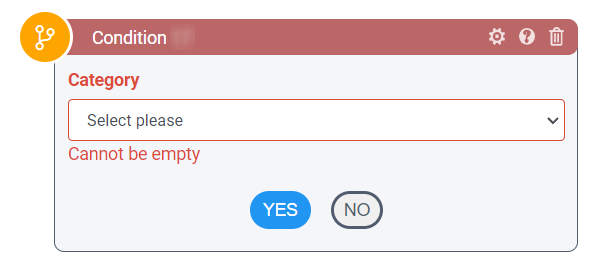
Fill in the following fields in the block or in the “Block Settings” pop-up window:
- Title: Enter the name of the block.
- Category: Select the type of fields for the data recording (Call Group fields, Custom Fields). Depending on the option selected the following fields should be filled up:
- If the “Call Group fields” option is selected:
- Parameter: Select the field set in the Call Group from which the value for comparison will be obtained.
- Condition: Select the logical condition for the comparison between the value from the parameter and set value (Equals, More, More or equal, Less, Less or equal, Is one of, Not one of, Is empty, Is not empty, String contains, Not Equals).
- Value: Enter the value for the comparison.
- Result: The final resulting expression.
- If the “Custom Fields” option is selected:
- Parameter: Select the custom field from which the value for comparison will be obtained.
- Condition: Select the logical condition for the comparison between the value from the parameter and set value (Equals, More, More or equal, Less, Less or equal, Is one of, Not one of, Is empty, Is not empty, String contains, Not Equals).
- Value: Enter the value for the comparison.
- Result: The final resulting expression.
Note, that for the “Call Group fields” option usage you should have these fields set and activated on the Call Group level.
Note, that for the “Custom Fields” option usage you should have these fields set in the “Operator input” block.
To apply the current changes and the entered information, click the "Apply" button.
To save the changes in the block, click the "Save" button.
To set the call script flow if the condition expression is valid, click the “Yes” button and add the corresponding blocks.
To set the call script flow if the condition expression is invalid, click the “No” button and add the corresponding blocks.


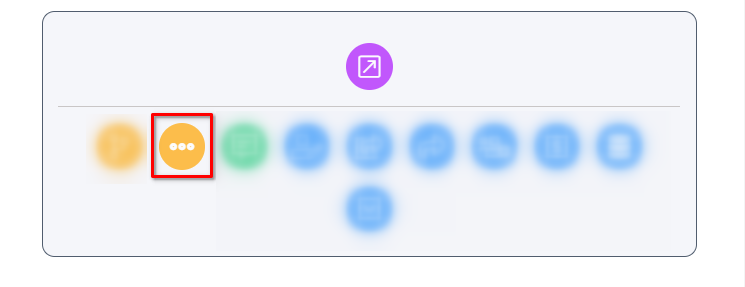
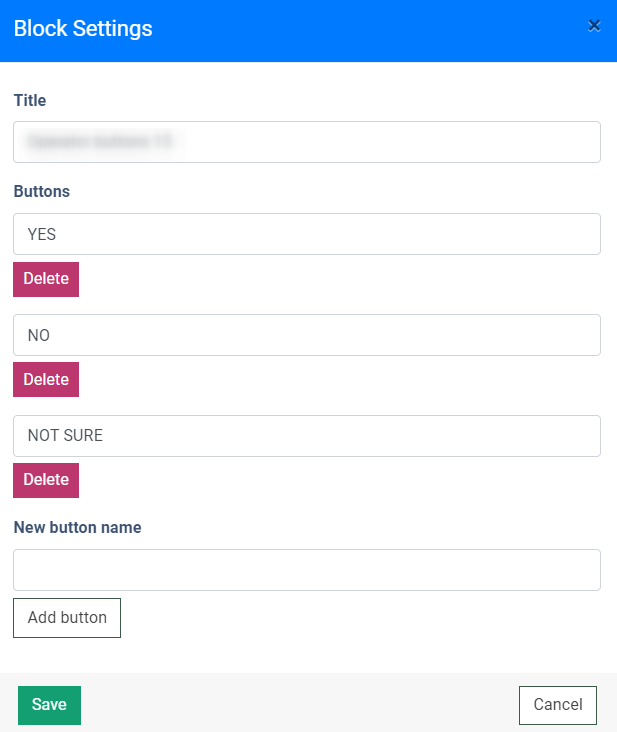
Operator buttons
The “Operator buttons” block allows you to insert the buttons with the corresponding actions to move through the script.
To add the block, click the “Operator buttons” button.
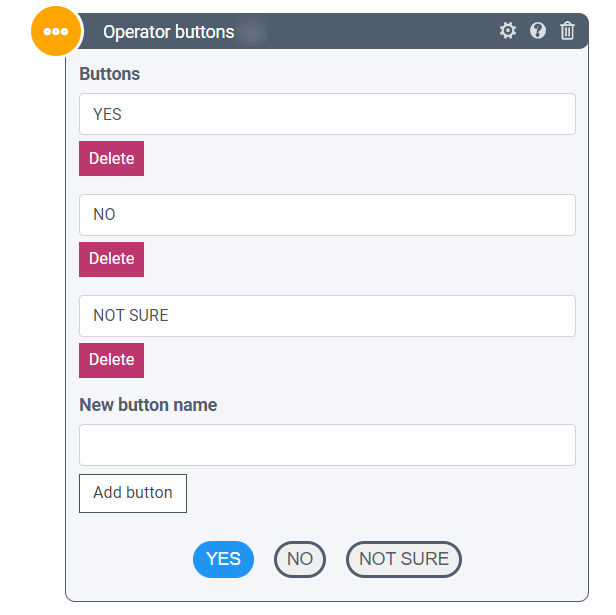
To create a new button, enter the name in the “New button name” field and click the “Add button” button.
To delete the existing button, click the “Delete” button below the corresponding field.
The same operations are available if you click the “Gear” button at the top of the block and amend the changes in the “Block Settings” pop-up window.
Click the “Save” button to complete the settings.
To set the branching for the Call Script that depends on the particular button pressed by the operator, click the button in the block directly and add the relevant block. This action allows you to build the script flow for every button in the block.
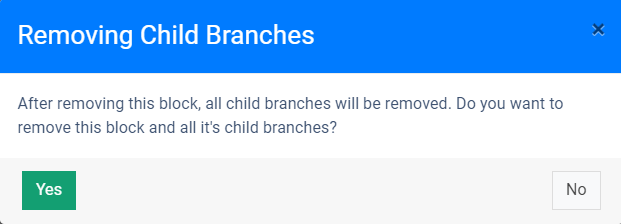
Note, that by deleting the main branching “Operator buttons” block, all child branches related to this block will be removed too. To perform this action, click the “Delete” button in the “Operator buttons” block and confirm the operation by clicking the “Yes” button in the “Removing Child Branches” pop-up window.
Text out
The “Text out” block allows you to display the corresponding text along with the placeholders in the Operator Dashboard for the operator.
To add the block, click the “Text out” button.
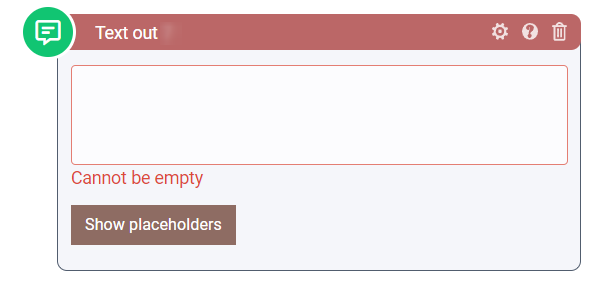
To manage the block, click the “Gear” button at the top of the block.
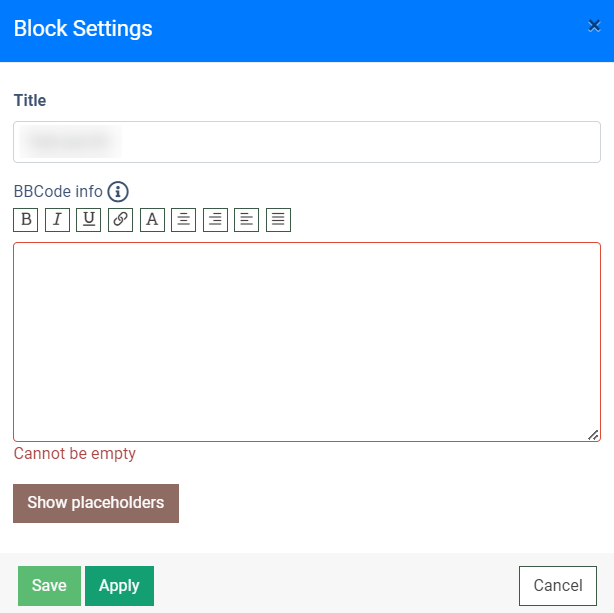
Enter the name of the block in the “Title” field, and enter the message for the operator in the text field in the “Block Settings” pop-up window.
To insert the BBCode element or use the tag, click the corresponding button and input the element to the message.
To view the list of available placeholders, click the “Show placeholders” button.
Note, that the list of available placeholders will be available as soon as corresponding fields are added and enabled on the Call Group level.
To apply the current changes and the entered information, click the "Apply" button.
To save the changes in the block, click the "Save" button.
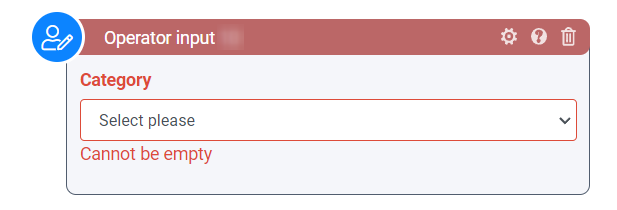
Operator input
The “Operator input” block allows for data entry from the operator’s side. The operator can enter the information into the field in the Operator Dashboard during the outbound call processing. This data can be saved to the Lead Stash or Lead Info section and used for further call processing.
To add the block, click the “Operator input” button.
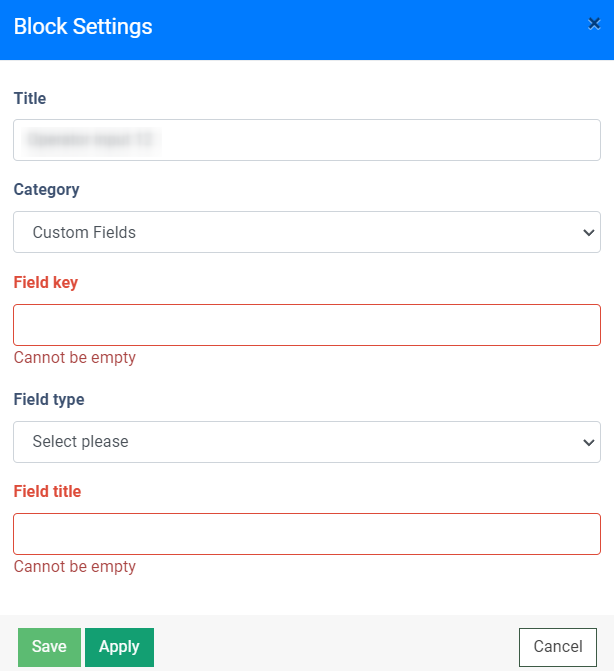
To manage the block, click the “Gear” button at the top of the block, or select the type of field for the data recording in the “Category” field.
Fill in the following fields in the block or in the “Block Settings” pop-up window:
- Title: Enter the name of the block.
- Category: Select the type of fields for the data recording (Call Group fields, Custom Fields). Depending on the option selected the following fields should be filled up:
- If the “Call Group fields” option is selected:
- Field key: Select the field key for the data recording from the selected Call Category. The field key is stored in the Call Group section > Client Information Form tab > “Title” field.
- Field type: Select the data type for the field (text, number).
- Field title: Enter the name of the field that will be displayed in the script.
- If the “Custom Fields” option is selected:
- Field key: Enter the name of the key that is related to the custom field. The custom field is stored in the Lead Stash. It may be additional information about the lead that was exported from another system component, or data stored in the Lead Stash during previous call processing.
- Field type: Select the data type for the field (text, number).
- Field title: Enter the name of the field that will be displayed in the script.
Note, that for the “Call Group fields” option usage you should have these fields set and activated on the Call Group level.
To apply the current changes and the entered information, click the "Apply" button.
To save the changes in the block, click the "Save" button.

To store the data entered into the corresponding fields, add the “Save to Lead Stash” block after the corresponding input block.
Auto Integration
The “Auto Integration” block allows you to add the event tracking action to the Call Script, which will be triggered and performed automatically when the call ends, after passing the specified Call Script block.
Note: The “Auto Integration” block is not displayed in the Call Script directly, but the action is triggered and performed automatically when the call ends, after passing this block.

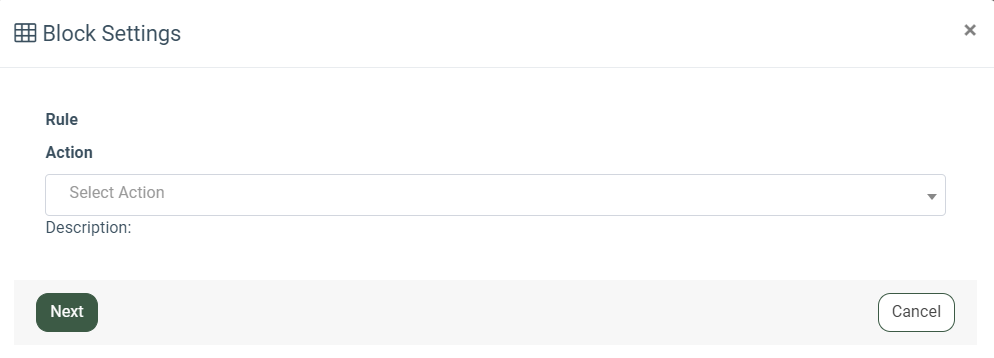
To manage the block, click the “Gear” button at the top of the block. Select the corresponding action in the “Action” field of the “Block Settings” pop-up window.
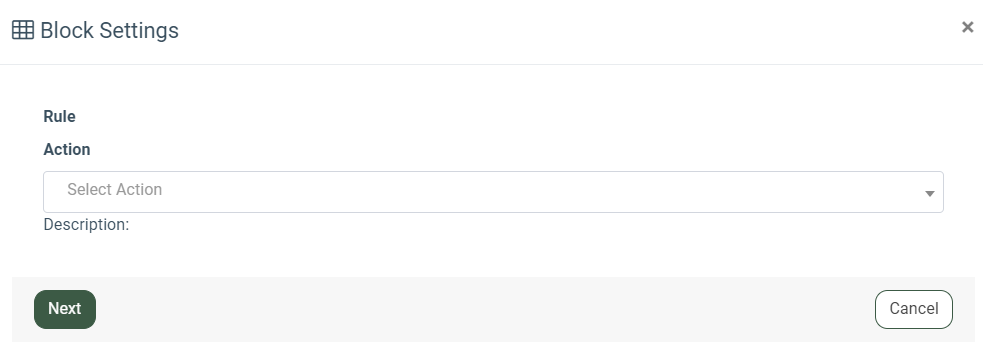
The following actions are available:
- Send to Opt Intel: The action allows you to add an email address or phone number to the existing Email Opt-out List/Phone Number Opt-out List in Opt-Intel when the selected trigger event occurs. Read more about the “Send to Opt Intel” action in the following Knowledge Base article.
- Send to E-Delivery Contact List: The action allows you to add an email address and/or phone number to the existing Contacts List in E-Delivery when the selected trigger event occurs. Read more about the “Send to E-Delivery Contact List” action in the following Knowledge Base article.
- Add to DNPL: The action allows you to add data to the existing DNPL list when the selected trigger event occurs. Read more about the “Add to DNPL” action in the following Knowledge Base article.
- Post Lead to LMS: The action allows you to post leads to LMS. Read more about the “Post Lead to LMS” action in the following Knowledge Base article.
To complete the configuration, click the “Next” button and fill in the corresponding fields with settings.
All actions are logged and displayed within the Call Journey.
Manual Integration
The “Manual Integration” block allows you to add the event tracking action to the Call Script. The operator can perform this action or skip it when the call reaches the ongoing block.
This block is displayed in the Call Script during the active call, and the operator has two buttons to trigger it: click the “Send” button to perform the corresponding action, or click the “Skip” button to skip this action.

To manage the block, click the “Gear” button at the top of the block. Select the corresponding action in the “Action” field of the “Block Settings” pop-up window.
The following actions are available:
- Send to Opt Intel: The action allows you to add an email address or phone number to the existing Email Opt-out List/Phone Number Opt-out List in Opt-Intel when the selected trigger event occurs. Read more about the “Send to Opt Intel” action in the following Knowledge Base article.
- Send to E-Delivery Contact List: The action allows you to add an email address and/or phone number to the existing Contacts List in E-Delivery when the selected trigger event occurs. Read more about the “Send to E-Delivery Contact List” action in the following Knowledge Base article.
- Add to DNPL: The action allows you to add data to the existing DNPL list when the selected trigger event occurs. Read more about the “Add to DNPL” action in the following Knowledge Base article.
- Post Lead to LMS: The action allows you to post leads to LMS. Read more about the “Post Lead to LMS” action in the following Knowledge Base article.
To complete the configuration, click the “Next” button and fill in the corresponding fields with settings.
All actions are logged and displayed within the Call Journey, including which action was chosen: Send or Skip.
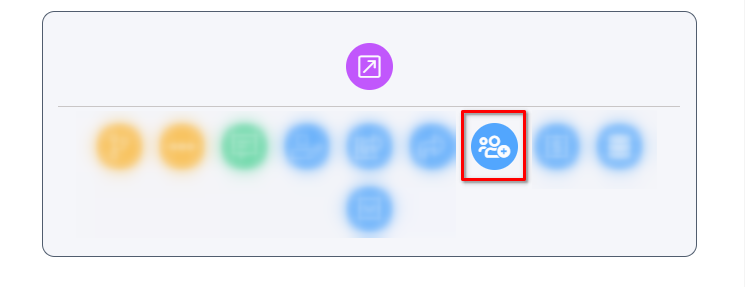
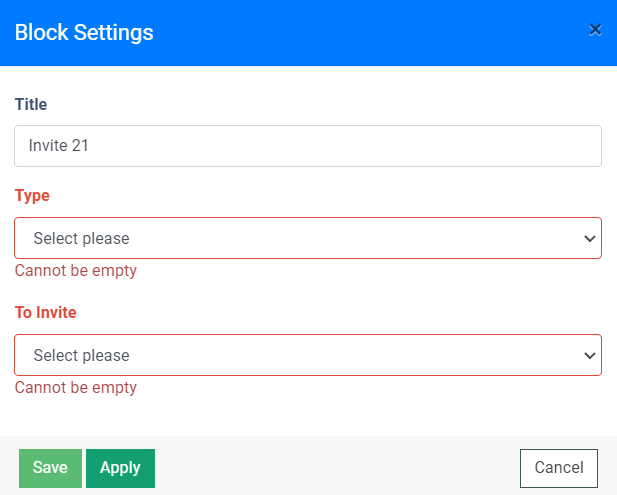
Invite
The “Invite” block allows you to send a request for joining the ongoing call for another operator.
To add the block, click the “Invite” button.
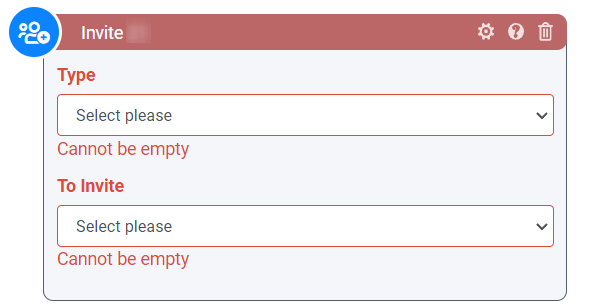
Fill in the following fields in the block directly, or in the “Block Settings” pop-up window:
- Type: Select the type of invitation for the operator (Invite, Whisper Invite).
- If the “Invite” option is selected, the operator will be able to join the call and process it along with the current operator.
- If the “Whisper Invite” option is selected, the operator will join the ongoing outbound call with no option to speak to the lead (client) but with the ability to give pieces of advice to the operator.
- To Invite: Select the operator you would like to join the call.
Note, that the route for the invitation should be preset as a predefined route in the Call Group before using this block.
To apply the current changes and the entered information, click the "Apply" button.
To save the changes in the block, click the "Save" button.
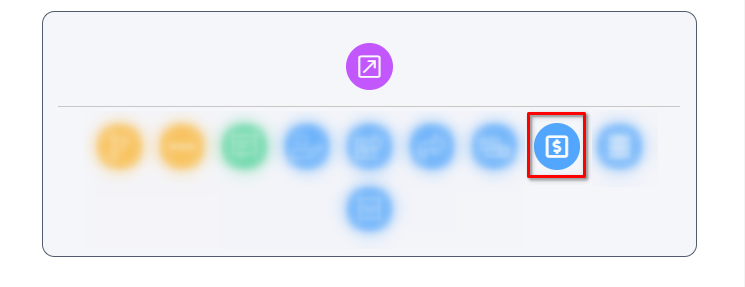
Operator payout
The “Operator Payout” block allows you to set the amount that should be paid to the operator.
To add the block, click the “Operator Payout” button.
An example of the block usage and workflow:
- The Call Script with the “Text Out”, “Operator Payout”, and “Transfer To” blocks are created and built. The amount that should be added to the operator’s balance for one call is entered in the “Operator Payout” block.

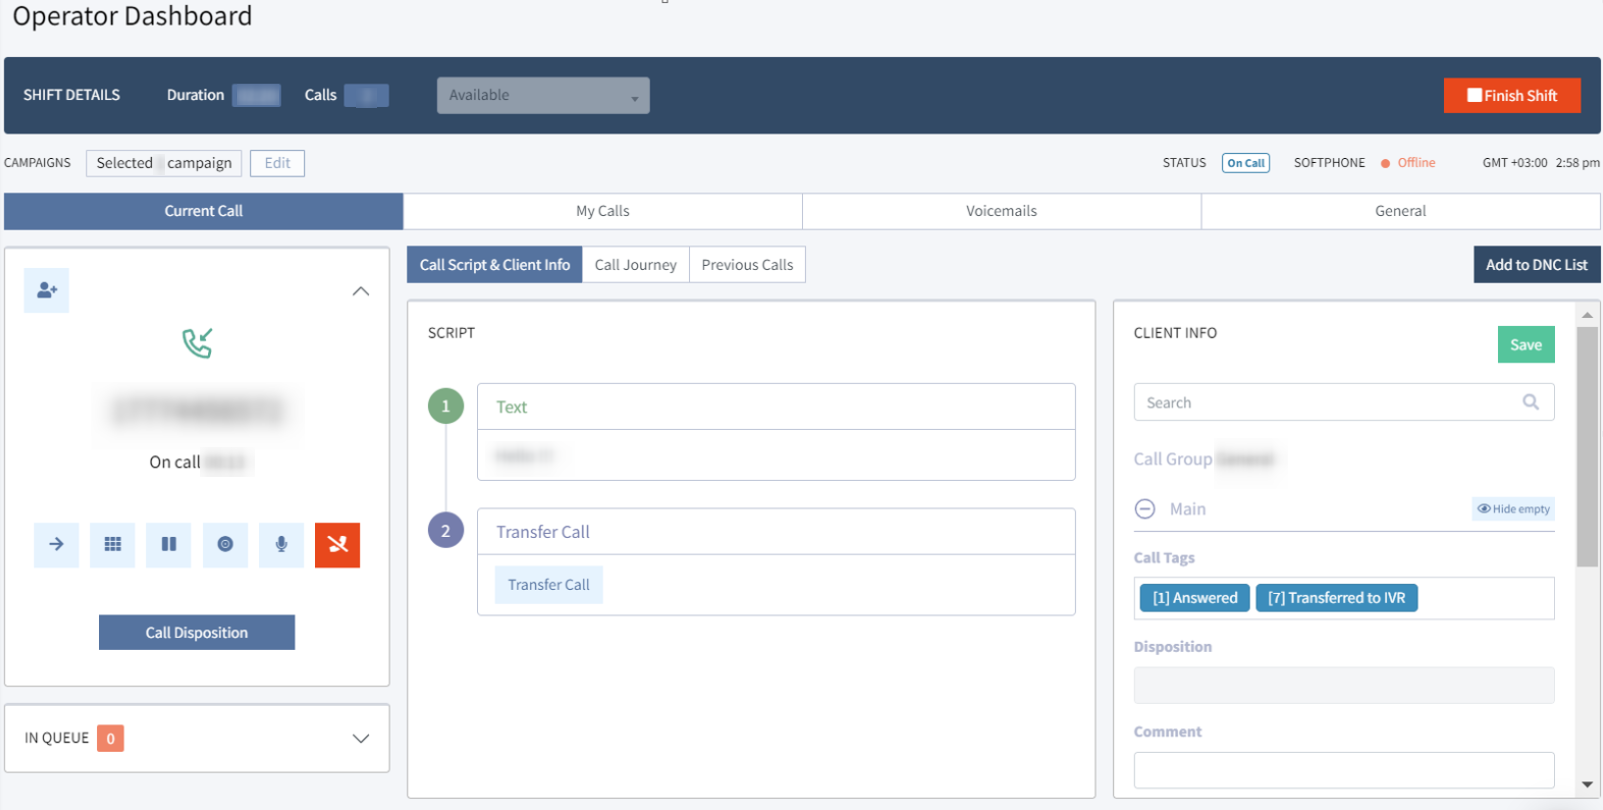
- The operator is performing the call processing via the Operator Dashboard section. As you can see in the screenshot below, the call was processed through the “Text Out”, “Operator Payout”, and “Transfer To” blocks.

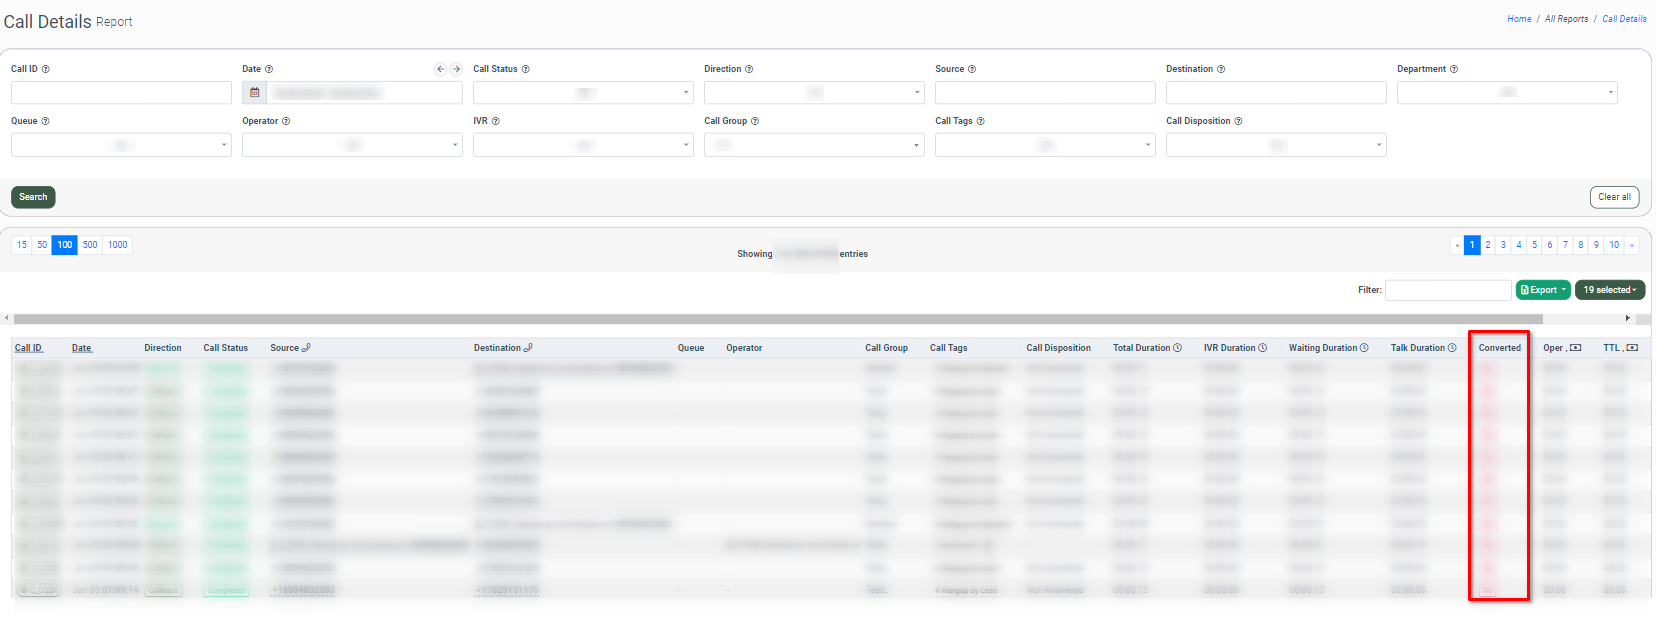
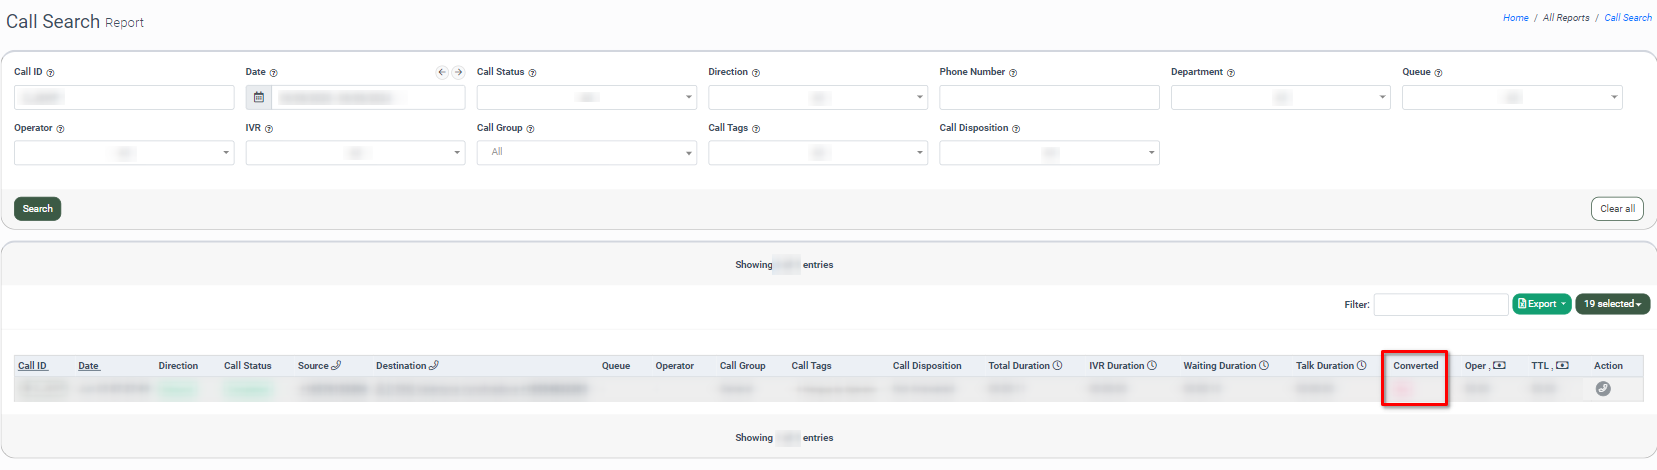
- As soon as the call is processed, the corresponding call record will be displayed in the Call Details report and the amount earned by the operator is in the “Oper” field.
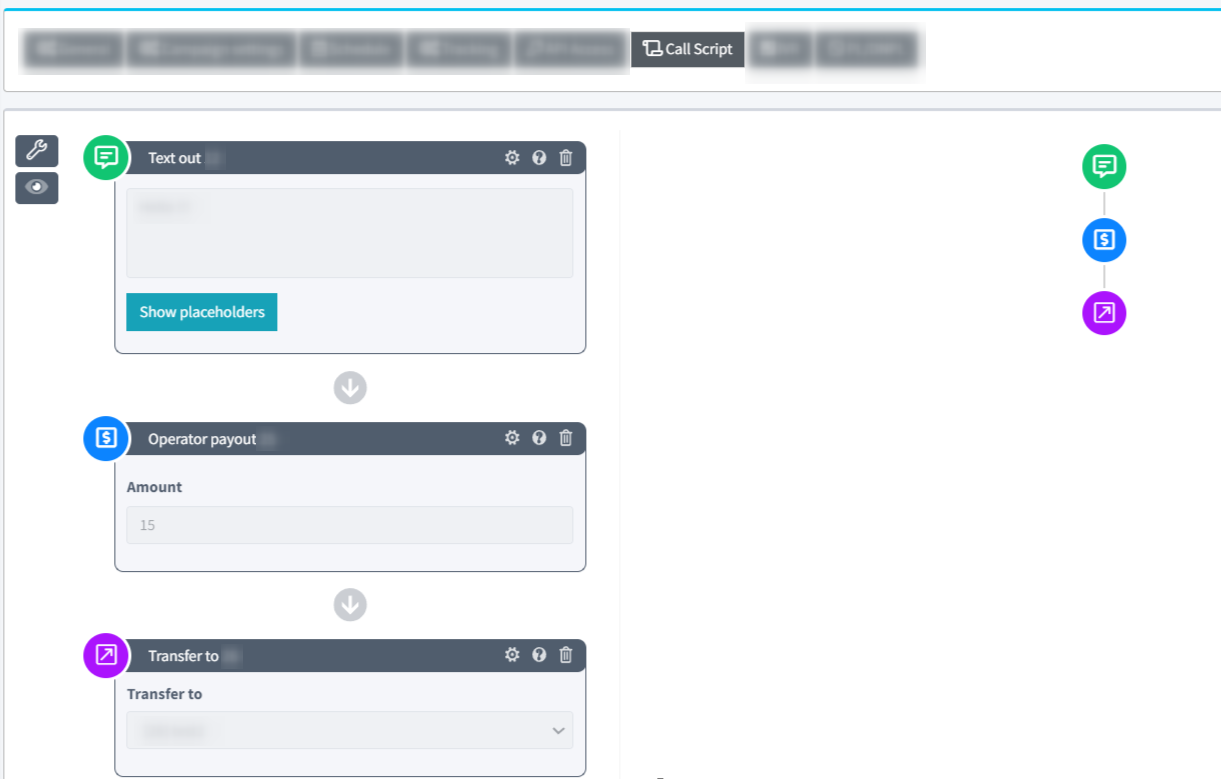

Enter the amount that should be paid to the operator in the “Amount” field directly in the block, or click the “Gear” button at the top of the block and make a corresponding selection in the “Amount” field.
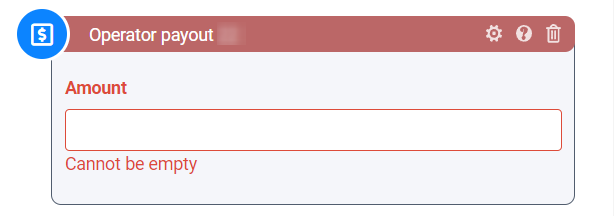
To change the title of the block, click the “Gear” button at the top of the block and enter a new name of the block in the “Title” field of the “Block Settings” pop-up window.
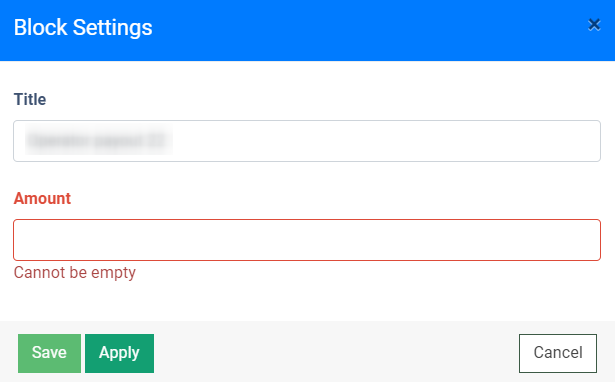
To apply the current changes and the entered information, click the "Apply" button.
To save the changes in the block, click the "Save" button.
The amount for the Oprator’s payout will be displayed in the “Oper” data column of the Call Details and Call Search reports.
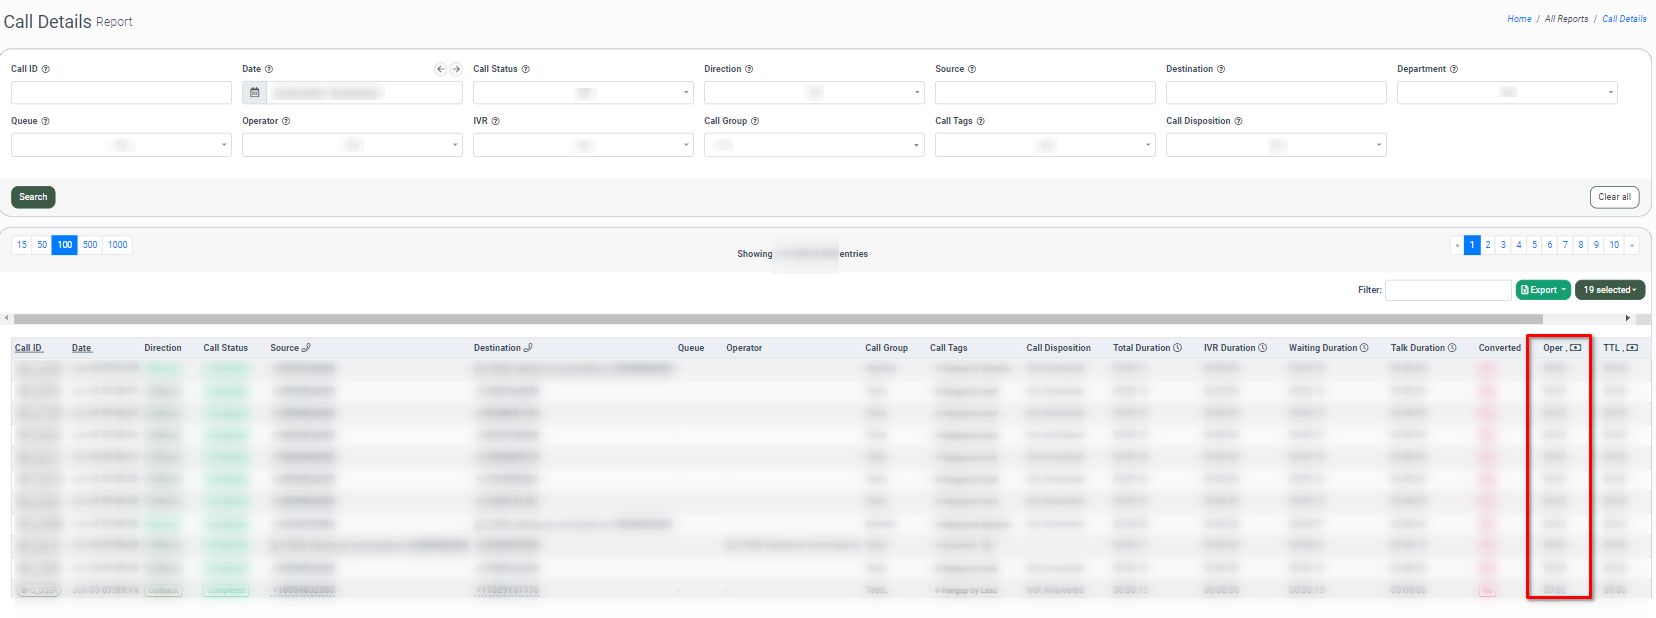
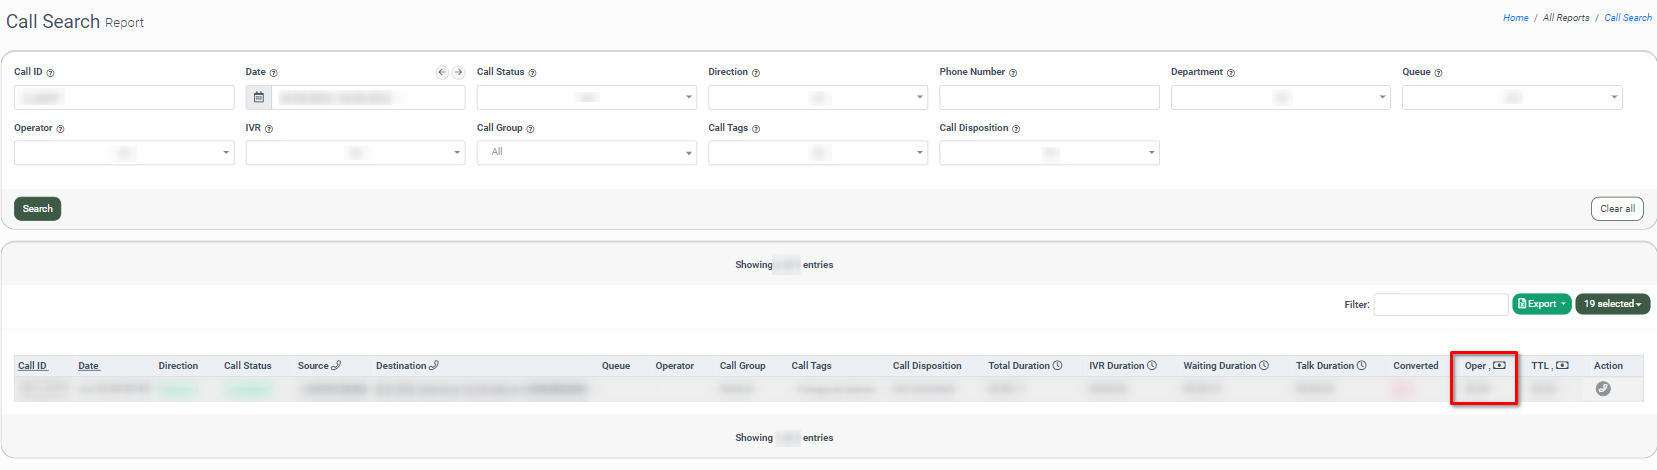
Read more information about the Call Details report in the following Knowledge Base article.
Read more information about the Call Search report in the following Knowledge Base article.
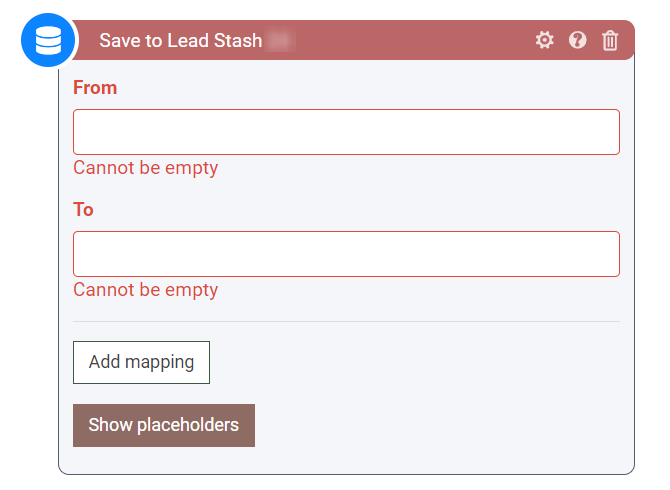
Save to Lead Stash
The “Lead Stash” block allows you to set the fields for the data recording to the Lead Stash.
The Lead Stash is an internal data storage system that allows you to store and access lead data.
Read more information about the Lead Stash in the following Knowledge Base article.
The data will be obtained from the operator’s input during the call processing.
To add the block, click the “Lead Stash” button.
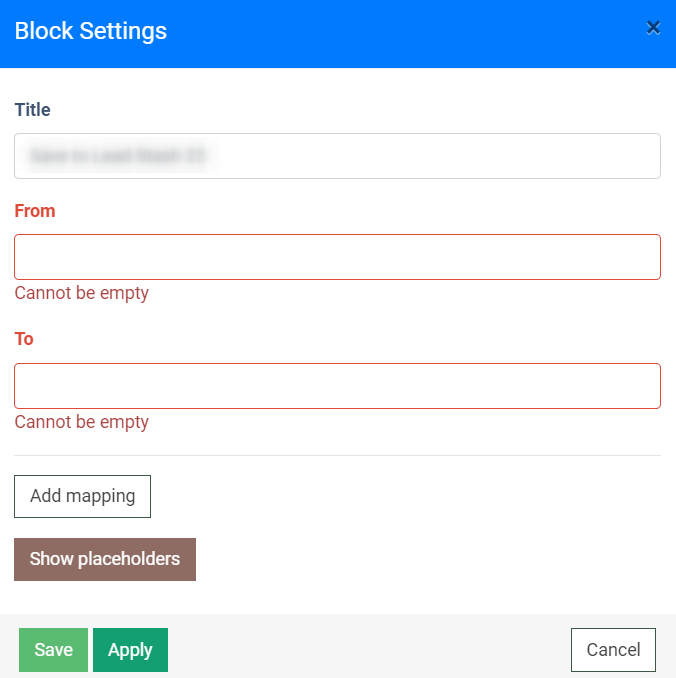
Fill in the following fields directly in the block, or in the “Block Settings” pop-up window:
- Title: Enter the name of the block.
- From: Select the field of the call script from which the data should be recorded. The fields should be added via the call script constructor, or obtained from the Call Group settings.
- To: Select the fields of the Lead Stash to which the data should be recorded. If the mentioned field is not in the Lead Stash, a new field will be created there.
To add an additional field for the recording to the Lead Stash, click the “Add mapping” button.
To view the list of available placeholders, click the “Show placeholders” button.
To hide the list of available placeholders, click the “Hide placeholders” button.
Note, that all field names in this pop-up should be entered in the placeholder format.
To apply the current changes and the entered information, click the "Apply" button.
To save the changes in the block, click the "Save" button.
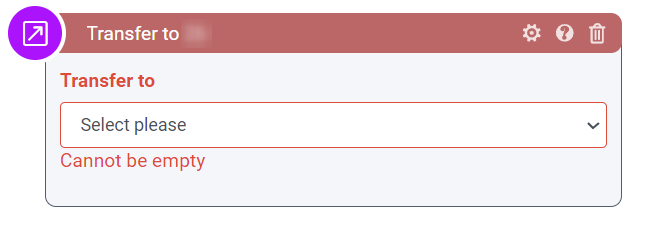
Transfer to
The “Transfer to” block allows you to add a route for the call transfer.
To add the block, click the “Transfer to” button.
Select the route for the call transfer in the “Transfer to” field directly in the block, or click the “Gear” button at the top of the block, and make a corresponding selection in the “Transfer to” field.
Note, that the predefined routes should be preset in the “Call Group” section before using this block.
To change the title of the block, click the “Gear” button at the top of the block and enter a new name of the block in the “Title” field of the “Block Settings” pop-up window.
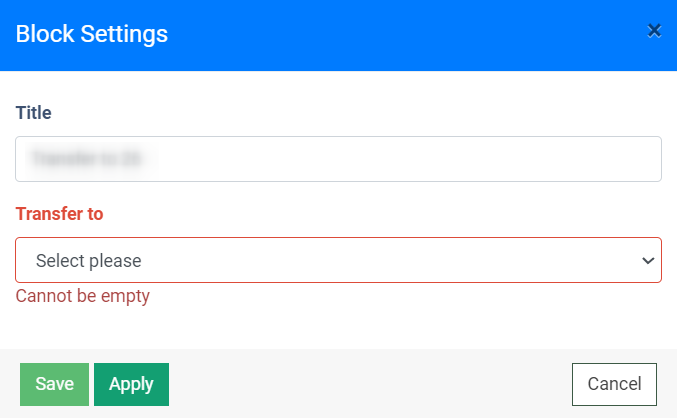
To apply the current changes and the entered information, click the "Apply" button.
To save the changes in the block, click the "Save" button.
Converted
The “Converted” block allows you to set the “Yes ” status for the lead call after the corresponding transfer, so the “Yes” value will be set for the “Converted” field of the Call Details and Call Search reports.
This block does not provide any configurations since its main aim is to set the “Converted” status after lead processing through the block.
Read more information about the Call Details report in the following Knowledge Base article.
Read more information about the Call Search report in the following Knowledge Base article.
 To add the block, click the “Converted” button.
To change the title of the block, click the “Gear” button at the top of the block and enter a new name of the block in the “Title” field of the “Block Settings” pop-up window.
Note, that the “Converted” status will be set for the lead call only if the “Transfer To” block is added to the Call Script. The "Transfer To" and "Converted" blocks should be placed and set on one branch of the Call Srypt. The "Transfer To" block should be placed after the "Converted" block.
