The Ping Tree Settings list allows you to create, view, and manage ping trees in the system.
Ping Tree Settings List
To access the list, go to the Client Management > Setup > Ping Tree Settings section.
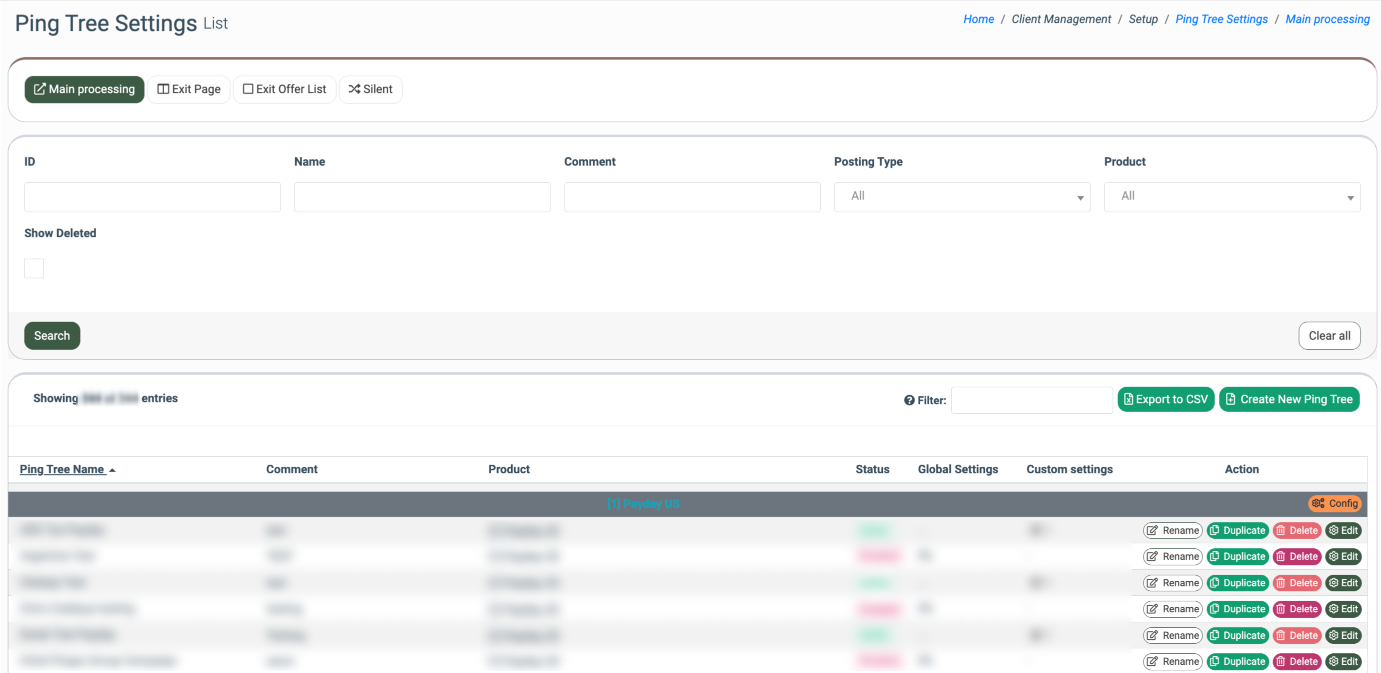
The primary tabs of the page correspond to the ping tree types based on the selected platform (LMS, Call Logic):
-
Main processing: The tab displays a list of all ping trees for the Main processing Campaign type, grouped by the Product (for LMS only).
-
Exit Page: The tab displays a list of all ping trees for the Exit Page Campaign type grouped by the Product (for LMS only).
-
Exit Offer List: The tab displays a list of all ping trees for the Exit Offer Campaign type grouped by the Product (for LMS only).
-
Silent: The tab displays a list of all ping trees for the Silence Campaign type grouped by the Product.
-
Direct Call: The tab displays a list of all ping trees for the Direct Call Campaign type grouped by the Product (for Call Logic only).
Read more about Campaigns and their types in this Knowledge Base article.
You can narrow down the search results by using the following filters:
-
ID: Enter the ID number of the Ping Tree.
-
Name: Enter the name of the Ping Tree.
-
Comment: Enter the comment for the Ping Tree
-
Posting Type: Select the type of leads posting (Direct Post, Ping-Post, Ping-Post Call, Smart, Smart Legs).
-
Product: Select the Product from the list.
-
Show Deleted: Check the box to display deleted ping trees.
The Ping Tree Settings list contains the following information:
-
ID: The ID number of a Ping Tree in the system.
-
Ping Tree Name: The name of the Ping Tree.
-
Comment: Additional information about the Ping Tree.
-
Product: The name of the product for the Ping Tree.
-
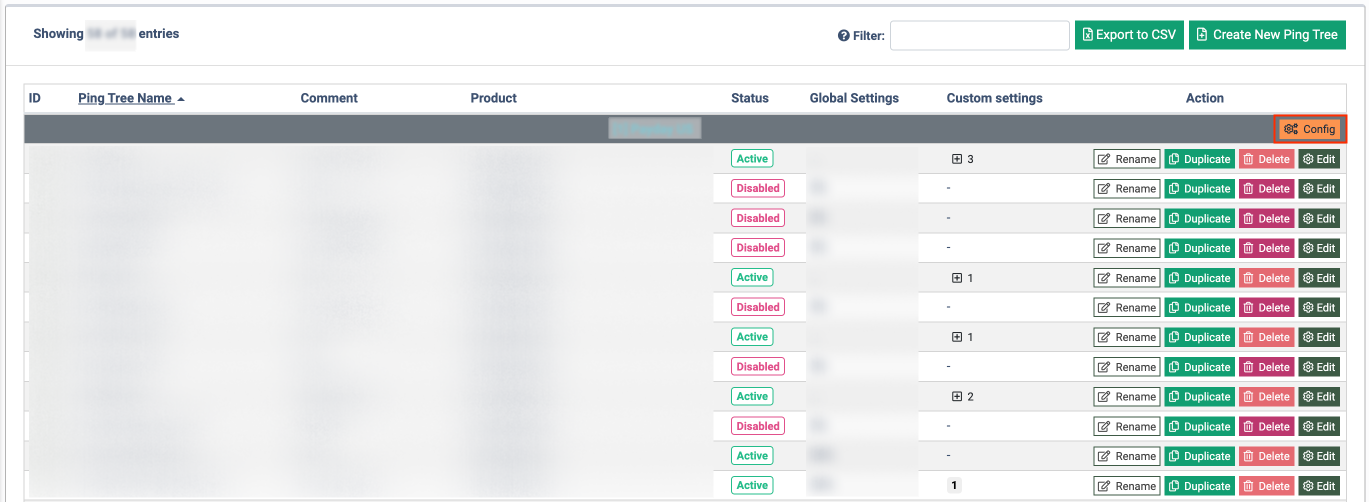
Status (Active / Disabled): The status of the Ping Tree.
-
Global Settings: Traffic distribution among all ping trees for a Product in percentage (%).
-
Custom Settings: Custom Publisher Ping Tree distribution settings made on the Publisher's side in the Publisher Settings section.
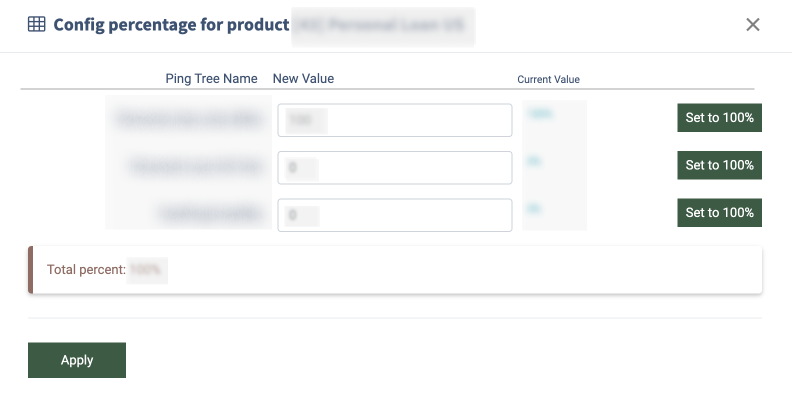
To configure the ping tree distribution for the specific Product, go to the Ping Tree Settings section for the specified Product and click the “Config” button.
In the pop-up window, set the values to define traffic distribution, and click the “Apply” button to apply the changes.
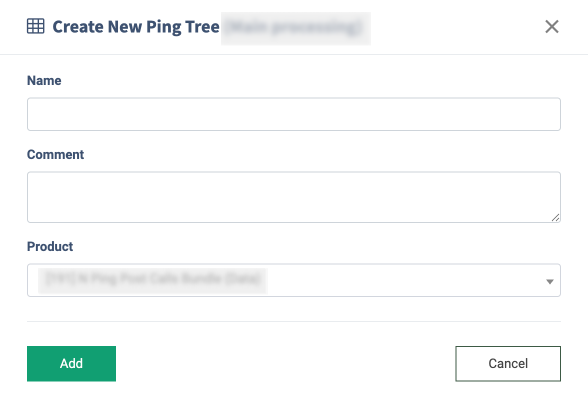
To create a new Ping Tree, click the “Create New Ping Tree” button and fill in the following fields in the pop-up window:
-
Name: Enter the name of the Ping Tree.
-
Comment: Enter additional information about the Ping Tree.
-
Product: Select the Product from the drop-down list.
Click the “Add” button to create a Ping Tree.
Read more about the Ping Tree activation in this Knowledge Base article.
Managing the Existing Ping Tree
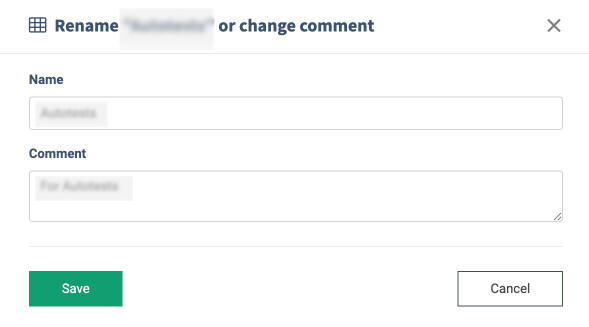
To rename and modify the comment added for an existing Ping Tree, select the Ping Tree from the list and click the “Rename” button in the “Action” column. Fill in the data fields in the pop-up window and click the “Save” button.
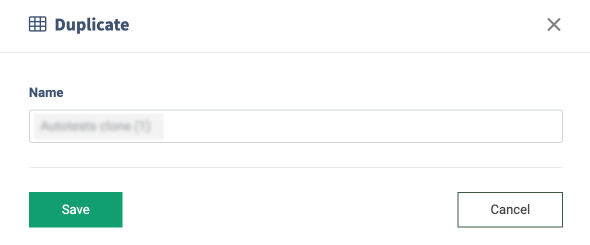
To create a duplicate of the existing Ping Tree, select that Ping Tree from the list and click the “Duplicate” button in the “Action” column. Fill in the name of the new Ping Tree in the pop-up window and click the “Save” button.
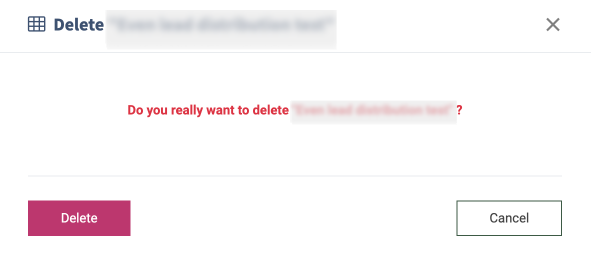
To delete a specific Ping Tree, select the Ping Tree from the list and click the “Delete” button in the “Action” column. Confirm the action by clicking the “Delete” button in the pop-up window.
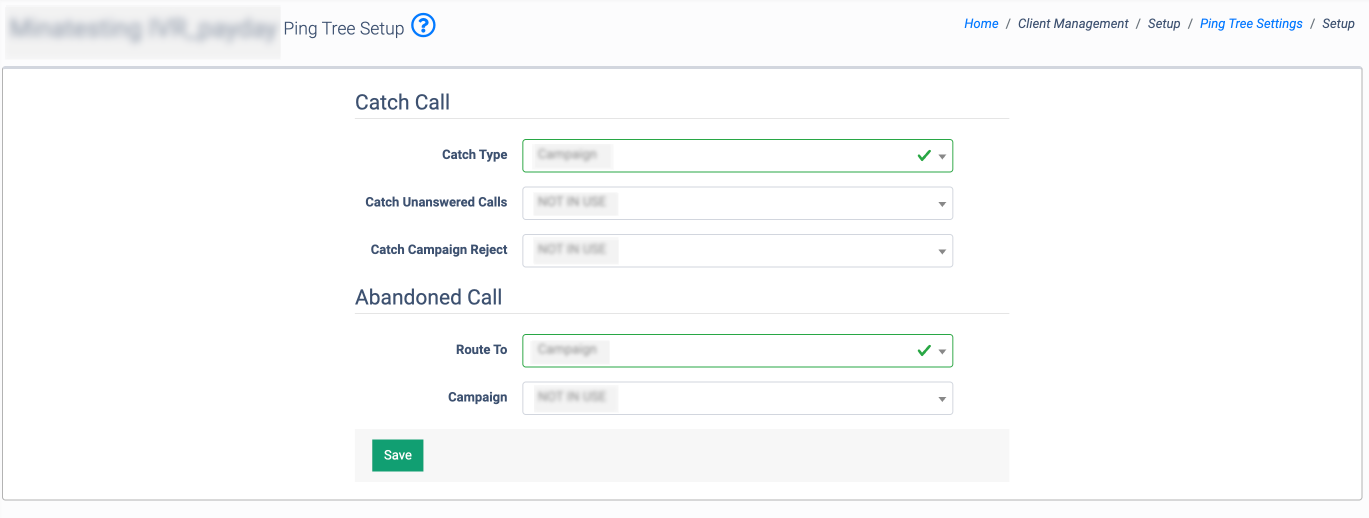
To set the call transfer (call catch) option for the particular Ping Tree, click the “Setup” button in the “Action” column. Note that this option is available only for Call Logic Ping Trees.
You will be redirected to the Ping Tree Setup section, where the following settings are available.
The “Catch Call” block contains settings for managing the call transfer (call catch) workflow in cases where the call is unanswered, rejected on IVR, or processed with an error. You can set the transfer option for the particular Campaign or Ping Tree.
- Catch Type: Select the type of call transfer (call catch) in cases of its unanswering, rejection on the IVR, or processing with an error (Campaign, Ping Tree).
- If the “Campaign” option is selected:
- Catch Unanswered Calls: Select the Campaign. The call will be transferred to the selected Campaign in case of no response from the Buyer.
- Catch IVR Reject: Select the Campaign. The call will be transferred to the selected Campaign when a buyer is not found.
- Catch IVR Error: Select the Campaign. The call will be transferred to the selected Campaign in case of a processing error (the maximum number of invalid user inputs is exceeded) during the IVR.
- If the “Ping Tree” option is selected:
- Catch Unanswered Calls: Select the Ping Tree. The call will be transferred to the selected Ping Tree in case of no response from the Buyer.
- Catch IVR Reject: Select the Ping Tree. The call will be transferred to the selected Ping Tree when a buyer is not found.
- Catch IVR Error: Select the Ping Tree. The call will be transferred to the selected Ping Tree in case of a processing error (the maximum number of invalid user inputs is exceeded) during the IVR.
- If the “Campaign” option is selected:
The “Route to” block contains settings for the call transfer workflow in case of its abandonment. The call abandonment occurs when the Buyer picks up the call, but the conversation itself lasts less than the time set in the “Duration to Sell” setting. You can set the transfer option for the particular Campaign or Ping Tree.
- Route to: Select the type of call transfer in case of its abandonment (Campaign, Ping Tree)
- If the “Campaign” option is selected:
- Campaign: Select the Campaign. The call will be transferred to the selected Campaign in case of its abandonment
- If the “Ping Tree” option is selected:
- Ping Tree: Select the Ping Tree. The call will be transferred to the selected Ping Tree in case of its abandonment.
- If the “Campaign” option is selected:
Click the “Save” button to complete the settings.
To set up and edit the existing Ping Tree, select the Ping Tree from the list and click the “Edit” button in the “Action” column.
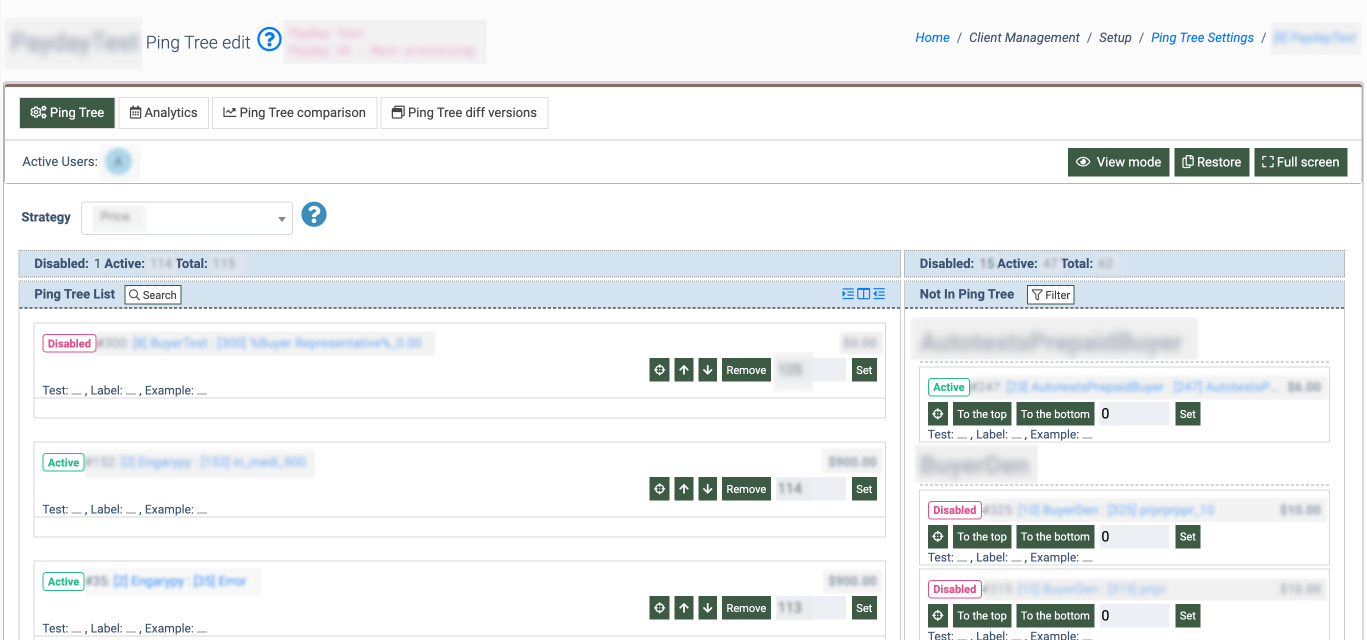
The "Ping Tree" tab allows you to configure the Ping Tree strategy and prioritize the Ping Tree`s campaigns based on the chosen strategy. Note: The strategies option is not applicable for the Exit Page and Exit Offer List Ping Trees.
To apply a specific strategy to the Ping Tree, select one of the following strategies from the "Strategy" drop-down list, configure the campaigns' list, and click the "Save" button.
Price Strategy
The strategy allows you to distribute leads according to the highest price set for the campaigns added to a Ping Tree. First, the system posts a lead to the Campaign with the highest price, then moves to a Campaign with the next highest price until the lead gets sold or rejected by all the Campaigns.
Example:
Campaign 1 is set at $10, Campaign 2 is set at $50, and Campaign 3 is set at $25. Campaign 2 will receive the lead first. If the lead gets rejected by Campaign 2, it will be posted to Campaign 3 next.
Priority Strategy
The strategy allows you to distribute leads based on the established campaign priority. First, the system posts a lead to the Campaign with the highest priority and then moves to a Campaign with the next highest priority until the lead is sold or rejected by all the campaigns.
Example:
Campaign 1 is low-priority, Campaign 2 is mid-priority, and Campaign 3 is high-priority. Campaign 3 will be the first to receive the lead due to its priority ranking. If the lead doesn't get sold, it will be posted to Campaign 2.
Weight Strategy
Leads are distributed to buyers based on their assigned weights. A higher weight increases the probability that a buyer receives a lead.
Example:
If Campaign 1 has a weight of 5, Campaign 2 has a weight of 2, and Campaign 3 has a weight of 1, then:
- Campaign 1 is 5 times more likely to get a lead than Campaign 3.
- Campaign 2 is 2 times more likely to get a lead than Campaign 3.
- Campaign 1 is 2.5 times more likely to get a lead than Campaign 2.
Parallel Pings (Higher Price) Strategy
The strategy allows you to send leads simultaneously to all campaigns and select the Campaign that offers the highest price.
Example:
You have 100 campaigns in a Ping Tree, the value in the Parallel Post Count field is 50, and the value in the Global Post Timeout field is 3. This means that a lead is presented to 50 campaigns at once, and the waiting time for campaigns to respond is 3 seconds according to the timeout response settings. The system records all of the responses by the offer price. Those campaigns that do not respond are classified as "rejected.” The lead is then sent to the remaining 50 Campaigns, which also respond with a price or reject. Once all of the responses are collected, the lead is sold to the Campaign that offered the highest price.
Parallel Pings (All Sold) Strategy
The strategy allows you to send lead simultaneously to all the campaigns and sell it to every campaign that accepts it. Note: The strategy is available only for the Silent Ping Tree.
Example:
You have 50 campaigns, the value in the Parallel Post Count field is 50, and the value in the Global Post Timeout field is 3. This means that a lead is presented to 50 campaigns at once, and the waiting time for the campaigns to respond is 3 seconds according to the timeout response settings. Those campaigns that do not respond are classified as "rejected.” The lead is sold to all the campaigns that responded.
Ping-Post Strategy
The strategy allows you to send Ping simultaneously to all campaigns and then send Post to the highest offer. Note: The strategy is available only for Ping-Post products.
During the lead processing, all timeouts for Ping-Post products with the Ping-Post strategy work independently one from another. You can restrict the lead processing time only with the Ping Tree timeout or the Publisher's maximum lead processing time.
Example 1:
Campaign 1 timeout = 20
Campaign 2 timeout = 45
Publisher's maximum lead processing time = 30
Ping Tree timeout = 40
In this case, lead processing will end at a maximum of 30 seconds because of the Ping Tree timeout and Publisher's maximum lead processing time, timeout = 30 at the Publisher level is the smallest.
Example 2:
Campaign 1 timeout = 60
Campaign 2 timeout = 10
Publisher timeout = 55
Ping Tree timeout = 40
In this case, lead processing will end at a maximum of 40 seconds because of the Ping Tree timeout and Publisher's maximum lead processing time, timeout = 40 at the ping tree level is the smallest.
Fill in the following fields to execute the strategy effectively:
-
Global Ping Timeout: The maximum response time for all the campaigns to respond to Ping.
-
Global Post Timeout: The maximum response time for all the campaigns to respond to Post.
-
Parallel Post Count: The maximum number of simultaneous HTTP requests to be processed. If you have additional campaigns, the next one will start processing once the previous one is completed.
Max EPL Strategy (Call Logic Only)
The Max EPL Strategy allows you to maximize earnings per call by routing calls to the Buyer with the highest expected revenue based on actual performance data. The strategy calculates the expected value using the actual average earnings per sold call and the actual conversion rate from transferred calls to sold calls.
Calculation:
Average Price=Total Earnings/Sold Calls
Win Rate=Sold Calls/Transferred Calls
Max EPL=Average Price*Win Rate
This approach allows the strategy to rely on actual earnings and transfer performance instead of post price and posting activity.
Example:
Campaign A generated $2,000 from 100 sold calls and had 200 transferred calls.
- Average Price = $20
- Win Rate = 50%
- Max EPL = $10
Campaign B generated $2,400 from 80 sold calls and had 240 transferred calls.
- Average Price = $30
- Win Rate = 33.3%
- Max EPL = $10
Although Campaign B has a higher average payout per sold call, both Campaigns produce the same expected value based on actual transfer performance.
Note: By default, the strategy calculates Campaign performance using data from the last 7 days. You can configure the performance lookback period for Max EPL calculations at the Campaign, Buyer, or Product level.
Profit Maker Strategy (Call Logic Only)
The Profit Maker Strategy allows you to maximize overall profitability by prioritizing Campaigns that are closest to reaching their remaining capacity before they stop accepting calls.
Like the Max EPL Strategy, Profit Maker considers a Campaign’s expected earnings based on its historical performance. In addition, it factors in the Campaign’s remaining capacity and the time left until the Campaign stops accepting calls. This helps maximize the number of successful sales for Campaigns that have limited time remaining.
Calculation:
Expected Earnings=(Total Earnings/Sold Calls)*(Sold Calls/Transferred Calls)
Acceptance Rate: Calculated as the percentage of accepted calls over the last 7 days.
Profit Maker Value=(Expected Earnings*Acceptance Rate)*Remaining Caps/Time Remaining
Campaigns with higher expected earnings, higher acceptance rates, more remaining caps, and less remaining time receive a higher priority.
Note: The acceptance rate is calculated using data from the last 7 days. For accurate calculations, a Campaign must have at least 10 leads during this period, regardless of whether they were sold or rejected.
Example:
Campaign A
- Expected Earnings = $20
- Acceptance Rate = 75%
- Remaining Caps = 5
- Time Remaining = 2 hours
Campaign B
- Expected Earnings = $24
- Acceptance Rate = 60%
- Remaining Caps = 8
- Time Remaining = 4 hours
Although Campaign B has a higher expected earnings value, the Profit Maker Strategy may route the call to Campaign A because it has less remaining time to utilize its available capacity. This helps maximize the overall number of successful sales before the Campaign stops accepting calls.
Note: By default, the strategy calculates Campaign performance using data from the last 7 days. You can configure the performance lookback period for Profit Maker calculations at the Campaign, Buyer, or Product level.
Even Within a Group
The system evenly distributes leads among all Campaigns within each group. This strategy works effectively when identical filter and schedule settings are applied, including the Publisher’s filters and DNPL settings.
Fill in the following fields to execute the strategy effectively:
- Campaign Counter TTL: Select the time range after which counters for Campaigns will be equalized.
- Distribute by: Select the event to process the distribution.
- Post: Distribution is based on lead posting attempts.
- Sold: Distribution is based on successful sales (accepts).
- Even within all groups: Select the “On” option for the system to distribute leads evenly, not only within a single group but across all groups, rotating priority between them.
Example 1: Campaign A and Campaign B are in the group. If the previous lead was received by Campaign A, the next one would be received by Campaign B.
Example 2: Campaign A and Campaign B are in the group. Campaign A was temporarily out of the workflow (the Campaign was paused or was not accepting leads according to the filter settings). At the same time, Campaign B received 50 leads. The next 50 leads will be received by Campaign B.
This system behavior can be corrected by using the Campaign Counter TTL parameter. The Campaign Counter TTL parameter helps to equalize counters for campaigns that were paused for more than a predefined amount of time.
Example: Campaign A and Campaign B are in the group. Campaign A has the Campaign Counter TTL set for one hour. For example, Campaign A was paused for 2 hours, and Campaign B received 1000 leads during this time. When Campaign A becomes active, its internal counter will be set to a 1000 value, like she’s been getting leads all this time, too. This ensures equal lead distribution in case the campaign is launched after a long pause. This is an internal counter that will have no effect on the reports.
The “Distribute by” parameter determines the event by which the even disposition will be processed (sold/post). In case of the sold option selection, the system will strive to equalize sales. This option can not be guaranteed because Campaigns in the group may give accepts too unevenly.
Warning: After changing the “Distribute by” or "Even within all groups" parameter and saving the Ping Tree settings, the uniform distribution countdown will start again from the current moment. This action can not be undone.
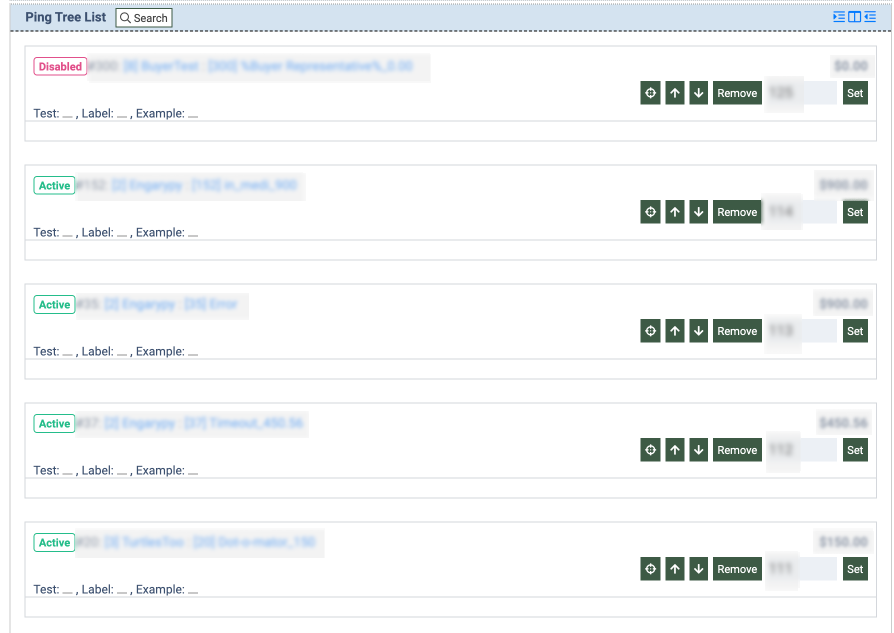
Ping Tree List Configuration
The “Ping Tree List” block displays all of the campaigns added to the Ping Tree and allows you to change the list order according to your preference. You may use tools on the right side of the list block to move, select, and remove campaigns from the list.
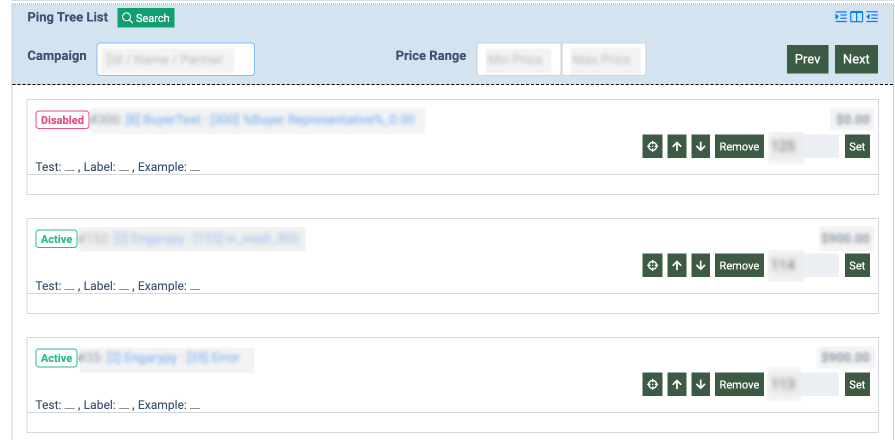
To search for specific campaigns, click the "Search" button in the header block of the Ping Tree. Fill in the following fields by preference:
-
Campaign: Enter the campaign ID, the name of the campaign, or the name of the partner.
-
Price Range: Fill in the "Min Price" and the "Max Price" fields to set the price range for the search.
Click the "Prev" or "Next" buttons to navigate through the search results.
The “Not In Ping Tree” list displays all the campaigns that have not been added to the Ping Tree, sorted by the buyer. You can use the tools on the right side of the block to select campaigns, move campaigns to the Ping Tree, and set campaign values. You may also use the drag-and-drop method to move the campaigns from one list to another.

To confirm all the modifications on the Ping Tree tab, click the “Save” button. Once the changes are applied, the system automatically creates a new backup version of a Ping Tree.
The “Analytics” Tab
The “Analytics” tab allows you to view and analyze the report that contains the performance overview of the Ping Tree for a specific date. To load the performance data, use the “Date” and “Status” filters and click the “Search” button.
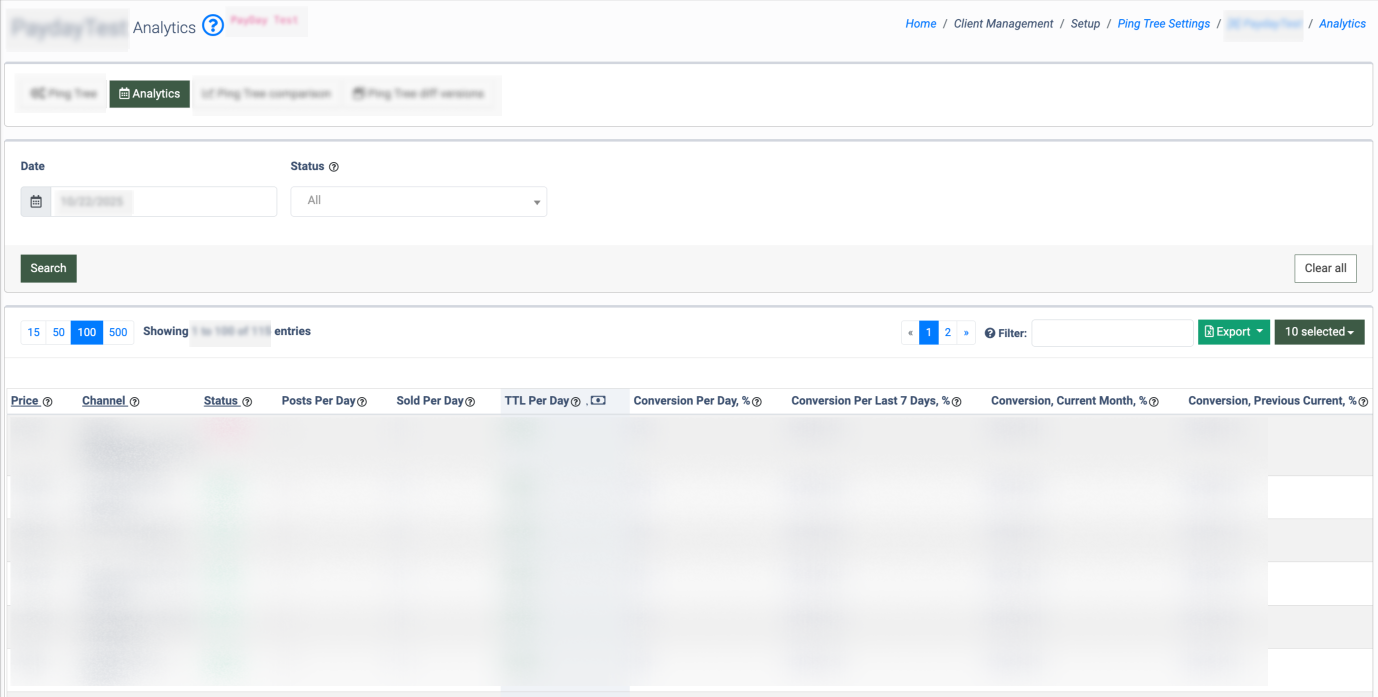
The performance overview report contains the following information:
-
Price: The price for the Campaign.
-
Channel: The name of the Campaign and the Buyer.
-
Status (Active / Deleted / Disabled / Paused / Temp Paused): The status of the Campaign in the system.
-
Posts Per Day: The number of posts.
-
Sold Per Day: The number of sold leads.
-
TTL Per Day: The total earnings.
-
Conversion Per Day, %: The Posts to the Sold ratio for the selected date, in percentage.
-
Conversion Per Last 7 Days, %: The Posts to the Sold ratio for the seven days before the selected date, in percentage.
-
Conversion, Current Month, %: The Posts to the Sold ratio for the current month, in percentage.
-
Conversion, Previous Month, %: The Posts to the Sold ratio for the previous month, in percentage.
The "Ping Tree Comparison" Tab
The "Ping Tree comparison" tab allows you to compare the Ping Tree performance between two selected periods. To generate the report, use the "Current Ping Tree date," "Comparison Ping Tree," "Comparison Date," and "Status" filters, and click the "Search" button.
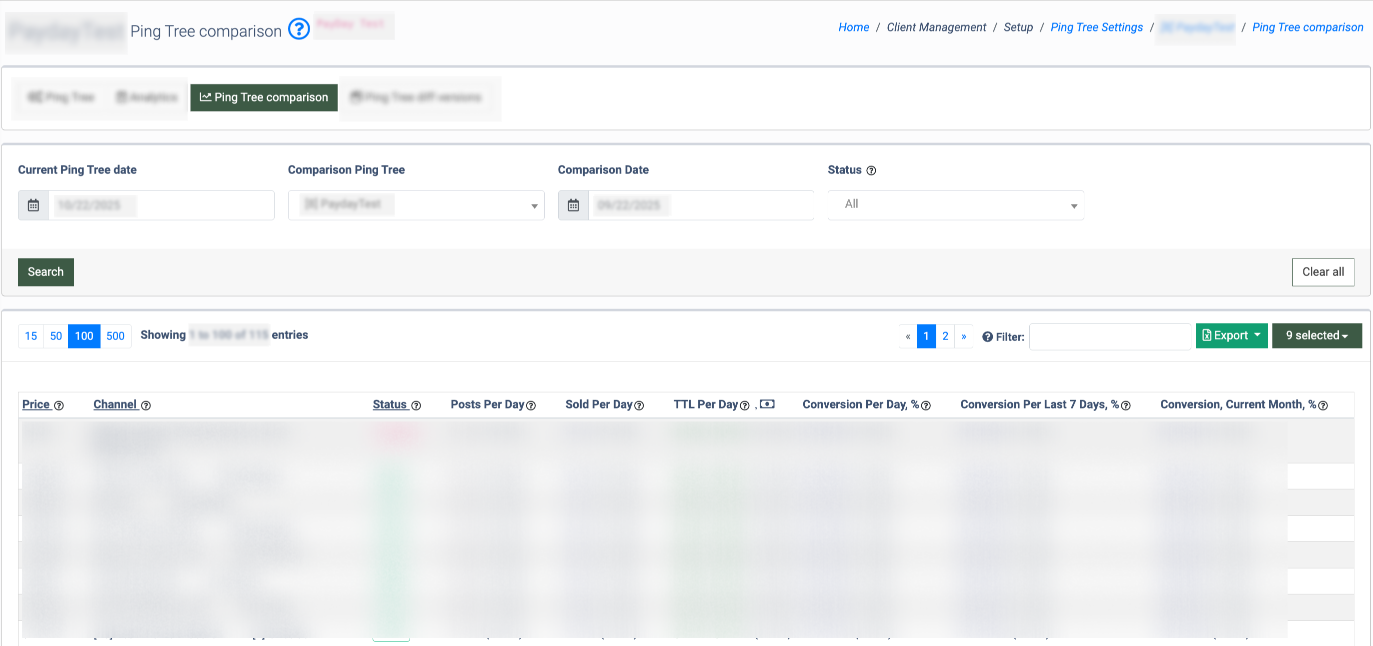
The comparison report contains the following information:
-
Price: The price for the Campaign.
-
Channel: The name of the Campaign and the Buyer.
-
Status (Active / Deleted / Disabled / Paused / Temp Paused): The status of the Campaign in the system.
-
Posts Per Day: The number of posts for the current date / the number of posts for the comparison date.
-
Sold Per Day: The number of sold leads for the current date / the number of sold leads for the comparison date.
-
TTL Per Day: The total earnings for the current date / total earnings for the comparison date.
-
Conversion Per Day, %: The Posts to the Sold ratio for the current date in percentage / the Posts to the Sold ratio for the comparison date in percentage.
-
Conversion Per Last 7 Days, %: The Posts to the Sold ratio for the last seven days before the current date in percentage / the Posts to the Sold ratio for the last seven days before the comparison date in percentage.
-
Conversion, Current Month, %: The Posts to the Sold ratio for the current month in percentage / the Posts to the Sold ratio for the month before the comparison date in percentage.
-
Conversion, Previous Month, %: The Posts to the Sold ratio for the previous month in percentage / the Posts to the Sold ratio for the previous month before the comparison date in percentage.
The “Ping Tree Diff Versions” Tab
The “Ping Tree diff versions” tab allows you to view and compare all the previous backup versions of the Ping Tree settings stored in the system. Once you select the versions you would like to compare, the blocks will be loaded automatically. All the changes are highlighted in yellow, and all the new records are highlighted in green.
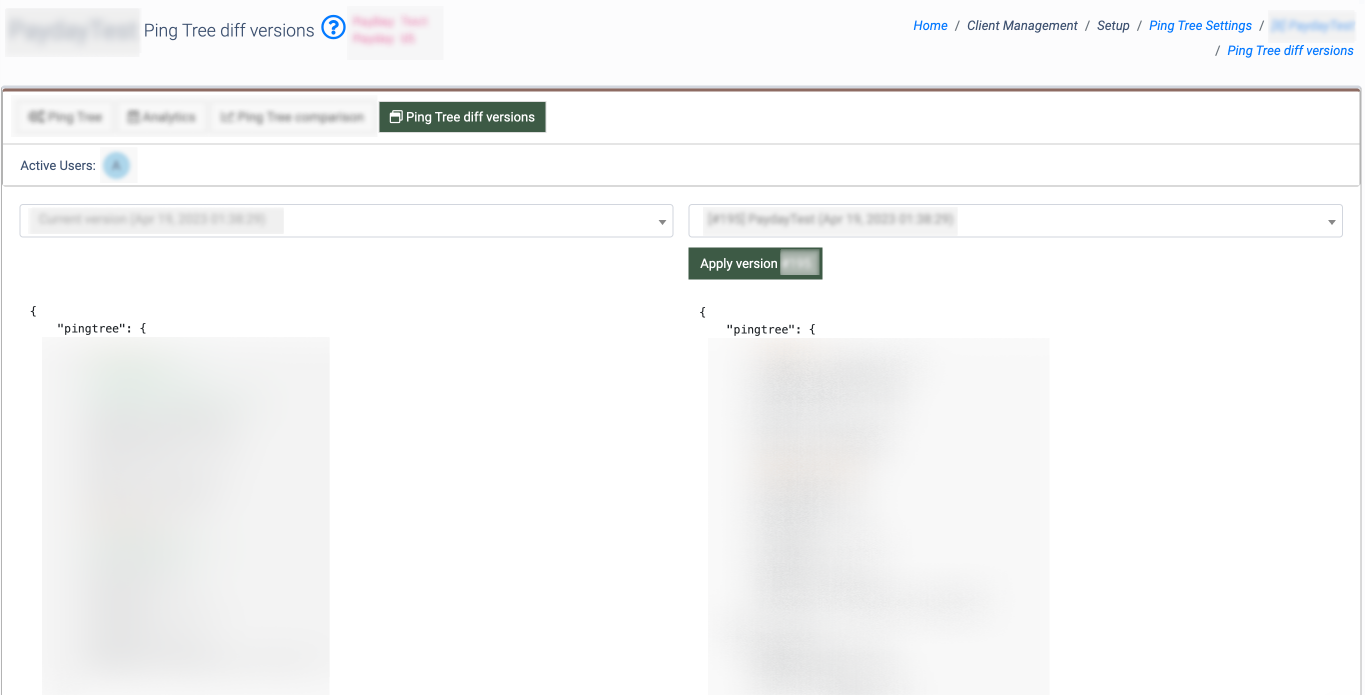
To restore the previously saved backup version of the Ping Tree, click the “Apply version” button.