Additionally, this section includes features for Buyer users to manage their balance and billing activity, as well as for Publisher users to oversee payment settings, payment history, and event tracking rules.
To manage your profile settings, go to the Account Settings > My Profile section, or use the My Profile Modal Window in the upper-right corner of the page.
- Account Settings
- Security Settings
- System Settings
- Billing Settings
- Billing Activity
- Payment Settings
- Tracking

To change the profile picture, click the “Change” button on your logo and proceed from within wordpress.com.
The Account Security Strength indicator displays the current protection level of your account:
- Weak: The Two-Factor Authentication is disabled.
- Good: The Two-Factor Authentication is enabled, but the auto-pin locking feature is disabled.
- Strong: Both the Two-Factor Authentication and auto-pin locking features are enabled.
Note: If your Trusted IP List contains IP addresses that have been inactive for more than a month, your security strength level will automatically decrease by one level. Additionally, if any IP remains inactive for over four months, the security level will be automatically reduced to a Weak level.
Read more about the features that can strengthen your account in this Security Settings article.
Account Settings
The “Account Settings” tab contains general information about your account and allows you to manage your personal details and contact settings to ensure your account remains up to date.
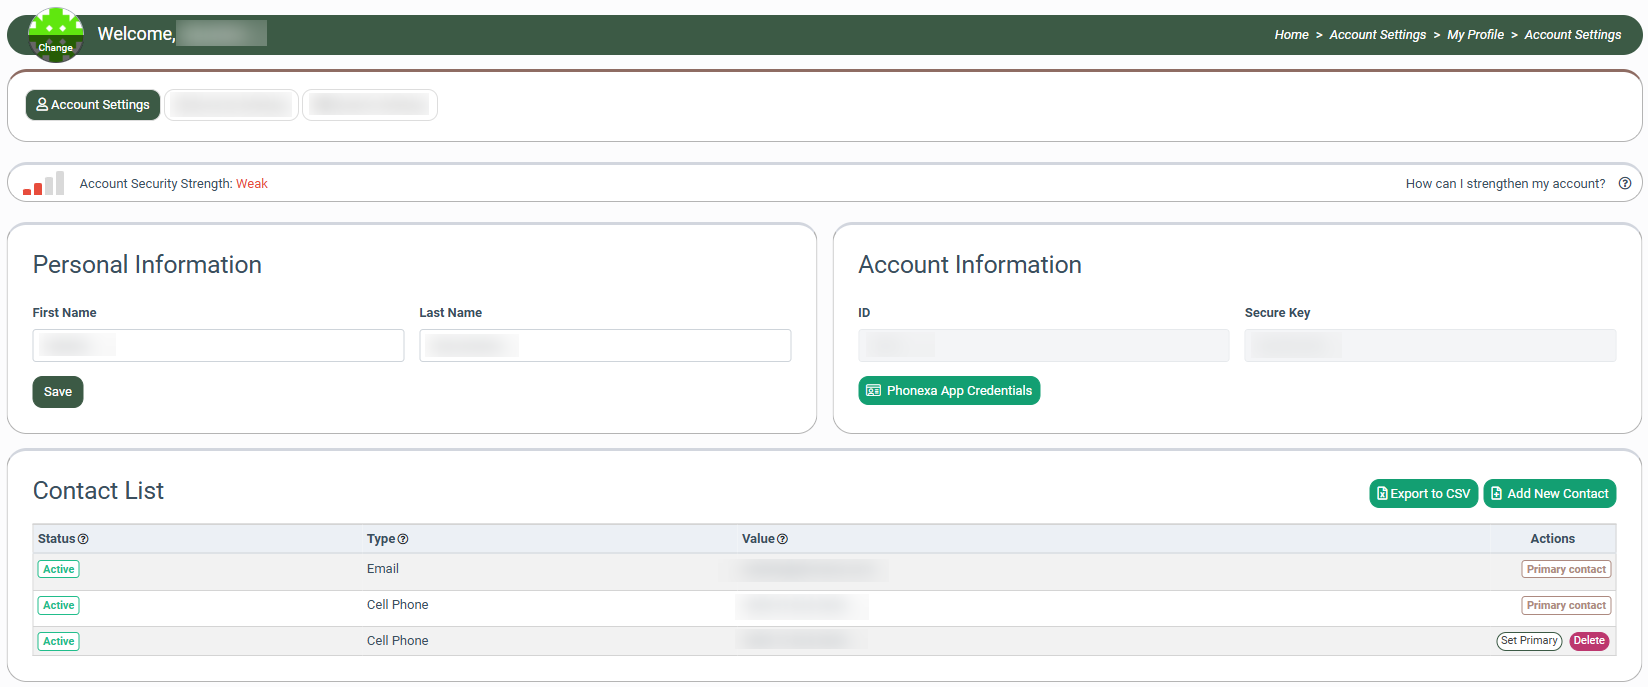
Read more about how to configure the “Account Settings” tab in this Knowledge Base article.
Security Settings
The “Security Settings” tab allows you to safeguard your account by enabling features such as two-factor authentication (2FA), updating passwords, setting up PIN settings, adding trusted IP addresses, and reviewing recent login activity for enhanced protection.
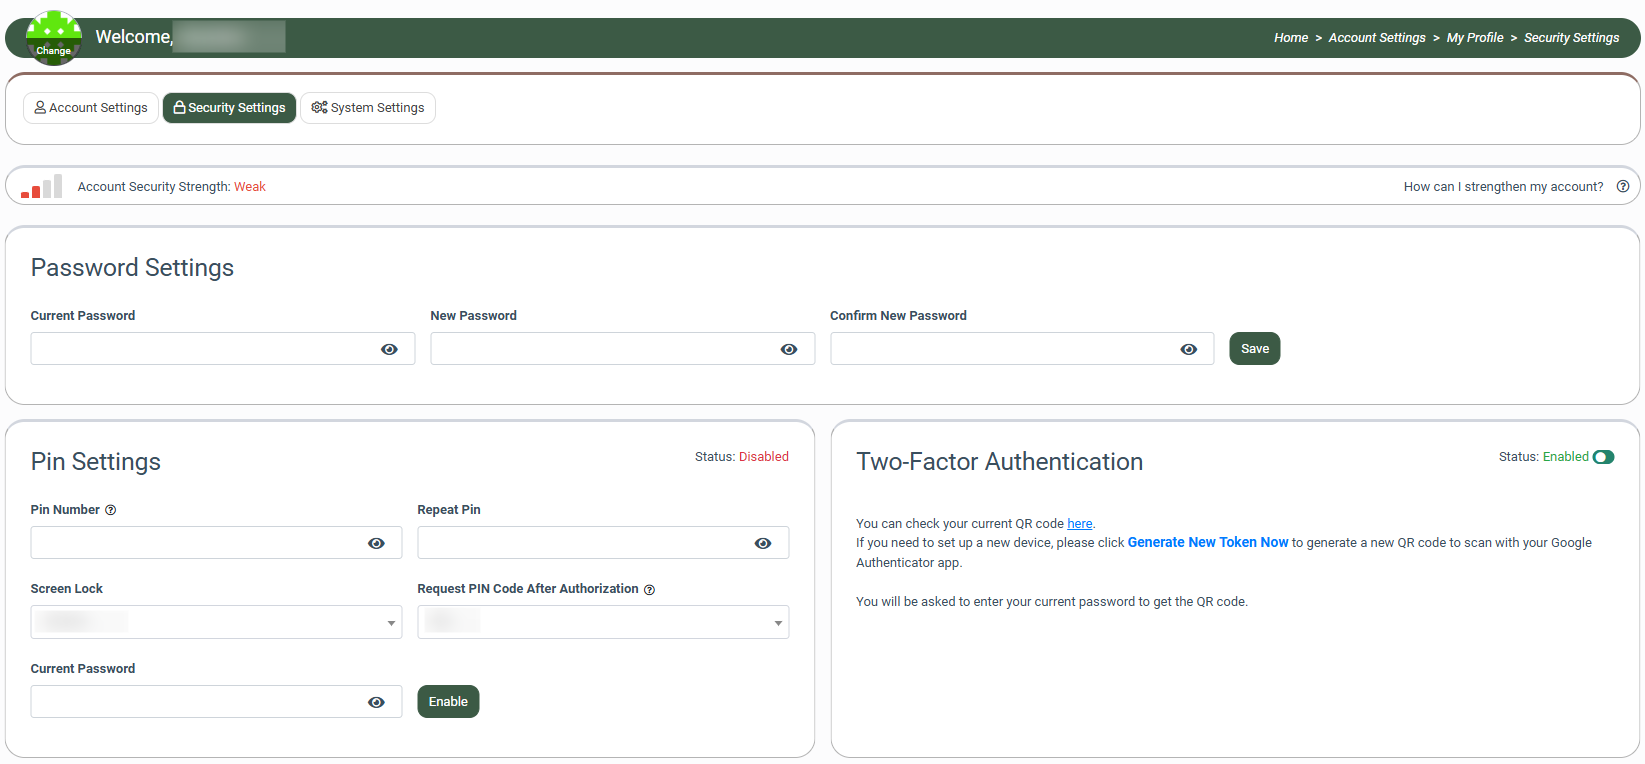
Read more about how to configure the “Security Settings” tab in this Knowledge Base article.
System Settings
The “System Settings” tab allows you to customize the appearance of the system specifically for your account.

Read more about how to configure the “System Settings” tab in this Knowledge Base article.
Billing Settings
The “Billing Settings” tab allows you to select and configure payment methods. Also, it allows you to set up the Auto Recharge payment option.
Note: Only users with the “Buyer Representative”, “Buyer Editor”, and “Buyer Accountant” system roles have access to this page.
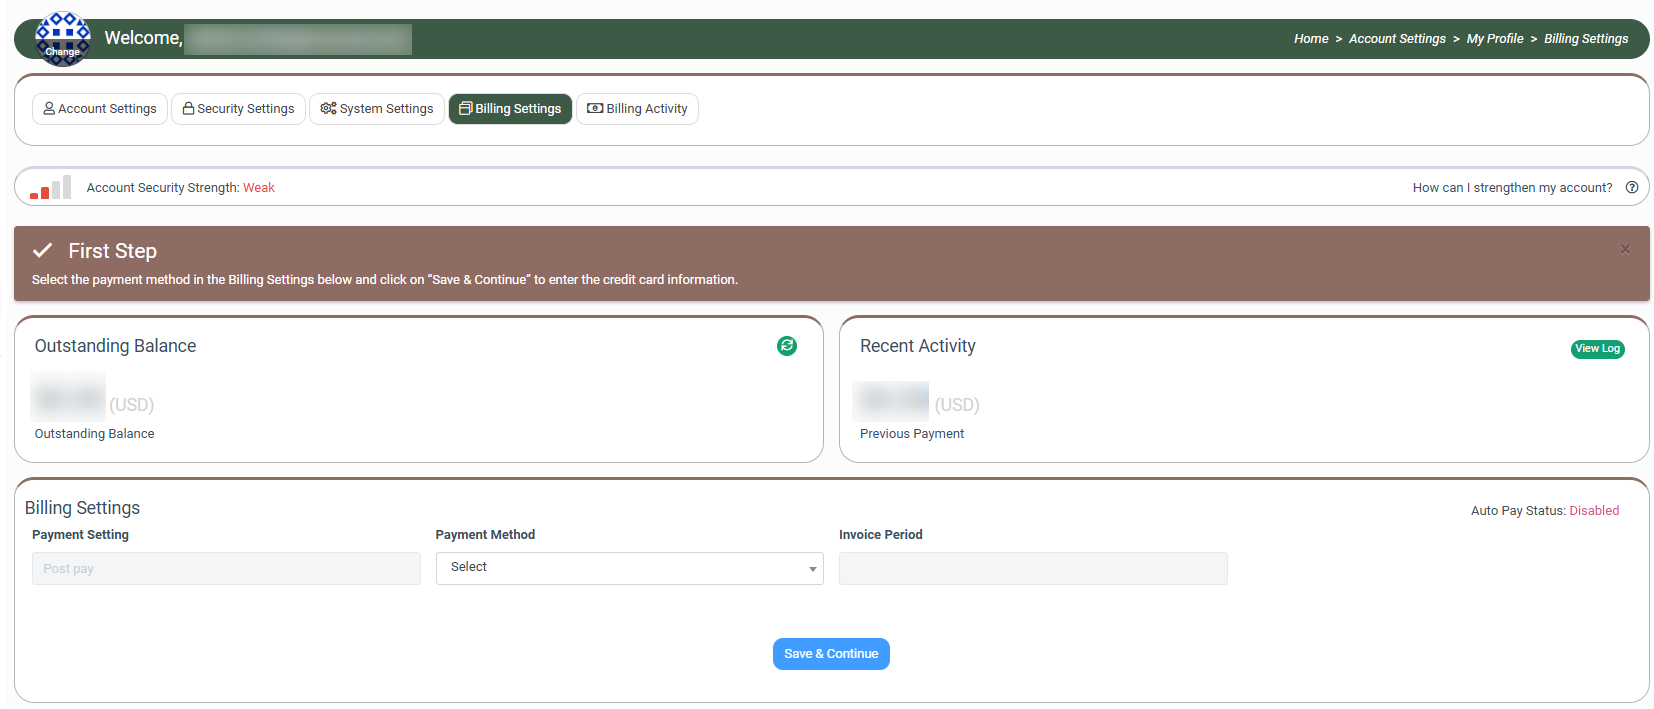
Read more about how to configure the “Billing Settings” tab in this Knowledge Base article.
Billing Activity
The “Billing Activity” tab allows you to view the billing activity for both pre-pay and post-pay Buyers, including replenishments, payments, returns, and adjustments in LMS/Call Logic and Books360.
Note: Only users with the “Buyer Representative”, “Buyer Editor”, and “Buyer Accountant” system roles have access to this page.
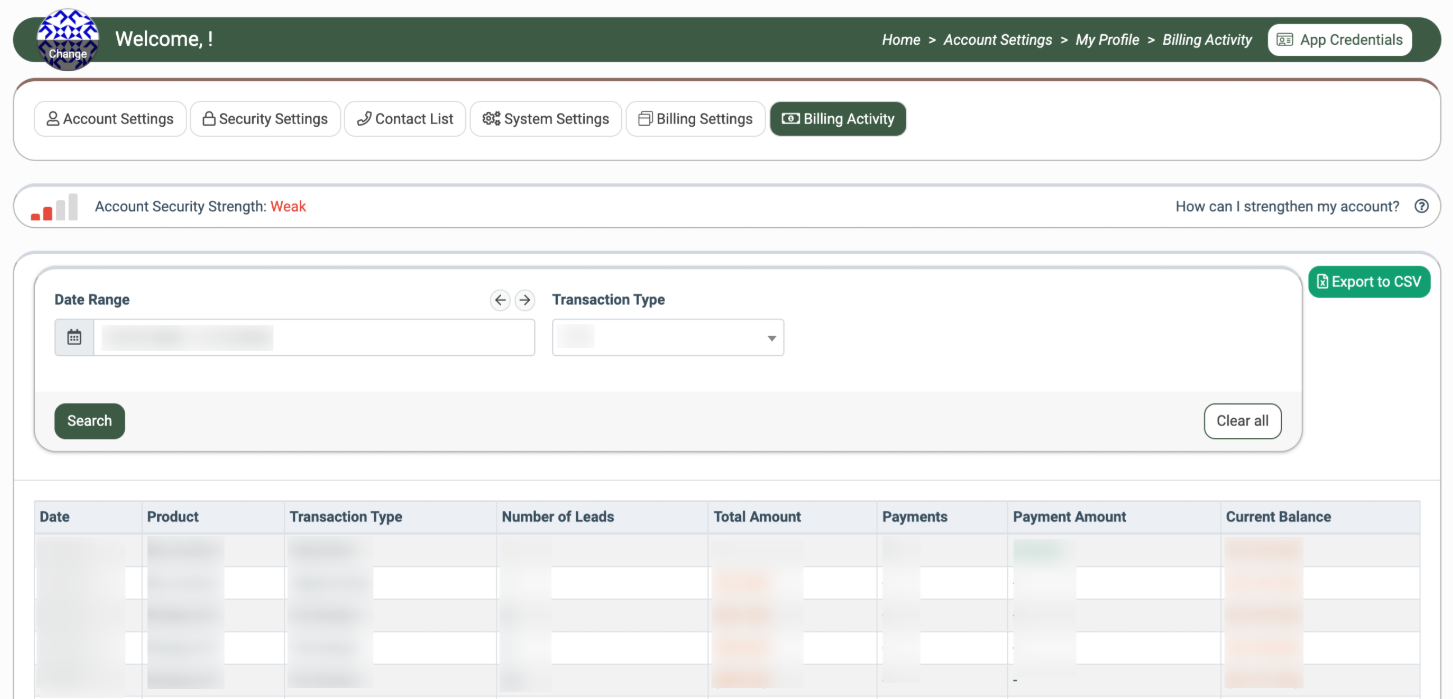
Read more about how to configure the “Billing Activity” tab in this Knowledge Base article.
Payment Settings
The “Payment Settings” tab allows you to select and configure payment methods for Publisher payout processing and view the payment history.
Note: This tab is available only to users logged in as Publishers.
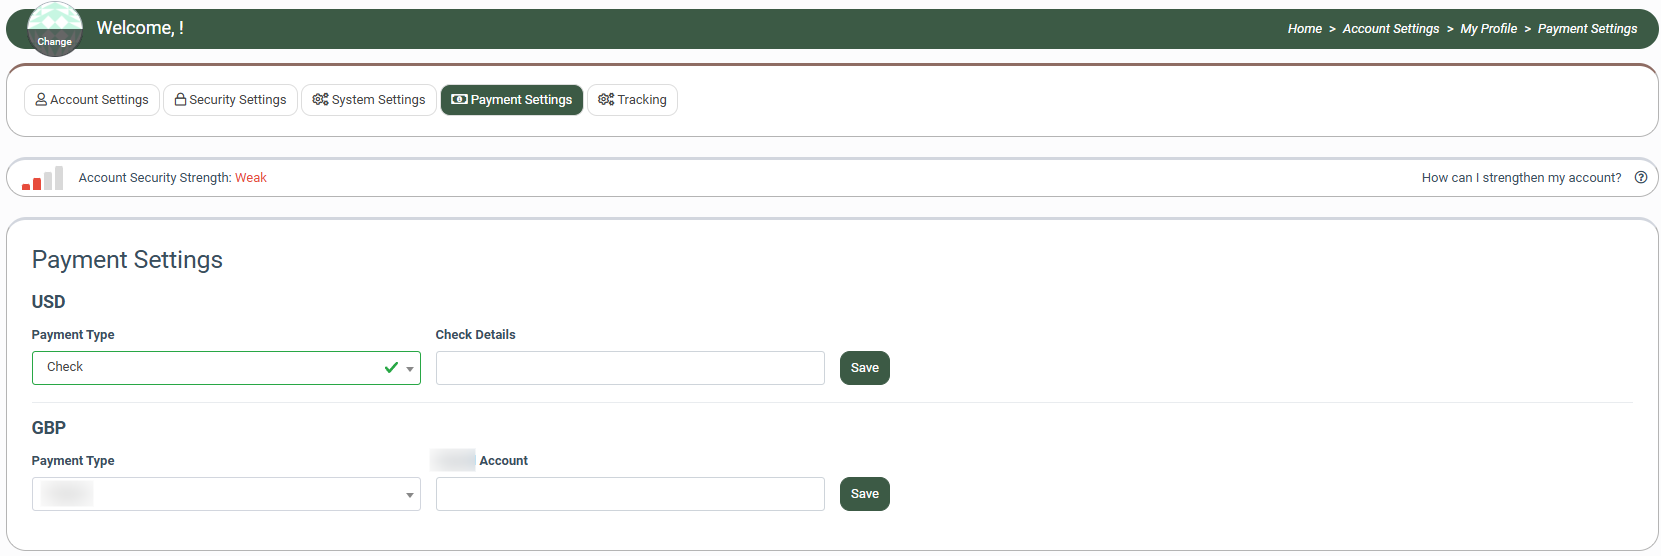
Read more about how to configure the “Payment Settings” tab in this Knowledge Base article.
Tracking
The “Tracking” tab allows Publishers to access the Event Tracking feature. As a Publisher, you can view, add, manage, and remove event tracking rules. Event Tracking allows you to track the various events in the system (e.g., lead sold, lead rejected, publisher earnings received, etc.) and set the actions to be automatically triggered by them.
Note: This tab is available only to users logged in as Publishers.
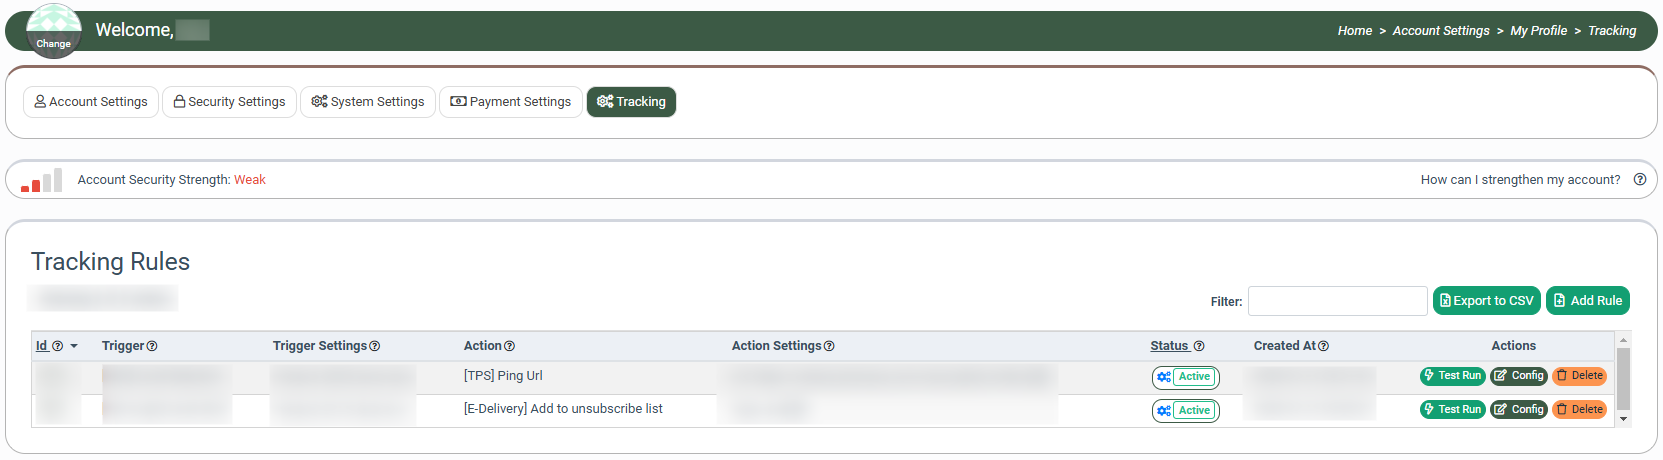
Read more about how to configure the “Tracking” tab in this Knowledge Base article.