Use Case: After the visitor opens the page with the Tracking Pool Widget, the script collects and sends the additional data into our system. When the caller dials the phone number displayed via the Tracking Pool Widget, the IVR skips the blocks related to the pinged data. The data will be displayed as the tPar and IVR data in the "Lead Body", "IVR Log" and "Tracking Log" tabs on the “Lead Info” page.

The following configuration is required:
- Configure the Product
- Create a New Tracking Pool
- Set up the Widget
- Create a New Page (for testing purposes)
- Configure Custom Data Ping to the Third-Party Services:
- Event Tracking
- IVR
Note: Only one of the options can be selected.
Configure the Product
The Product level configuration requires enabling the Lead Stash settings, creating an Extra Field, and setting it to be used in IVR.
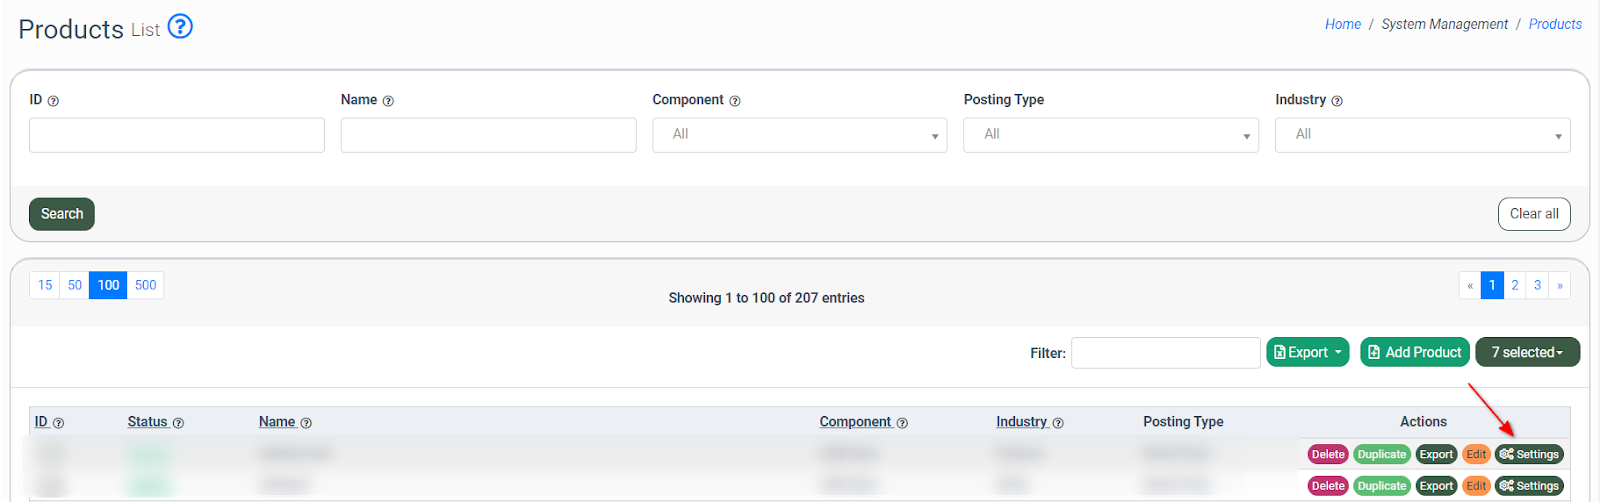
To start the configuration, go to the System Management > Products section, select the relevant product, and click the “Settings” button in the “Action” column.
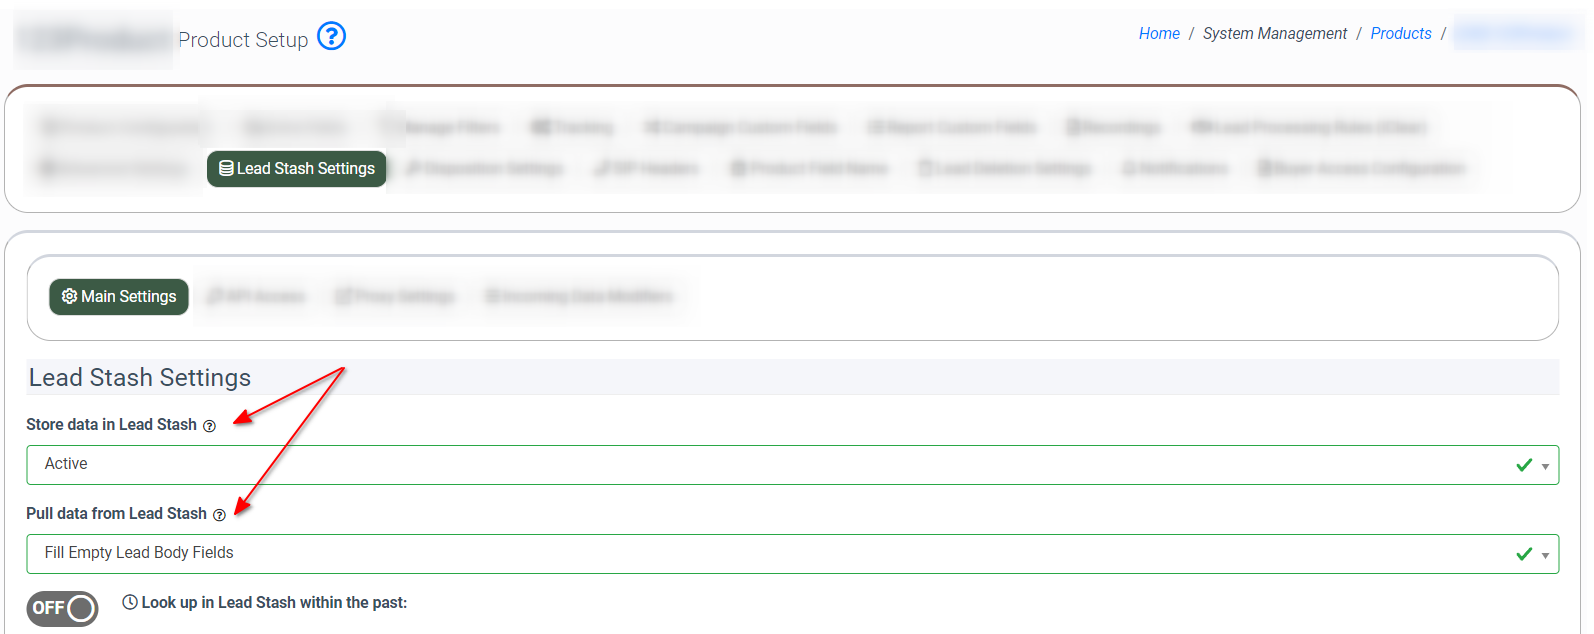
On the “Lead Stash Settings” tab, select the “Main Settings” subtab, then find and enable the following features:
- Store data in Lead Stash: Select the “Active” option to enable the lead data in the Lead Stash.
- Pull data from Lead Stash: Select the “Fill Empty Lead Body Fields” option to set up the system’s behavior when the lead data is found in the Lead Stash. This option pulls the lead data, compares it with the already posted data, and fills the empty fields.
Note: Pinging the data over the tPar works only if the “Fill Empty Lead Body Fields” option is selected.
tPar is an additional parameter that can be used to pass fields that are not in the product. The data from this field is not stored anywhere in our system thus data passed in tPar can not be filtered.
Click the “Save” button.
Read more about the Lead Stash in this Knowledge Base article.
To create an extra field, go to the “Extra Fields” tab and click the “Add New Extra Field” button. Fill in the following fields in the pop-up window:
- Internal Name: Enter the internal name of the field.
- Name In Reports: Enter the field name that will be reflected in the reports and the filter names.
- Field Type: Select the "String" option for the string data input.
Click the “Save” button.

Read more about the Extra Field settings in this Knowledge Base article.
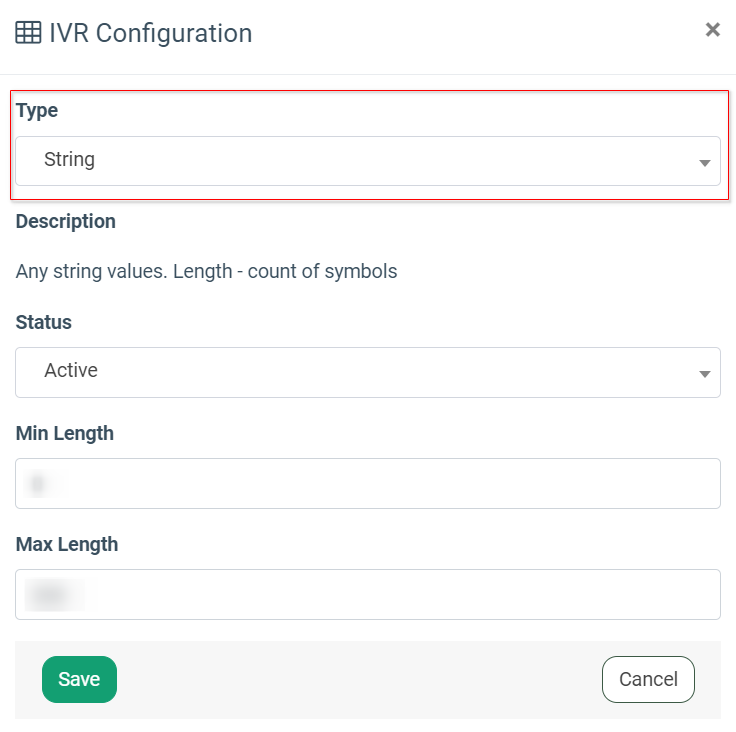
To configure and use the extra field in IVR, click the “IVR Configuration” button in the “Actions” column. Fill in the following fields:
- Type: Select the “String” option.
- Status: Select the “Active” option to enable the IVR Configuration.
Click the “Save” button.
Create a New Tracking Pool
Before adding the phone numbers to your Tracking Pool, reserve and assign them to the Publisher of your choice.
Note: Read more about defining the required number of the tracking pool phone numbers in this Knowledge Base article.
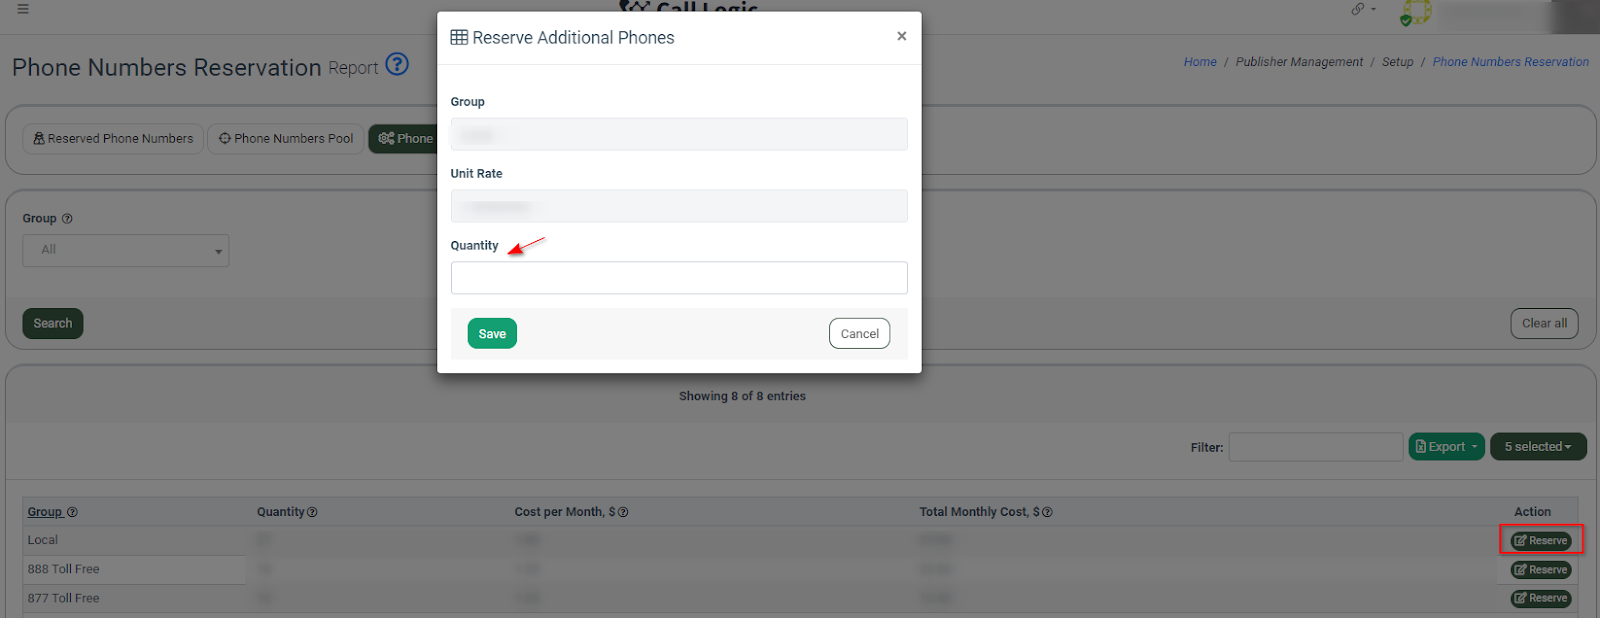
To reserve the phone number, go to the Publisher Management > Setup > Phone Numbers section and select the “Phone Numbers Reservation” tab where you can reserve the Local or Toll Free number. Then select the group from the list and click the “Reserve” button in the “Actions” column. Enter the quantity you would like to reserve in the pop-up window and click the “Save” button. Click the “OK” button to confirm the changes in the pop-up window.
The reserved phone numbers will appear on the “Reserved Phone Numbers” tab. To assign the Publisher to the phone number, select the number from the list, and click the “Edit” button in the “Actions” column on the “Reserved Phone Numbers” tab. In the pop-up window, fill in the “Product” and “Publisher” fields. All of the calls received on this phone number will be assigned to the corresponding publisher. Click the “Save” button to complete.

Read more about how to reserve, assign, and reassign phone numbers and manage phone number pools in this Knowledge Base article.
To continue the configuration, return to the Publisher Management > Promo Materials > Call Tracking section and click the “Add New Tracking Pool” button.
Read more about the Call Tracking feature and Creating a Tracking Pool in this Knowledge Base article.

Fill in the following fields in the “Add New Tracking Pool” pop-up window:
- Name: Enter the name of a tracking pool.
- Product: Select the Product.
- Publisher: Select the Publisher (the one the phone numbers are assigned to).
To complete, click the “Create” button.

Note: The Publisher cannot be edited once the Tracking Pool is created.
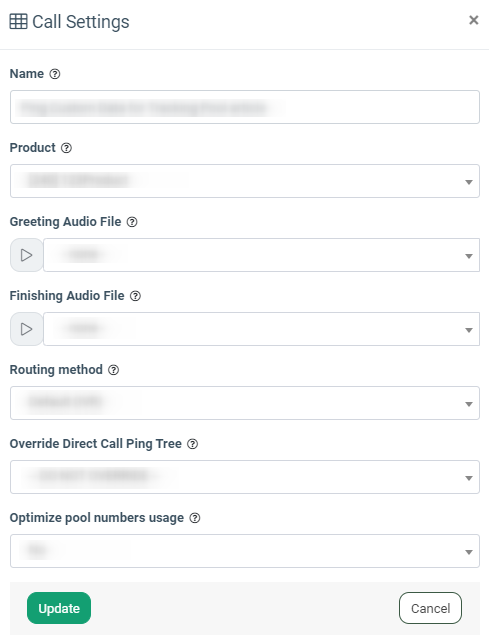
To configure the Tracking Pool settings, click the “Call Settings” button in the “Actions” column. Fill in the following fields in the pop-up window:
- Name: Enter the name of the tracking pool.
- Product: The name of the selected Product.
- Greeting Audio File: Select the audio for the call greeting (if available).
- Finishing Audio File: Select the audio for the end of the call (if available).
- Routing method: Select the preferable routing method (Default (IVR) / Direct (Campaign) / Specific IVR).
- Override Direct Call Ping Tree: Select the ping tree you want to prioritize for the direct call.
- Optimize pool numbers usage: Select the 'Yes" value to issue the first number added to the pool in all cases when the publisher posts the lead data, including the lead phone number.
To add the phone numbers to the Tracking Pool, click the “Phone Number List” button in the “Actions” column of the corresponding Tracking Pool.

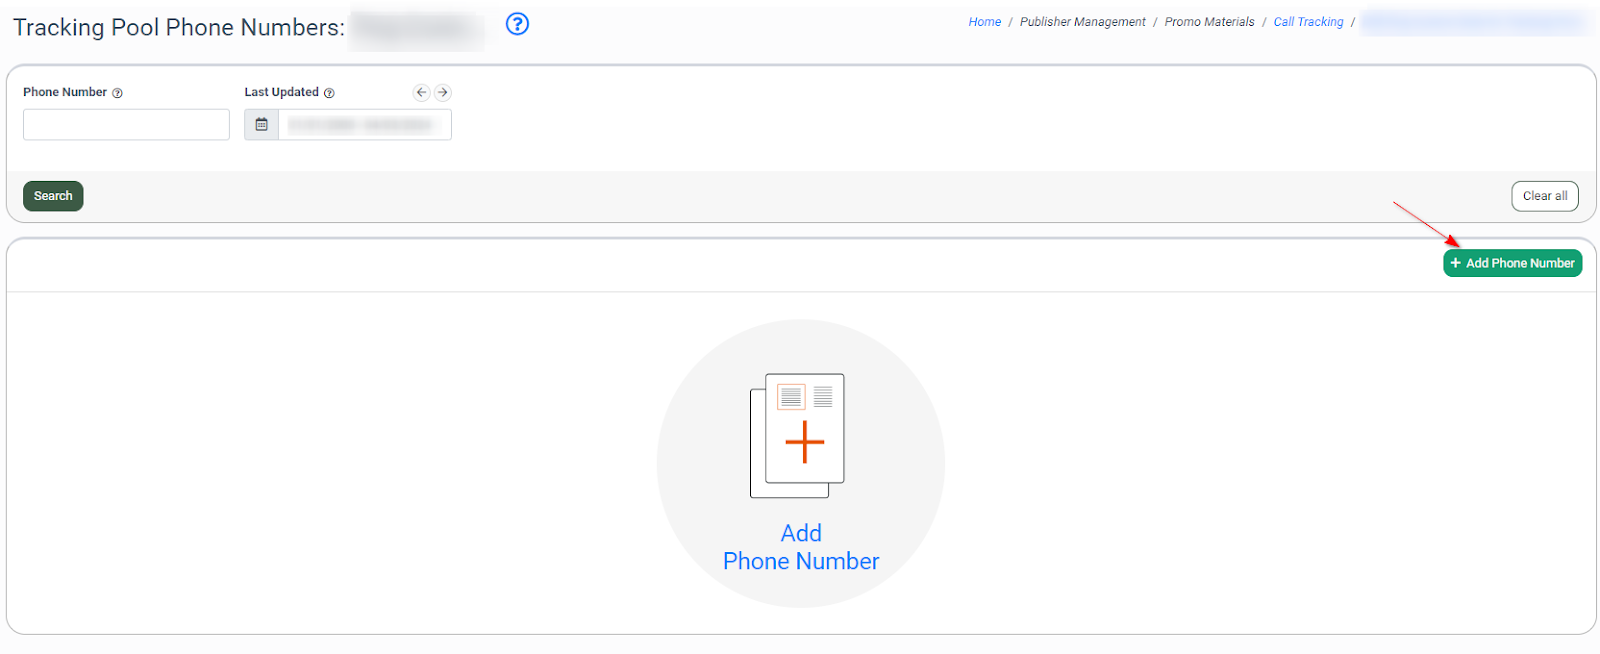
The system will redirect you to the Tracking Pool Phone Numbers page. The list contains all the phone numbers assigned to your tracking pool. If you have just created the list, it will not contain any phone numbers.
To assign a new phone number to the tracking pool, click the “Add Phone Number” button.
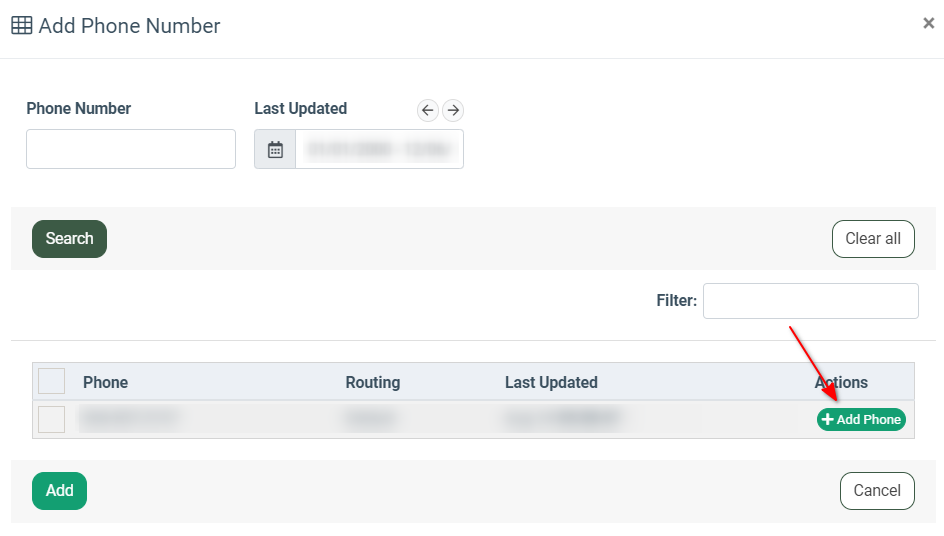
In the “Add Phone Number” pop-up window, select one or multiple phone numbers reserved for the Publisher and assigned to the product that the tracking pool has been created for, then click the “Add Phone” button.
Note: The Publisher the Tracking Pool is assigned to must have at least one phone number available. Read more about defining the required number of the tracking pool phone numbers in this Knowledge Base article.
To complete, click the “Add” button.
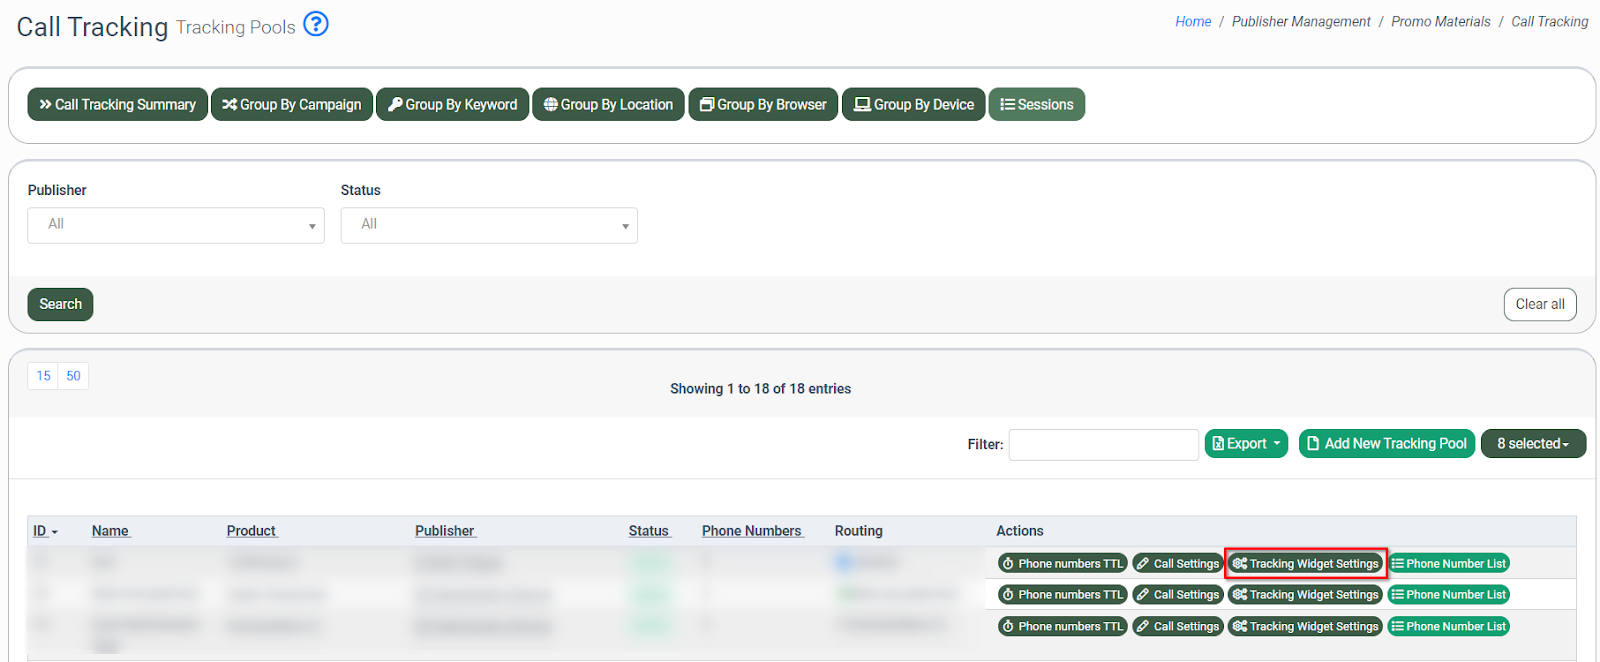
Set up the Widget
To access the widget configuration, go back to the Publisher Management > Promo Materials > Call Tracking section and click the “Tracking Pool Widget Settings” button in the “Actions” column.
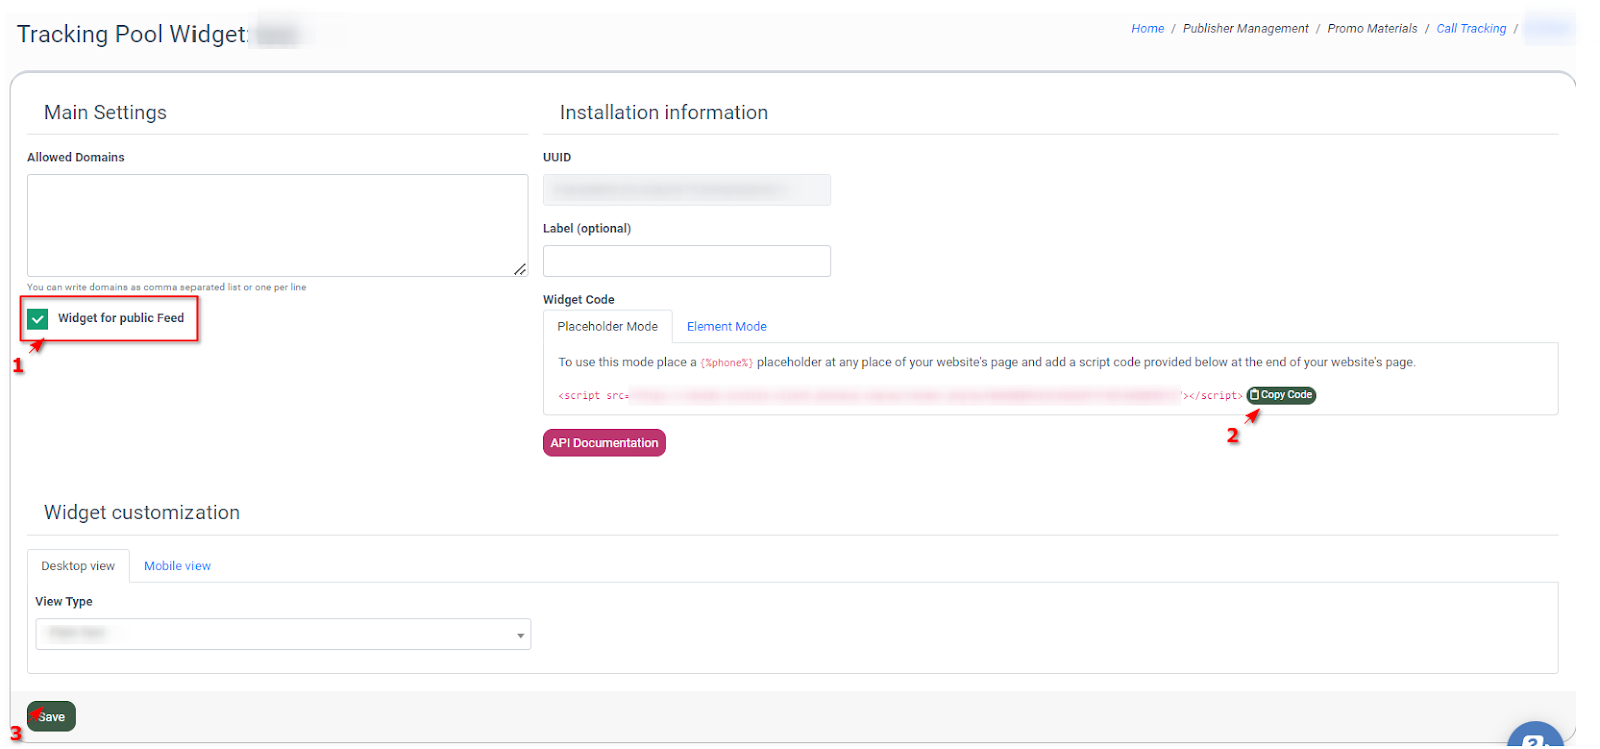
On the Widget Configuration page, in the “Main Settings” block, find and fill in the following field:
- Widget for public Feed (1): Check the box to make the widget public.
Configure the rest of the widget settings according to your preference.
Copy the Widget Code with the “Copy Code” button (2) and click the “Save” button (3).
Read more about the Tracking Pool Widget configuration in this Knowledge Base article.
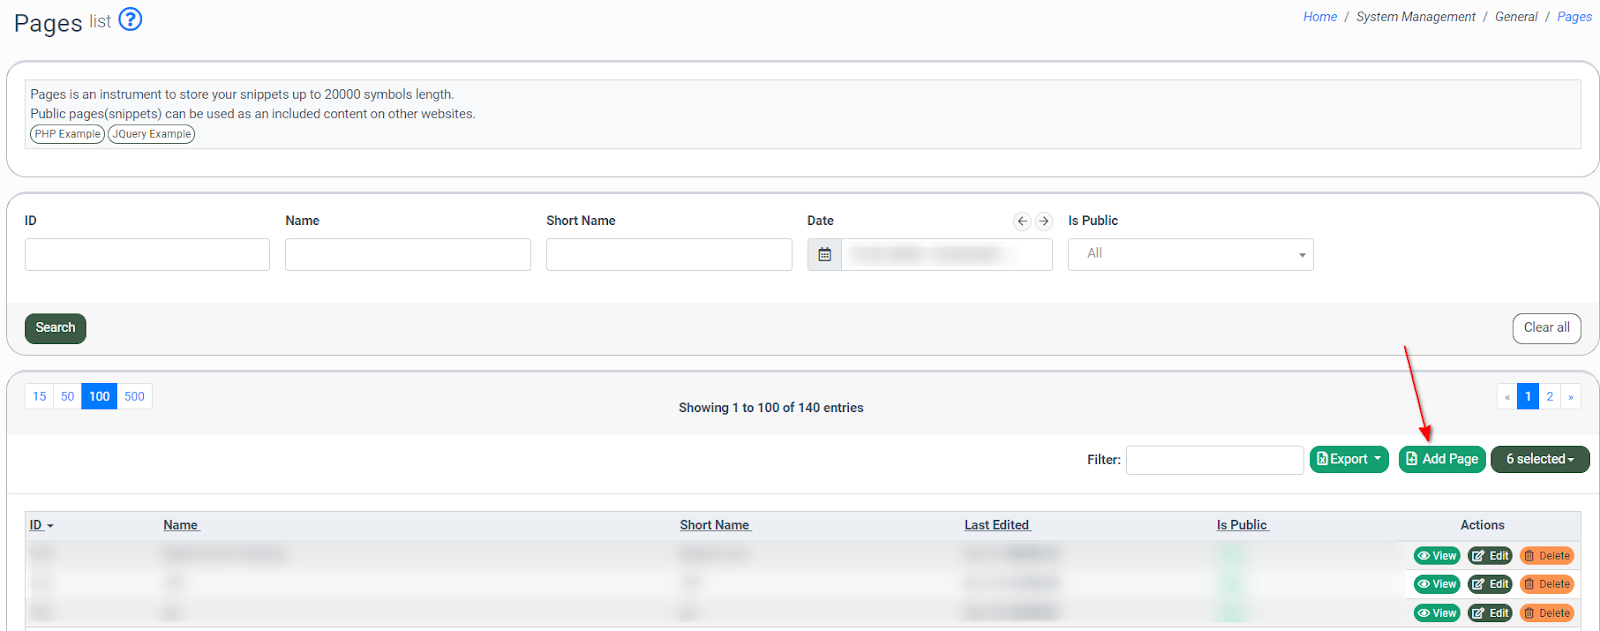
Create a New Page (for testing purposes)
For testing purposes, you can create a Page and place a script on it.
To create the new Page, go to the System Management > General > Pages section, and click the “Add Page” button.
Fill in the following fields in the “Add Page” pop-up window:
- Name: Enter the name of a new page.
- Short Name: Enter the short name of the page.
- Content: Paste the Widget Code and enter the script that will ping additional data.
Note: The same script can be inserted into the website page instead of the Pages section.
Click the “Add” button.
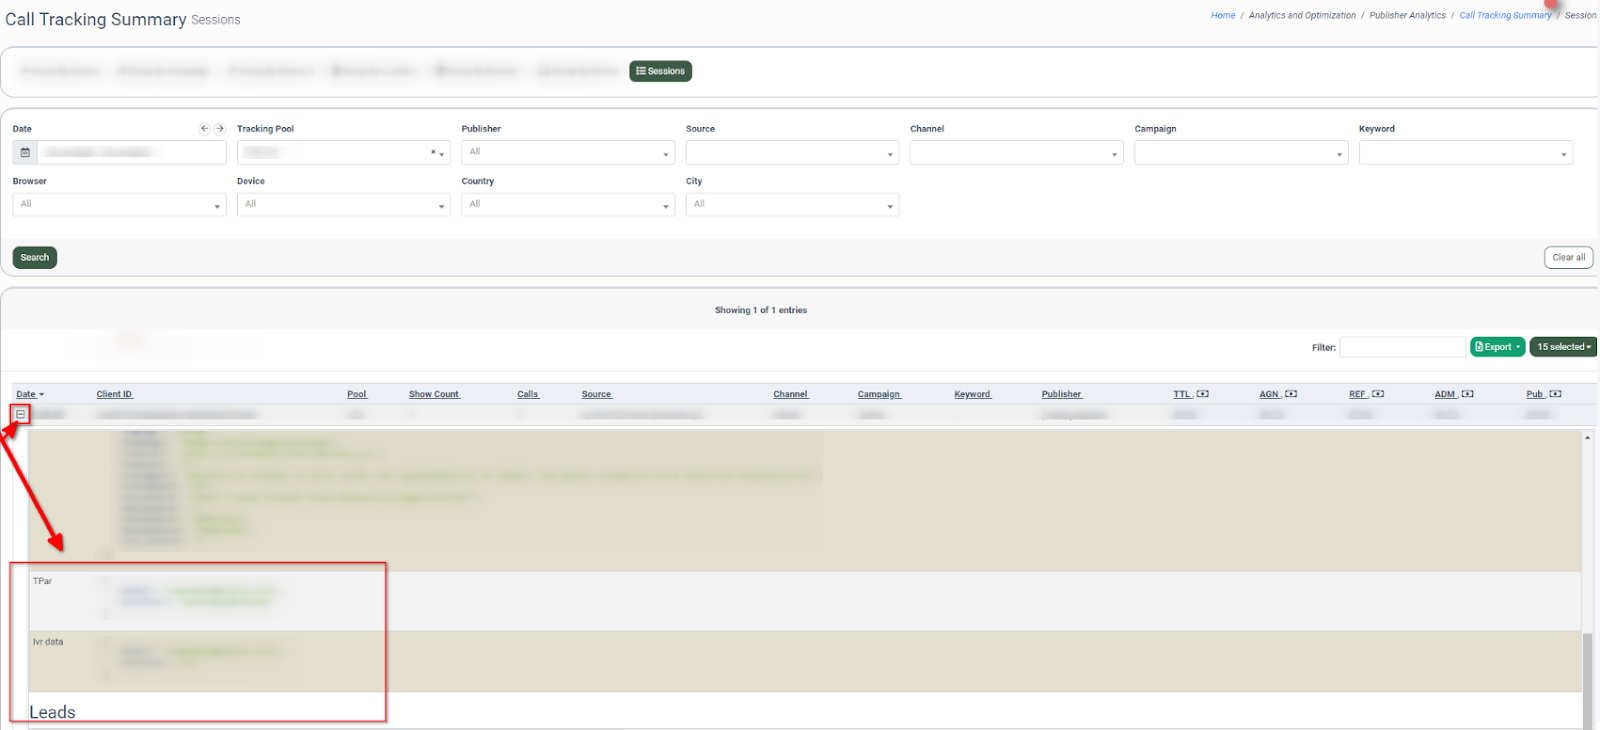
Click the “View” button to view the page with the widget. After the page is opened, the system starts the session. To track the session and the data to ping, go to the Analytics and Optimization > Publisher Analytics > Call Tracking Summary section and select the "Sessions" tab. Find the session and click the “+” button in the “Date” column to unroll the data.
Read more about Call Tracking Summary and Session in this Knowledge Base article.
The example of the script that includes the Widget Code and additional data to ping:
<script src="https://cdnX-instN-client.phonexa.com/resource/global/js/params_store.js"></script>
<script src="https://inst-clientN.phonexa.com/pw/render.php?p=xxxxxxxxxxxxxxxxxxxxxxxxxxxxxxxxxxxxxxx"></script>
<script>
/*
Note:
Setting custom tracking parameters (which are not the part of your lead body) if you need to pass them to the system please refer to product documentation API to get the list of product fields
*/
var tPar = {
myTrackingParam: '12345'
};
/*
Setting lead body fields (which are part of product’s lead body)
please refer to product documentation API to get the list of product fields
*/
var ivrData = {
state: omParamsStore.getCookieItem('state') || 'CA', // get state from cookie
email: omParamsStore.getUrlItem('email') || 'unknown@unknown.com', // get email from URL
workType: 'plumbing', // set work type as a static value
};
/*
Passing parameters to the system
If you need to have a callback function which will be called after the parameter is passed, you can pass it as a third parameter
In example below we send data to the system as soon as the page is loaded, but you can call omPwSetCustomData function whenever you need, ex: after some user action
*/
document.onreadystatechange = function () {
if (document.readyState == "complete") {
omPwSetCustomData(tPar, ivrData, function (data) { /* place your callback code here */ });
}
}
</script>
Configure Custom Data Ping to the Third-Party Services
Event Tracking
To ping custom data to the third-party services via the Event Tracking feature, go to the System Management > Products section, select the relevant product, click the “Settings” button in the “Action” column, and select the “Tracking” tab on the Product Setup page.
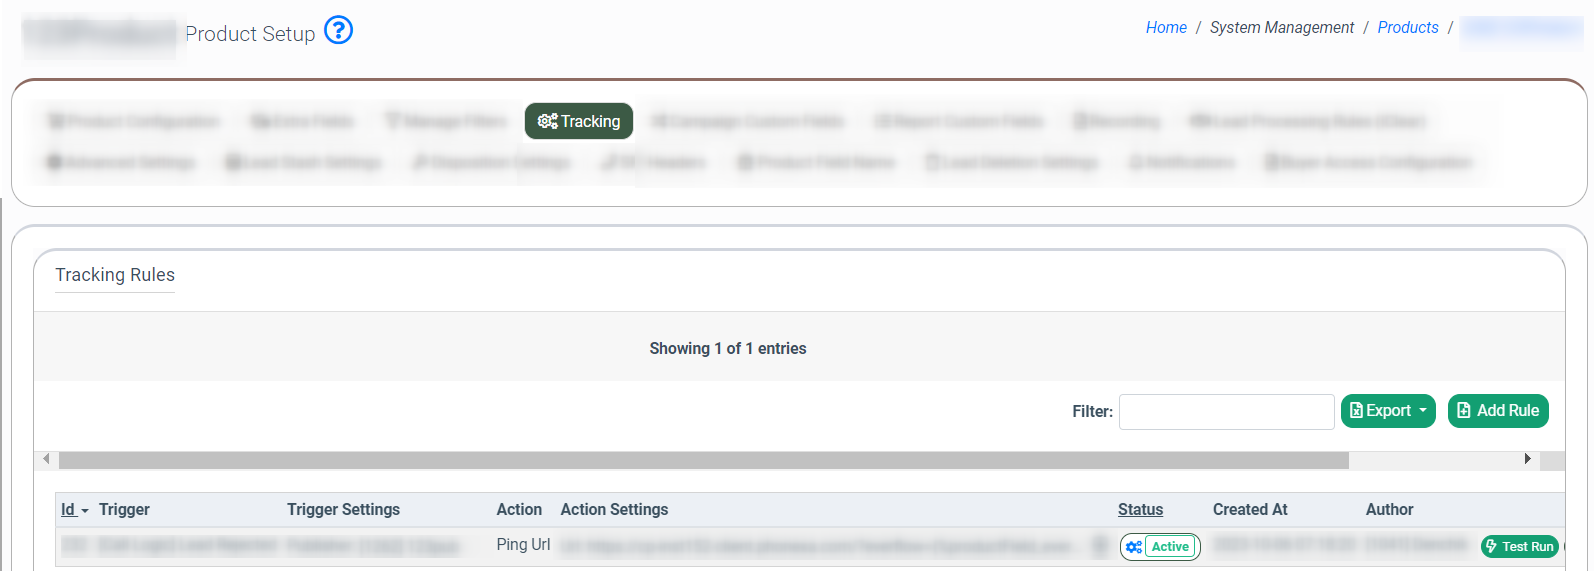
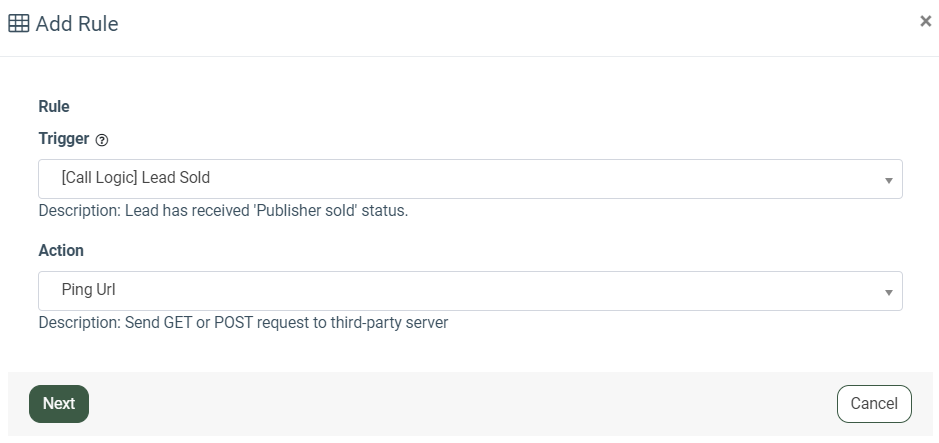
To add a new Tracking Rule, click the “Add Rule” button and fill in the following fields:
- Trigger: Select the event that triggers the action (Lead Sold, Lead Rejected, Campaign Rejected, Campaign Accepted, Campaign Sold, Publisher Earning Received, Buyer Response).
Read more about the events that trigger the action in this Knowledge Base article.
- Action: Select the “Ping Url” option.
Click the “Next” button.
In the “Add Rule” pop-up window fill in the following fields:
- Publisher: Select the same Publisher as the one in the Tracking Pool.
- URL: Enter the request URL with the parameters to ping to the third-party service.
Click the “Save Rule” button.

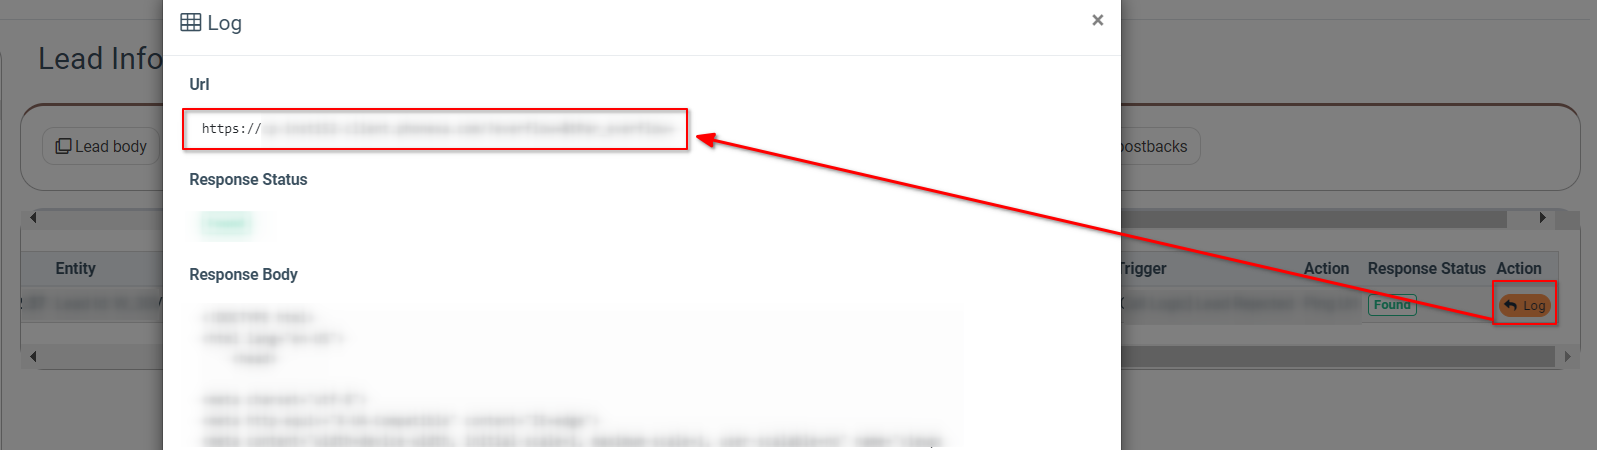
Use Case: If the trigger event configured in the rule takes place, the data is pinged automatically to the third-party service. The data will be displayed via the "Tracking Log" tab on the “Lead Info” page.
Note: In addition to the Product level, the Event Tracking can also be customized on the Campaign and Publisher levels.
Read more about the Event Tracking feature in this Knowledge Base article.
IVR
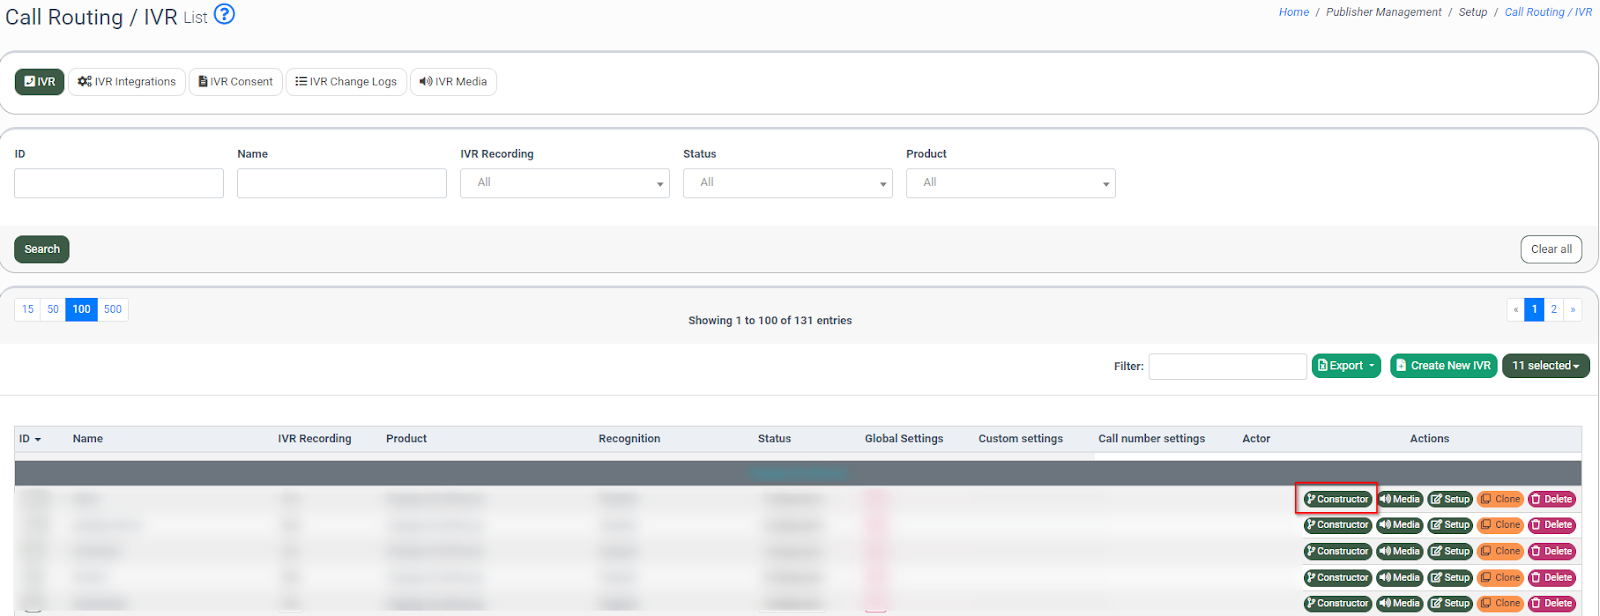
To ping custom data to the external systems via the IVR, go to the Publisher Management > Setup > Call Routing / IVR section, select the "IVR" tab, click the “Create New IVR” button, and create the IVR Flow.
Read more about how to create and configure the IVR Flow in this Knowledge Base article.
To configure the IVR Flow, click the “Constructor” button.
The system will redirect you to the IVR Constructor page.
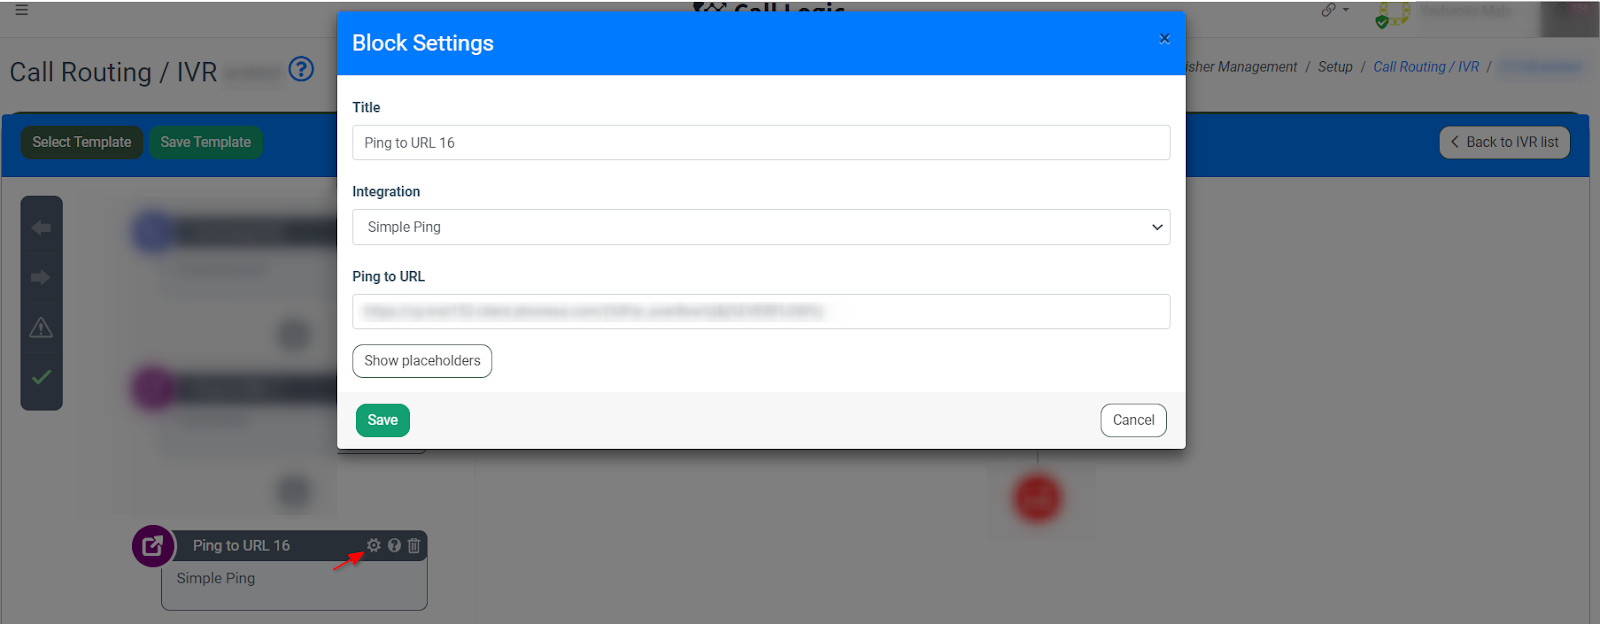
Add the “Ping-to-URL” block to the IVR Flow. To set up the block click the “Configure” button (the button with the “Gear” icon), and fill in the following fields:
- Title: Enter the title of the block.
- Integration: Select the “Simple ping” integration from the drop-down list.
Read more about the “Ping-to-URL” block and the “Simple ping” integration in this Knowledge Base article.
- Ping to URL: Enter the request URL with the parameters to ping to the third-party service.
Click the “Save” button.
Finish and apply the IVR settings.
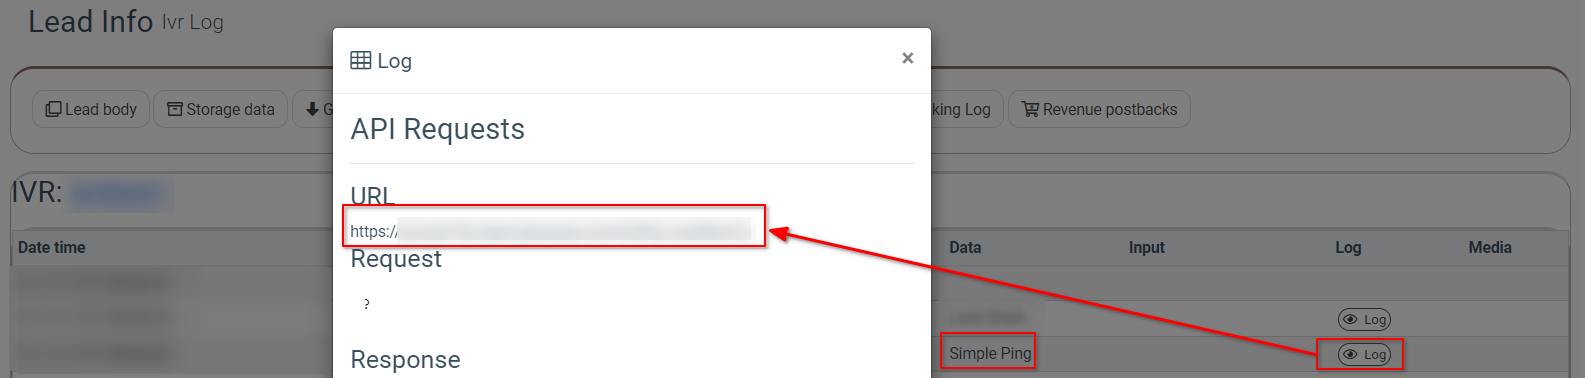
Use Case: After the caller opens the page with the Tracking Pool Widget, the system pings the script with the additional data into our system. When the caller dials the phone number shown on the Tracking Pool Widget, the IVR skips the blocks related to the pinged data. Once the caller reaches the "Ping-to-URL" block, the data is pinged automatically to the third-party service. The data will be displayed via the "IVR Log" tab on the “Lead Info” page.